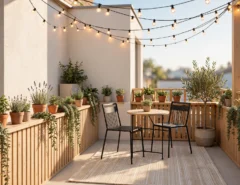
I have killed more plants than I can count. There was the fern that turned brown within a week, the succulent I somehow managed to drown, and the tomato seedling that stretched itself into a pale, leggy ghost on my windowsill before giving up entirely. If your story sounds anything like mine, you have probably decided that gardening is just not for you. Maybe you live in an apartment with a balcony the size of a doormat. Maybe you have a yard, but the soil is hard as concrete and full of rocks. Or maybe you have simply accepted the label of plant killer and stopped trying. I believed all of that about myself for years, and it kept me from growing a single thing, until a neighbor showed me her fire escape garden. She grew tomatoes, basil, peppers, and flowers in nothing but pots, and it changed everything I thought I knew about who gets to be a gardener.
Here is the truth that took me far too long to learn. Containers erase almost every excuse that stops beginners. Bad soil does not matter, because you fill the pot with good soil yourself. No yard does not matter, because pots sit happily on balconies, patios, doorsteps, and windowsills. A busy schedule does not matter as much either, because a small pot takes about two minutes a day to check and water. You do not need land, you do not need experience, and you definitely do not need some magical green thumb that other people were born with. Gardening in containers is simply a set of small skills, and every one of them can be learned by doing. The stakes are low, because if one pot fails, you dump it out and start again, having learned something useful.
The fifteen ideas below are organized the way I wish someone had organized them for me. Each one starts with a real problem that stops beginners cold, then gives you the practical fix that solves it. We will cover the pot mistakes that kill plants before they start, the watering confusion that drowns more plants than drought ever does, the soil shortcut that matters more than any fertilizer, and the easy plant choices that practically grow themselves. By the end, you will have a complete beginner toolkit, not just a list of pretty pictures. So grab a pot, any pot, and let’s fix every reason your plants have been dying.
1. Start With One Big Pot
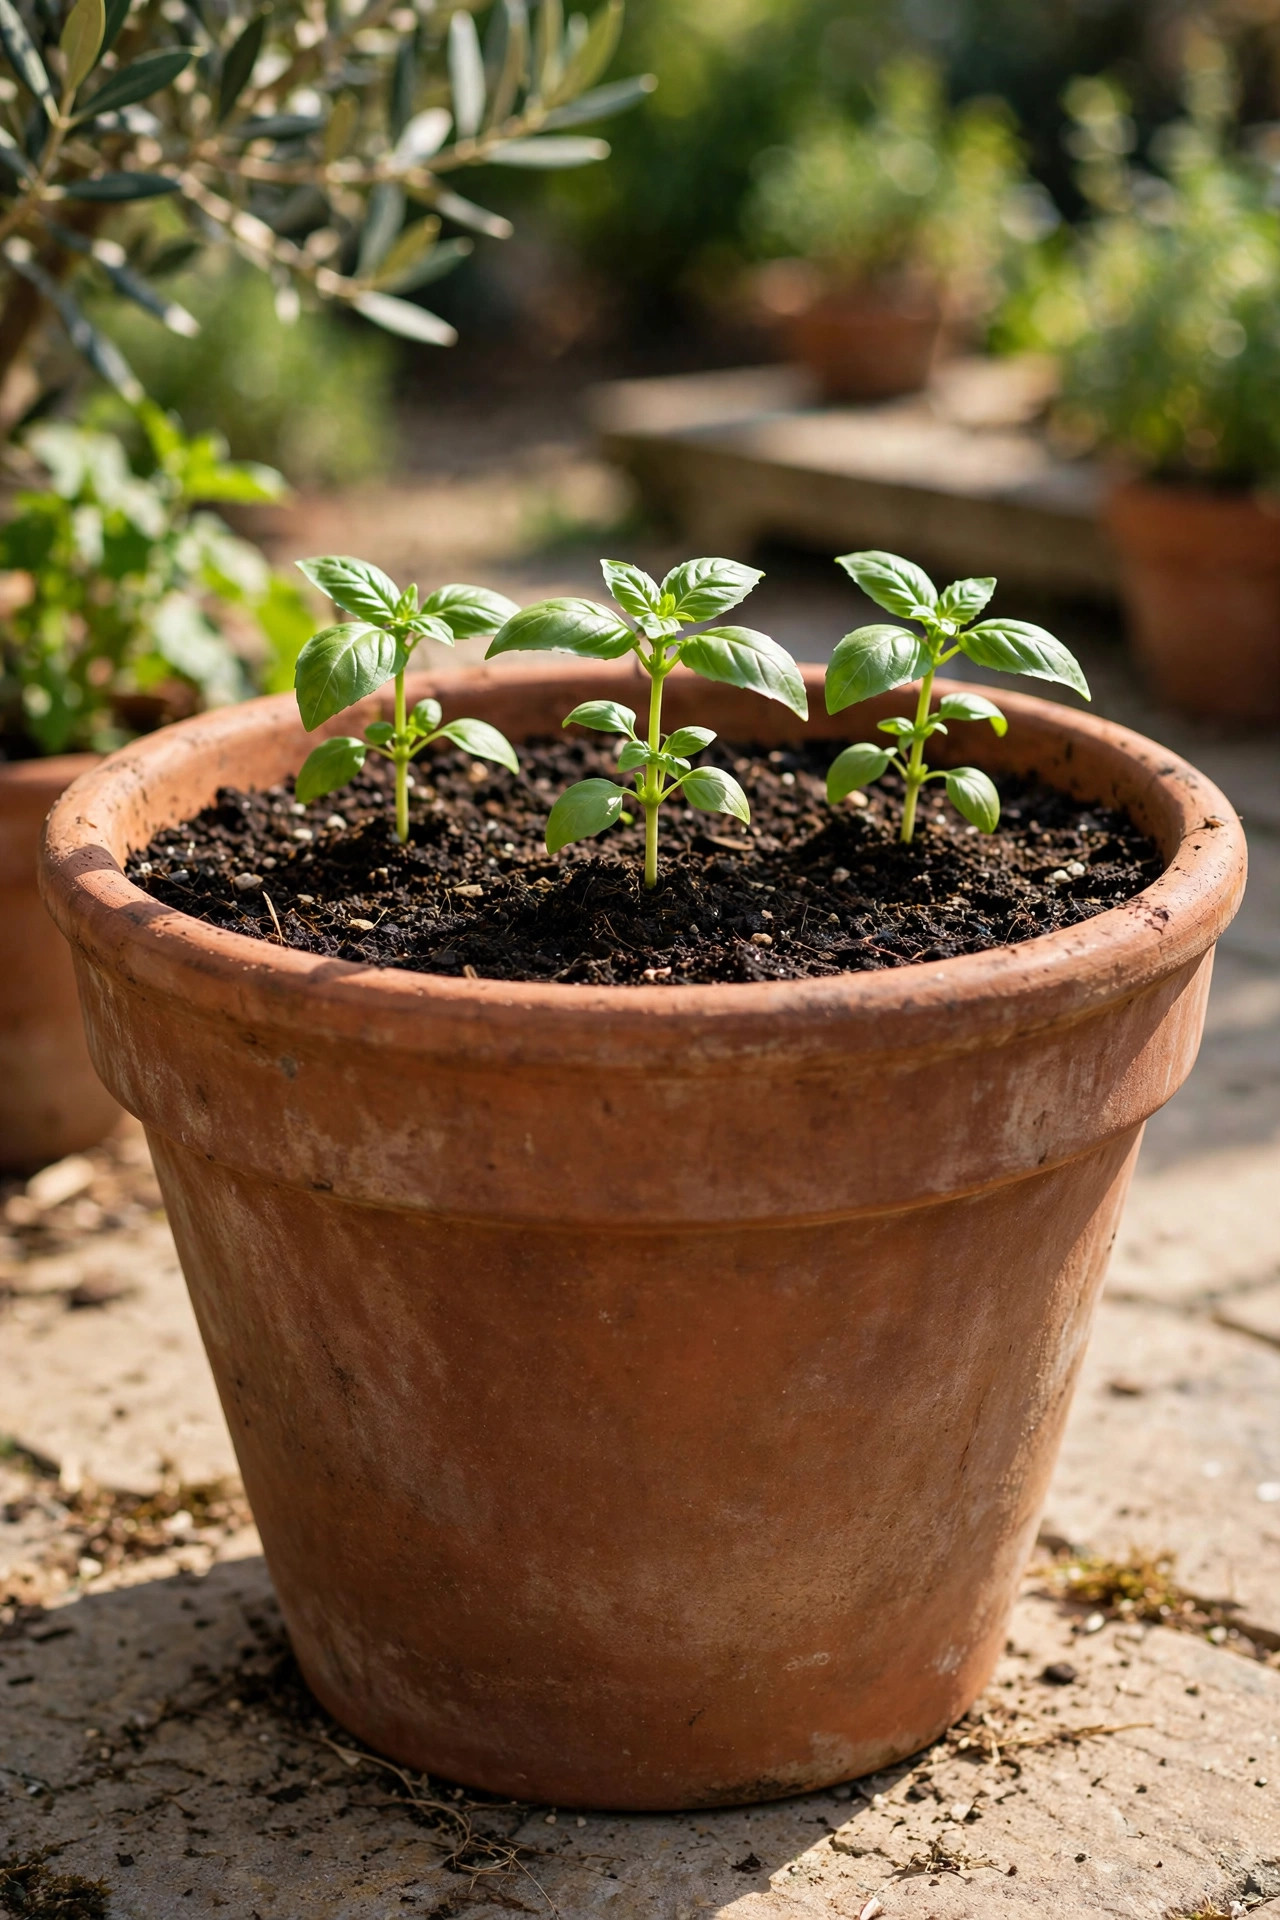
The number one pot mistake beginners make is starting too small. Those cute little four inch pots at the garden center look perfect on a windowsill, but they are actually plant torture chambers in disguise. A tiny pot holds only a handful of soil, which means it dries out completely in a single hot afternoon. The roots have nowhere to spread, so the plant stays stressed and stunted no matter how much love you give it. Then you water it, the little pot floods, and an hour later it is dry again. This wild swing between soaking wet and bone dry is what kills most beginner plants, not neglect and not some mysterious curse. I lost an entire set of herbs this way my first summer, watering them every morning and watching them wilt every evening, completely confused about what I was doing wrong. What made it worse was the money I kept spending. Every dead herb got replaced with a fresh one, and every fresh one died the same way, which felt like proof that I was the problem. It was not me, and it is not you. Tiny pots are simply unforgiving, and no amount of effort overcomes physics. The soil volume is too small to buffer anything, so every hot day, every missed watering, and every cold night hits the plant at full force. Professionals do not grow in tiny pots either, and now you know why.
The fix is almost embarrassingly simple. Buy one pot that is at least twelve inches wide and twelve inches deep, and make it your first garden. A big pot holds a large volume of soil, and soil is like a bank account for water. The bigger the account, the longer it takes to run dry, which means your plant gets steady moisture instead of feast or famine. Roots get room to stretch out and grow strong, and strong roots make a plant that can handle a missed watering or a heat wave without drama. Fill that big pot with good potting mix, plant three or four herb seedlings or one cherry tomato plant in it, and water deeply until it drains from the bottom. You will be shocked at how much easier everything feels. One big pot forgives nearly every beginner mistake, and that forgiveness is exactly what you need while you are learning. If a big ceramic pot feels expensive, look for large plastic nursery pots, which cost a fraction of the price and work just as well. Food-grade five-gallon buckets from the hardware store are another cheap option once you drill drainage holes in the bottom. Set your big pot on a rolling plant caddy so you can chase the sun through the season without breaking your back. In your first week, check the soil every morning just to learn how long your particular pot holds moisture. That one week of attention teaches you more than any book ever could.
2. Pick a Self-Watering Planter
If your main problem is that you simply forget to water, you are in good company. Life gets busy, the pot sits in the corner, and by the time you notice the drooping leaves, the plant is already too far gone to save. Traditional pots punish forgetfulness harshly, because once the soil dries out completely, it can actually become water resistant, so even your rescue watering runs straight through without soaking in. I have watched this happen to friends who genuinely love their plants but travel for work or have kids who consume every spare minute. They do not lack care, they lack a system that covers for them on the days when watering slips their mind entirely. The cruel irony is that dried-out potting mix becomes hydrophobic, meaning it actually repels water. You can pour a whole can through a bone-dry pot and watch it run out the bottom while the root ball stays dusty in the middle. The plant looks watered, you feel relieved, and nothing has actually reached the roots. This is why rescue watering so often fails, and why forgetful gardeners lose the same plants over and over no matter how guilty they feel afterward. Once you switch to the finger test and a self-watering pot, that whole cycle of guilt and dead plants finally comes to an end for good.
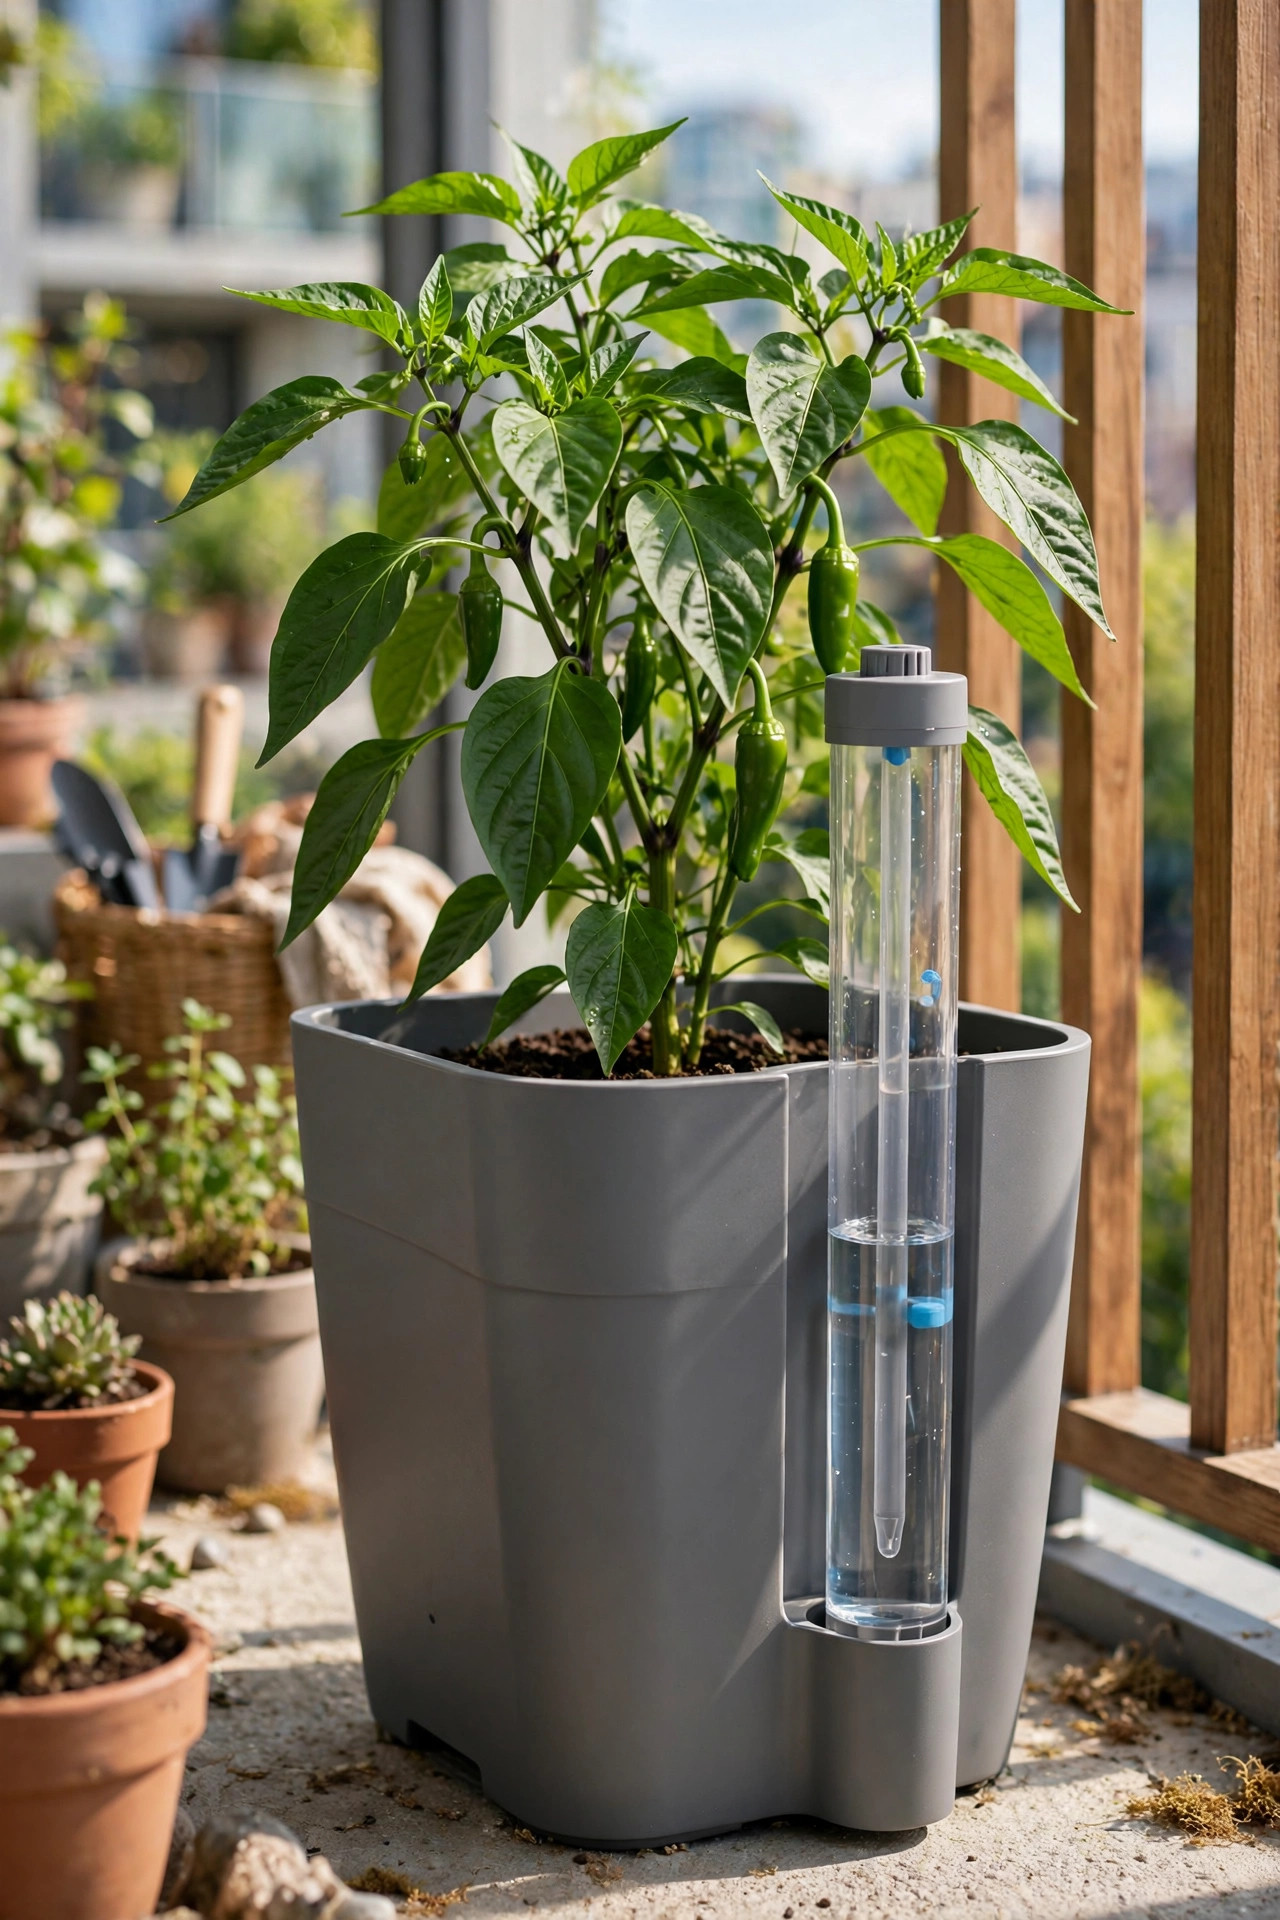
A self-watering planter is that system. These pots have a hidden water reservoir built into the bottom, separated from the soil by a platform with wicking chambers. You fill the reservoir through a little tube on the side, and the soil pulls up exactly as much water as it needs through capillary action, the same way a paper towel soaks up a spill. Most reservoirs hold enough water for one to three weeks depending on the plant and the weather, which turns watering from a daily chore into an occasional task you do while your coffee brews. They cost a bit more than plain pots, but one self-watering planter can keep a basil plant or a pepper plant alive through your busiest month. For a beginner who knows forgetfulness is the enemy, this is the single smartest purchase you can make, because it removes your weakest habit from the equation entirely. When you shop for one, look for a planter with a water level indicator, a little float or window that shows when the reservoir runs low. That single feature removes all guesswork. Refill through the tube until the indicator reads full, then ignore it for a week or two. In spring and fall a single fill can last three weeks, while in peak summer heat you might refill weekly. Either way, you have turned plant care from a daily worry into a small ritual you actually look forward to.
3. Grow Kitchen Herbs in a Window Box
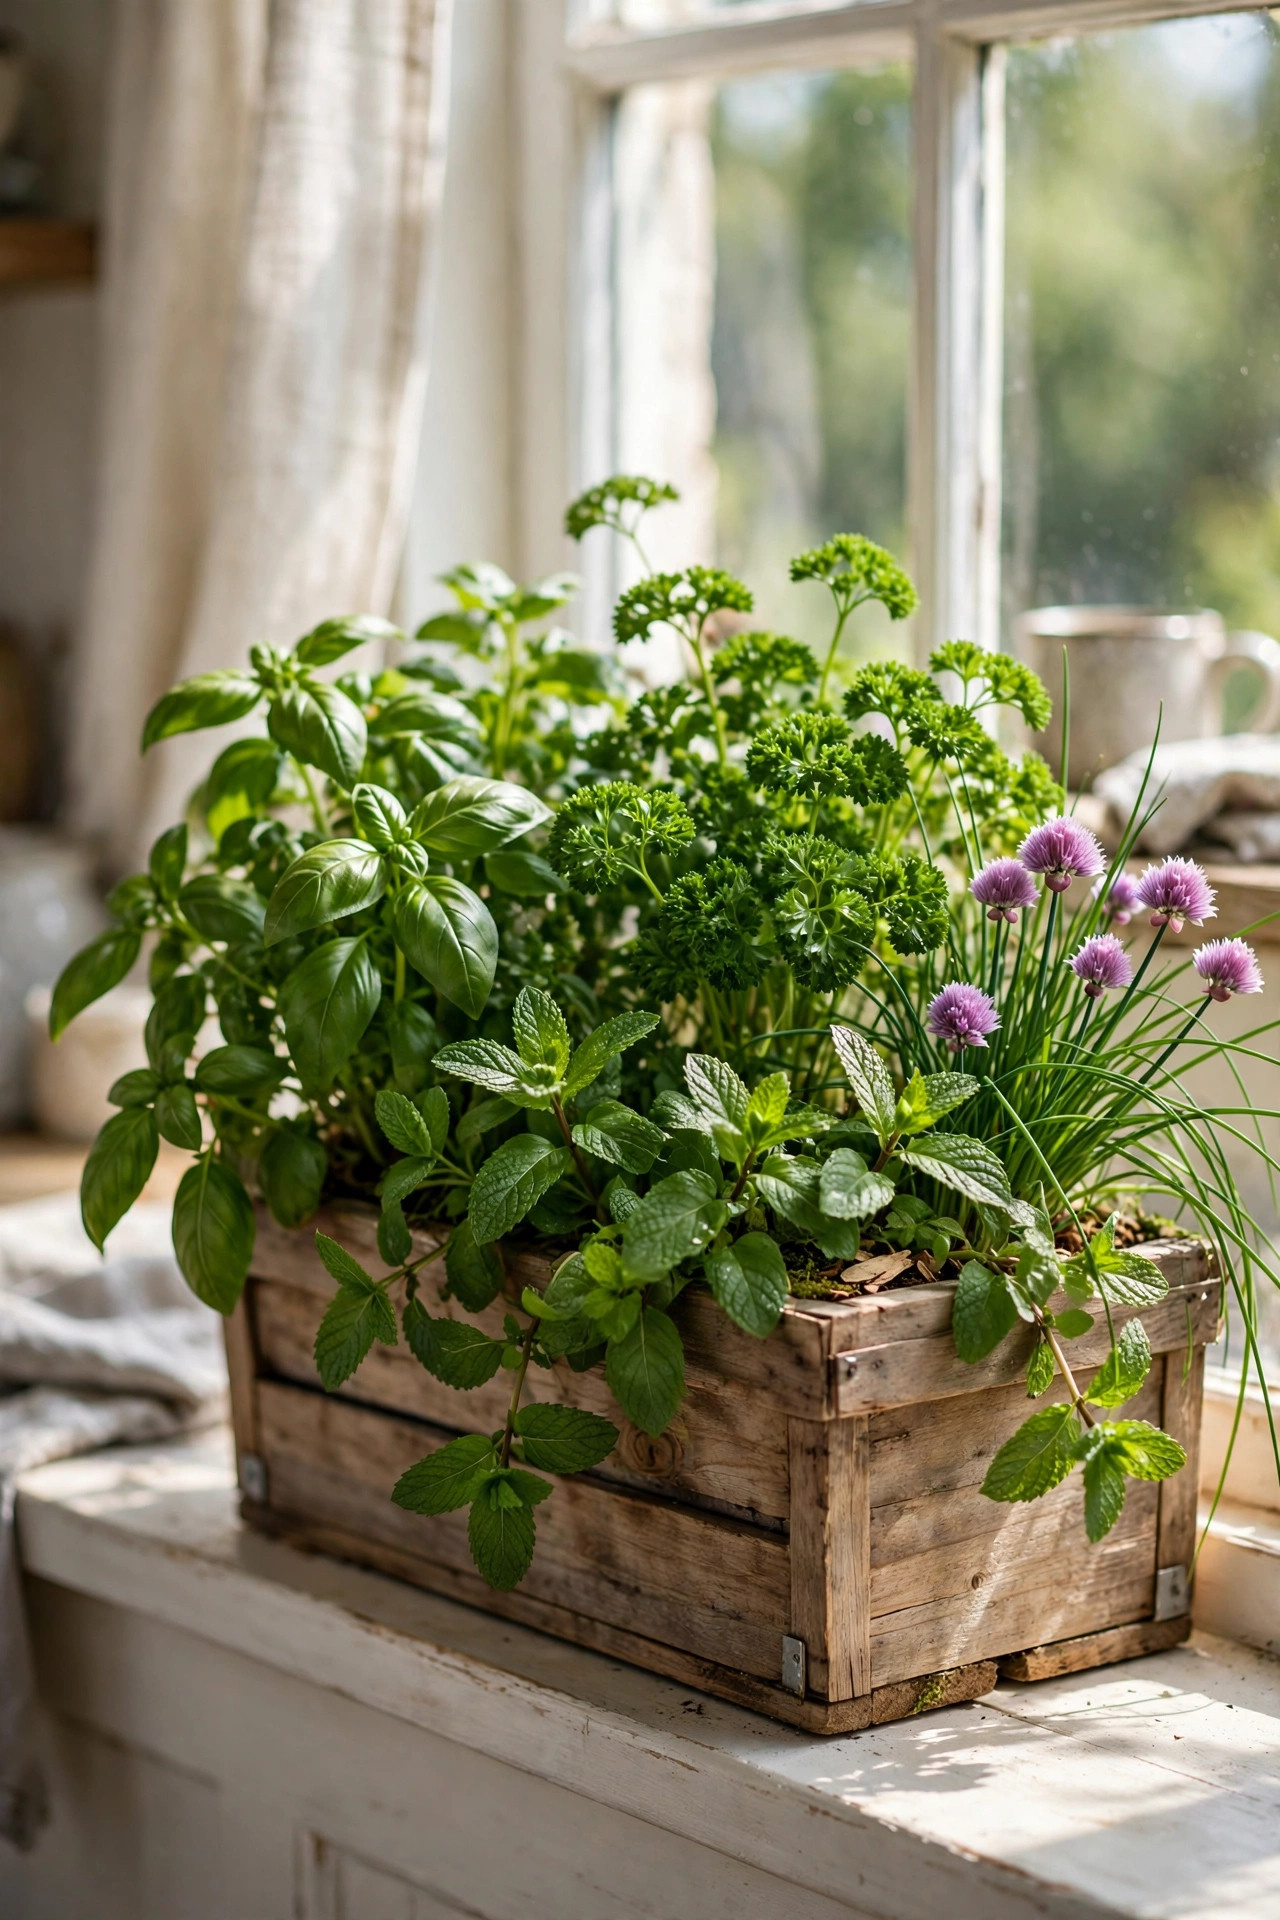
There is a special heartbreak in buying a fresh herb plant from the grocery store, watching it thrive for exactly four days, and then finding it collapsed and brown on the counter. Those store herbs are grown in perfect greenhouse conditions and then stuffed into tiny pots with no room for roots, so they are doomed before you even bring them home. Meanwhile the dried herbs in your spice rack taste like dusty paper compared to fresh ones. Snipping fresh basil over pasta or fresh mint into a glass of cold water is one of the great small pleasures of cooking, but most beginners assume herbs are fussy and give up before they start. The real problem is never the herb itself, it is the terrible conditions we force herbs to live in. Grocery store herbs are raised in greenhouses with perfect light, constant moisture, and professional feeding, then crammed into pots the size of a teacup for shipping. Their roots are already exhausted before you buy them. Then we set them on a dim kitchen counter and wonder why they collapse within days. It was never a fair fight. Given real soil, real sun, and room for roots, those same herbs are some of the toughest plants you can grow.
A window box fixes all of it at once, and it puts your garden exactly where you cook. Get a box at least eight inches deep that fits your sunniest windowsill or hangs on a balcony rail, fill it with potting mix, and plant the friendliest herbs for beginners. Basil, parsley, chives, and mint are nearly indestructible once they have real soil and real sun. Mint is so aggressive you should give it its own small pot inside the box or it will bully everything else, which is a fun problem to have. Water when the top inch of soil feels dry, snip from the top to encourage bushy growth, and never take more than a third of the plant at once. Within a month you will be cooking with handfuls of fresh herbs you grew yourself, and that first homegrown garnish will hook you on container gardening for good. A quick tip that doubles your harvest: pinch off any flower buds the moment you see them, especially on basil. Once basil flowers, the leaves turn bitter and the plant decides its job is done. Regular snipping keeps it in leaf-making mode all season long. And if your window box sits in blazing afternoon sun, a little shade cloth or a sheer curtain during heat waves keeps tender leaves from scorching. Fresh herbs from your own box will ruin store-bought herbs for you forever, in the best possible way.
4. Grow Tomatoes in a Five-Gallon Bucket
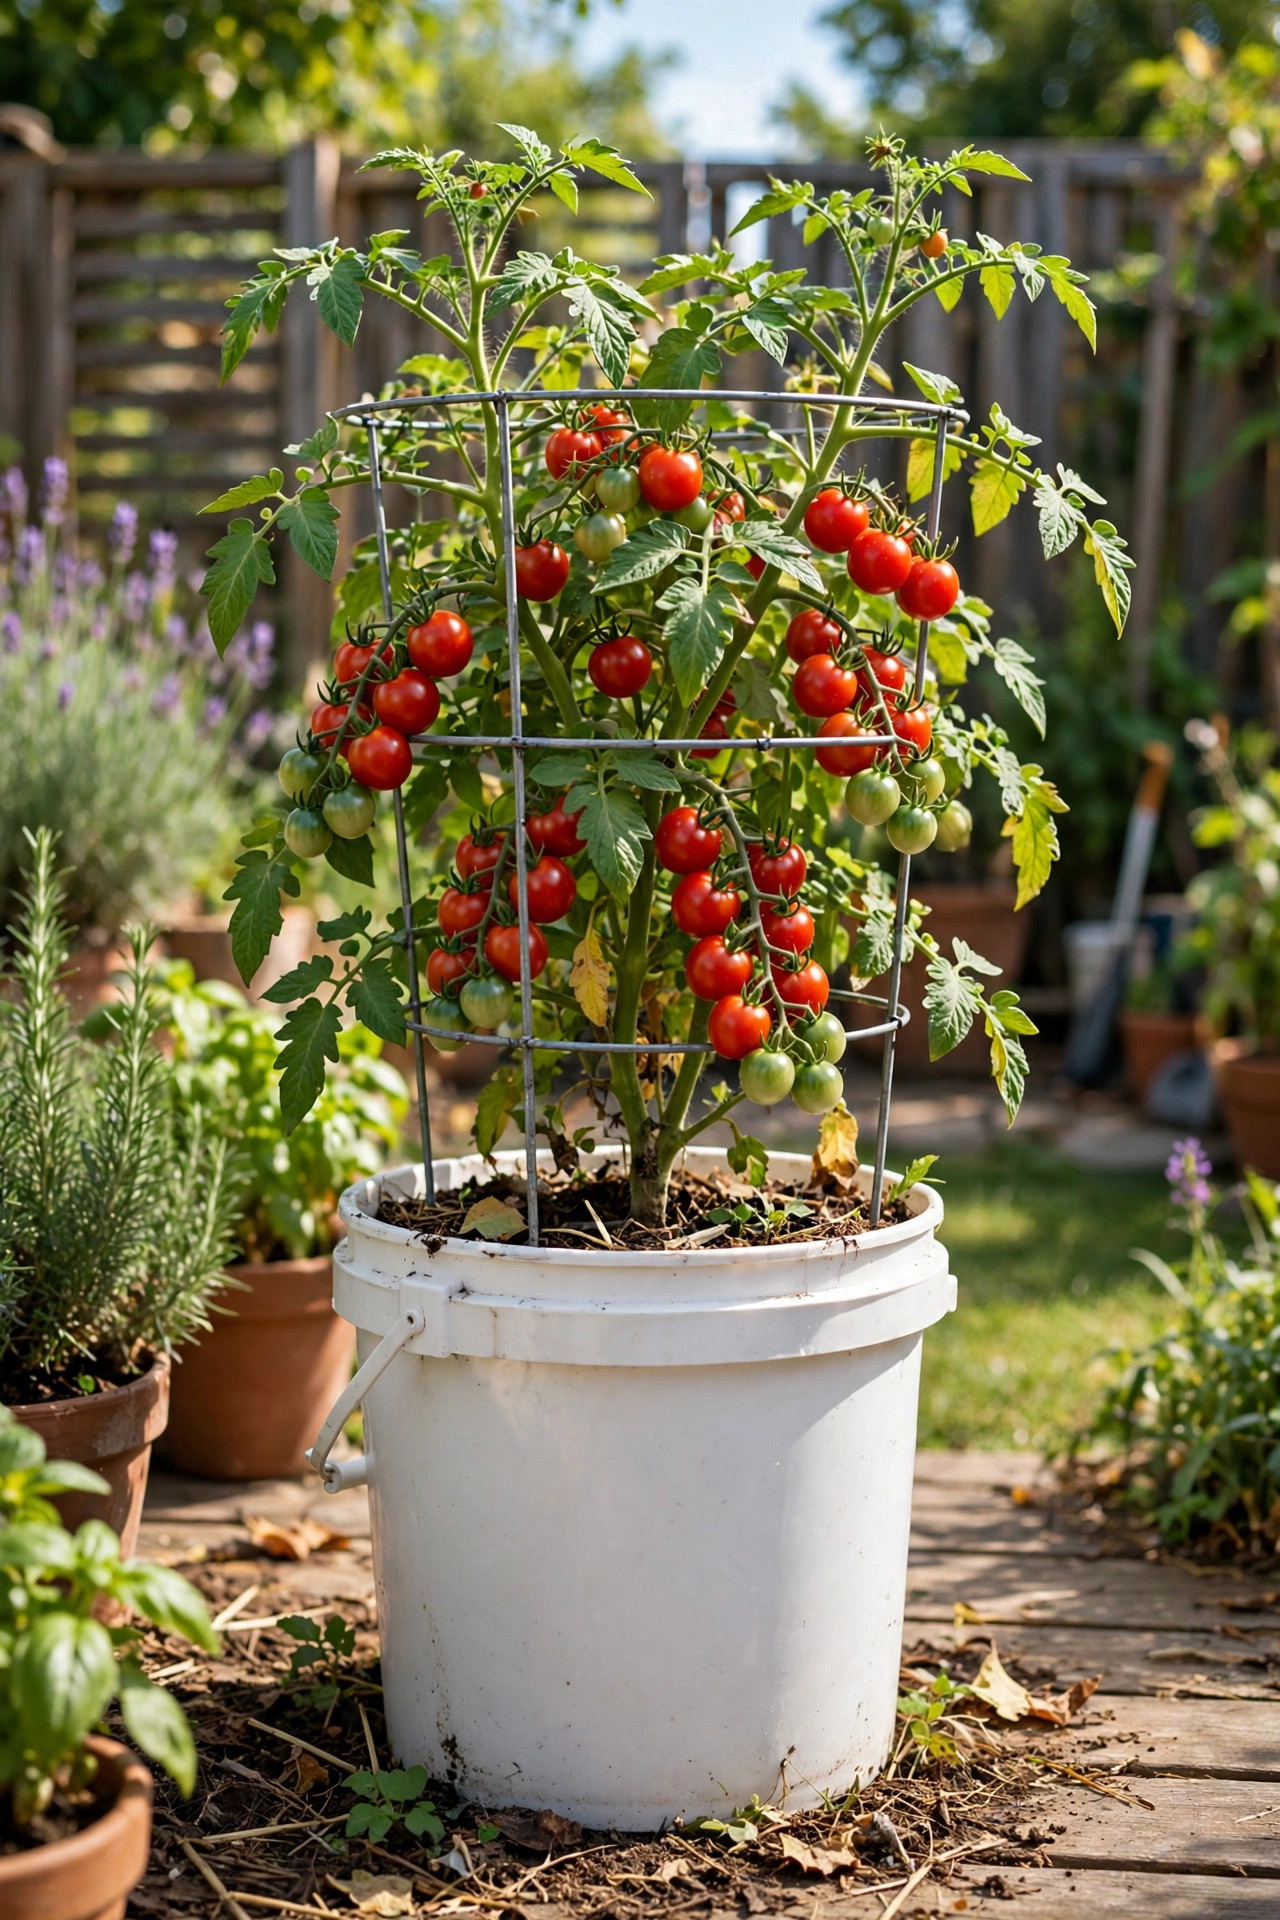
Almost every beginner gardener dreams of growing their own tomatoes, and almost every beginner assumes they need a backyard to do it. The tomato plants at the nursery look huge and intimidating, with tags showing sprawling vines and heavy fruit, and it is easy to conclude that a balcony or patio simply cannot handle them. Then there is the cost. A single packet of seeds is cheap, but raised beds, bags of soil, and all the gear that garden blogs recommend can add up fast. So the dream sits on the shelf year after year, while you keep buying pale, mealy grocery store tomatoes that taste like wet cardboard and wondering what a real tomato is supposed to taste like. There is also the intimidation factor. Tomato plants at the nursery are already two feet tall with thick stems, and the tags show sprawling vines that look like they need a farm to survive. It is easy to assume a container could never support that kind of growth. But cherry tomato varieties were practically made for pots. They are vigorous, forgiving, and bred to produce heavily in small spaces. You do not need giant beefsteak types to experience a real homegrown tomato.
A five-gallon bucket solves the whole problem for about the price of a sandwich. Food-grade buckets are sold at every hardware store, and many bakeries and delis will give you their empty frosting buckets for free if you ask nicely. Drill five or six half-inch drainage holes in the bottom, fill the bucket with potting mix, and plant one cherry tomato seedling deep, burying the stem up to its first set of leaves, because tomatoes grow bonus roots all along a buried stem. Add a simple tomato cage or a sturdy stick for support, set the bucket in your sunniest spot, and water deeply whenever the top two inches feel dry. Cherry varieties like Sweet Million or Sungold are bred for containers and will pump out handfuls of candy-sweet fruit from July until frost. One bucket, one plant, more tomatoes than you can eat, and proof that you never needed a yard at all. One warning that saves beginners every year: do not plant full-size tomato varieties in a bucket and expect the same results. Large indeterminate types need far more root space and will struggle no matter what you do. Stick with cherry or grape types labeled for containers or patios, and you will be harvesting by the handful. Rotate the bucket a quarter turn every few days so all sides get sun and the plant grows evenly instead of leaning. By August you will be giving tomatoes away to your neighbors.
5. Plant a Salad Bowl of Cut-and-Come-Again Lettuce
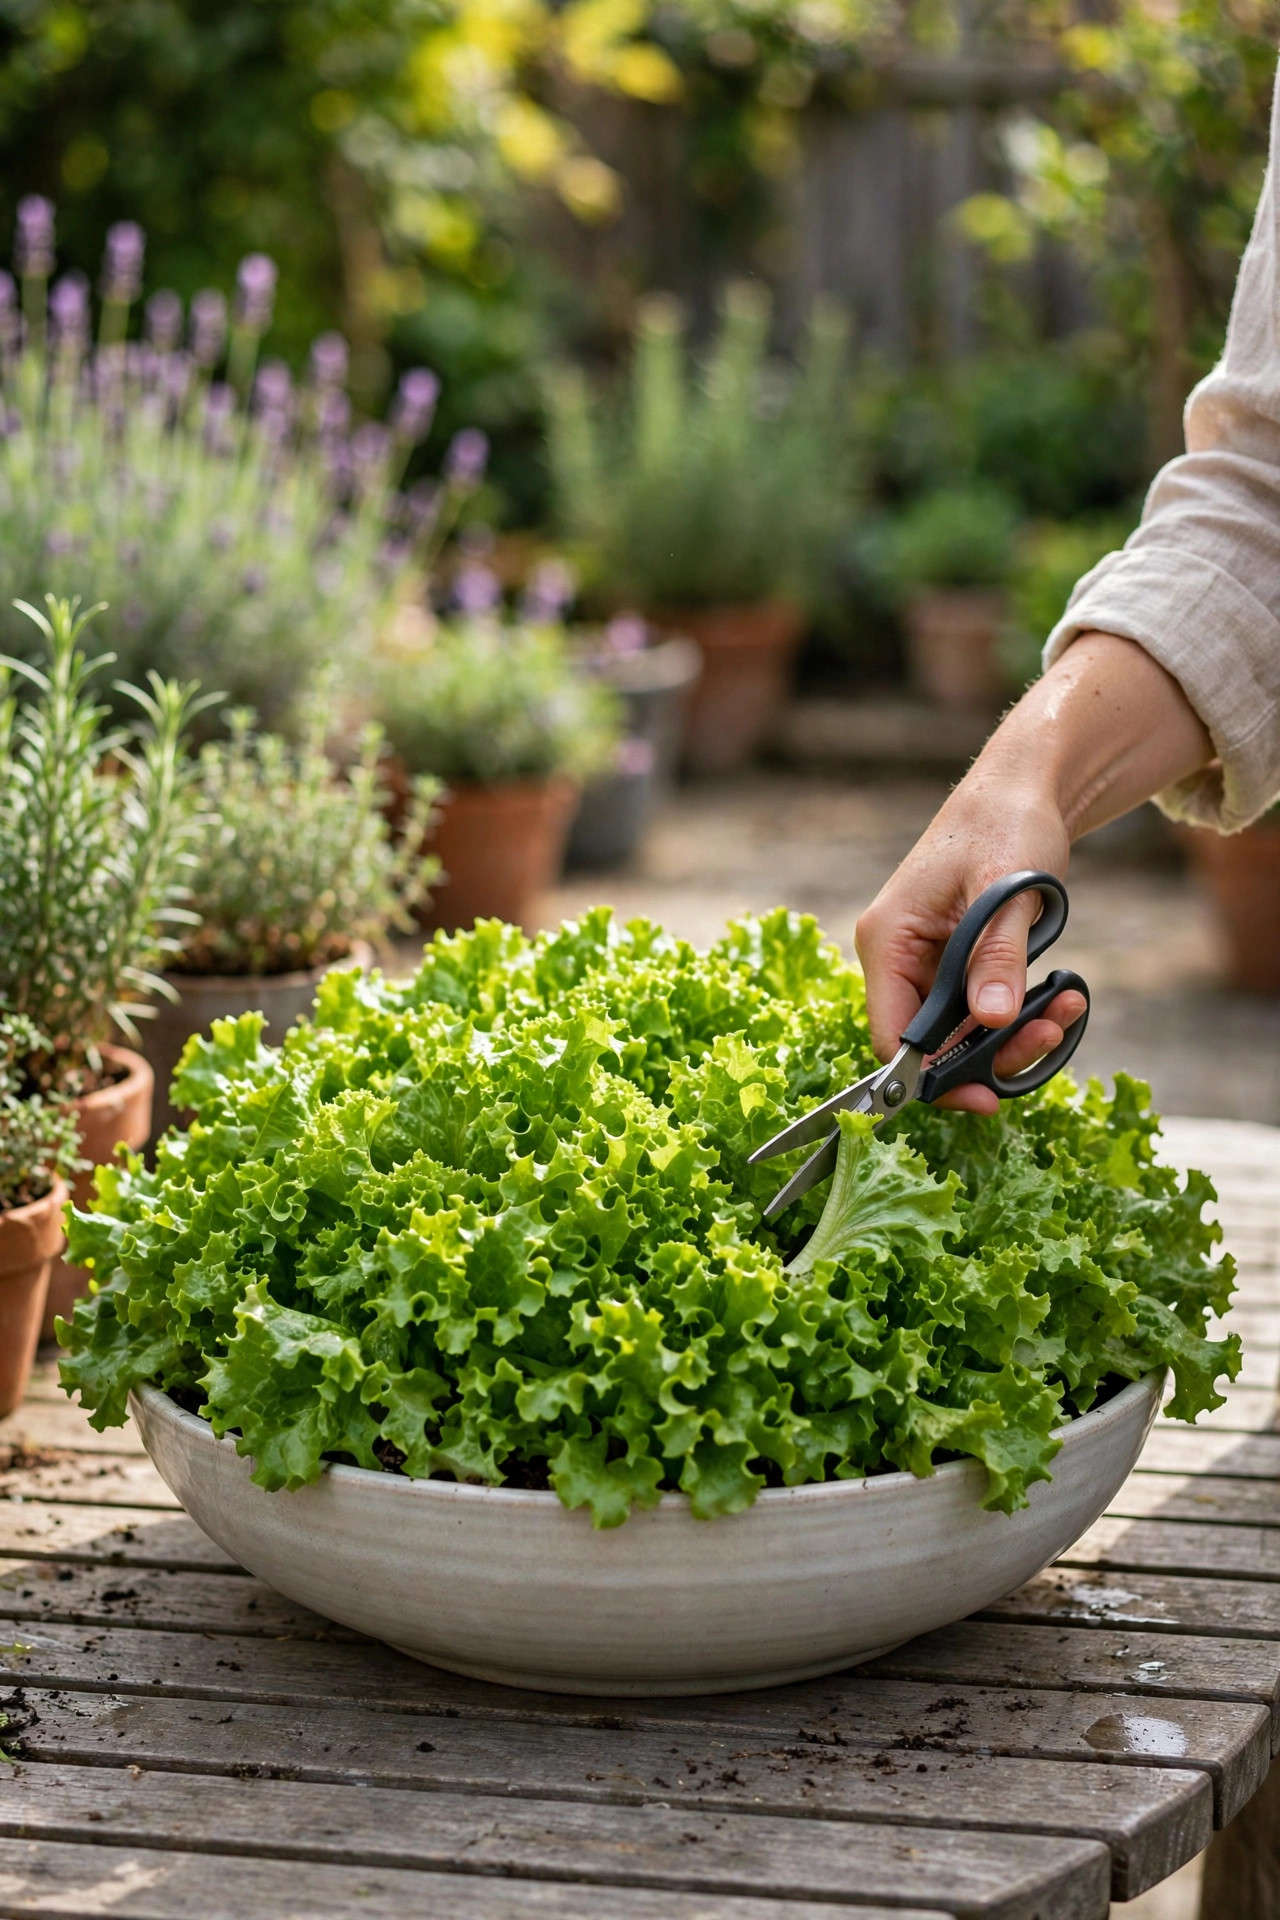
Bagged salad is one of the saddest grocery purchases there is. You pay good money for a plastic tub of greens, and by day three the leaves are slimy at the edges and the whole thing smells faintly of swamp. The problem is that lettuce starts losing freshness the hour it is picked, and store lettuce has traveled for days before it reaches your fridge. Growing your own sounds wonderful until you picture rows of garden beds and thinning seedlings and all the fussy work that lettuce seems to require. Most beginners assume salad greens need a real vegetable garden, so they never try, and they keep throwing away half-used tubs of wilted greens every single week. There is also a hidden cost nobody talks about. Those plastic tubs add up to real money over a month, plus the quiet guilt of all that plastic waste. And the taste difference is honestly shocking. Lettuce picked thirty seconds before eating is crisp, sweet, and alive in a way that shipped greens simply cannot match. Once you have eaten a salad harvested from your own balcony, the store version tastes like a faded memory of lettuce. Growing your own bowl costs only pennies per salad and puts that money back in your pocket every single week of the season.
A wide, shallow bowl on your patio or balcony completely changes the math. Loose-leaf lettuce varieties like Salad Bowl, Oakleaf, and Black Seeded Simpson are the most forgiving vegetables a beginner can grow, because you never wait for a head to form. Fill a bowl at least six inches deep with potting mix, sprinkle the tiny seeds across the surface, dust them with a thin layer of mix, and water gently. In three to four weeks you will have a lush green carpet. Here is the magic part. Instead of pulling the plants, snip the outer leaves with scissors, taking no more than a third at a time, and the center keeps growing new leaves for weeks. One bowl gives you fresh salad for two months from a single sowing, and lettuce actually prefers the cool shade of a balcony to blazing garden sun. Sow a new bowl every three weeks and you will never buy a sad plastic tub again. Lettuce has one quirk worth knowing: it hates heat. When summer temperatures climb, it bolts, meaning it shoots up a flower stalk and the leaves turn bitter almost overnight. That is not failure, it is just the plant’s natural life cycle. Simply sow your bowls in spring and again in late summer for fall, and skip the hottest weeks entirely. A little afternoon shade extends the season even further. Work with the plant’s preferences instead of against them and you will harvest for months.
6. Drill Drainage Holes in Everything
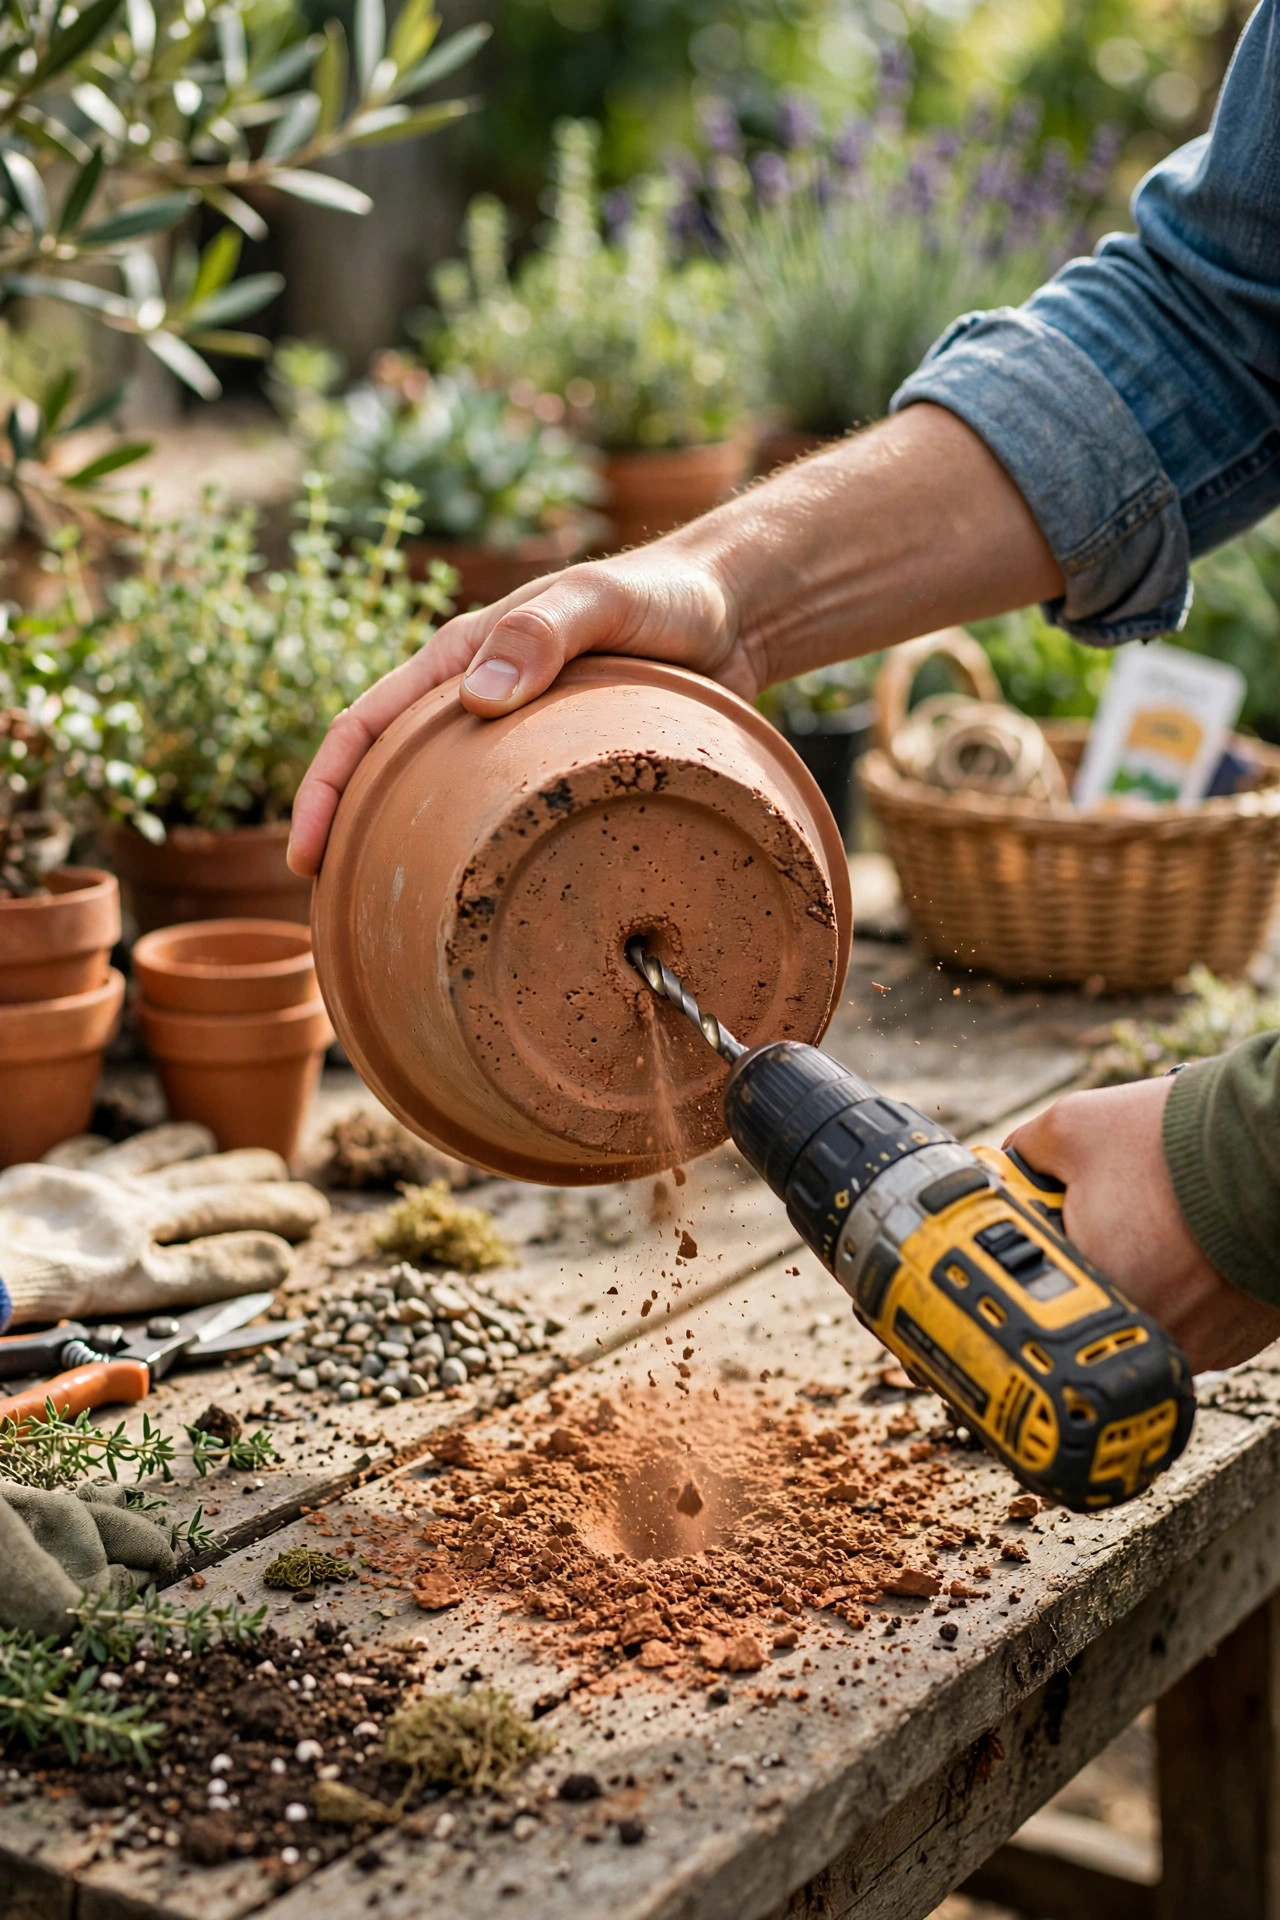
Here is the quiet killer that murders more container plants than all other mistakes combined. Roots need air just as much as they need water, and when a pot has no drainage hole, water pools at the bottom and pushes all the air out of the soil. The roots literally suffocate and rot in the stagnant water, and the plant responds with yellow leaves, mushy stems, and a slow collapse that looks exactly like underwatering. So the beginner waters more, which makes the rot worse, and the plant dies while its owner did everything they thought was right. Those decorative pots without holes are sold everywhere, and nobody at the store warns you that they are death traps for anything you plant in them. The cruelest part is how the symptoms mislead you. A drowning plant droops and yellows exactly like a thirsty one, so the natural response is to water more. I have seen beginners lovingly water their plants to death, more and more each day, while the roots rotted away below the surface. If your plant looks thirsty but the soil feels wet, stop watering immediately and check the drainage. Nine times out of ten, the pot is the problem, not you.
The fix takes five minutes and a drill. Flip every pot over and drill three to five half-inch holes in the bottom, more for big pots. If the pot is ceramic, use a masonry bit, go slow, and keep the spot wet while you drill so the pot does not crack. Set the pot on a saucer or a plant caddy with wheels, because now water will flow out the bottom every time you water, and that is exactly what you want to see. That draining water is proof that fresh air is being pulled down into the soil behind it, which keeps roots breathing and healthy. If you absolutely cannot drill a pot you love, use it as a decorative outer sleeve and drop a plain plastic nursery pot with holes inside it. Either way, no plant should ever sit in a sealed container. Drainage is not optional equipment, it is the foundation everything else is built on. While you have the drill out, add holes to any decorative pot you plan to use, and pick up a few inexpensive plastic saucers. Water should always be able to escape freely, and saucers catch the runoff so your patio stays clean. Empty the saucer after watering so the pot never sits in a puddle, which would undo all your good work. This five-minute job is the highest value task in container gardening, and every successful grower does it without even thinking.
7. Use Potting Mix, Never Garden Soil

When beginners fill their first pots, most of them do the obvious thing. They scoop soil straight from the yard or buy the cheapest bag labeled garden soil, because soil is soil, right. Wrong, and this mistake causes slow, confusing failures that are hard to diagnose. Garden soil in a container compacts into a dense brick within weeks. Water sits on top instead of soaking in, roots cannot push through the packed mass, and the whole pot becomes a soggy, airless mess. It can also carry weed seeds, fungus, and insect eggs straight into your clean pots. I have seen beginners blame themselves for months over plants that never had a chance, when the only real problem was the heavy, dead soil strangling the roots from day one. The signs of bad soil are frustratingly vague, which is why this mistake persists for so long. Plants grow slowly, leaves look dull, and water either pools on top or runs down the inside edge of the pot without wetting the middle. Beginners blame the plant variety, the weather, or their own watering habits, and they try fertilizer after fertilizer hoping something helps. But no amount of feeding fixes roots that cannot breathe. If your plants have always struggled despite your best efforts, the soil is the first suspect, not the last.
Bagged potting mix is engineered to solve exactly this problem, and it is worth every penny. Real potting mix is mostly peat moss or coconut coir blended with perlite or vermiculite, those little white crunchy bits you see in the bag. That recipe stays fluffy and open, so water flows through evenly while still holding enough moisture for roots to drink, and air pockets remain for roots to breathe. A big bag costs less than a pizza and fills several medium pots. Fill your containers with it, leaving an inch of space at the rim so water does not run off, and you have given your plants the single biggest advantage a beginner can offer. Fertilizer, fancy pots, and perfect watering schedules all matter far less than this one choice. Soil is the foundation, so build on the right one and everything else gets easier. One more soil tip that saves real money: you do not need to replace all the mix every single year. In spring, dump the old mix into a wheelbarrow, pick out the old roots, blend in about a third fresh potting mix and a scoop of compost, and refill your pots. This refresh restores nutrients and structure for a fraction of the cost of all-new bags. After two or three seasons, replace it fully. Good soil care compounds like interest, and your plants will show it in every leaf.
8. Watch Your Sun Before You Plant
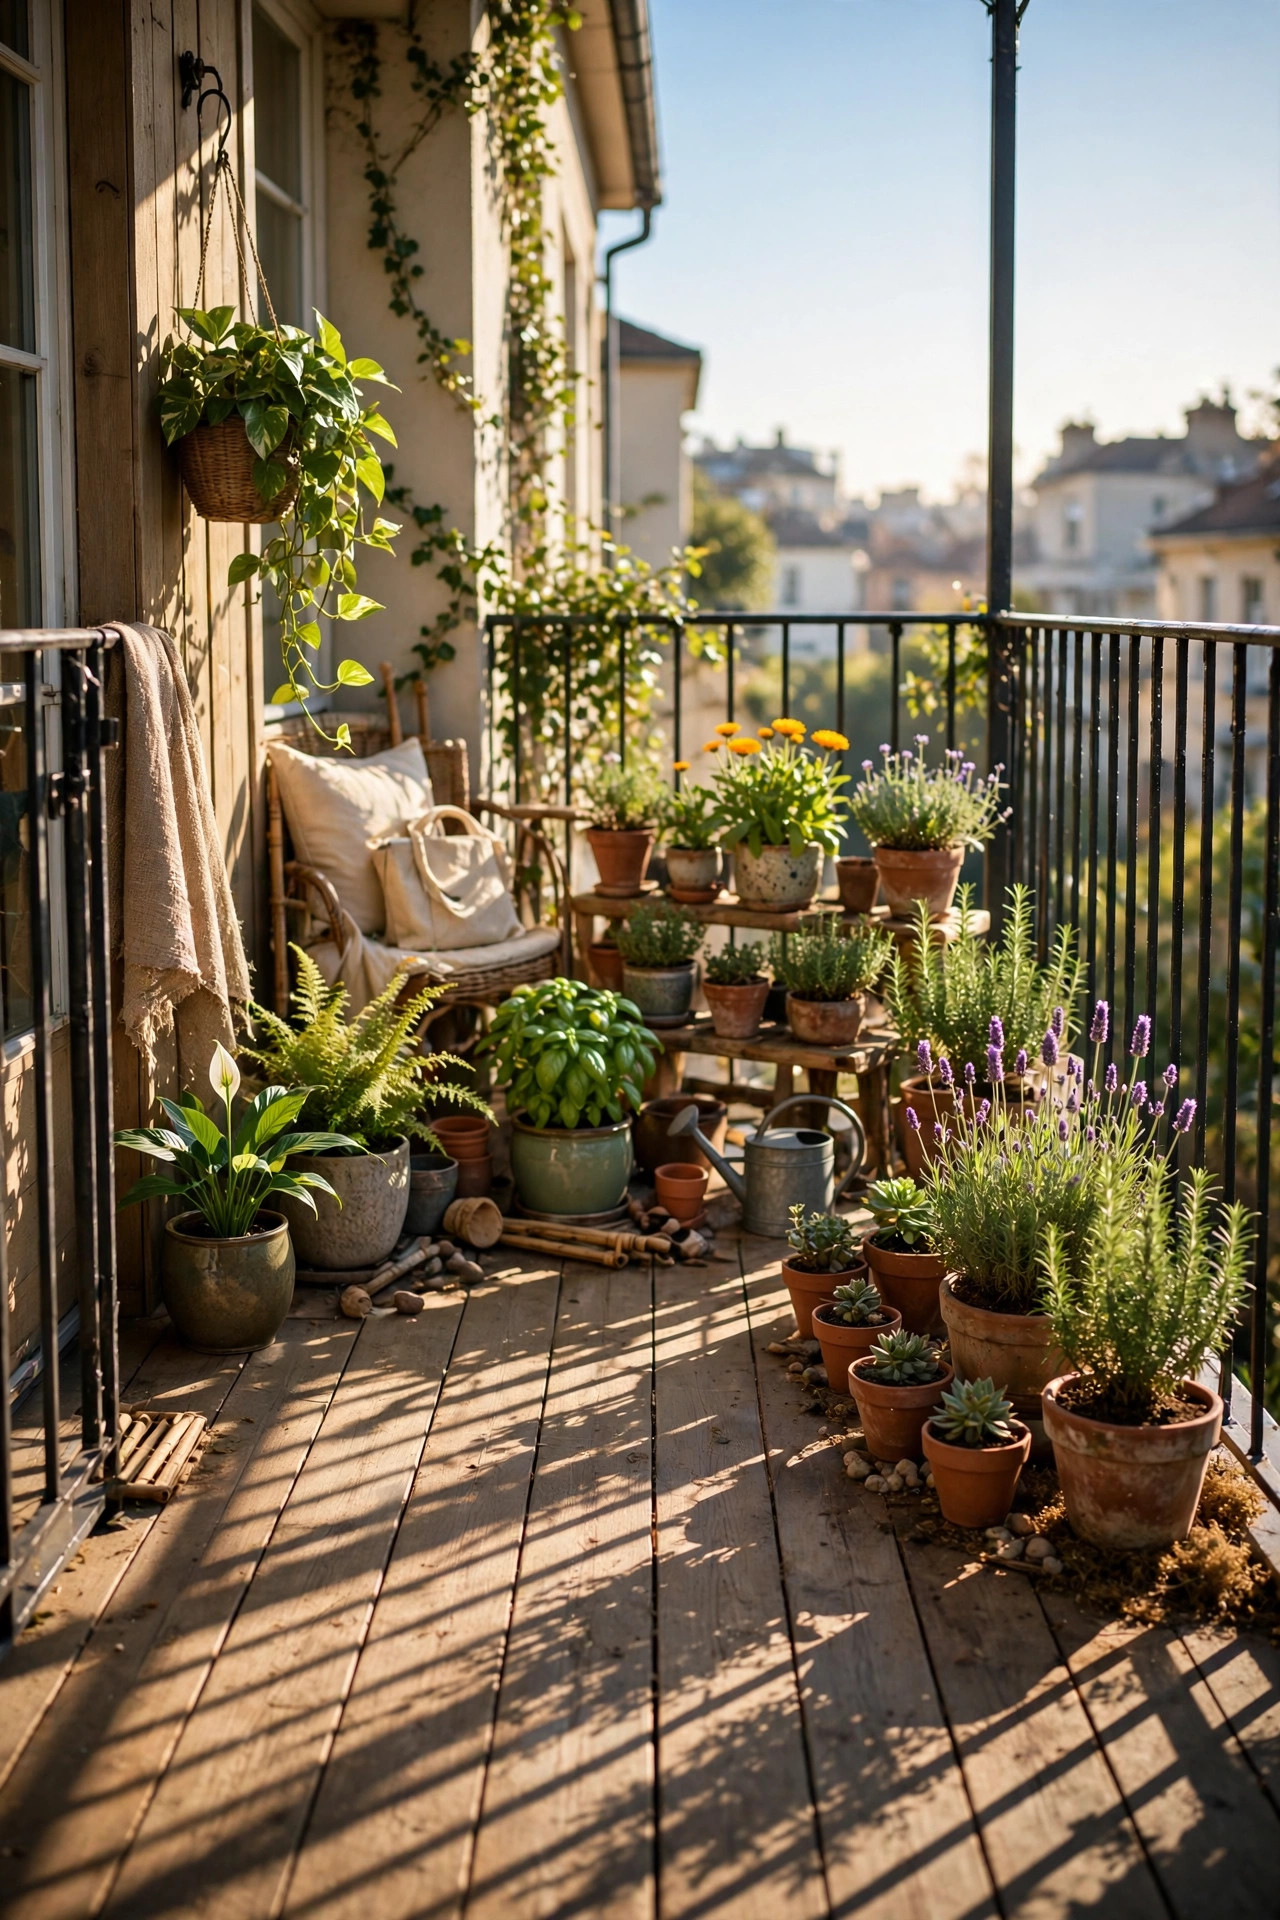
The most common placement mistake beginners make is putting the plant where it looks nice instead of where the sun actually falls. That shady corner by the door seems perfect for a tomato pot, right up until the plant stretches itself tall and pale, reaching desperately for light that never comes, and produces exactly zero tomatoes. Or the opposite happens. A delicate lettuce bowl goes onto a blazing south-facing balcony in July, and within days the leaves turn bitter and the plants bolt into tall flower stalks. Light is food for plants, and guessing wrong about it wastes a whole season of effort. The frustrating part is that our eyes are terrible judges of light. A spot that looks bright to you might get only two hours of direct sun. Seasoned gardeners carry this lesson in their bones, but beginners usually learn it the hard way, typically with a dead tomato plant. Light drives photosynthesis, which is literally how plants make their food, so a plant in dim conditions is a plant on a starvation diet. No fertilizer or fancy pot compensates for too little sun. The good news is that containers make this fix easy. Unlike a garden bed, a pot can be moved. If a plant sulks for two weeks, just slide it somewhere brighter and watch what happens.
The fix costs nothing and takes one day. Before you plant anything, spend a day watching your space. Check it in the morning, at midday, and in the late afternoon, and jot down which spots get direct sun and for how long. Most vegetables and herbs want six or more hours of direct sun, which usually means a south or west facing spot. Leafy greens and many flowers are happy with three to four hours, so they suit east facing balconies or spots with afternoon shade. Once you have your little sun map, match each plant to its spot instead of the other way around. Put the tomatoes and peppers in the sunniest place you have, tuck the lettuce and parsley where the afternoon shade falls, and suddenly every plant is exactly where it wants to be. Ten minutes of observation saves months of disappointment, and it is the closest thing gardening has to a cheat code. Keep your sun notes somewhere you will find them next spring, taped inside a cabinet or saved in your phone. Sun patterns shift with the seasons as the sun rides higher in summer and lower in winter, so a spot that is perfect in May might be shady by September. That is completely fine, just move the pots as the light moves. Container gardening is gardening with wheels, and chasing the sun through the year is one of its greatest advantages over a fixed garden bed.
9. Learn the Finger Test for Watering
Watering is where beginners feel the most lost, because every plant tag says something vague like keep soil evenly moist, which tells you absolutely nothing useful. So beginners develop one of two bad habits. Some water on a strict schedule, every single day no matter what, which drowns the roots during cool, cloudy weeks. Others wait until the plant visibly wilts, which stresses it so badly that growth stalls for days after each rescue. Both habits come from the same problem. You cannot see what is happening inside the pot, so you are watering blind, guessing at a hidden world of roots and moisture. No wonder it feels like a mystery. Plant tags make it worse with advice like water regularly, which could mean absolutely anything. And well-meaning friends all contradict each other, with one swearing by daily watering and another insisting plants prefer neglect. Without a way to check what is actually happening underground, beginners bounce between the two extremes and their plants pay the price. The finger test cuts through all of that noise with one simple, physical fact: what does the soil feel like right now. It takes ten seconds, costs nothing at all, and works better than any fancy moisture gadget the garden center tries to sell you.
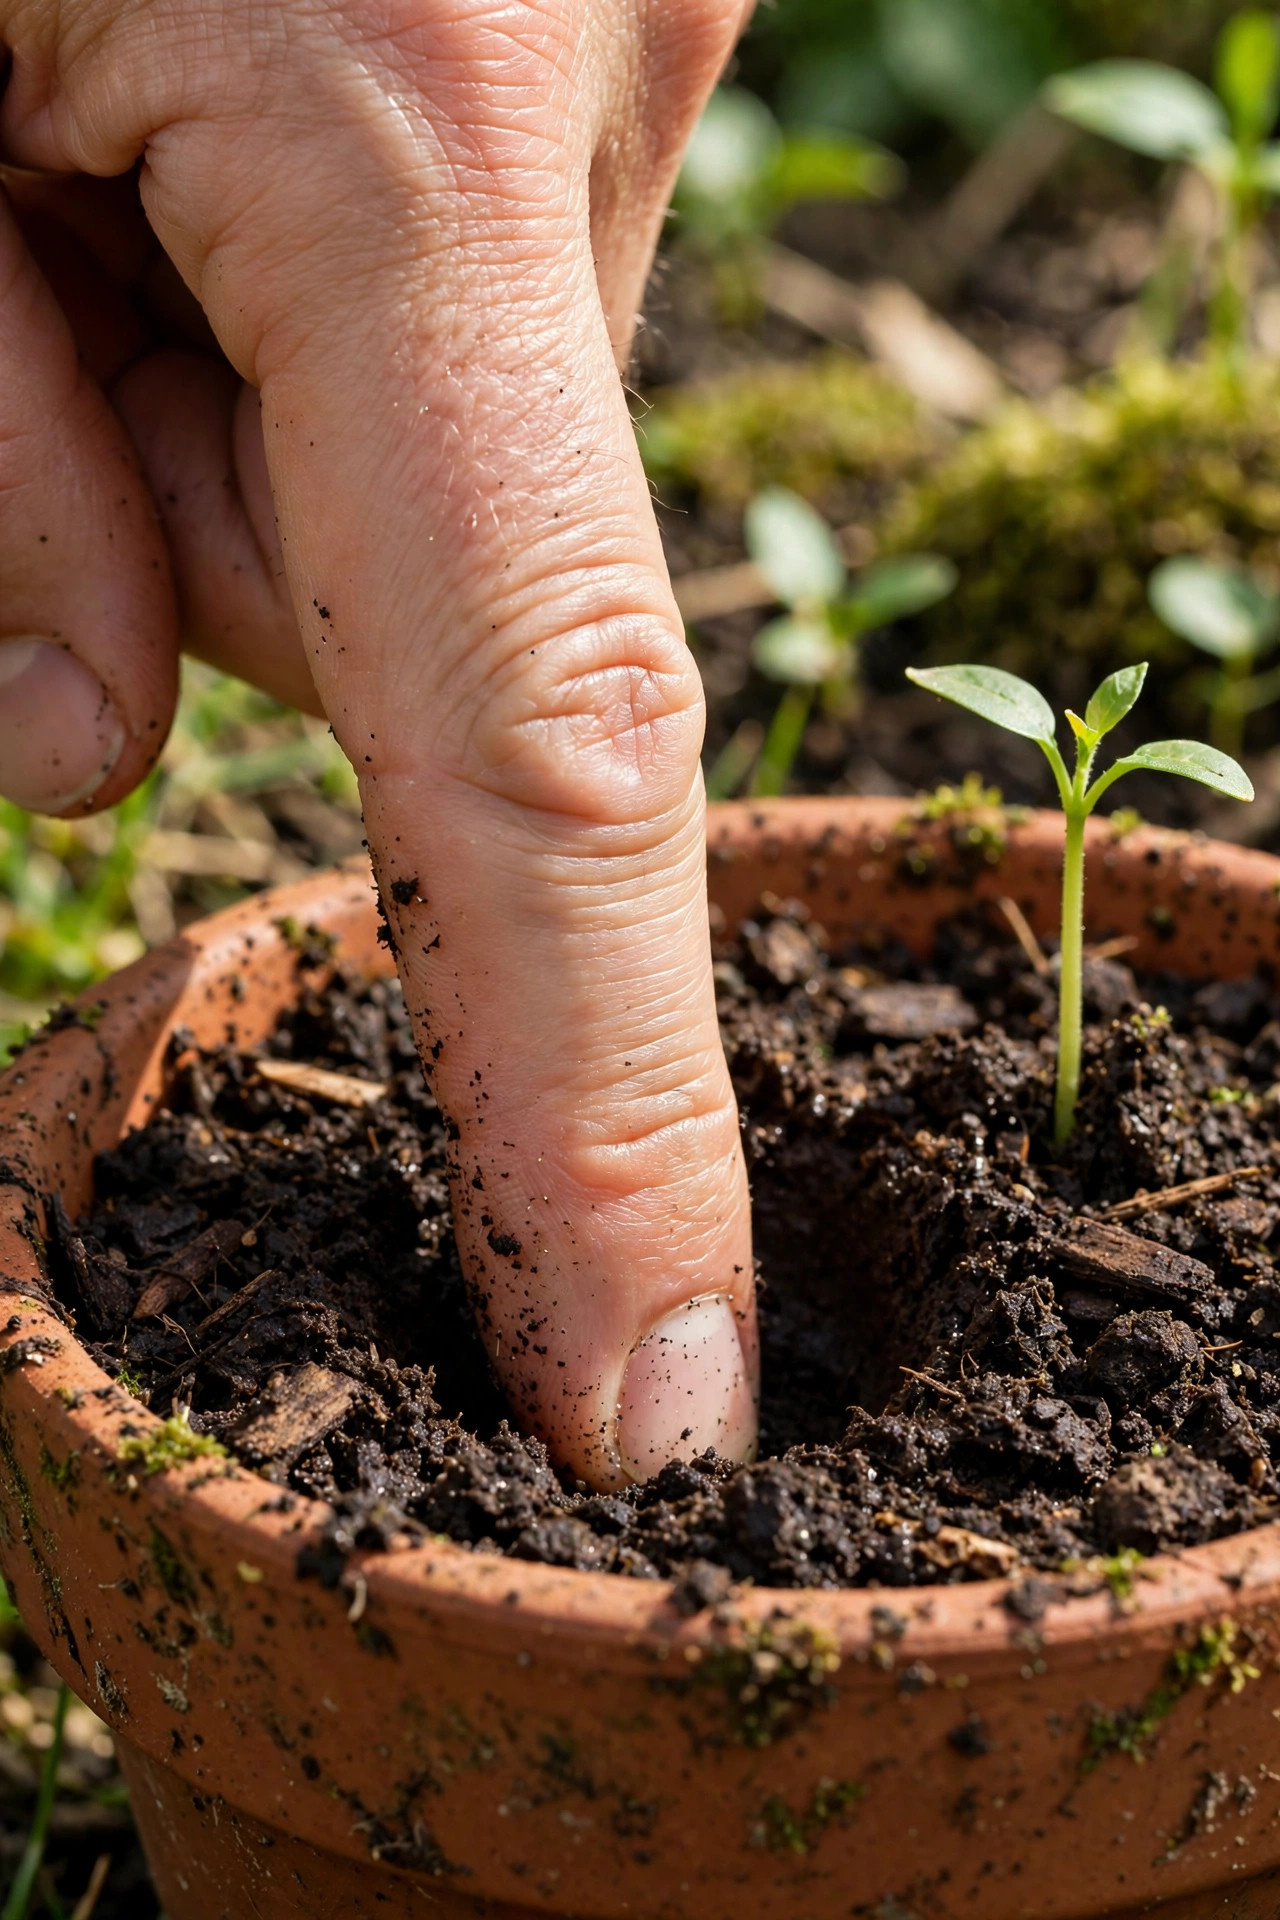
Your finger is the tool that ends the mystery. Push your index finger into the soil up to the second knuckle, about two inches deep. If the soil feels cool and damp and bits stick to your skin, walk away, the plant is fine. If it feels dry and crumbly and nothing sticks, water deeply until it flows from the drainage holes. That is the entire technique, and it works for nearly every container plant you will ever grow. Check daily in hot weather, every few days when it is cool, and always in the morning so leaves dry before night. Within two weeks this becomes pure habit, faster than brushing your teeth. You will stop drowning plants, stop starving them, and start watering with the calm confidence of someone who actually knows what the roots need. As you build the habit, you will start noticing patterns everywhere. Big pots hold moisture longer than small ones. Terracotta breathes and dries faster than plastic. Windy days drink more water than still ones. Soon you will glance at a pot and know, before you even touch the soil, whether it needs water. That intuition is what experienced gardeners call a green thumb, but it is not magic at all. It is just the finger test, repeated until it becomes pure instinct.
10. Feed a Little, Feed Often

About a month into the season, many beginners hit a confusing wall. The plants looked great at first, then growth stalls, lower leaves turn yellow, and everything just sits there looking tired despite perfect watering and plenty of sun. The instinct is to assume disease or bad luck, but the real culprit is usually hunger. Every time you water a container, a little bit of nutrition washes out the drainage holes along with the water. Potting mix starts with some built-in food, but a hungry tomato or pepper can burn through it in weeks. Unlike garden beds, which have deep reserves of nutrients, a pot is a closed system. Once the food is gone, it is gone, and the plant simply cannot grow without it. The yellowing usually starts with the oldest, lowest leaves, because the plant cannibalizes its own older growth to feed new leaves at the top. Beginners often mistake this for a watering problem or a disease, and they reach for remedies that do nothing at all. But if the lower leaves yellow while the top keeps growing, and watering and light are both fine, hunger is the likely culprit. Learning to read that signal will save you from so much confusion down the road.
The beginner-friendly fix is weak, regular feeding, not occasional heavy doses. Buy a balanced liquid fertilizer, the kind you mix with water, and use it at half the strength shown on the label, every two weeks through the growing season. Half strength sounds timid, but it is actually the pro move, because container roots are concentrated in a small space and full-strength fertilizer can burn them. Think of it like feeding a pet small meals instead of one giant feast. Water the pot normally first, then apply the diluted feed, which helps it spread evenly instead of shocking dry roots. Mark feeding days on your calendar until it becomes routine. Within two weeks of starting, you will see deeper green leaves and fresh growth, and that yellowing stall will become a story you tell other beginners. If you prefer an even simpler routine, mix slow-release granular fertilizer into the potting mix when you plant. These little coated pellets dissolve gradually over months, feeding the plant every time you water. It is the ultimate set-and-forget option for beginners who know they will skip liquid feeding days. Just remember that slow-release runs out eventually, usually by midsummer, so a mid-season top-up keeps heavy feeders like tomatoes happy all the way through fall.
11. Plant Marigolds as Bodyguards
Nothing deflates a new gardener faster than pests. You check your beautiful pepper plant one morning and the leaves are covered in tiny green aphids, or something has chewed neat holes through your basil overnight. The garden center sells a wall of chemical sprays, but beginners rightly hesitate to douse food plants in poison, and many sprays also kill the helpful insects you actually want around. So people either give up or wage a losing daily battle with a spray bottle of soapy water. It feels like nature is personally targeting your little garden, and for a beginner, one bad pest outbreak is often the end of the whole hobby. What stings most is the timing. Pests always arrive right when the plant looks its best, just as the first peppers form or the basil gets bushy. It feels personal, like the universe waited until you were proud. But pests are simply part of gardening, not a verdict on your skills. Every grower deals with them. The difference is having a plan before they arrive, instead of panicking after the damage is done. A little prevention right now saves you from a great deal of heartbreak later in the season when pests are at their worst.
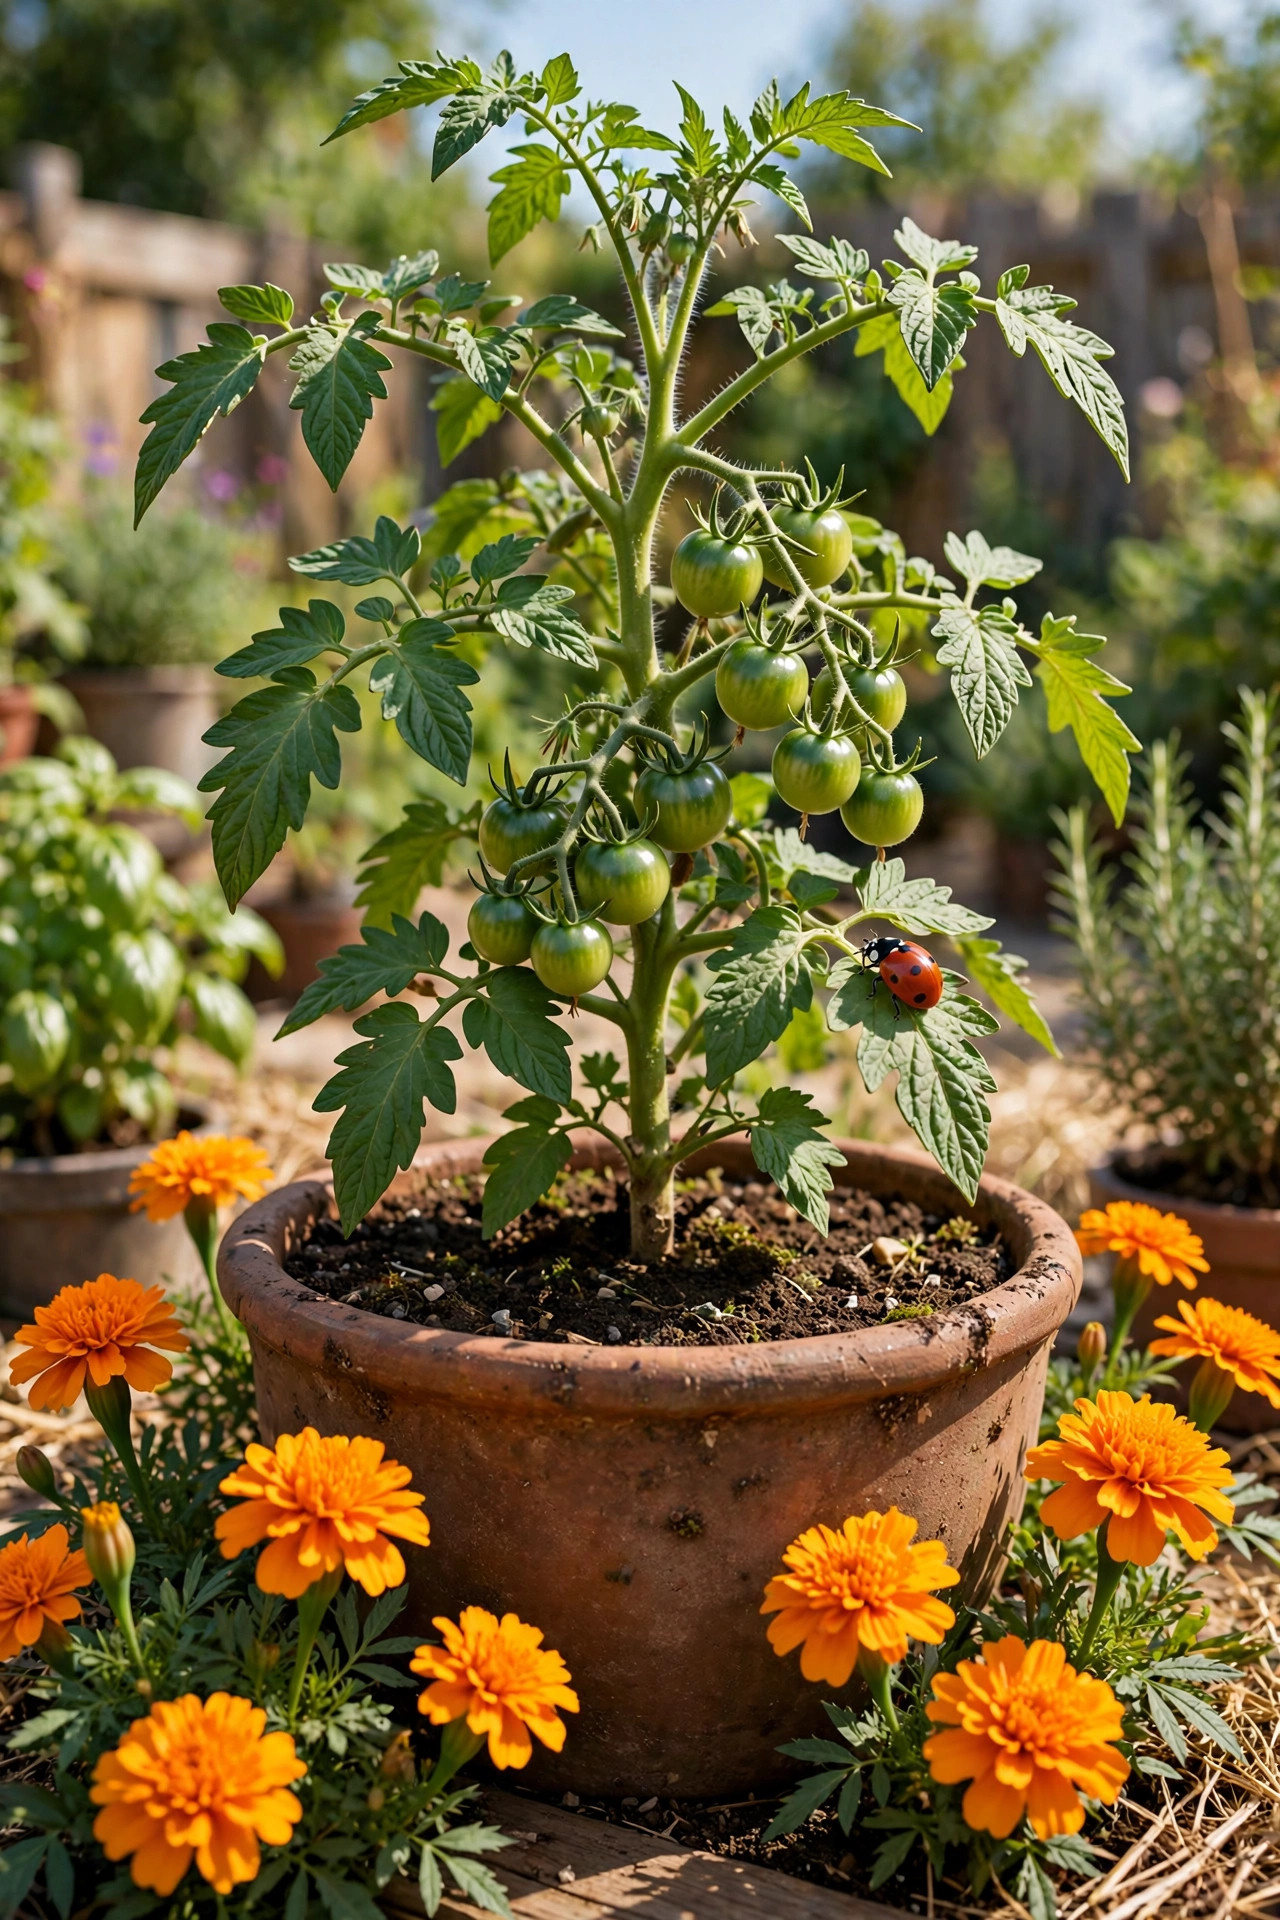
Marigolds are the oldest pest-fighting trick in the book, and they work beautifully in containers. These cheerful orange and yellow flowers release a scent from their roots that repels nematodes in the soil and confuses many flying pests, while their bright blooms attract ladybugs and hoverflies that eat aphids for breakfast. Tuck one marigold plant into every vegetable pot, or ring a tomato bucket with three of them. They ask for nothing special, just sun and water like everything else, and they bloom nonstop from spring to frost. Pair them with basil near your tomatoes and you have a classic companion planting trio that professional organic growers have used for generations. You are not just decorating, you are hiring tiny bodyguards that work for free, and your plants get to grow up in a neighborhood with its own security team. For the best effect, plant your marigolds at the same time as your vegetables, not after pests appear. Prevention beats cure every single time. Deadhead the spent blooms regularly by snipping off faded flowers, and the plants will pump out new ones until frost. If aphids do show up despite your bodyguards, a strong blast of water from the hose knocks most of them off, and the ladybugs your marigolds attracted will happily handle the rest.
12. Go Up With a Vertical Planter
The smallest balconies present a brutal math problem. The floor might fit three pots before you cannot open the door anymore, and every gardening dream dies right there in the traffic jam. Floor space is the scarcest resource a container gardener has, and beginners waste it by lining up pots in a single row like soldiers. Meanwhile the railing, the wall, and the empty air above the pots sit completely unused. It feels like you need a bigger balcony to grow more food, and since you cannot magically expand your outdoor space, most people just accept a tiny garden and a lot of frustration. I have seen balconies barely wider than a doorway producing salads, herbs, and flowers for a whole family, simply because the gardener thought vertically instead of horizontally. The transformation is dramatic. What looked like a hopeless concrete slab becomes a green wall of growing things. And vertical gardens hide a bonus benefit: better air circulation around the plants, which means fewer fungal problems than you get with crowded floor pots. Your back will thank you as well, since everything sits at a comfortable working height instead of forcing you to bend all the way down to the ground constantly.
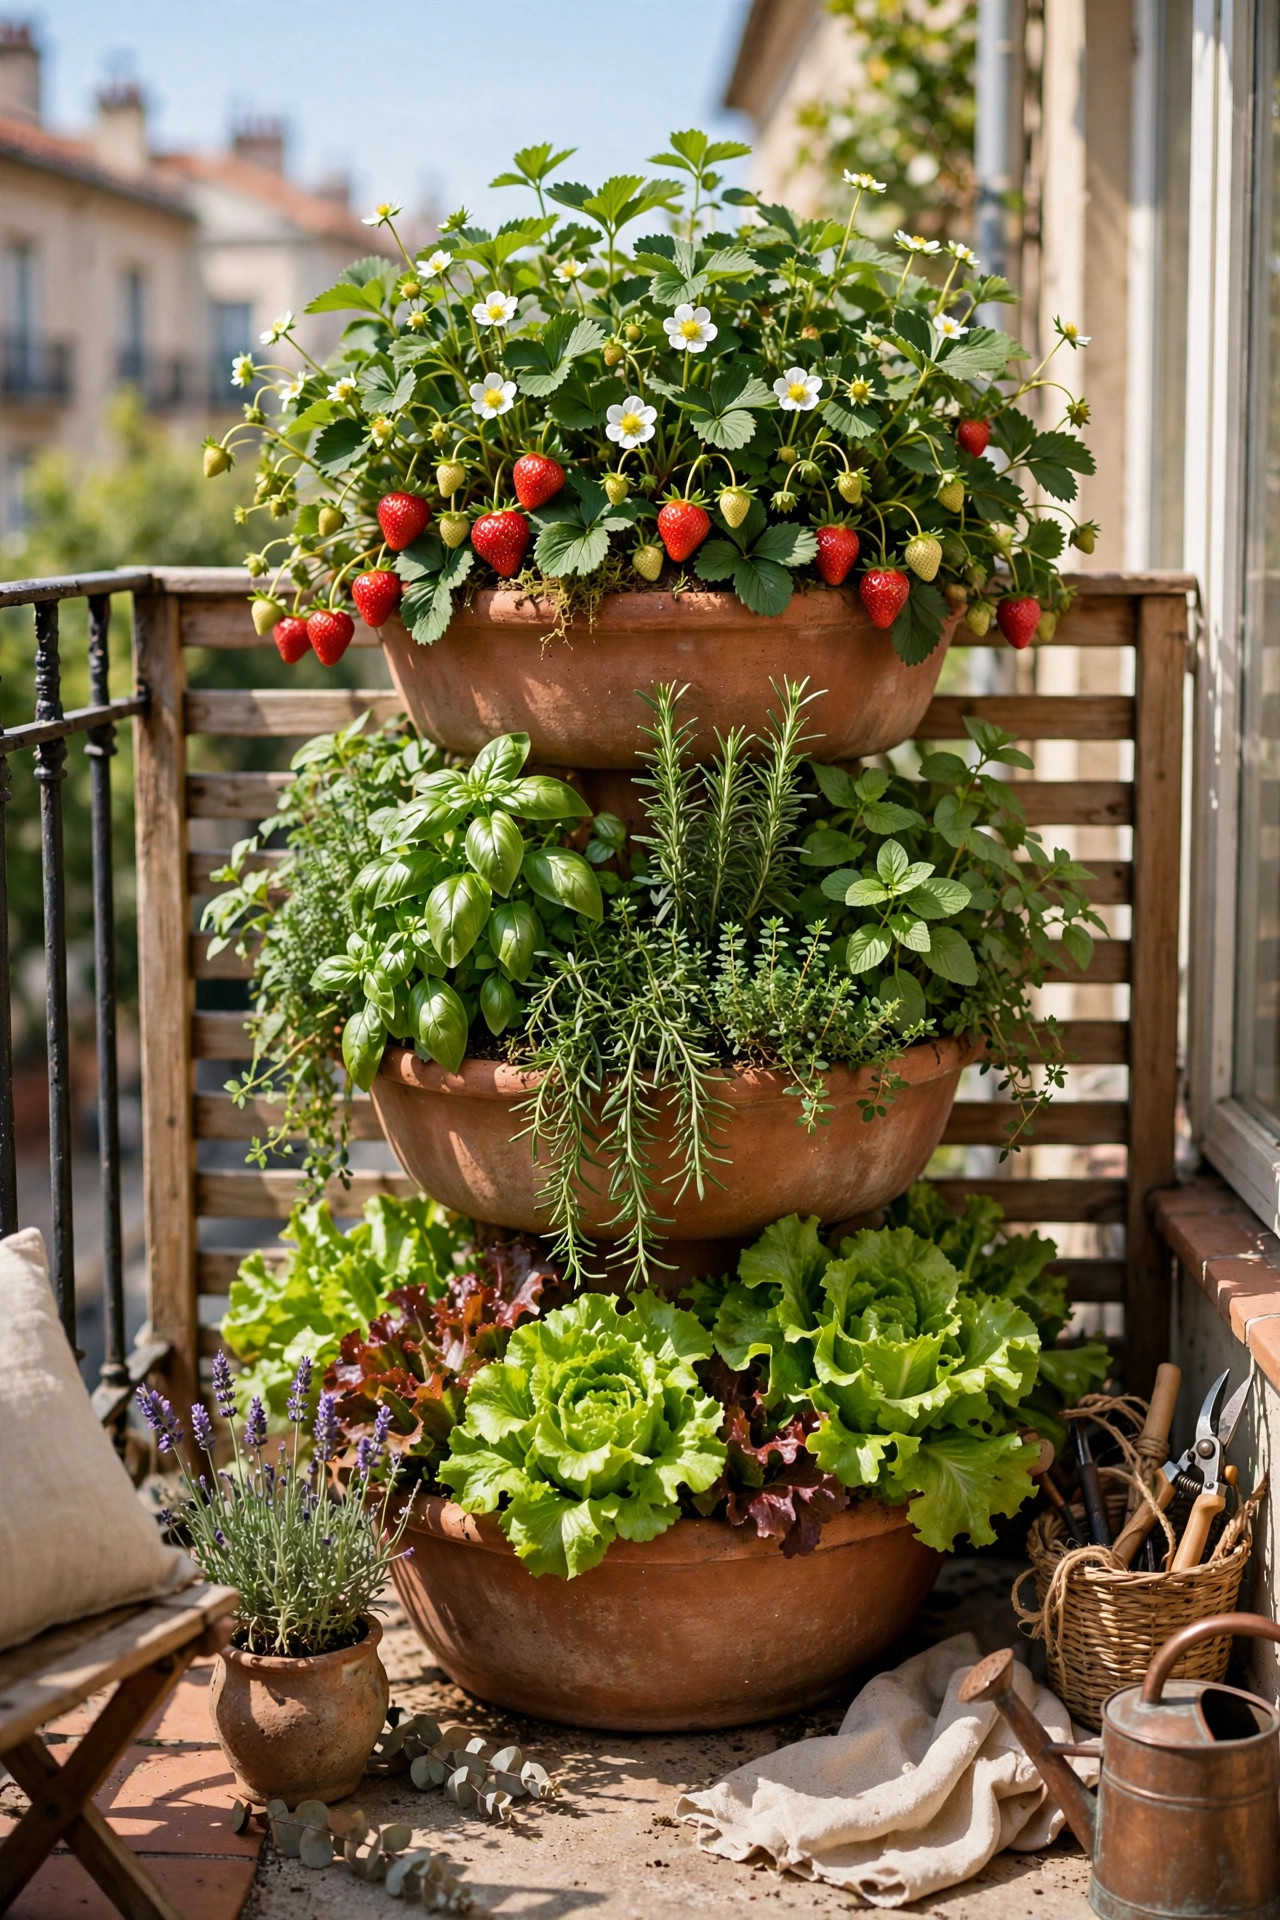
The fix is to stop thinking in floor space and start thinking in cubic feet. A simple three-tier stacked planter turns one square foot of floor into three levels of growing space, tripling your garden without moving a single wall. Railing planters hook over the balcony rail and use space that was doing nothing at all, perfect for herbs and trailing flowers. A wooden pallet stood upright against a sunny wall becomes a living wall for lettuce, strawberries, and herbs if you staple landscape fabric into pockets behind the slats. Even a basic wire shelving unit from a discount store, parked in the sunniest corner, holds a dozen small pots in the footprint of two. Water from the top and let gravity help, since upper pots drain into lower ones. When you grow up instead of out, a four-foot balcony can hold a genuine little farm, and the vertical layers look lush and impressive from every angle. Start with a sturdy structure, because a fully planted vertical garden gets heavy, especially right after watering. Anchor tall shelving to the wall so wind cannot topple it onto your neighbor’s balcony. Use lightweight plastic pots up high and save the heavy ceramic ones for ground level. And put a drip tray or saucer under each level to catch runoff. A little engineering up front prevents a heartbreaking collapse later, and your tower of plants will stand strong all season long.
13. Start With Succulents You Cannot Kill
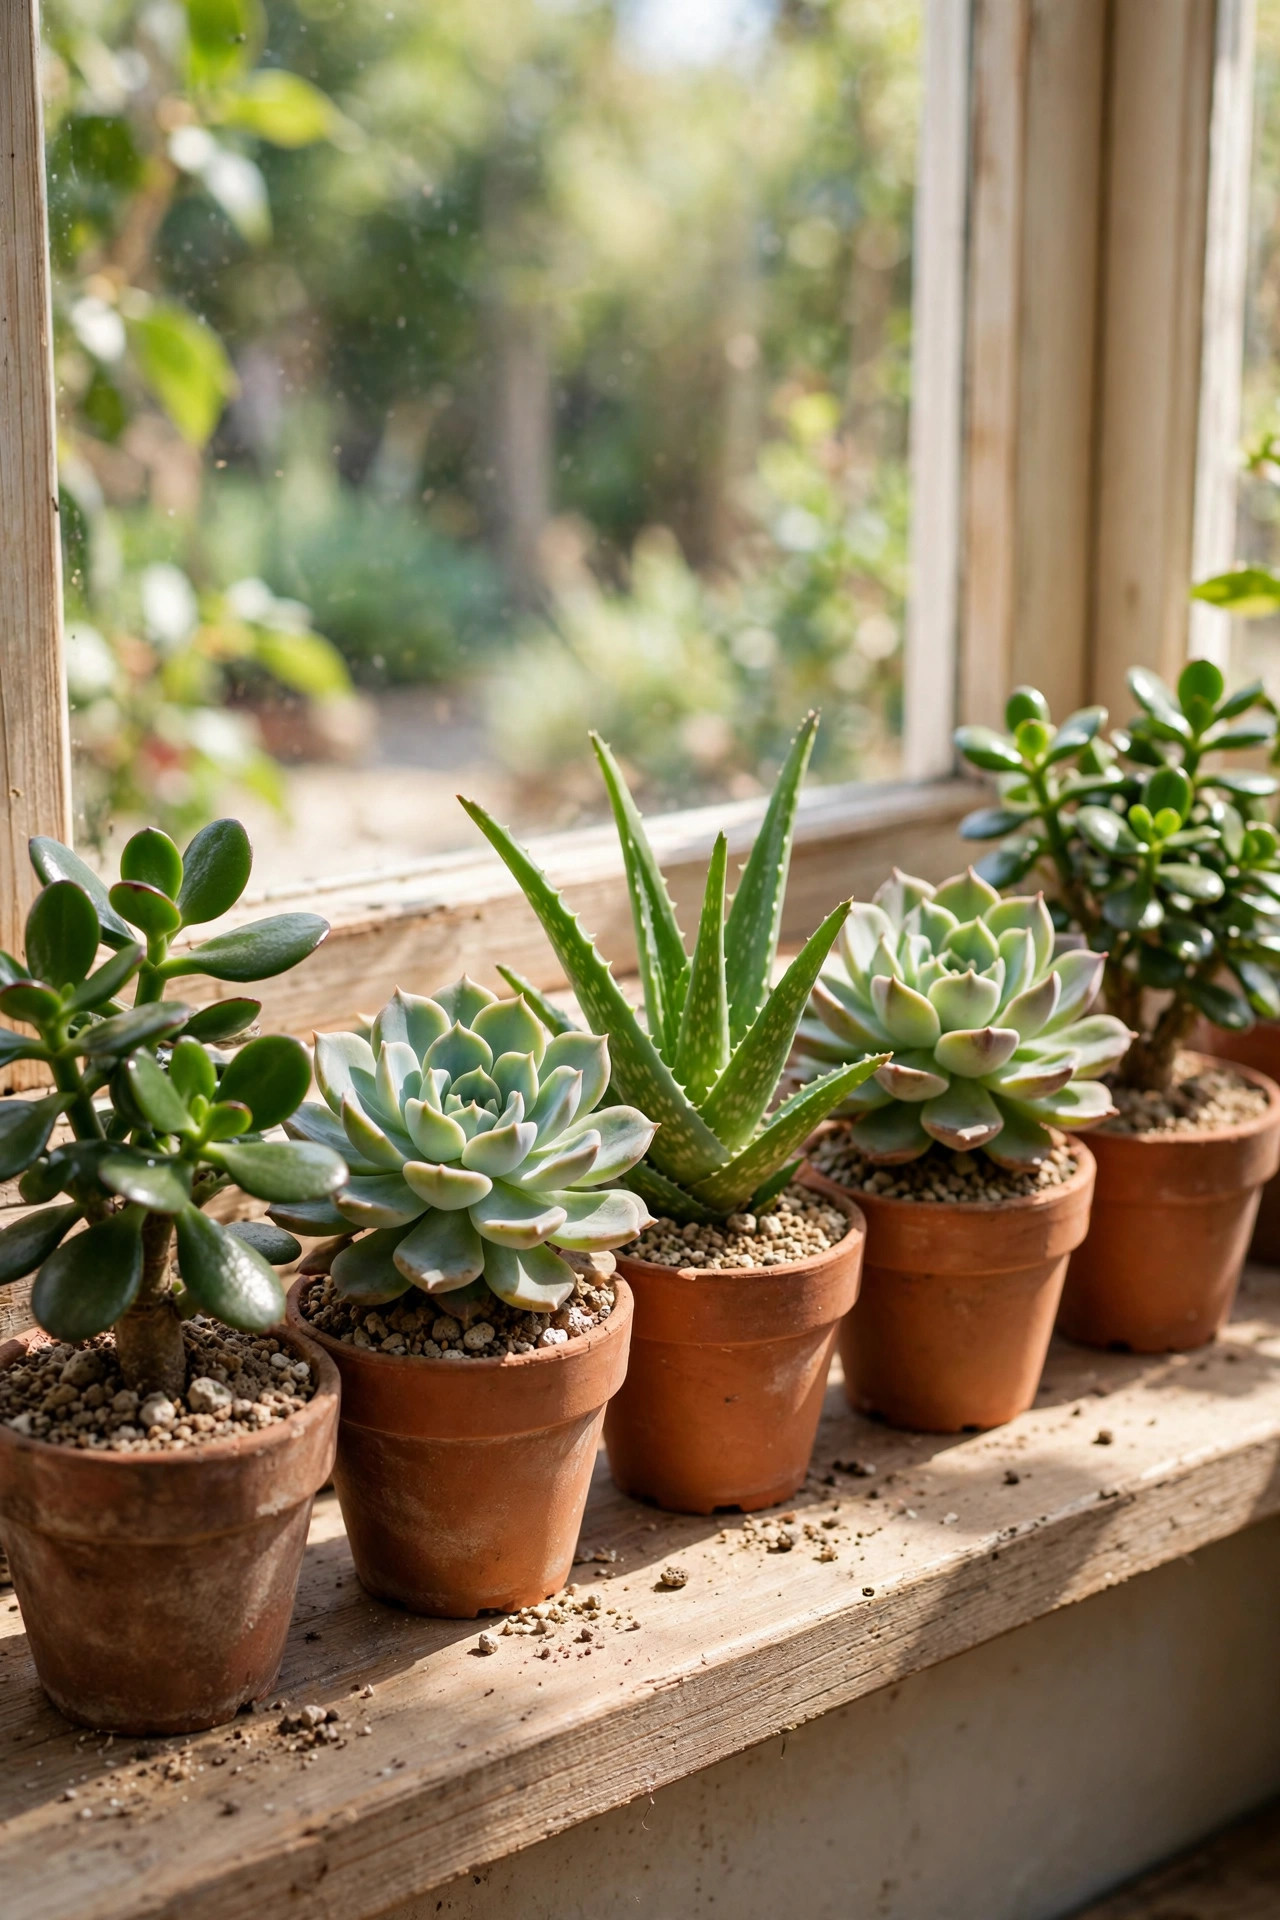
Some beginners carry a special kind of shame. They have killed cacti, which are plants famous for surviving neglect, and they have concluded that their touch is uniquely lethal. The story usually goes the same way. A cute little succulent comes home from the store, gets watered with love every couple of days, and slowly turns to mush. The owner feels terrible and swears off plants forever. But here is the secret the plant never told them. Succulents almost never die of thirst. They die of kindness, specifically of being watered like a regular houseplant when they are built for desert conditions. The problem was never the person, it was a total mismatch between the plant’s needs and the care it received. This mismatch is incredibly common because succulents are sold everywhere as easy starter plants, often in adorable pots with no drainage and zero care instructions. The store wants the sale, not your long-term success. But armed with the truth about how they actually live, you can keep them thriving for decades. Some jade plants become family heirlooms, passed down through generations. Yours can too, once you stop loving them to death. Understanding what they truly need is the whole battle, and you have already won most of it just by reading this far.
Once you understand that single fact, succulents become the most forgiving starter plants on earth. Pot them in a gritty, fast-draining cactus mix, or make your own by blending regular potting mix half and half with coarse sand or perlite. Give them the sunniest spot you own, because weak light makes them stretch into pale, floppy ghosts. Then water deeply but rarely, only when the soil is completely dry all the way through, which might mean every two to three weeks indoors. Start with the tough ones like jade plants, echeveria, and aloe, which shrug off beginner mistakes that would kill fussier plants. A row of succulents on a sunny sill gives you living, growing green things with almost zero effort, and that first year of success rebuilds the confidence that one drowned cactus destroyed. You are not a plant killer, you were just watering desert plants like swamp plants. The one extra rule for succulent success is light, light, and more light. A sunny south-facing window is ideal indoors, and outdoors they want full sun for most of the day. Without enough light they stretch tall and pale, reaching for a sun they cannot find. If yours starts stretching, move it closer to the light gradually over a week so it does not sunburn. Get the light right, water rarely, and these so-called difficult plants become the easiest things you own.
14. Grow a Pollinator Pot
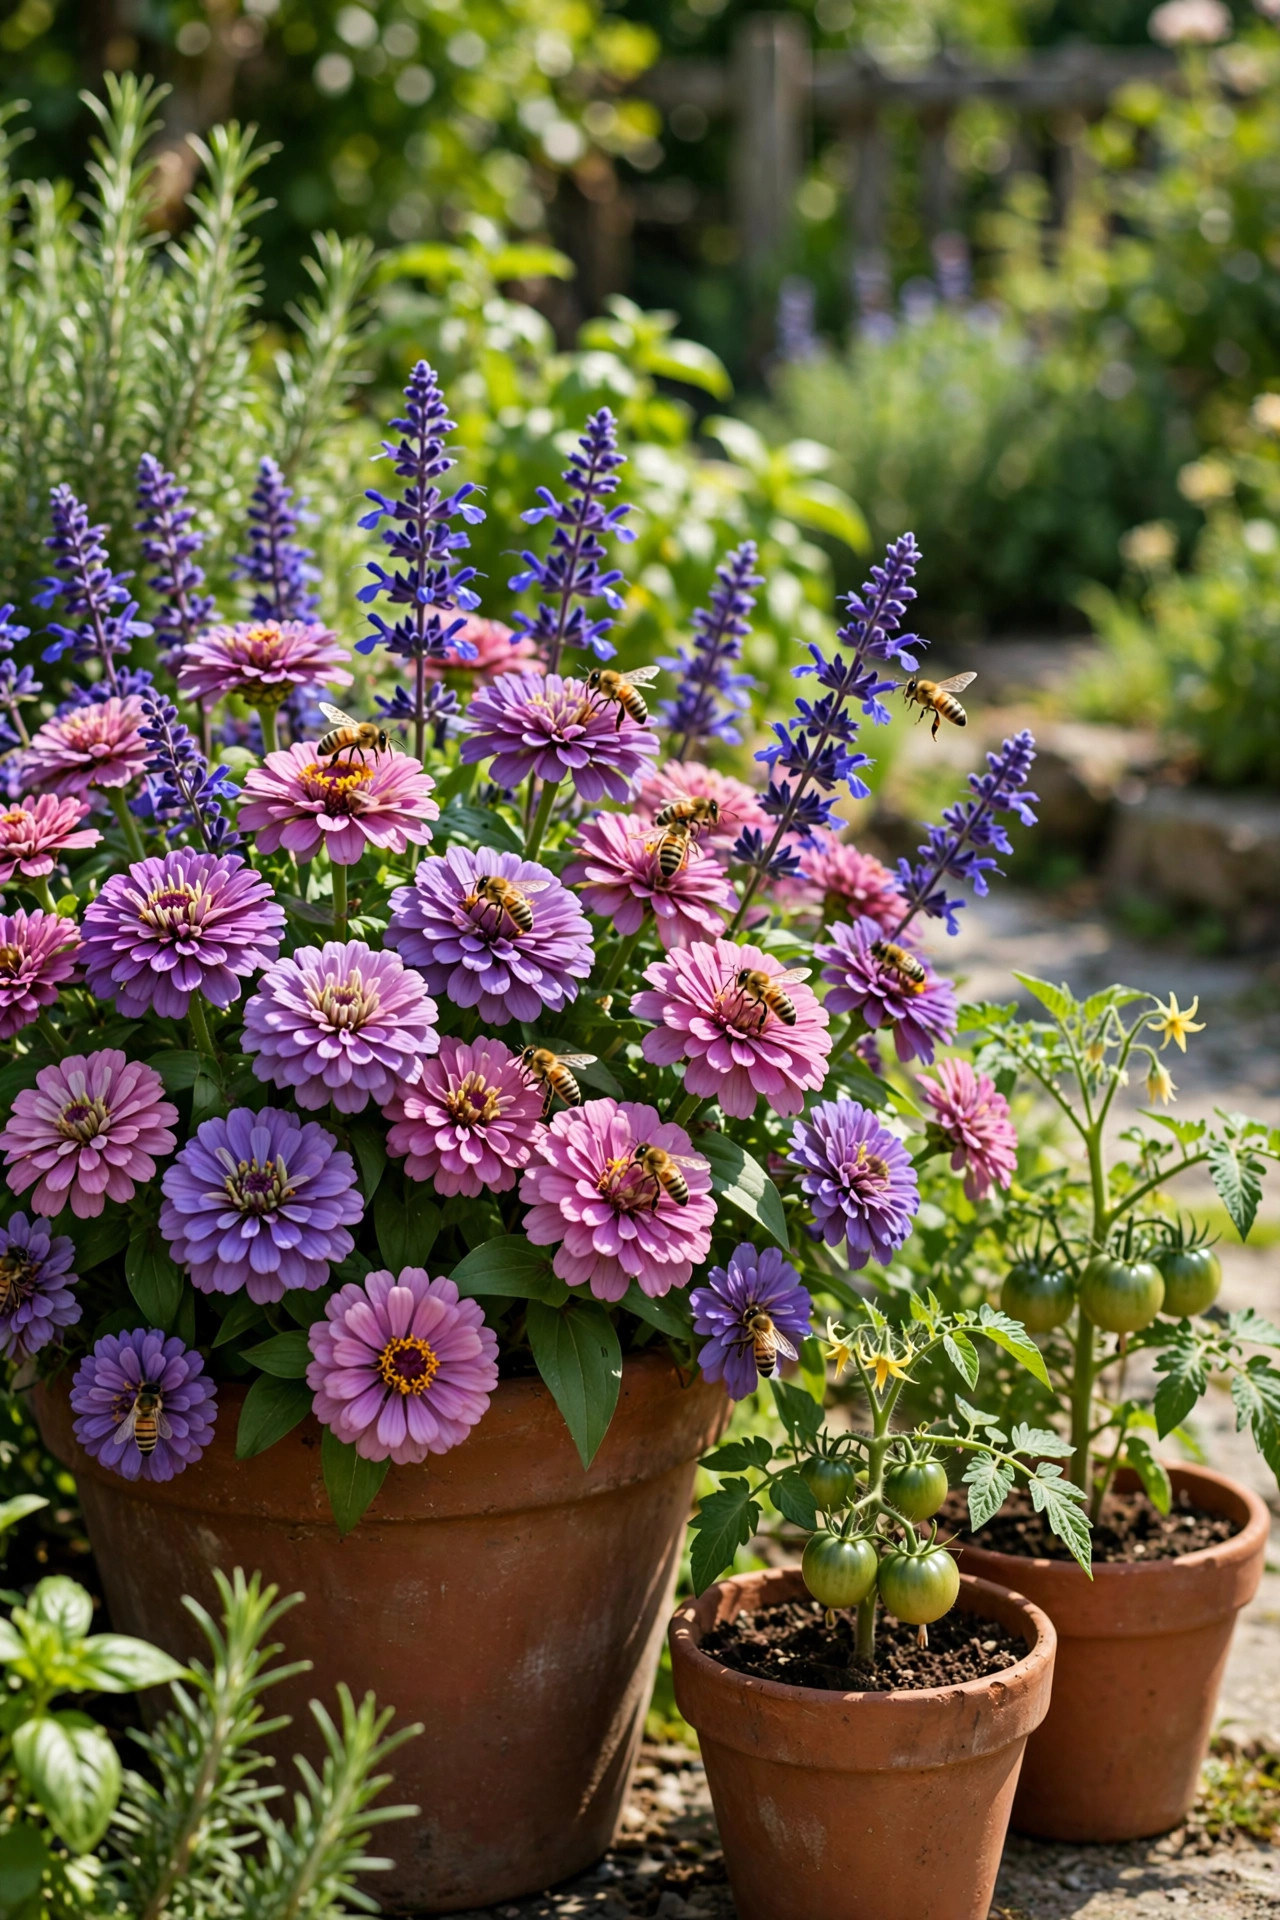
Here is a problem most beginners do not even know they have until it bites them. Your tomato plant flowers beautifully, covered in yellow blossoms, but almost none of them turn into fruit. Your cucumber vines bloom and then the tiny baby cucumbers yellow and drop off. The plant looks healthy, the sun is fine, the water is fine, yet the harvest never comes. The missing ingredient is pollination. Many vegetables need bees and other insects to carry pollen from flower to flower before fruit can form, and a lonely balcony three floors up might as well be a desert island to a passing bee. No pollinators means no pollination, which means flowers without fruit and a very confused gardener. Balconies above the second floor are the worst for this, because many bees prefer to forage close to the ground. But even high balconies can attract pollinators if the floral display is generous enough to be worth the trip. A single sad flower will not do it. You need a real patch of blooms, loud with color and scent, broadcasting an invitation that passing bees simply cannot ignore. Give them a loud enough reason to visit and they will reward you with a harvest bigger than you imagined.
A single pot of the right flowers fixes this by turning your balcony into a destination worth visiting. Bees navigate by color and scent, and they cannot resist a concentrated patch of blooms. Plant a generous pot with bee favorites like lavender, salvia, zinnias, and borage, and place it right next to your vegetables, within a few feet. The flowers act like a neon sign, drawing pollinators in, and once the bees arrive for the flowers, they visit the tomato and cucumber blossoms too. You will notice the difference within days, as tiny fruits start swelling where flowers used to just fall off. As a bonus, a pollinator pot is gorgeous, smells wonderful, and gives you cut flowers all summer. One pot of flowers can easily double your vegetable harvest, which makes it the highest return investment in your entire container garden. Avoid pesticide sprays anywhere near your pollinator pot, even organic ones, since they cannot tell a helpful bee from a harmful bug. If you must treat a pest outbreak, do it in the evening when bees are home for the night, and keep sprays far away from open blooms. Better yet, let your pollinator garden build its own balance. The ladybugs, lacewings, and hoverflies it attracts will patrol your vegetables for free, and your garden becomes a tiny ecosystem instead of a battlefield.
15. Keep Growing After Summer
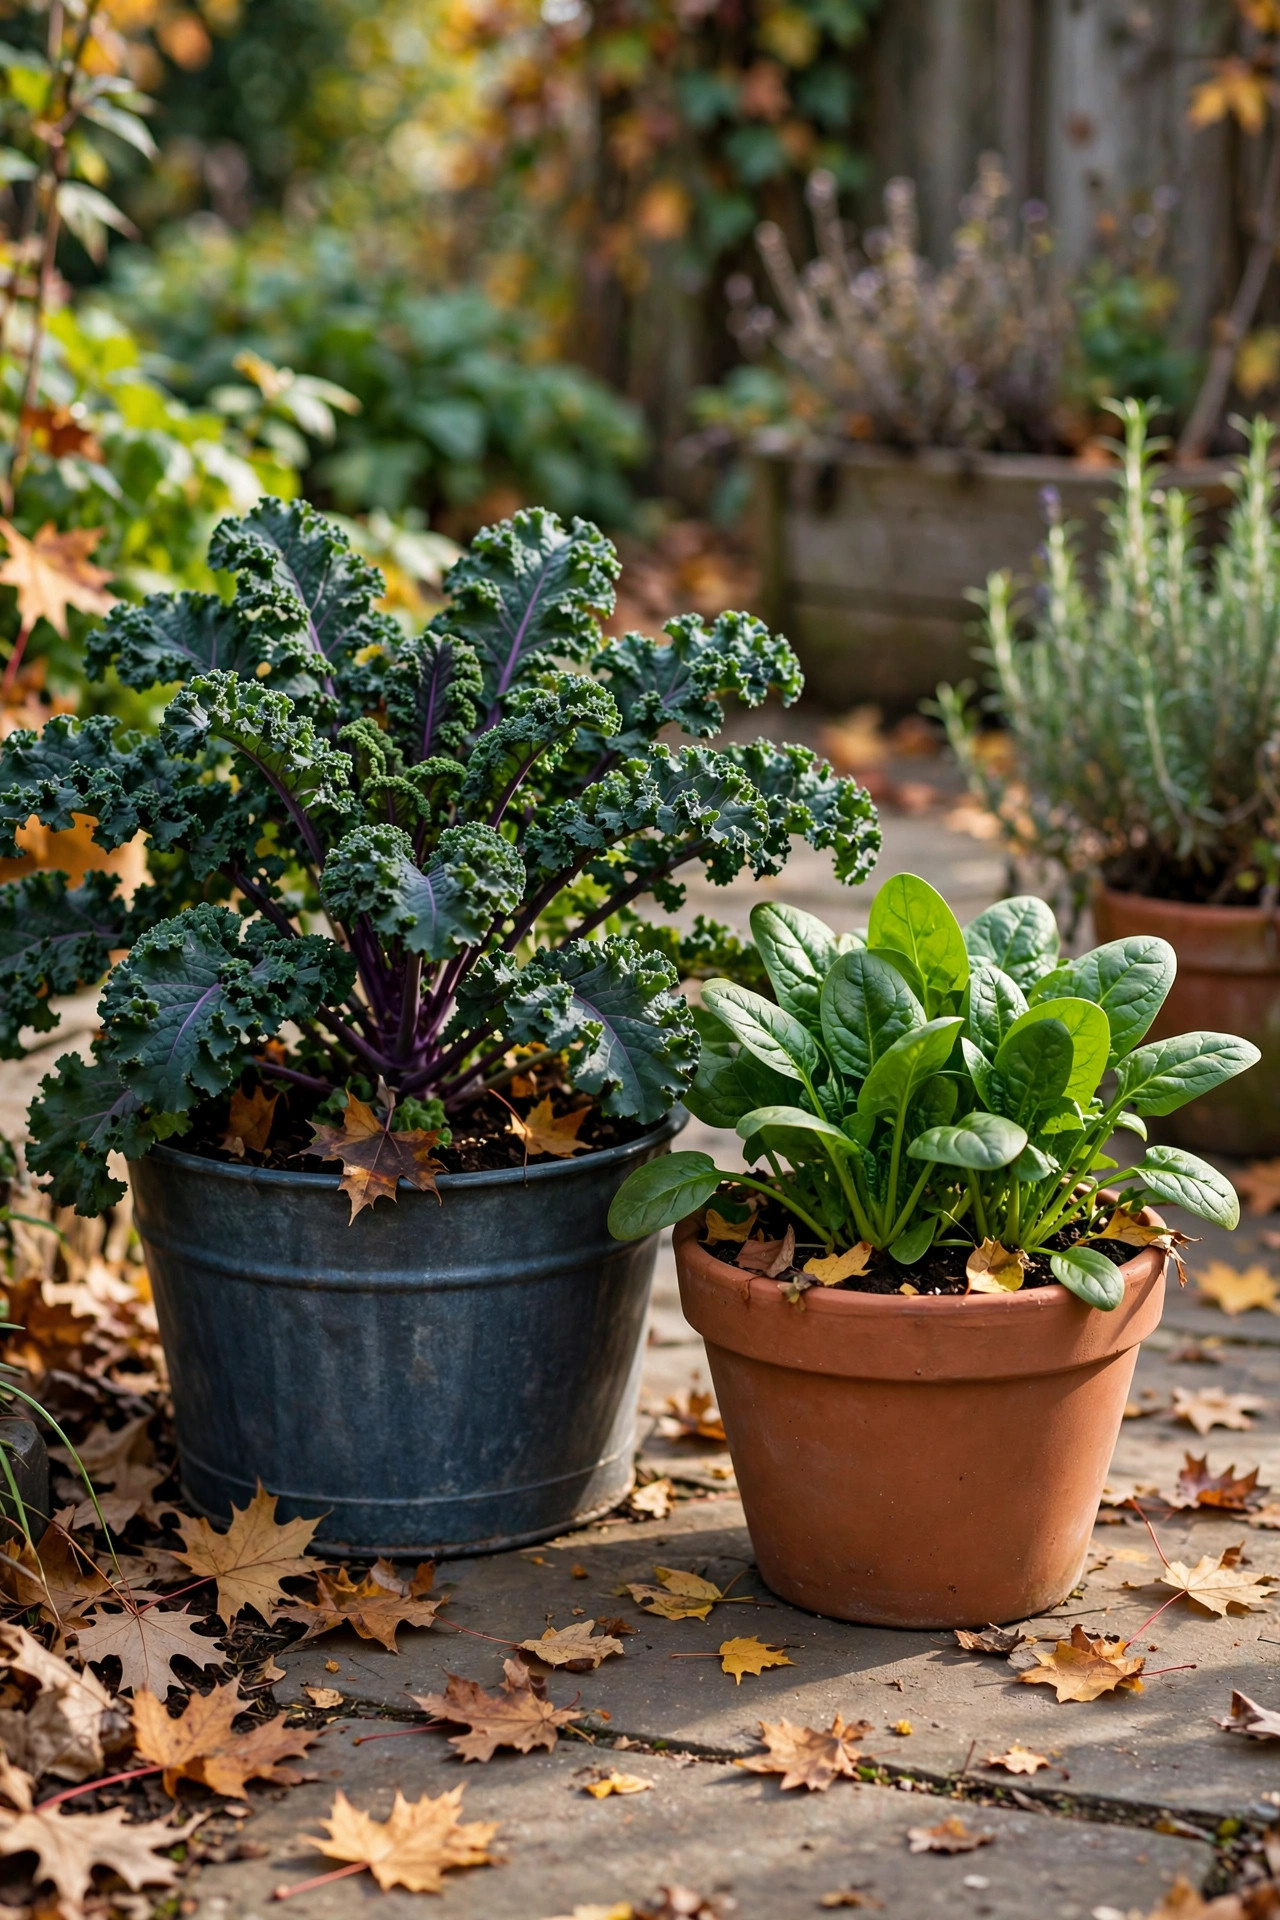
Most beginners treat container gardening as a summer-only hobby, and that is a shame, because it wastes half the growing year. The tomatoes finish in September, the pots get dumped, and everything sits empty and sad through the beautiful cool months of fall. Then spring arrives and you start from zero again, having forgotten half of what you learned. The assumption is that gardening ends when summer ends, because everyone pictures gardening as a hot-weather activity. But many of the tastiest plants actually prefer cool weather and will happily grow in containers long after the tomatoes are gone, if someone just gives them a chance. There is a psychological trap here too. After the intensity of summer gardening, fall feels like a natural stopping point, and empty pots feel like a well-earned rest. But those empty pots are wasted opportunity, sitting idle during some of the finest growing weather of the year. Cool air means fewer pests, less watering, and no heat stress whatsoever. Fall gardening is genuinely easier than summer gardening, and most beginners never realize it until they finally try. The garden you thought was finished in September still has some of its very best months ahead of it.
Fall is secretly the easiest season for container beginners, because cool-season crops are tougher and less fussy than summer vegetables. Kale, spinach, arugula, and radishes all thrive in the crisp air of autumn, and a light frost actually makes kale and spinach taste sweeter. In late August or September, refill your summer pots with fresh potting mix and sow these crops directly. They germinate fast in warm soil, grow steadily through fall, and many will survive winter in mild climates with nothing more than a sheltered corner. Even where winters are harsh, you get two or three extra months of harvest from the same pots. Year-round growing keeps your skills sharp, your pots productive, and your kitchen supplied long after the neighbors have put their gardens to bed. Once you taste December spinach you picked yourself, summer-only gardening will feel like quitting a race at the halfway mark. To stretch the season even further, keep a roll of garden fleece or an old bedsheet handy. When a hard freeze threatens, drape it over your pots in the evening and remove it in the morning. This simple blanket can buy you weeks of extra harvest. Cold frames and mini hoop tunnels work even better if you catch the bug. Once you realize the season is yours to extend, winter stops feeling like an ending and starts feeling like planning season for an even better spring.
Conclusion
If you take only one thing from this article, let it be this. Every gardener you admire started exactly where you are now, standing in front of an empty pot and wondering if they were about to kill something. The difference between them and a non-gardener was never talent or some mysterious green thumb. It was simply that they started, made every mistake in this article at least once, and kept going anyway. Containers make those mistakes cheap and painless. A failed pot costs a few dollars and an afternoon, and it teaches you something no book can. Your second pot will always do better than your first, and your fifth will make you feel like a completely different person.
So start embarrassingly small. One big pot, one bag of potting mix, one plant you actually want to eat or admire. Put it where the sun falls, check it with your finger, and forgive yourself for whatever goes sideways. Gardening is not a test you pass or fail, it is a slow conversation with living things, and containers let you have that conversation anywhere, even on a fire escape or a doorstep. A year from now you will be the neighbor giving away spare tomato seedlings and explaining drainage holes to someone who is sure they kill everything. I know, because that used to be me.
FAQs
What is the easiest plant to grow in a container for a total beginner?
Start with herbs like basil, mint, or chives, or loose-leaf lettuce. These plants germinate quickly, show you visible progress within weeks, and forgive the most common beginner mistakes. Basil in particular tells you exactly what it needs, drooping dramatically when thirsty and perking right back up after watering. Avoid starting with fussy plants like blueberries or orchids, which need precise soil acidity and humidity. Pick one forgiving plant, grow it well, and let that first success build the confidence for everything else.
How often should I water my container plants?
There is no fixed schedule that works for everyone, because sun, wind, pot size, and plant type all change how fast soil dries. Instead of watering by the calendar, use the finger test every day or two. Push your finger two inches into the soil. If it feels damp, wait. If it feels dry, water deeply until it drains from the bottom. In hot summer weather most pots need daily checking, while in cool spring weather twice a week may be enough. Morning watering is best, since it gives leaves time to dry before night and reduces disease.
What size pot do I need for growing vegetables?
Bigger is almost always better. Leafy greens like lettuce and spinach do fine in pots six to eight inches deep. Herbs want at least eight to ten inches. Fruiting plants are hungrier for space, so give peppers and eggplants pots at least twelve inches wide and deep, and give tomatoes a five-gallon container or larger. Small pots dry out in hours on hot days and stunt root growth, which is why beginners fail with cute tiny pots. When in doubt, go one size bigger than you think you need.
Can I use regular garden soil in my containers?
It is strongly not recommended. Garden soil compacts into a dense, airless brick inside pots, which suffocates roots and traps water. It can also introduce weed seeds, fungal diseases, and insect eggs to your clean containers. Bagged potting mix is blended specifically to stay light and fluffy, drain well, and hold the right amount of moisture. It costs little and makes a bigger difference than any fertilizer or fancy pot. Save the garden soil for in-ground beds and give your containers the mix they were designed for.
Why do my container plants keep dying even though I water them?
The most common cause is actually too much water combined with poor drainage. Roots need air as well as moisture, and constantly soggy soil suffocates them, causing yellow leaves and mushy stems that look confusingly like underwatering. Check that every pot has drainage holes and that you are letting the top inch or two of soil dry between waterings. The second most common cause is too little light, especially for vegetables. Move the pot to a sunnier spot and use the finger test before every watering, and most dying plants will recover.
Do I need to fertilize container plants?
Yes, because every watering washes a little nutrition out through the drainage holes, and potting mix only comes with a limited starter supply. Use a balanced liquid fertilizer at half the label strength every two weeks during the growing season. Half strength is important, since full strength can burn roots packed into a small pot. Always water normally first, then apply the diluted feed. You will notice deeper green leaves and stronger growth within a couple of weeks. Think of it as regular small meals rather than rare feasts.