
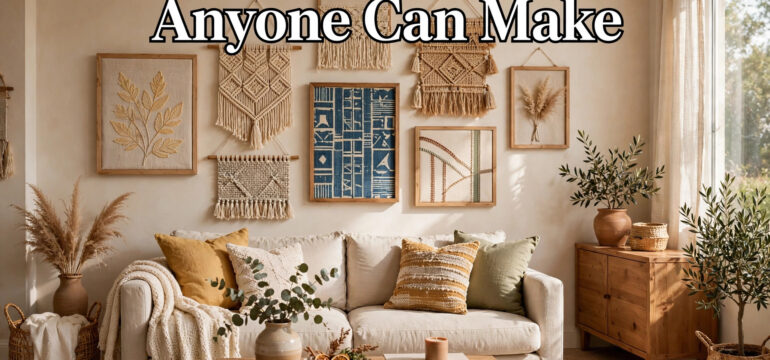
I will be honest with you before we start. The first gallery wall I ever hung fell down in the middle of the night. I had used those sticky hanging strips on textured walls, which the package clearly said not to do, and at about two in the morning I woke up to a crash that sounded like someone broke into my living room. Three frames on the floor, one with a cracked corner, and my pride in pieces next to them. I almost gave up on decorating my walls entirely that week. But here is what I learned from that noisy disaster. Wall art does not have to be perfect, expensive, or done by someone with an art degree. It just has to be yours, hung with the right hardware, on a wall you look at every day.
That failed gallery wall taught me something else too. The most loved art in my home now is the stuff I made myself, wobbly edges and all. There is a painted canvas in my hallway that a real artist would probably laugh at, but my kids point at it every time their friends come over and say my mom made that. No store bought print has ever gotten that reaction. When you make the art yourself, every piece carries a little story, the afternoon you spent painting it, the fabric you found at the thrift store, the frame you rescued from a garage sale. Those stories are what make a house feel like a home, not the price tag on the frame.
So here are 22 diy wall art ideas anyone can make, and I mean anyone. You do not need to know how to draw. You do not need fancy tools. Most of these cost less than a pizza, and several cost nothing at all because they use things you already have. I have tried nearly all of them in my own home, messed a few up, fixed them, and lived with the results long enough to tell you what actually works. Grab whatever frame, fabric, or paint you have lying around, and let us fill those blank walls together.
1. Framed Fabric Panels
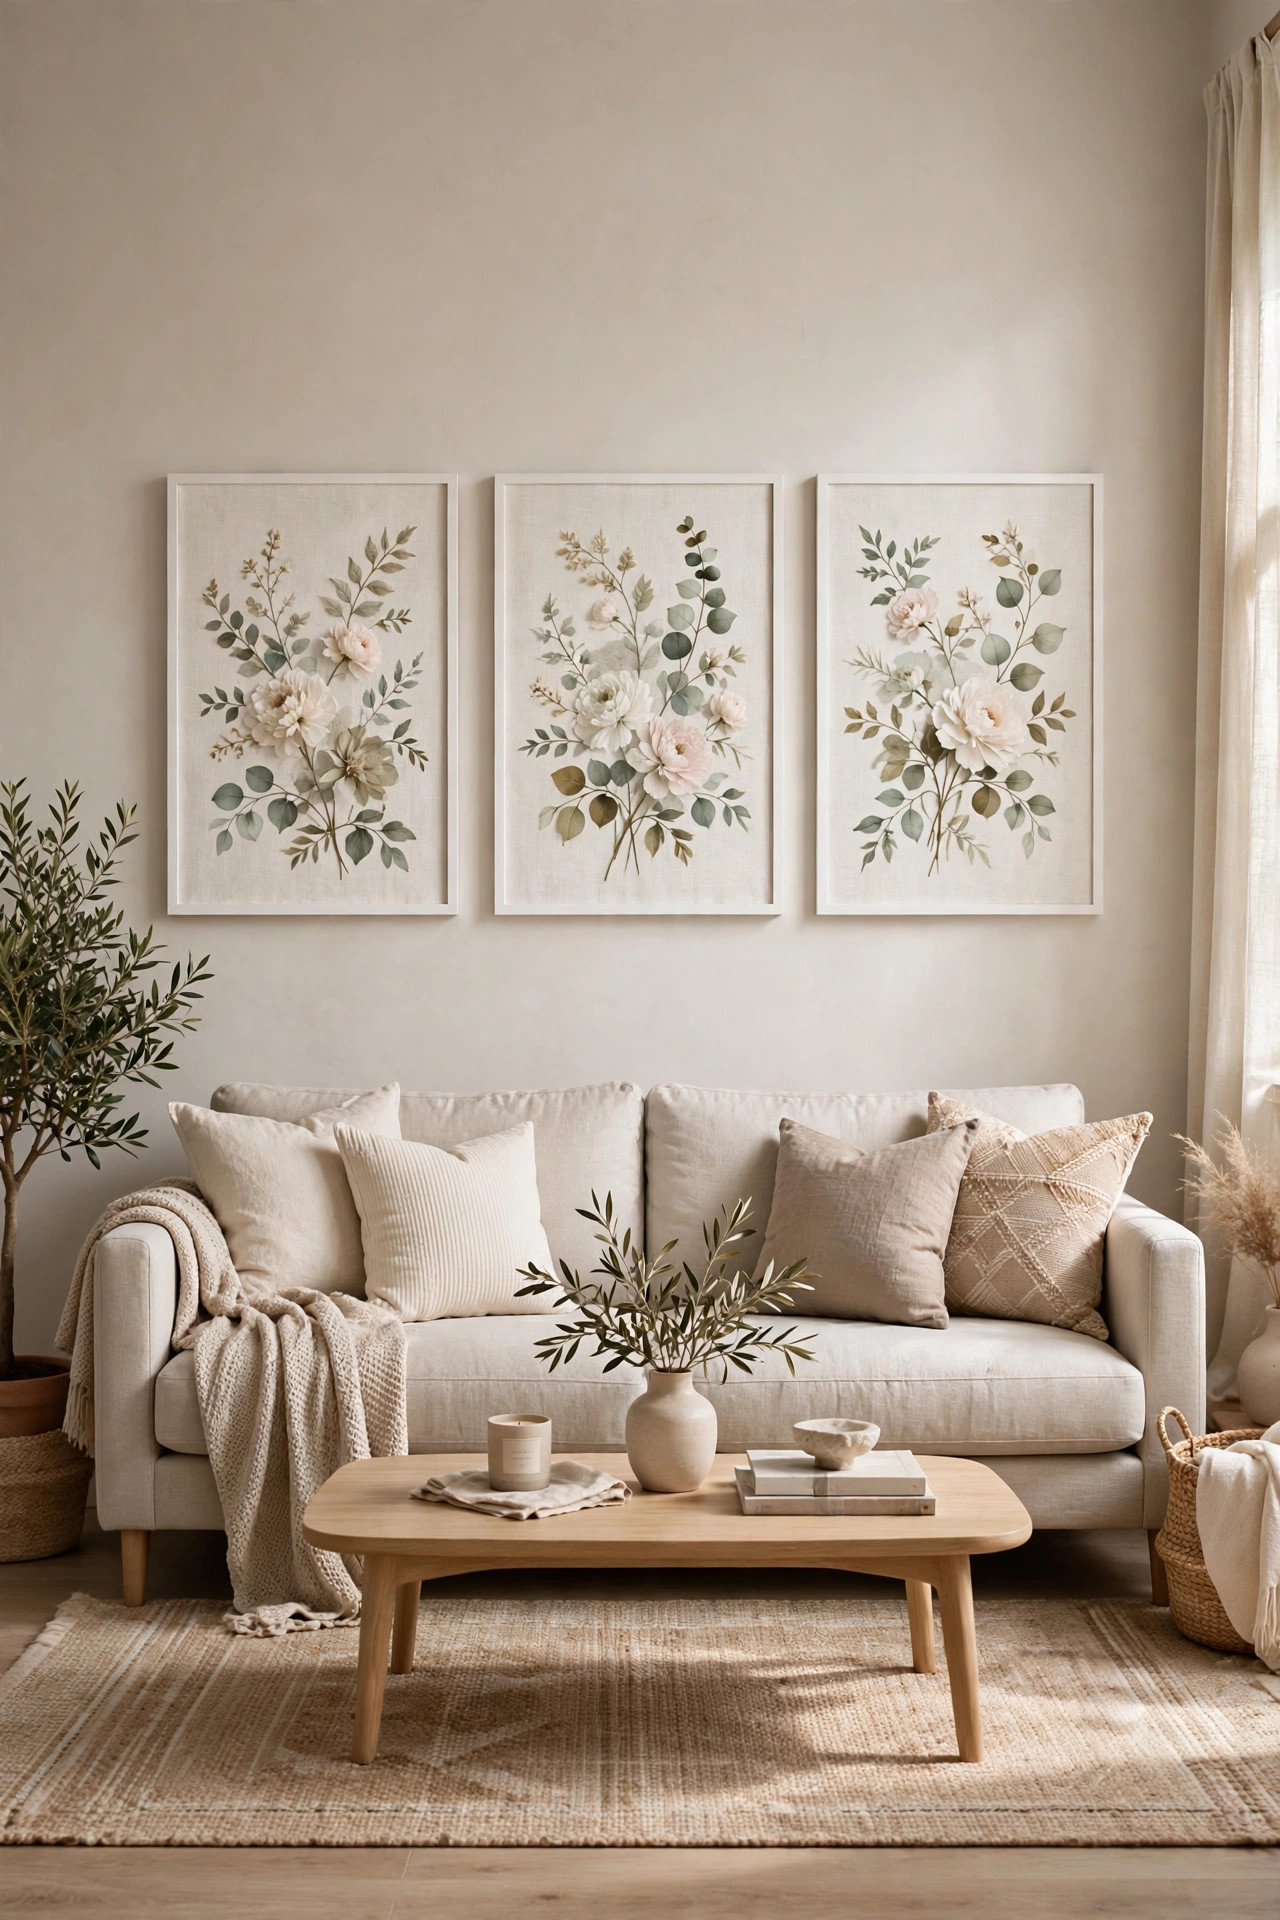
This was the project that got me back on the wall art horse after my sticky strip disaster, and it could not be simpler. You take a piece of fabric you love, stretch it over a piece of cardboard or foam board, and pop it into a frame. That is the whole project. I used a thrifted curtain panel with a faded floral print that I paid two dollars for, cut it into three pieces, and framed each one in plain white frames from the dollar store. Hung in a row above my sofa, they look like expensive art prints from a boutique. Nobody believes me when I tell them the total cost was under ten dollars. The beauty of fabric art is that the pattern does all the design work for you. You do not need any artistic skill at all, just an eye for a print that makes you happy when you look at it. Thrift stores are treasure chests for this project. I always check the curtain and bedding sections first, because one curtain panel gives you enough fabric for four or five framed pieces. Look for prints with colors that echo your room, and do not shy away from bold patterns. A big floral or geometric print framed simply looks incredibly modern. If the fabric is wrinkled from the store, press it with a warm iron before you start, because wrinkles are much harder to smooth once the fabric is taped down.
The trick to making fabric panels look polished instead of crafty is all in the stretching. Lay your fabric face down, center your board on top, and pull the fabric snug as you tape or staple it to the back, working from the middle of each side outward like you are wrapping a present. Smooth out every wrinkle before you commit, because wrinkles show through the frame. If your fabric is thin or light colored, put a piece of white paper between the fabric and the board so the board color does not show through. I like to use foam board from the dollar store because it is light, cheap, and easy to cut with a craft knife. For a bigger statement, skip the frame entirely and wrap the fabric around a stretched canvas frame from the craft store, stapling it on the back. Hang a set of three in matching frames for a look that feels intentional and designed, and step back to enjoy the easiest win on this whole list. If you want to skip frames altogether, wrap your fabric around cheap artist canvases and staple it on the back for a clean modern look. I did this in my guest room with a striped ticking fabric, and visitors always assume it is store bought art. For a fun twist, use three different but coordinating fabrics instead of one print cut three ways. Just keep the frames identical so the set feels unified. And here is a budget tip. Check the clearance bin at fabric stores, where small cuts sell for a dollar or two, which is plenty for framing.
2. Painted Canvas Stripes
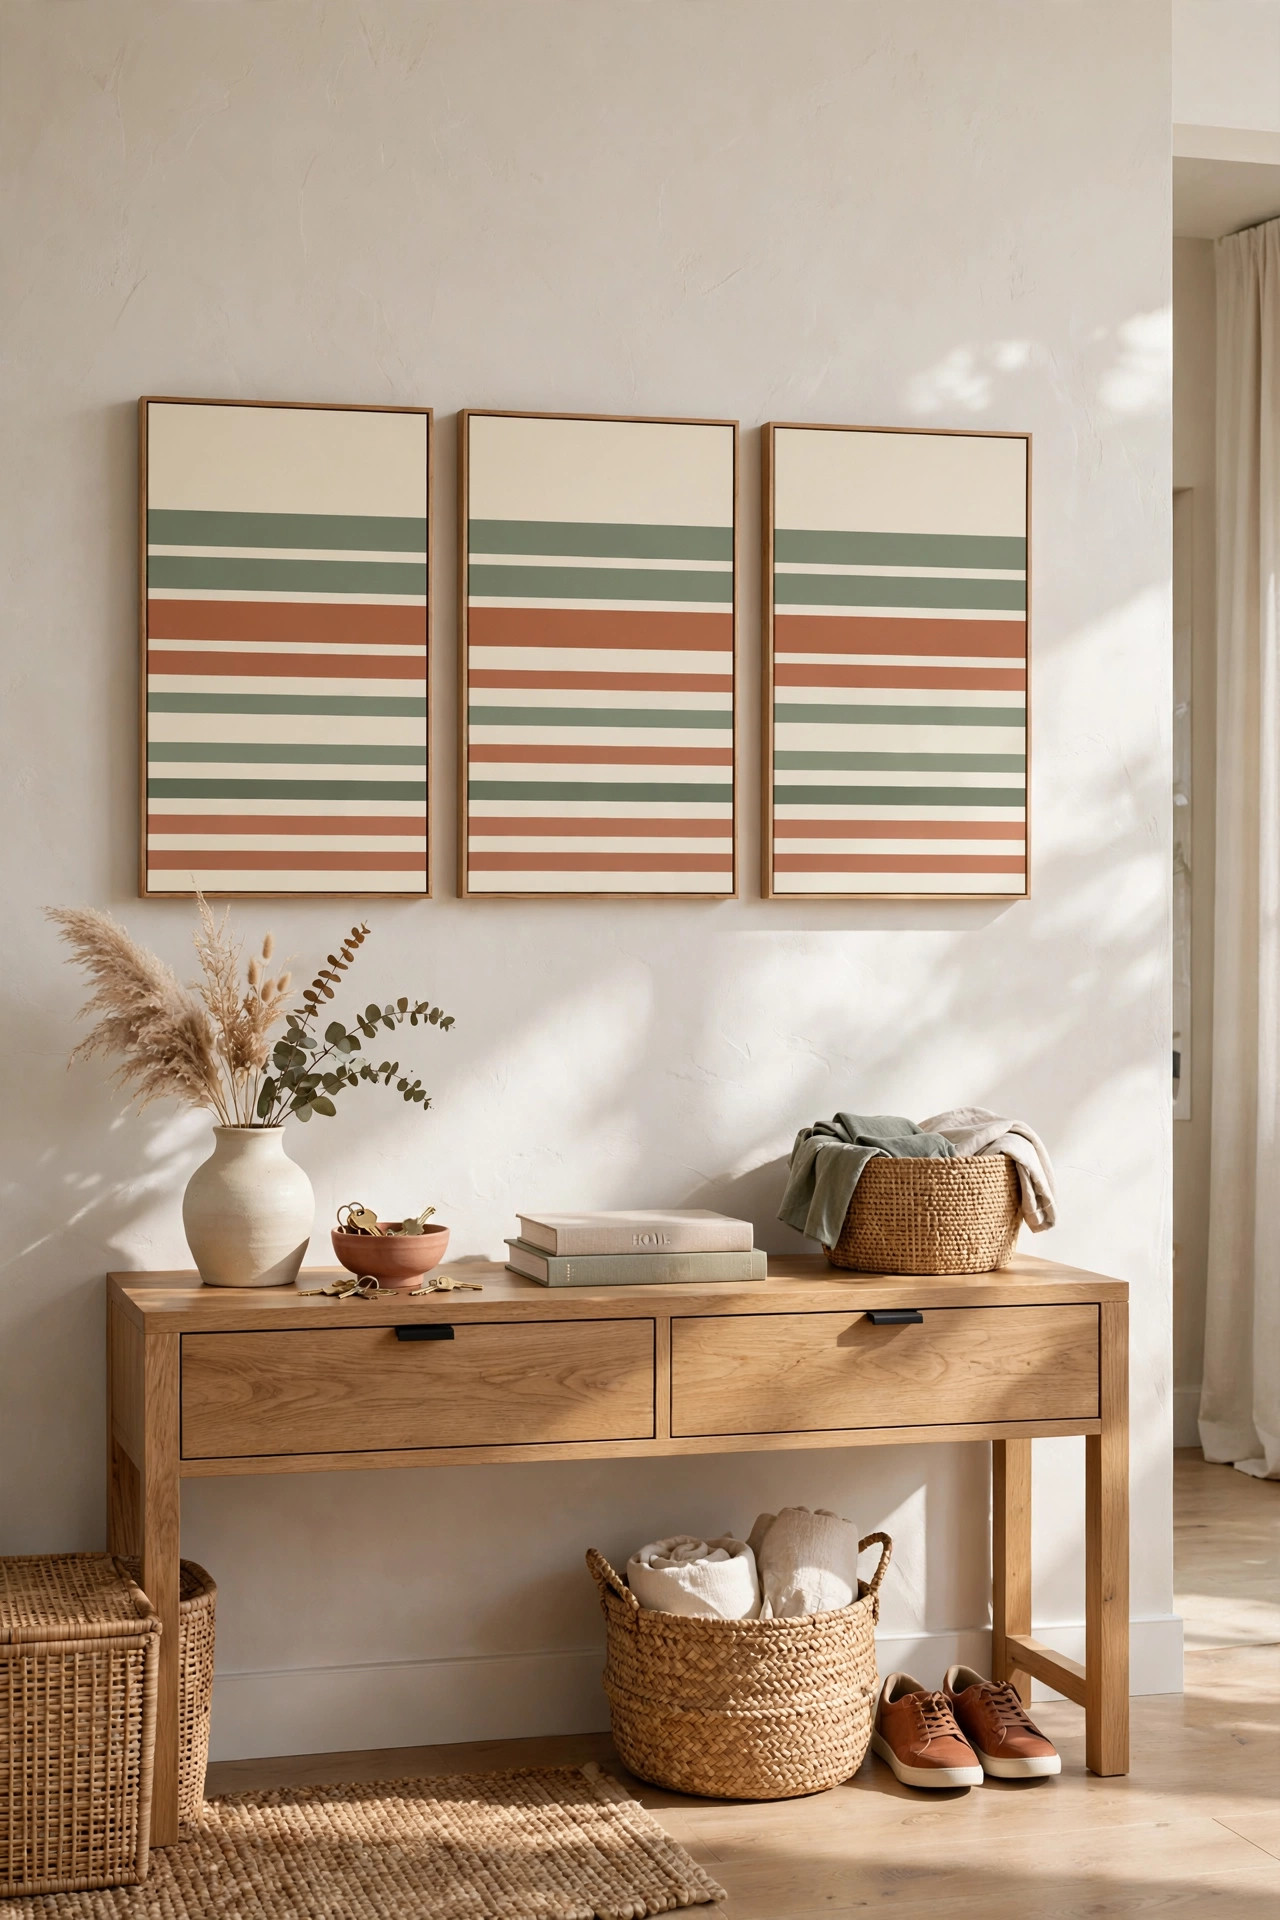
If you can paint a straight line, or even a wobbly one, you can make this art. All you need is a blank canvas, some painter’s tape, and two or three colors of acrylic paint. I made my first striped canvas on a rainy Saturday with paint I already had in a drawer, and it now hangs in my entryway where every guest sees it first. Tape off wide stripes across the canvas, paint each section a different color, peel the tape while the paint is still slightly wet, and you have modern art. Mine is cream, sage green, and a soft terracotta, and it pulls together the whole entryway. The painter’s tape does the hard part for you, so the edges come out crisp even if your hand is shaky. If straight stripes feel too plain, try a bold chevron or wide color blocks for a more modern feel. I made a second canvas with thick horizontal bands of navy, cream, and mustard for my son’s room, and it looks like something from a design catalog. You can also paint the whole canvas one solid color first, let it dry, then tape a big geometric shape in the middle and paint around it. When you peel the tape, the shape pops out in the base color. It is a simple trick with a big payoff, and nobody will believe you did it in an afternoon.
Here is what I wish someone had told me before my first try. Press the tape down firmly with a credit card or your fingernail along every edge, because paint loves to sneak under loose tape and ruin your crisp lines. Also, paint a thin coat of your base color over the tape edges first and let it dry. That seals the tape so your stripe color cannot bleed underneath. I skipped that step the first time and spent an hour touching up fuzzy edges with a tiny brush. For colors, you cannot go wrong pulling shades straight from your room. Look at your sofa, your rug, your curtains, and pick two or three of those colors for the stripes. That is the secret designers use. The art will look like it was made for your room because it literally was. A pack of three small canvases costs a few dollars at the craft store, and a striped trio hung together looks far more expensive than it is. For extra texture, try dragging a dry brush lightly over a dried stripe to create a subtle linen like effect. I did this on my entryway piece with a nearly dry brush and a slightly darker shade, and it added depth that flat paint never gives. Another fun variation is metallic paint for one stripe. A single gold or copper stripe among matte colors catches the light beautifully. Just remember that metallic paint shows every imperfection, so keep that stripe simple and let the tape do the work.
3. Photo Ledge Gallery
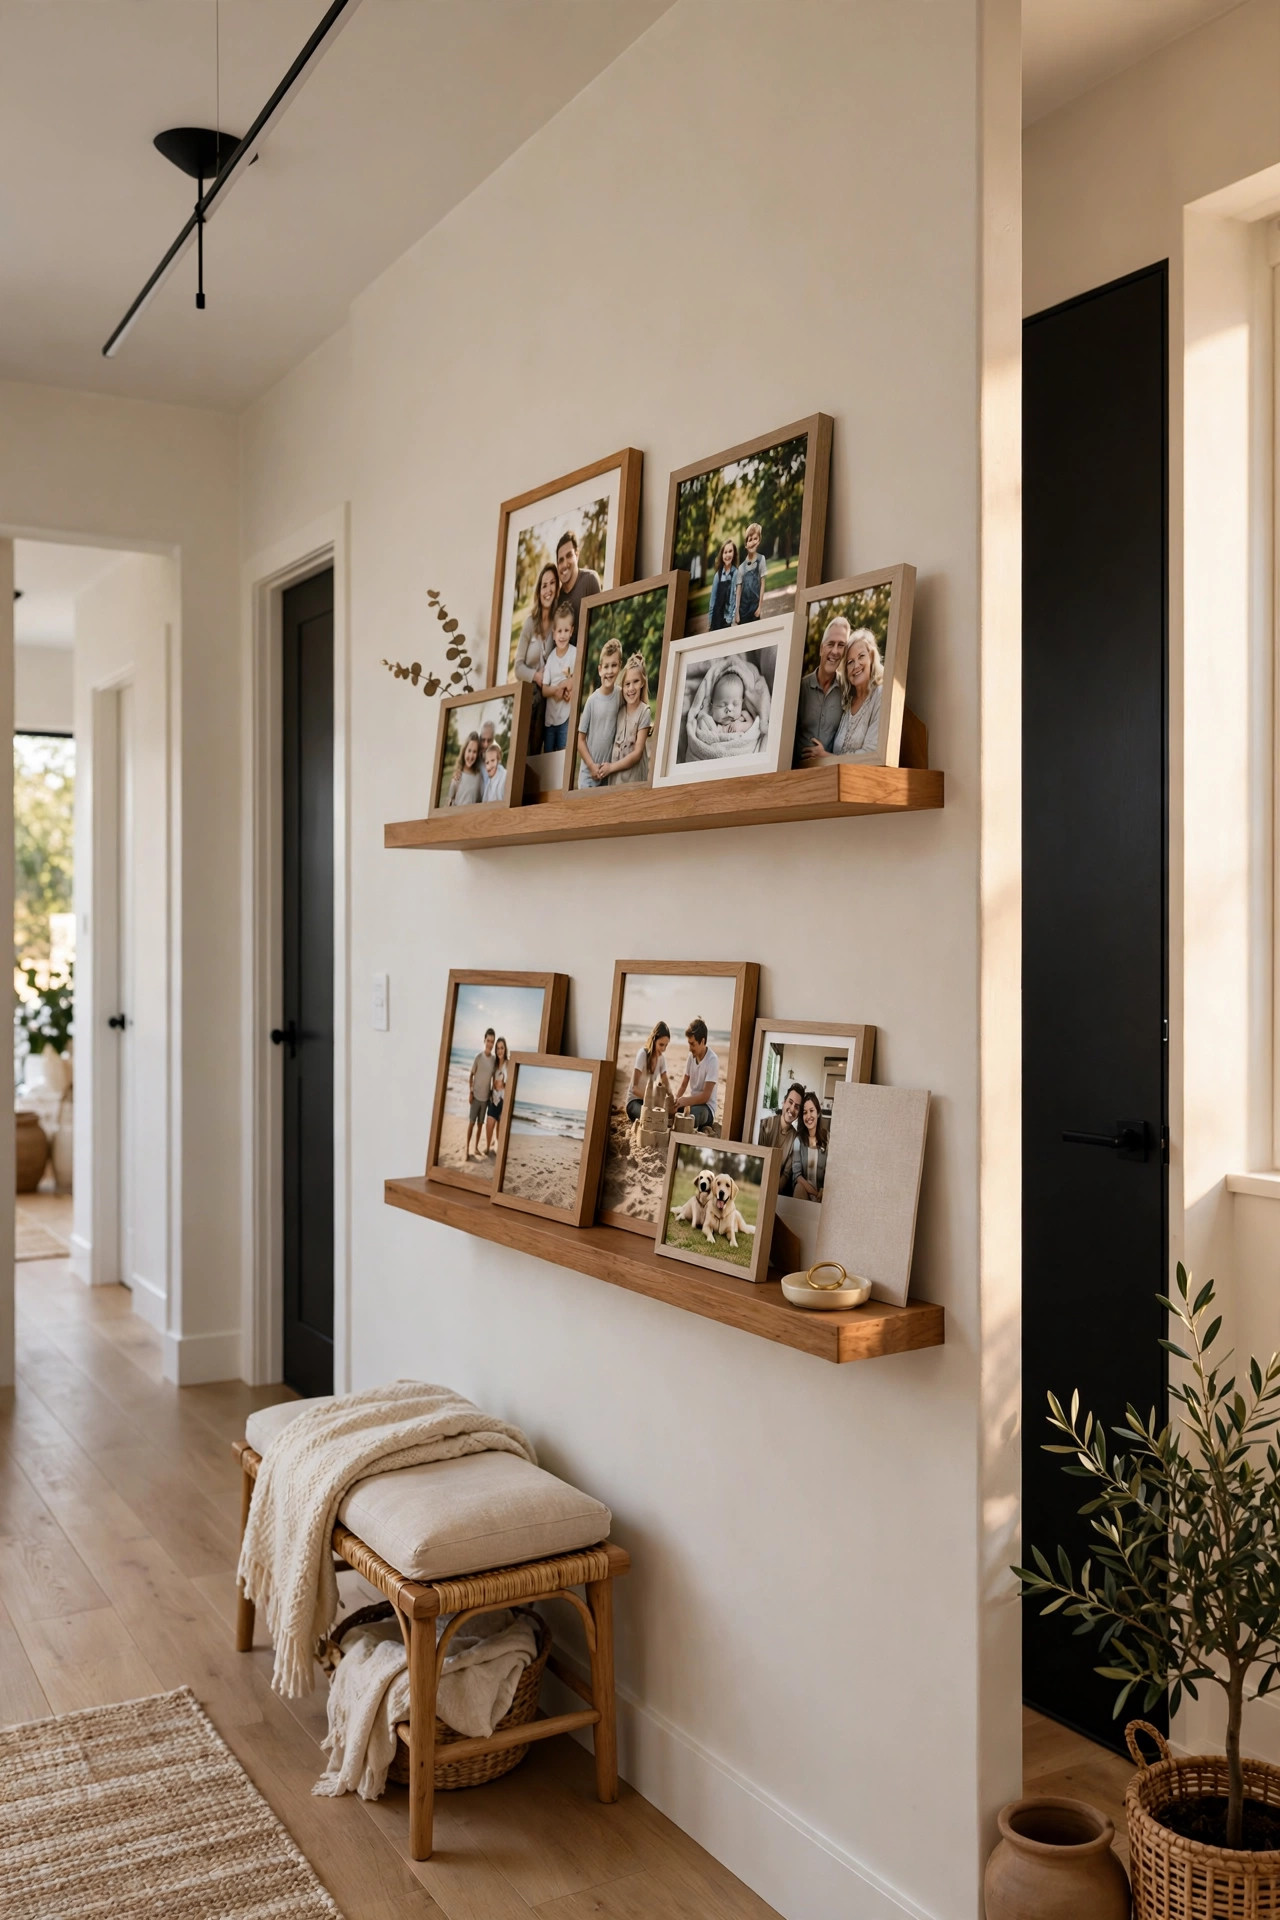
A photo ledge is just a narrow shelf, and it might be the most forgiving way to display art ever invented. Instead of hammering nails and committing to exact spots, you set your frames on the ledge and lean them against the wall. I put two long ledges in my hallway after my frame falling incident, because nothing on a ledge can crash to the floor in the night. Now I swap the art with the seasons. Family photos in the fall, black and white prints in winter, the kids’ school pictures in spring. It takes five minutes to change the whole look, and I have never once had to patch a nail hole since. If you are a renter or someone who changes their mind a lot, this is your project. I love that ledges let you layer art the way designers do, with frames overlapping slightly and small objects tucked in front. A tiny plant or a small candle in front of the frames adds depth and makes the whole display feel styled. In my hallway I added a small brass lamp at one end of the ledge, and in the evening the whole gallery glows warmly. Because nothing is nailed down, you can also lean seasonal pieces there, a framed autumn leaf print in October, a snowy photo in December, without any extra holes in your walls.
You can buy a photo ledge at any big box store, or make one yourself from a one by four board and a small strip of trim wood glued along the front edge to keep frames from sliding off. Sand it smooth, paint it white or stain it to match your trim, and hang it with two sturdy brackets screwed into wall studs. That stud part matters. Find them with a five dollar stud finder, because a loaded ledge is heavier than it looks. I hang mine with the top of the ledge at about eye level, then layer frames in front of each other, tall ones in back, small ones in front. Mix frame colors and sizes for a collected look, or keep them all black for something more modern. The best part is that nothing is permanent. Lean, step back, shuffle things around until it feels right, and you are done. One more tip that makes ledges look professional. Vary the heights dramatically, with one tall frame anchoring each end and smaller pieces filling the middle. That up and down rhythm is what separates a styled ledge from a row of frames that looks accidental. I also like to include one non frame object, like a small woven basket or a ceramic vase, to break up all the rectangles. Dust the ledge when you swap things around, because eye level shelves show dust fast. With two ledges and a free afternoon, you will have the most flexible art display in your home.
4. Dried Flower Hoop Art
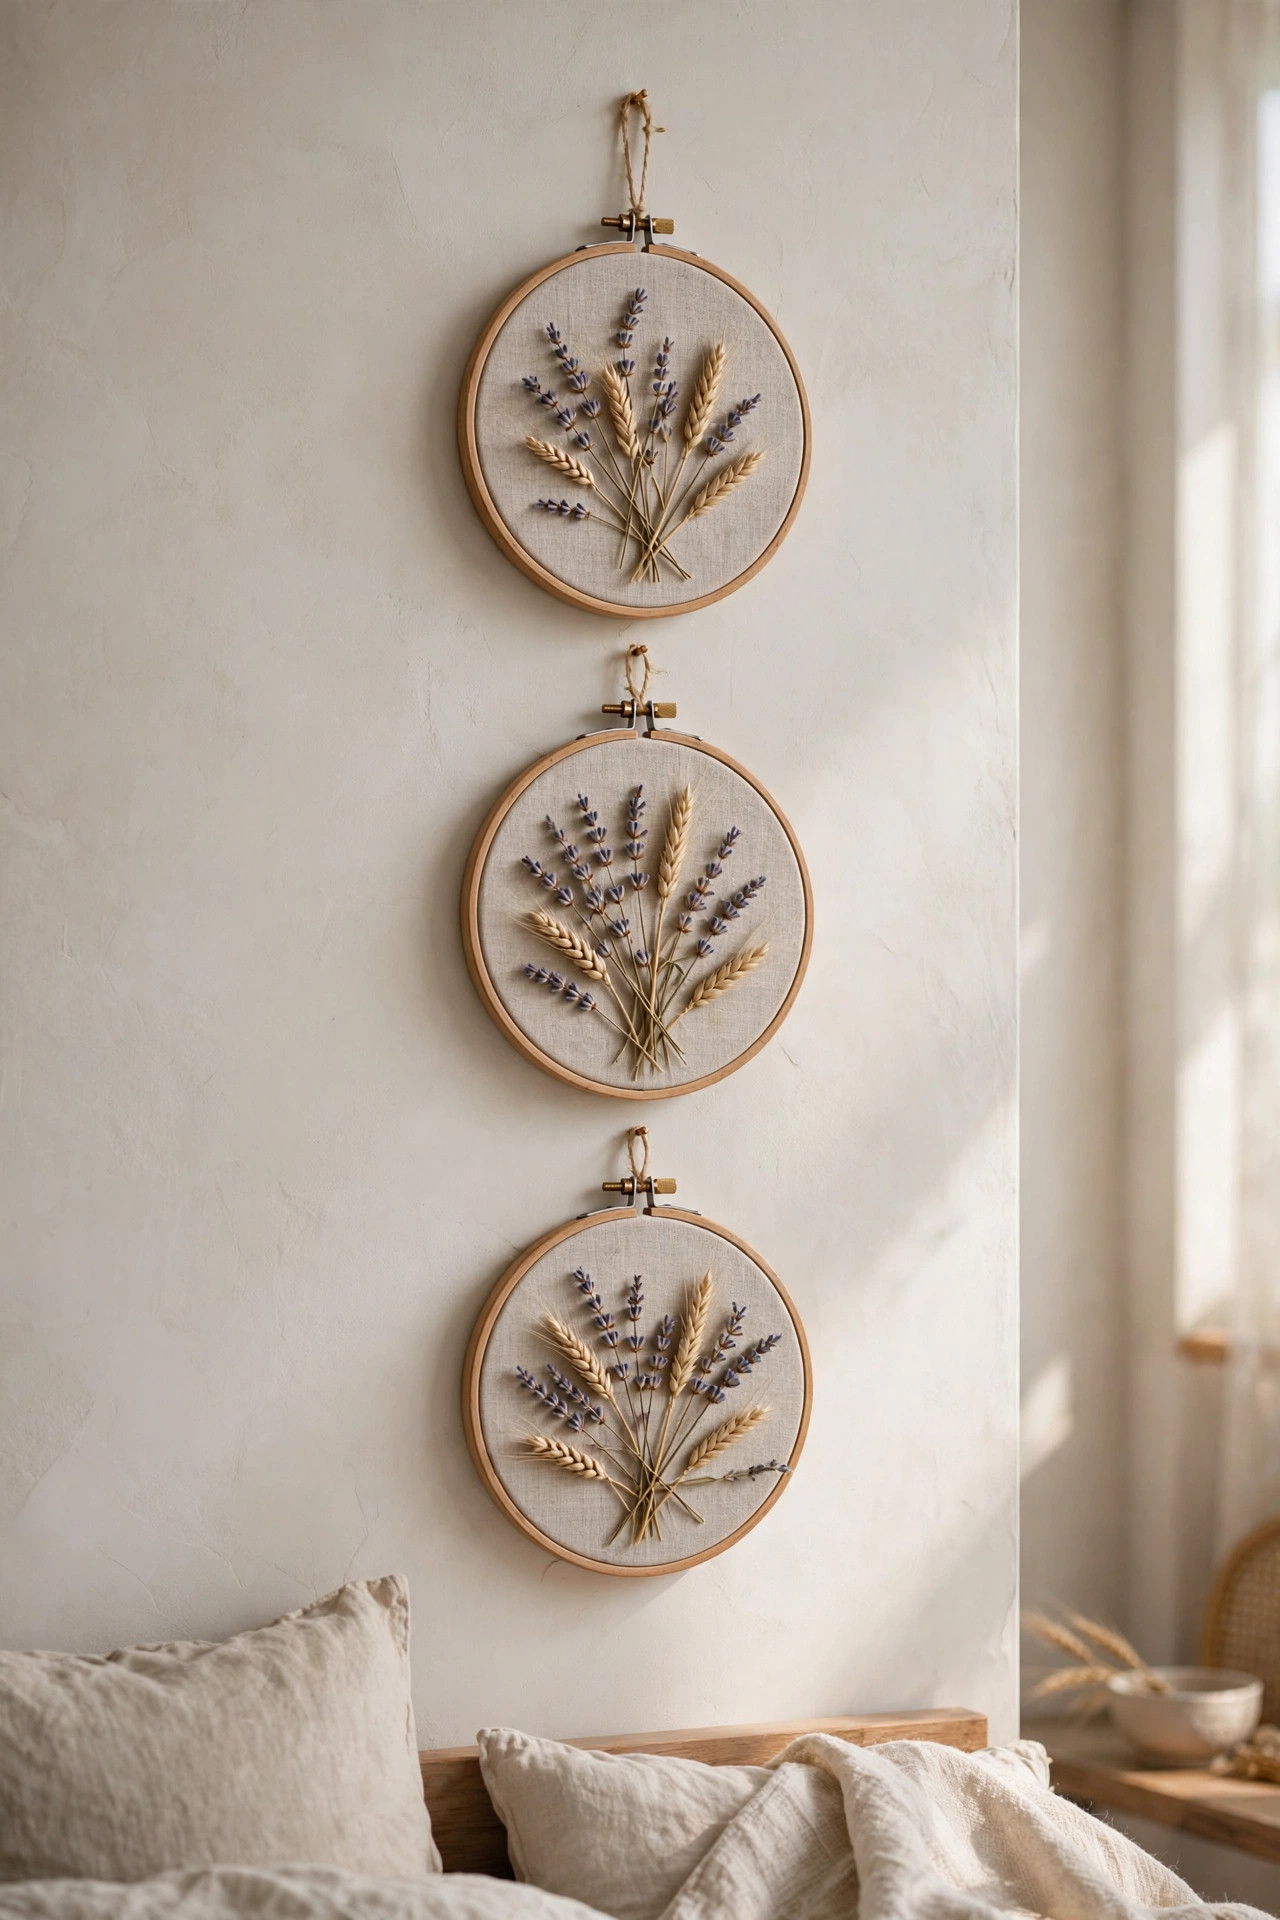
An embroidery hoop costs about a dollar, and it might be the prettiest frame you will ever use. Stretch a piece of linen or plain cotton inside the hoop, tighten the little screw at the top, and you have a round canvas ready for dried flowers. I made a set of three hoops for my bedroom wall using dried lavender, wheat stems, and some baby’s breath left over from a bouquet. I just arranged the stems on the fabric and stitched a few tiny stitches to hold the important pieces in place, then trimmed the extra fabric from the back. They have hung there for two years and still look beautiful. The round shape feels soft and different from every square frame in the house, and guests always ask where I bought them. What I love most is how forgiving this project is. If you do not like your arrangement, you just pull out a few stitches and try again, no harm done. I rearranged my first hoop three times before I was happy, and the fabric never showed a mark. You can also skip stitching entirely and use a tiny dot of hot glue on the back of each stem, which holds dried flowers perfectly and takes seconds. Either way, the front looks hand stitched and delicate, and nobody needs to know your shortcut.
You do not need embroidery skills for this, just a needle, some thread, and a little patience. Lay your hoop flat and play with the arrangement before you stitch anything. Start with your biggest stems in the middle and work outward with smaller pieces, like building a tiny bouquet right on the fabric. Take a photo of the arrangement with your phone before you start stitching, so you remember where everything went if a stem shifts. Use thread that matches your fabric so the stitches disappear. For the flowers themselves, raid your own garden at the end of summer, or buy a mixed dried bouquet at the craft store and split it between several hoops. Hang one large hoop as a statement, or group three different sizes together. Keep them out of direct sunlight so the colors stay soft and do not fade, and they will last for years. For a fuller look, layer two hoops together, a larger one behind and a smaller one in front, tied with the same twine you hang them with. I did this in my bedroom with a ten inch hoop behind a six inch one, and the dimension it adds is lovely. You can also paint the wooden hoop itself with craft paint to match your room. I left mine natural for a rustic feel, but a hoop painted matte black looks strikingly modern against light walls. Hang them with a simple loop of twine through the tightening screw at the top.
5. Woven Yarn Wall Hanging
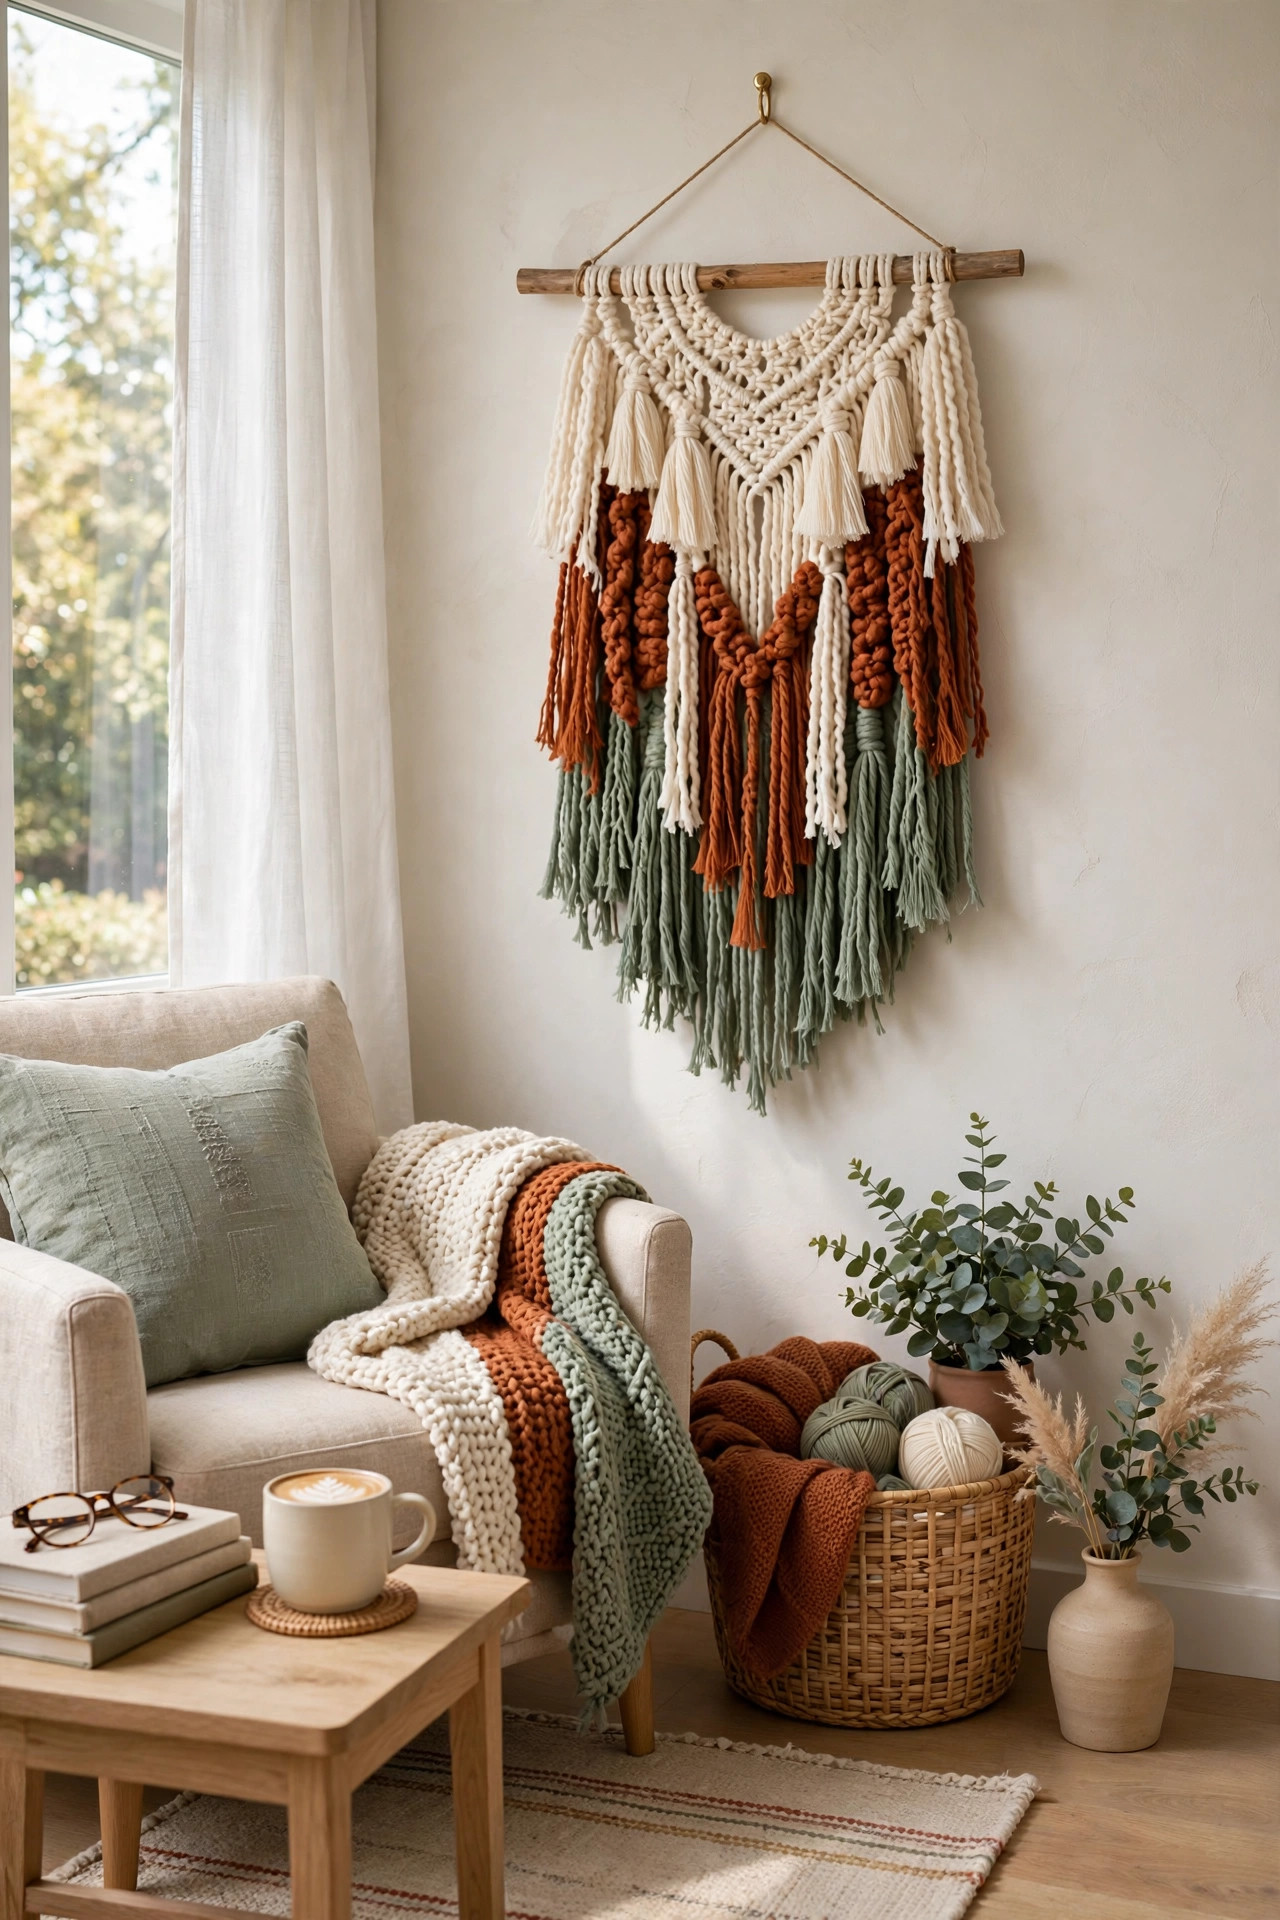
This looks like something from an expensive boho boutique, but it is literally yarn tied to a stick. I made my first one while watching television one evening, and my sister thought I had paid forty dollars for it at a home goods store. You need a wooden dowel or even a smooth branch from your yard, several colors of yarn, and a pair of scissors. Cut long pieces of yarn, fold each in half, loop it over the dowel with a simple knot, and repeat until the dowel is full. Then trim the bottom into a V shape or straight across, and hang it up. The whole thing took me about an hour, and most of that was deciding which colors to use. It adds instant warmth and texture to a blank wall, especially in a bedroom or reading corner. If you fall in love with the process, try making a larger statement piece for above your sofa using a thick tree branch instead of a dowel. I found a beautifully curved branch on a walk and made a four foot wide hanging that is now the centerpiece of my living room. The irregular shape of a real branch adds character that a straight dowel never can. Just make sure the branch is fully dry and sturdy, and sand any rough spots so they do not snag the yarn. A branch hanging feels wonderfully organic and costs absolutely nothing.
The magic is in the color choices and the trim. Pick yarn colors that already live in your room. I used cream, rust, and sage because those were my bedding colors, and the hanging looks like it was custom made for the space. For the knots, the lark’s head knot is all you need. Fold the yarn in half, lay the loop over the front of the dowel, pull the two loose ends through the loop, and tug tight. A child could do it. Once the dowel is full, lay the hanging flat and trim the bottom. I like the V shape because it looks intentional, but straight across works too. Comb through the yarn with your fingers to smooth it out. If you want to get fancy, weave a few rows of a contrasting color through the hanging strands near the top. Hang it from two nails or a single centered nail with twine tied to each end of the dowel. It weighs almost nothing, so hanging is easy and safe. For a more finished look, wrap the dowel itself in yarn before you start knotting, so no bare wood shows through. I wrap mine in the main color, winding tightly from end to end and securing with a dot of hot glue. You can also add wooden beads onto a few of the hanging strands for extra interest. I threaded large natural wood beads onto every fifth strand of my bedroom hanging, and they add the loveliest subtle detail. Slide the bead up, tie a small knot beneath it to hold it in place, and continue. These tiny touches are what make people assume it came from a boutique.
6. Chalkboard Quote Board
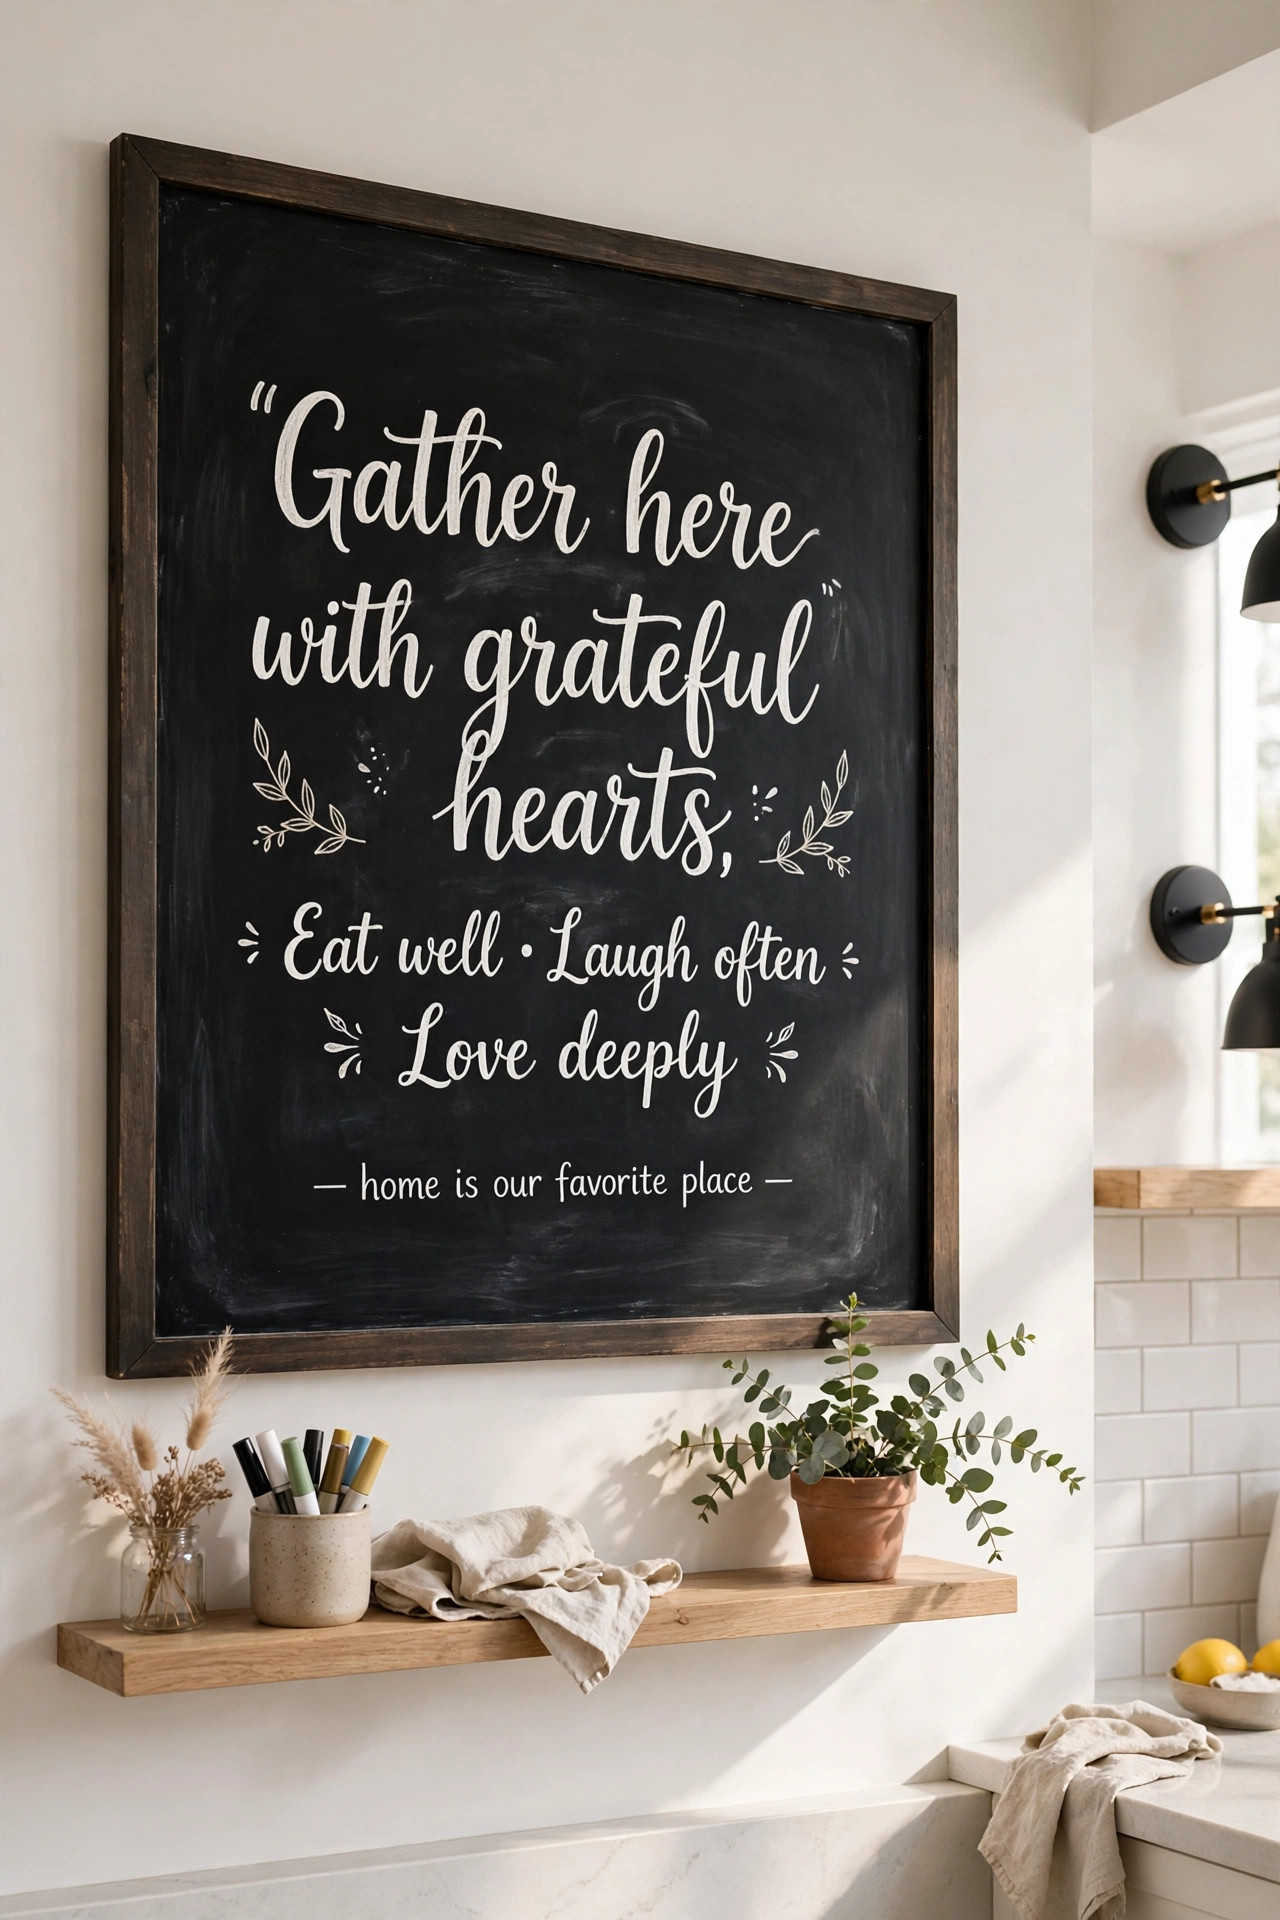
Every home needs one spot that can change with your mood, and a chalkboard quote board is exactly that. I keep a large framed chalkboard in my kitchen, and the quote on it changes with the seasons, something cozy in the fall, something hopeful in January, something funny when we have guests coming. It costs almost nothing to make. Buy an old framed print at the thrift store for a dollar, paint the glass or the print itself with two coats of chalkboard paint, and let it cure for three days before you write on it. That curing time matters. I wrote on mine after one day and the chalk ghosted into the paint permanently. Learn from my impatience and wait the full three days. While you wait, practice your quote on paper so you are confident when the big moment comes. I always write mine out three or four times, trying different layouts until one feels balanced. Short quotes work best on a board, because long sentences get tiny and hard to read from across the room. Five to eight words is the sweet spot. And here is a trick for perfectly straight lines of text. Use a ruler and a piece of chalk to draw faint guidelines first, then erase them after your letters are done. Nobody will ever know they were there.
Writing nicely on a chalkboard is a skill, but there is a cheat that works every time. Print your quote on paper in a font you like, rub chalk all over the back of the paper, tape it to the board, and trace over the letters with a pencil. When you lift the paper, a faint chalk outline of every letter stays behind. Then just trace over it with a chalk marker, which is much easier to control than real chalk and does not smudge when you brush past it. Chalk markers come off with a damp cloth when you want a fresh quote. I keep a little basket of markers in the drawer below my board. For the frame, anything works. Ornate gold frames look amazing with chalkboard paint, and they are always at the thrift store. This is also a wonderful project to do with kids, because they can practice their lettering and change the family quote whenever they want. Beyond quotes, your chalkboard can hold a weekly menu, a birthday countdown, or a funny message for your spouse to find in the morning. I once wrote a grocery list on ours in fancy lettering and my husband photographed it because it looked too pretty to erase. Keep a damp cloth nearby for quick fixes, because chalk marker mistakes wipe away in seconds when they are fresh. Once a month, give the whole board a good cleaning with a wet cloth so old ghost images do not build up.
7. Framed Wallpaper Scraps
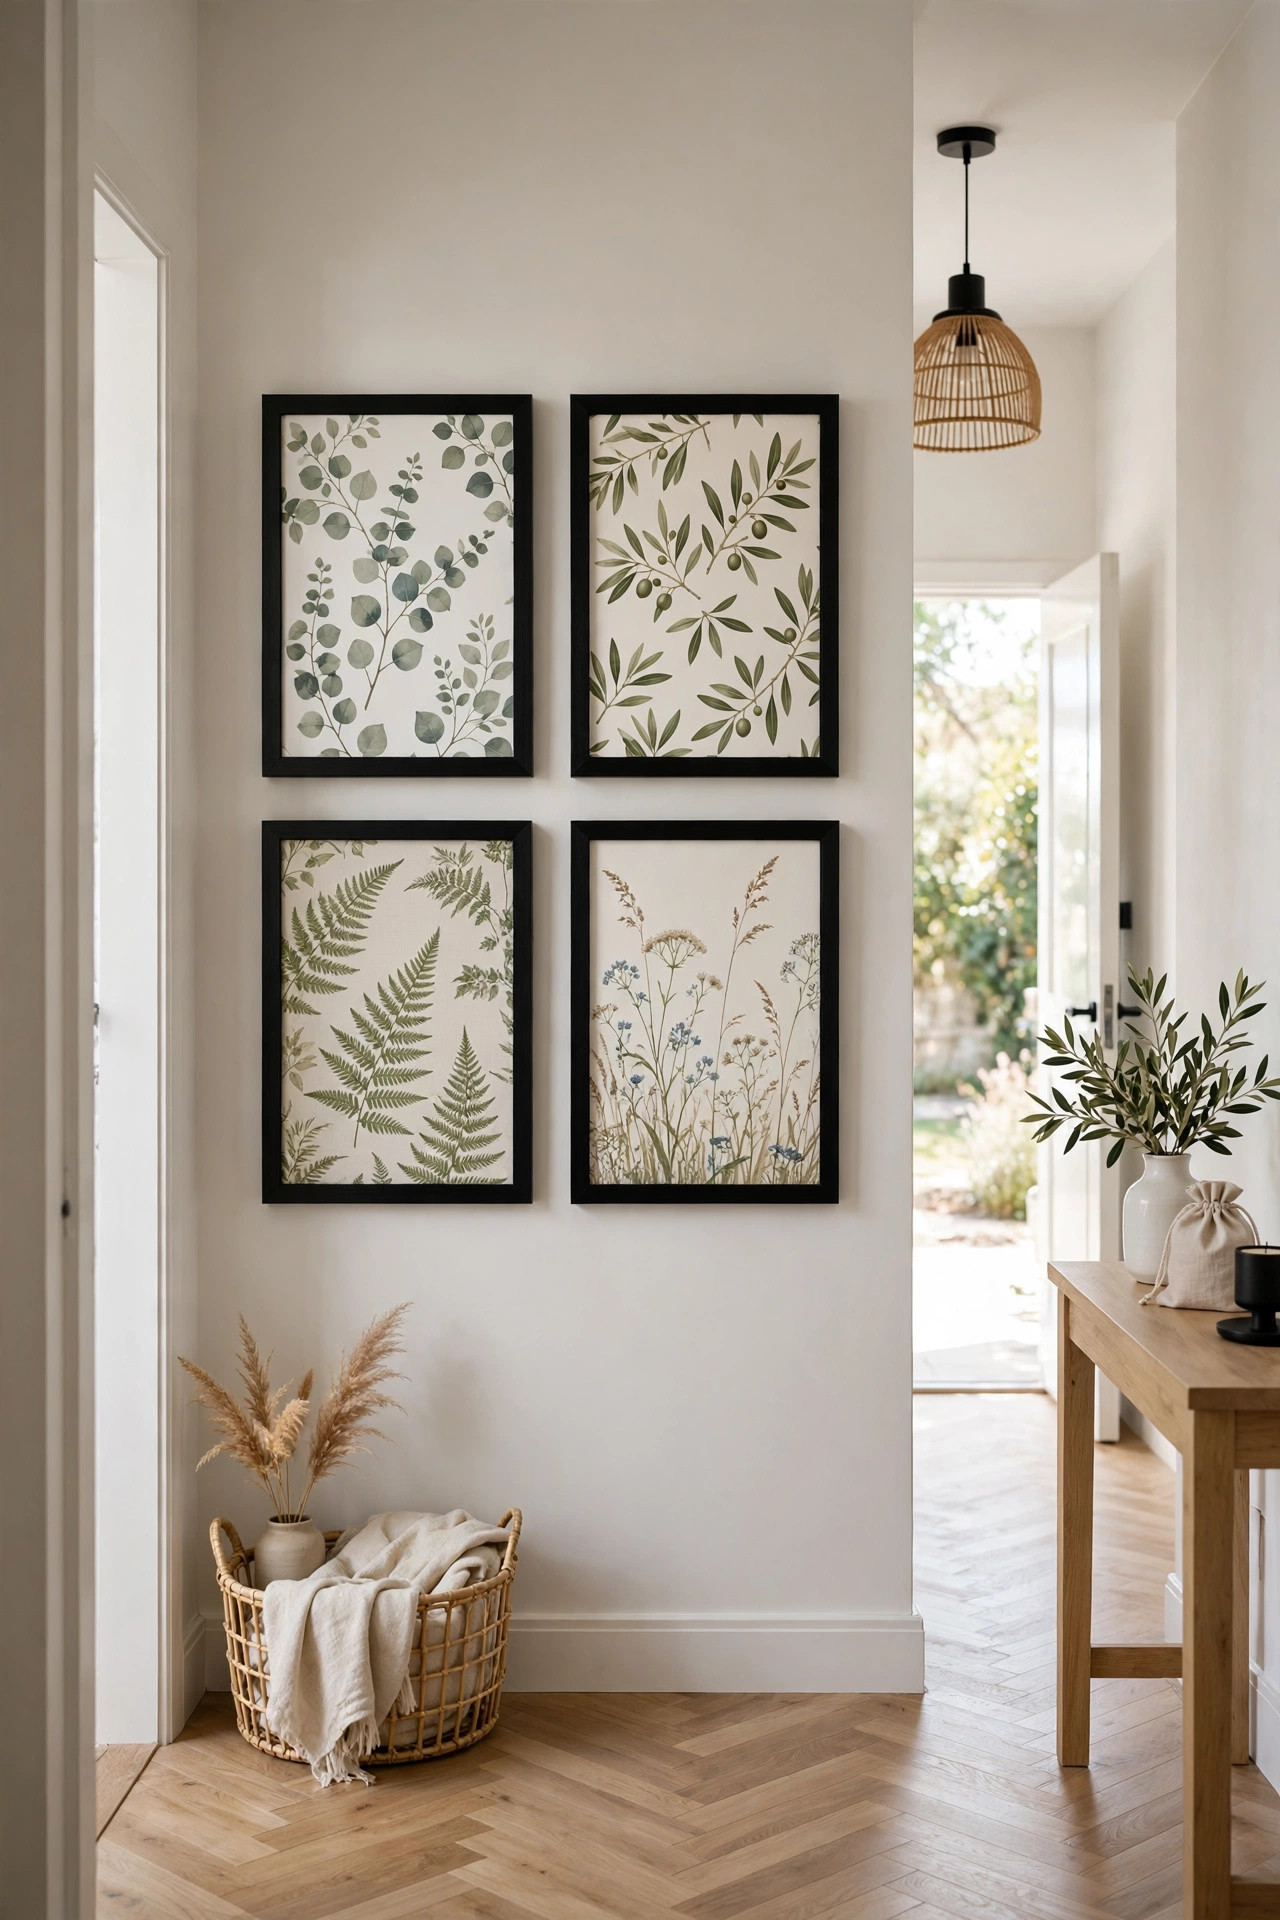
Leftover wallpaper is too pretty to throw away, and a single roll can make art for your whole house. I had half a roll of peel and stick wallpaper left from an accent wall project, with a gorgeous botanical print I could not bear to waste. I cut out the prettiest sections, framed them in simple black frames, and hung a set of four in my hallway. They look like expensive botanical prints, and the total cost was zero because the wallpaper was already paid for. Even if you do not have leftovers, wallpaper sample books are often free at paint stores, or you can buy single sample squares online for a dollar or two. One sample makes one perfect framed piece. Paint stores often give away old sample books when new collections arrive, so it never hurts to ask. I once got three full books just by asking politely, and they kept me in framed art supplies for a year. Online marketplaces are another goldmine, where people sell leftover rolls from their own projects for a few dollars. A single roll can frame art for your entire home with plenty left over. Just make sure the pattern scale suits a frame. Very large repeats can look lost in a small frame, while small dense patterns shine in them.
The key is choosing which part of the pattern to frame. Wallpaper repeats, so unroll a good length and look for the most balanced, complete motif. A single large flower, a perfect bird, a symmetrical section of the pattern. Cut it a little larger than your frame opening, then trim it down once you see how it sits. I like to use a mat, which is the white cardboard border inside a frame, because it makes even a small scrap look like gallery art. You can buy precut mats at the craft store for a couple of dollars. If your wallpaper has a busy all over pattern with no single motif, frame a section anyway and let the pattern be the star. Abstract sections of wallpaper look surprisingly modern in a simple frame. Group three or four framed scraps from the same roll together, and nobody will ever guess they started life as leftovers. For a cohesive gallery wall, use identical frames and identical mat sizes even if the wallpaper sections are all different. That repetition is what makes mismatched scraps look like a curated collection. I hung mine in a tight grid with two inches between each frame, and the effect is so polished that a friend asked which artist made the series. If your wallpaper is peel and stick, you can even skip the glass and stick the pieces directly onto mat board. It lies perfectly flat with zero wrinkles.
8. Painted Wood Plank Sign
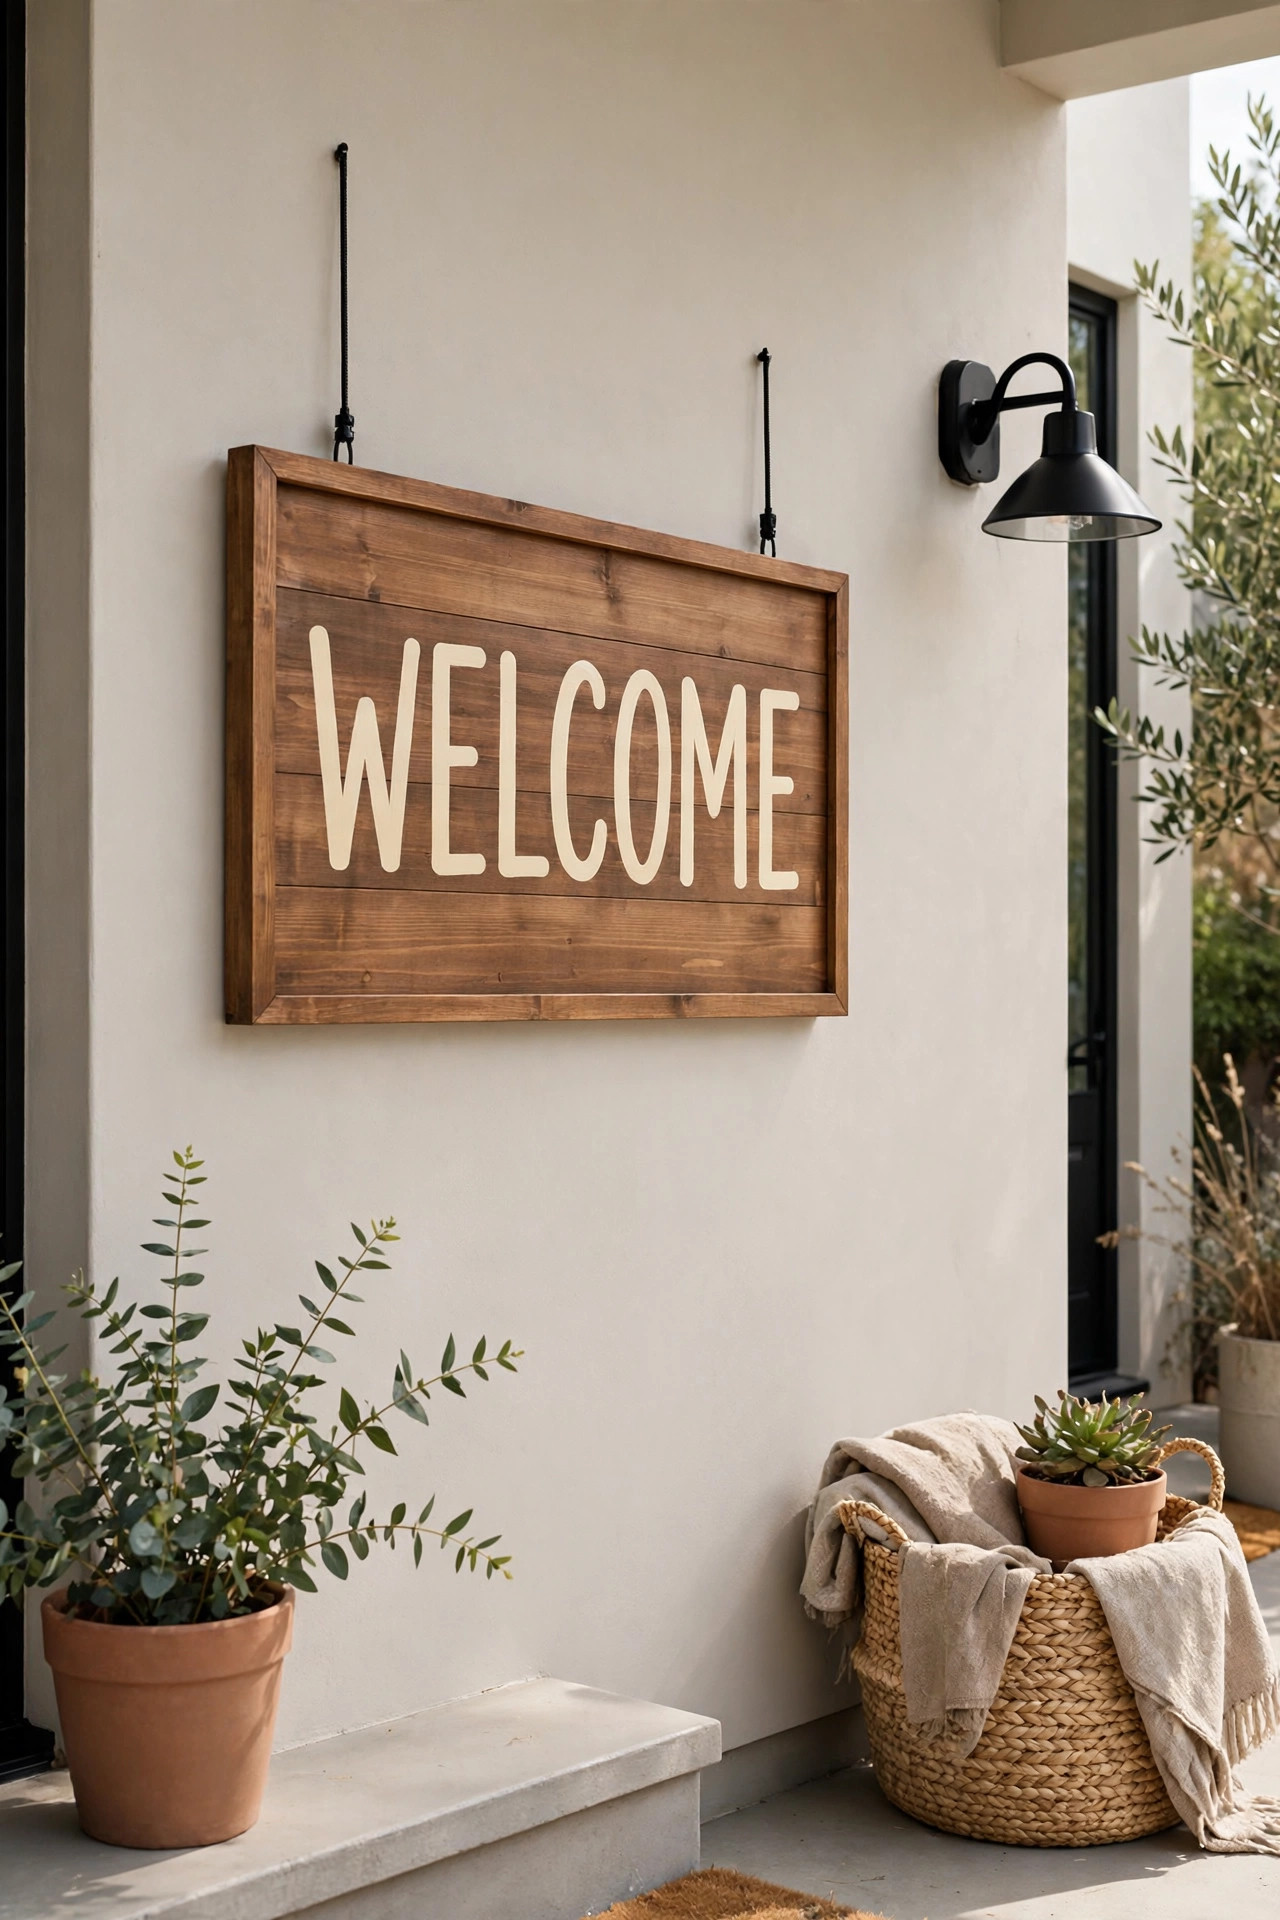
A few boards, some paint, and a steady hand are all it takes to make the kind of wooden sign that sells for fifty dollars at craft fairs. I made one for my front porch that says welcome in big cream letters on a stained wood background, and neighbors have knocked on my door to ask where I bought it. Start with a pine board from the hardware store, or better yet, an old fence picket or pallet board if you can find one. The rougher the wood, the more character the sign has. Sand it just enough to remove splinters, stain it or paint it your background color, and let it dry completely. Rushing the drying is the number one mistake. I once lettered over tacky paint and the letters bled into a blurry mess that I had to sand off and start over. These days I always let the background dry a full twenty four hours, even if the can says it dries faster. Humidity slows everything down, and patience here saves you from doing the whole project twice. While you wait, use the time to perfect your lettering layout on paper. I sketch my design full size first, which lets me catch spacing problems before they become permanent. A word that looks great small can look cramped when blown up big.
For the lettering, you do not need beautiful handwriting. Print your word on paper in a big bold font, shade the back of the paper heavily with a pencil, tape it to the board, and trace each letter firmly with a ballpoint pen. The pencil shading transfers a light outline onto the wood. Then fill in the letters with a small craft brush and acrylic paint. Take your time and use two thin coats instead of one thick one, because thick paint drips and thin paint gives you control. If you mess up a letter, wait for it to dry and paint right over it with the background color. Nobody will ever know. Seal outdoor signs with a clear outdoor polyurethane so rain does not ruin your work. Hang it with a simple sawtooth hanger on the back, and enjoy the sign that everyone assumes you bought. For a more rustic look, skip the sawtooth and screw two small D rings to the back, then hang the sign from a piece of twine. I did this on my porch sign and the twine adds to the farmhouse charm. If your sign will live outside, check it each spring and touch up the sealer where weather has worn it thin. A five minute touch up once a year keeps it looking fresh indefinitely. And do not limit yourself to words. Simple painted shapes like stars, trees, or hearts make beautiful signs with zero lettering stress.
9. Pressed Leaf Botanical Frames
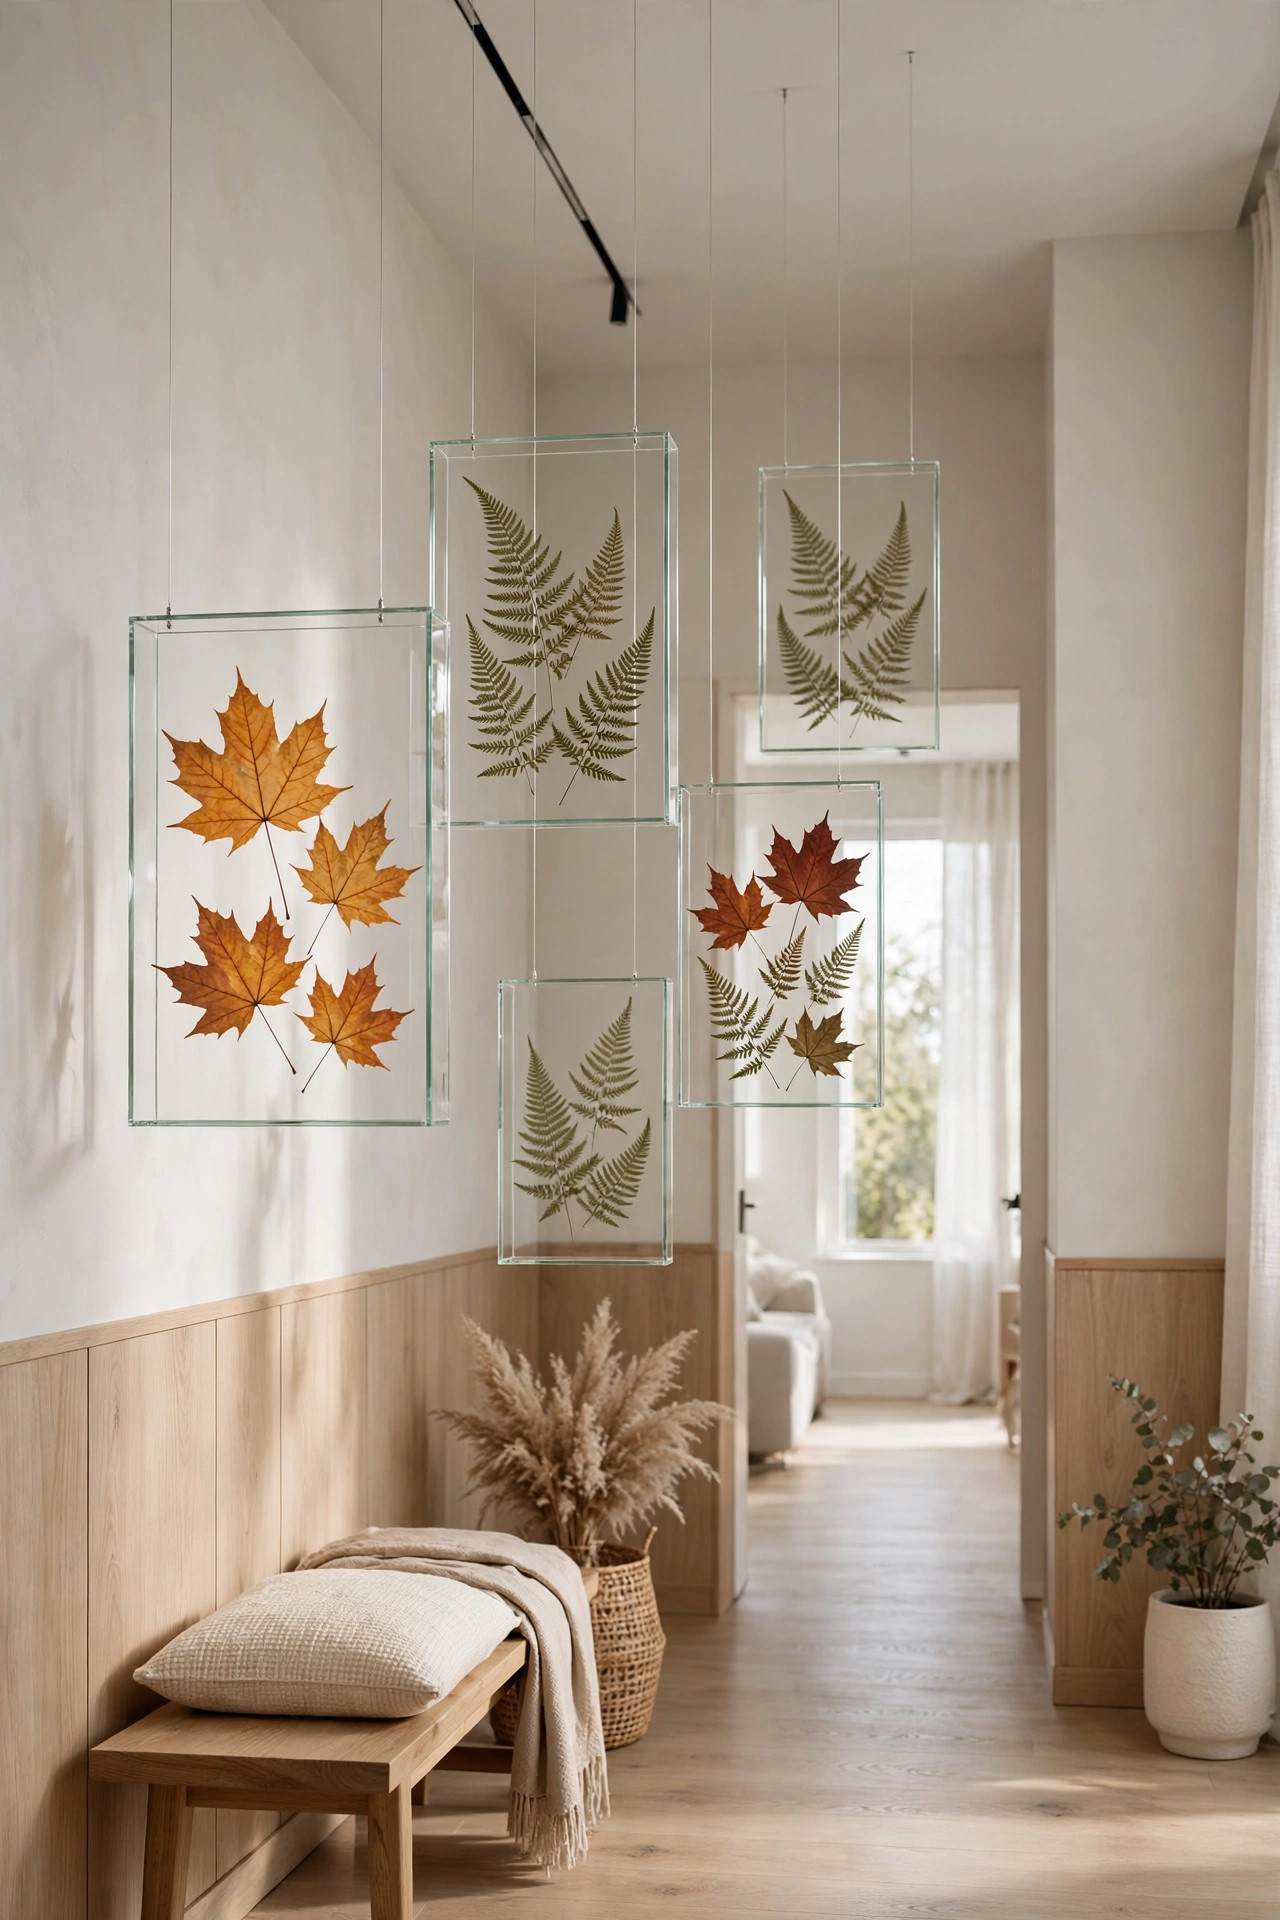
This is the cheapest art on the entire list, because the materials grow on trees. Literally. Pressed leaves and ferns framed in glass look like something from a natural history museum, delicate and timeless. I pressed a bunch of maple leaves and ferns one October afternoon with my kids, and we framed our favorites for the hallway. The whole project cost the price of the frames, because the leaves were free and the pressing just took time. There is something deeply satisfying about preserving a perfect leaf exactly as it looked on the day you found it. Every time I walk past those frames, I remember that crisp afternoon and the hot chocolate we had after. That is the hidden magic of this project. It preserves a memory, not just a leaf. I have started pressing a few special leaves every autumn, and my collection grows more meaningful each year. My kids now compete to find the most perfect leaf, and we judge them solemnly like art critics before pressing the winners. It has become a family tradition I never planned. The frames in our hallway are basically a diary of our autumns together, written in leaves instead of words.
Pressing is simple but it rewards patience. Place your leaves between two sheets of plain paper, then sandwich that inside a heavy book, then stack more books on top. Real patience means leaving them alone for two to three weeks. I checked mine after four days and the leaves were still soft and curled, so back under the books they went. Ferns press beautifully because they are already flat. Flowers work too, but press them face down so the petals spread nicely. Once they are papery and dry, arrange them on white or cream cardstock inside floating frames, which are the frames with glass on both sides. The leaves seem to hover in the glass, and it looks incredibly elegant. Do not glue the leaves down if you can avoid it. Just let the glass hold them in place so you can swap them out next season with new finds. If a leaf is especially curly and will not lie flat, press it a second time between fresh paper for another week. Some stubborn leaves need the extra time. For tiny delicate ferns, a single small dot of glue on the stem end keeps them from sliding while staying invisible. I also like to add a tiny handwritten label in the corner of the mat with the leaf type and date, like a real botanical specimen. It adds such a charming museum quality touch.
10. Abstract Sponge Painting
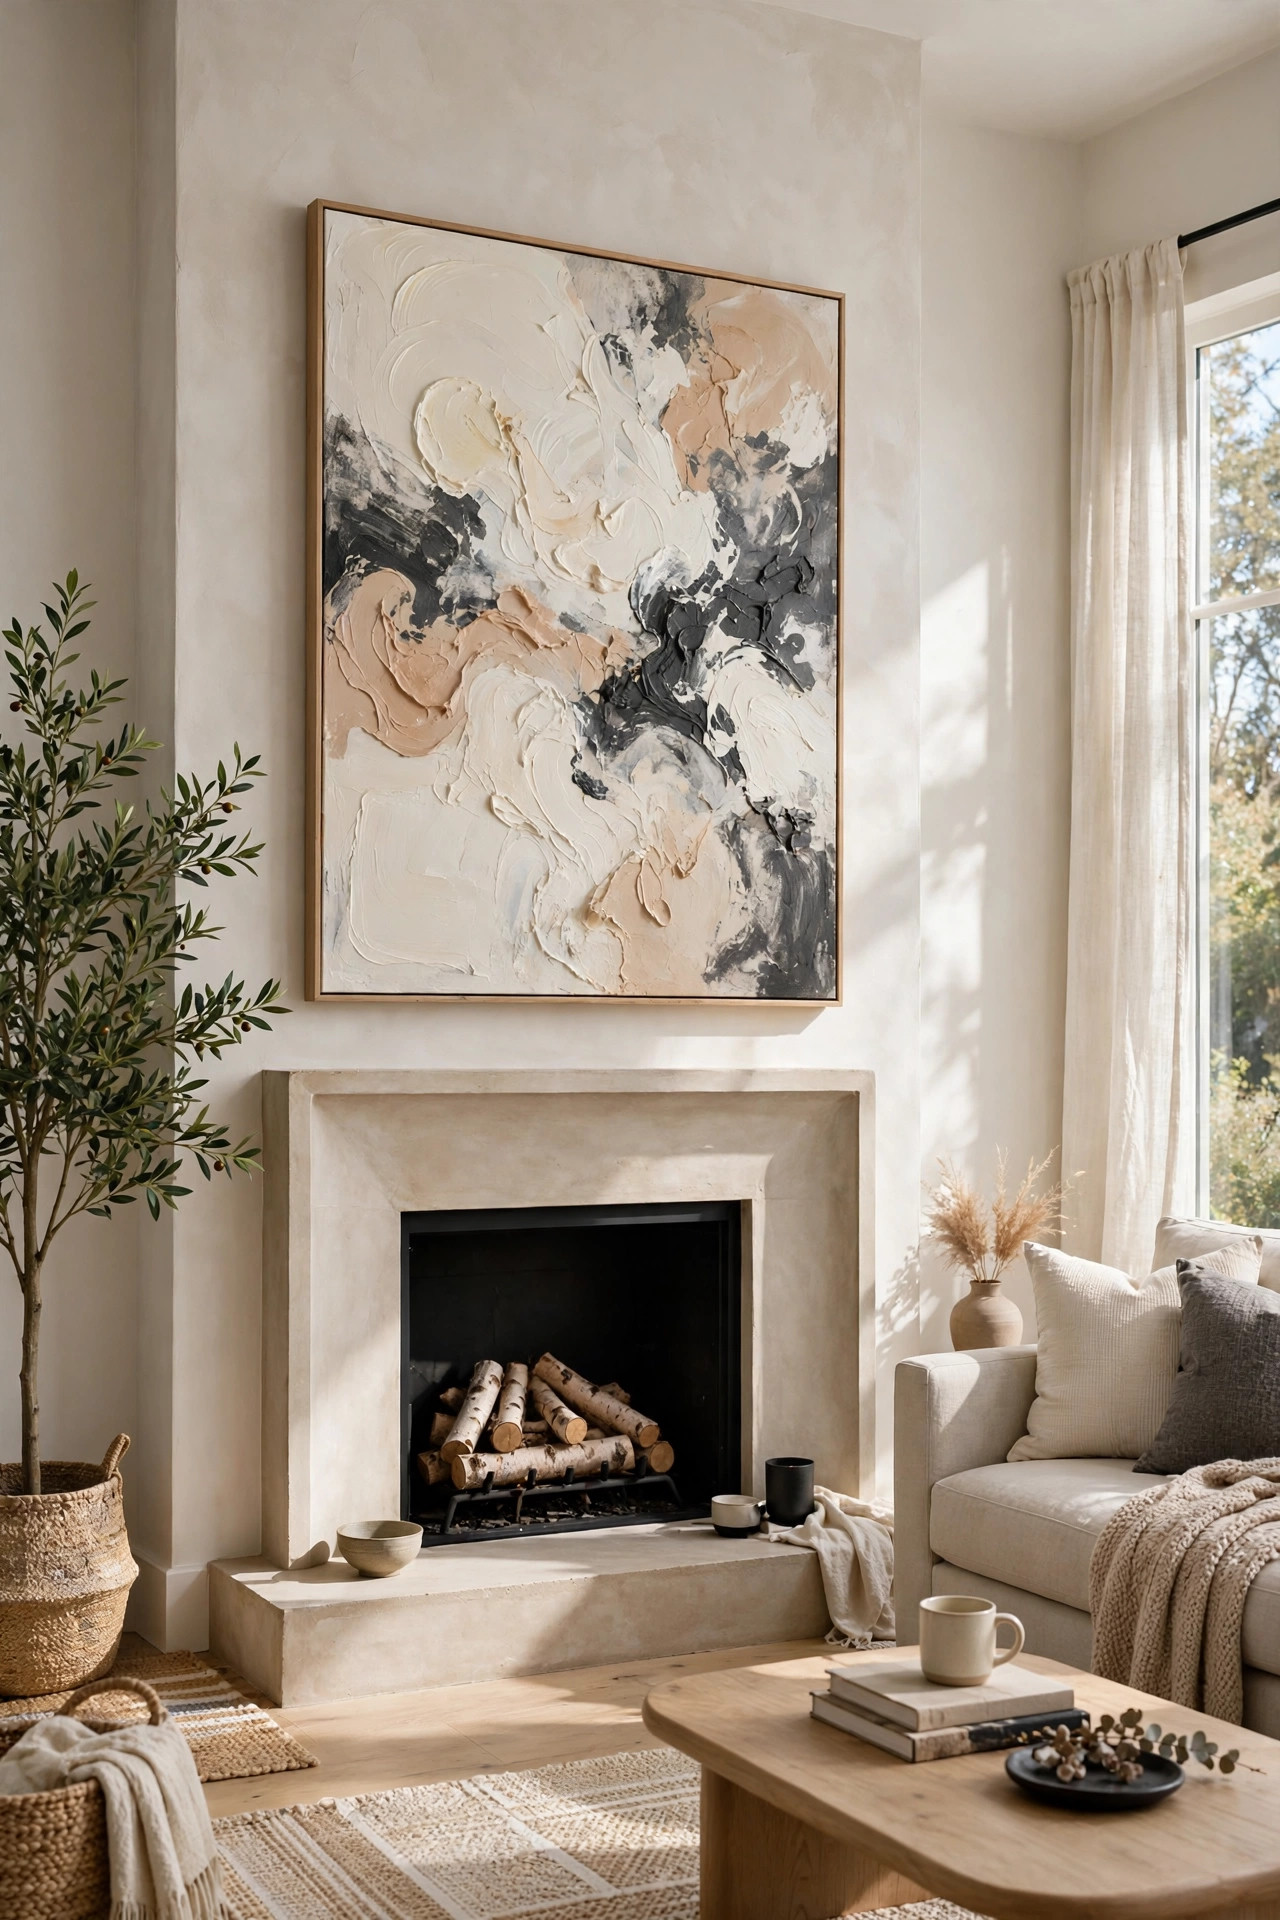
If the idea of painting with a brush terrifies you, paint with a sponge instead. Sponge painting is gloriously forgiving, because there are no brush strokes to judge and no lines to keep straight. You dab, you blot, you layer colors, and somehow it always looks like real abstract art. I made a large sponge painted canvas for above my fireplace using only three colors, cream, clay, and charcoal, and it is the piece guests compliment most. They assume I took a class. I did not. I watched a five minute video, squeezed paint onto a paper plate, and started dabbing. The secret is that restraint looks expensive. Three colors, lots of blank canvas showing through, and you are an abstract artist. What surprised me most is how different the same technique looks with different color palettes. My fireplace piece is warm neutrals, but I made a second one for my bedroom in soft blues and grays, and it feels like a completely different artist made it. Cool colors recede and calm a room, while warm colors advance and energize it. Think about the mood you want before you squeeze out the paint. A bedroom usually wants calm, a living room can handle energy.
Start with a large canvas, because small ones make you overwork the paint. Squeeze a little of each color onto a plate, dip a natural sea sponge lightly, blot most of the paint off on a paper towel, and then press it gently onto the canvas. Less paint is always better. You can add more, but you cannot take it away. Work in layers, letting each one dry before adding the next, so the colors stay distinct instead of turning to mud. I made that mud mistake on my first attempt and had to paint over the whole thing and start fresh. Step back across the room every few minutes, because sponge art looks completely different from ten feet away than it does up close. Stop before you think you are done. The biggest beginner error is adding one more dab too many. When in doubt, walk away for an hour and look again with fresh eyes. I also photograph my work in progress with my phone, because a small photo reveals composition problems your eyes miss up close. If one corner feels heavy, add a few dabs of your lightest color there to lift it. If the whole thing feels flat, one bold dark shape in an unexpected spot usually fixes it. And remember that the edges matter. Paint right to the edge of the canvas, or paint the sides a solid color, because unfinished edges scream amateur. A five minute edge cleanup is the difference between craft project and real art.
11. Mini Macrame Hangings
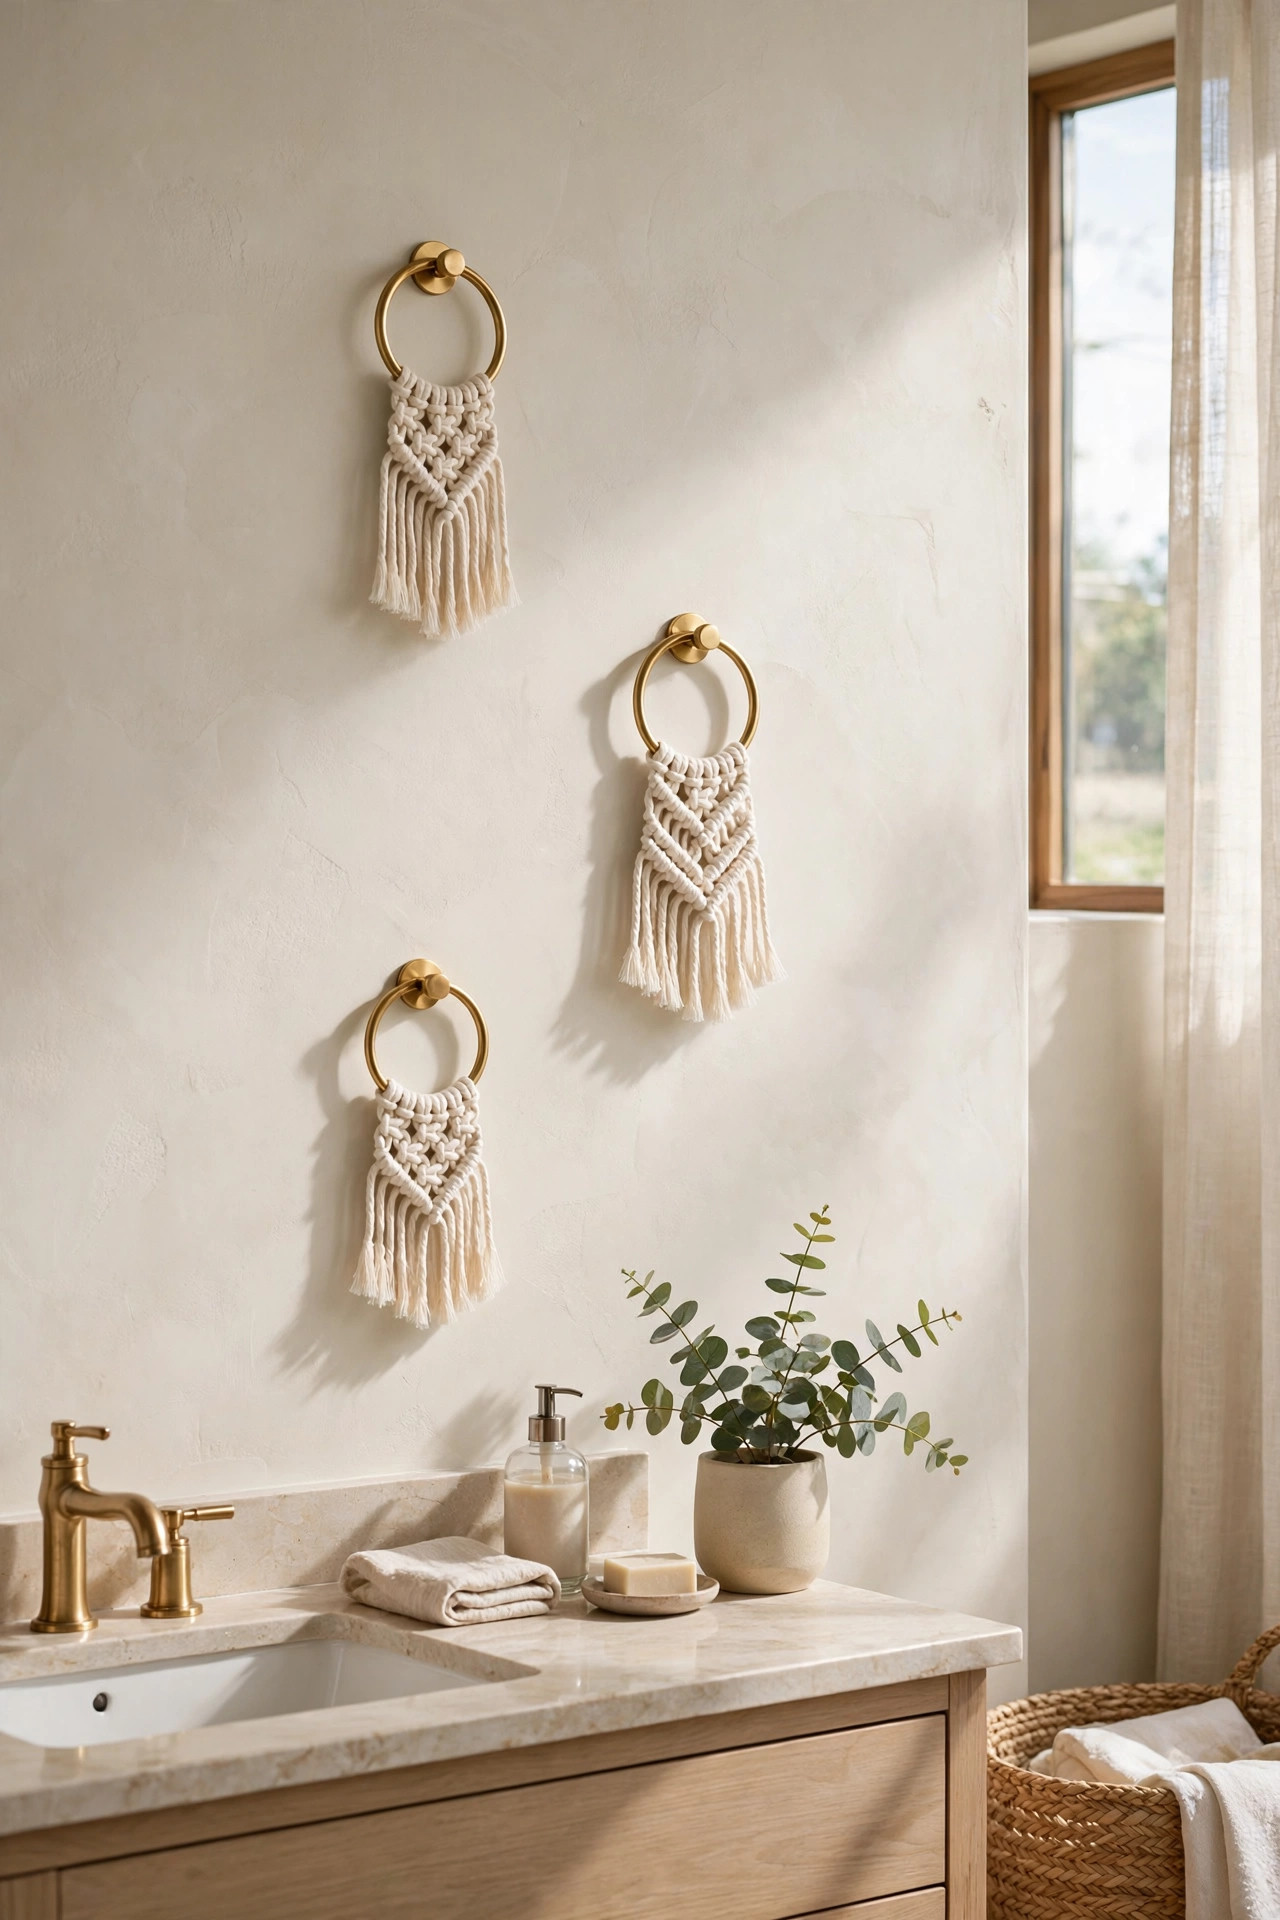
Big macrame wall hangings are beautiful but they take hours. Mini versions give you the same boho texture in about twenty minutes each, and a cluster of three minis looks even better than one big piece. I hung three small macrame hangings in my bathroom, each on a little brass ring instead of a dowel, and they turned the most boring room in my house into my favorite one. All you need to know is one knot, the square knot, which is just a pattern of left over right, right over left, repeated. I learned it from a library book in one sitting. Once your hands learn the rhythm, it feels like knitting, meditative and automatic. I now keep a small macrame project in a basket by my reading chair for evenings when I want something calm for my hands. There is real science behind why repetitive handwork relaxes us, and I believe it. My shoulders drop, my breathing slows, and twenty minutes later I have made real progress on something beautiful. If you get stuck on a knot, there are wonderful free video tutorials that show every step slowly. Watch one row being tied, pause, copy it, and continue. You will have it memorized by the third row.
Cut four cords about four times as long as you want the finished piece to be, because knots eat up length fast. Fold them over your ring or dowel and start knotting. The classic pattern is rows of square knots that form a diamond or triangle shape, but honestly any repeating pattern looks good. I made my first one as just straight rows of knots and it still looked great. When you are happy with the length, trim the bottom cords into a point or leave them long and wispy. Comb out the bottom fringe with a fine tooth comb for that soft, feathery look you see in stores. Hang your minis at slightly different heights in a group of three. They weigh almost nothing, so a single small nail each is plenty. If you enjoy it, the same knot makes plant hangers, so your new skill keeps on giving. I made a plant hanger for my pothos the week after my first wall hanging, using the exact same square knot, and now that trailing plant is the happiest corner of my kitchen. The only difference is that plant hangers use longer cords and gather at the bottom to cradle the pot. Cotton cord is the best material for both projects because it holds knots firmly and looks soft and natural. Avoid slippery synthetic cords until you are experienced, because they loosen over time. Start with natural cotton and you will love the results.
12. Framed Kids Artwork Wall
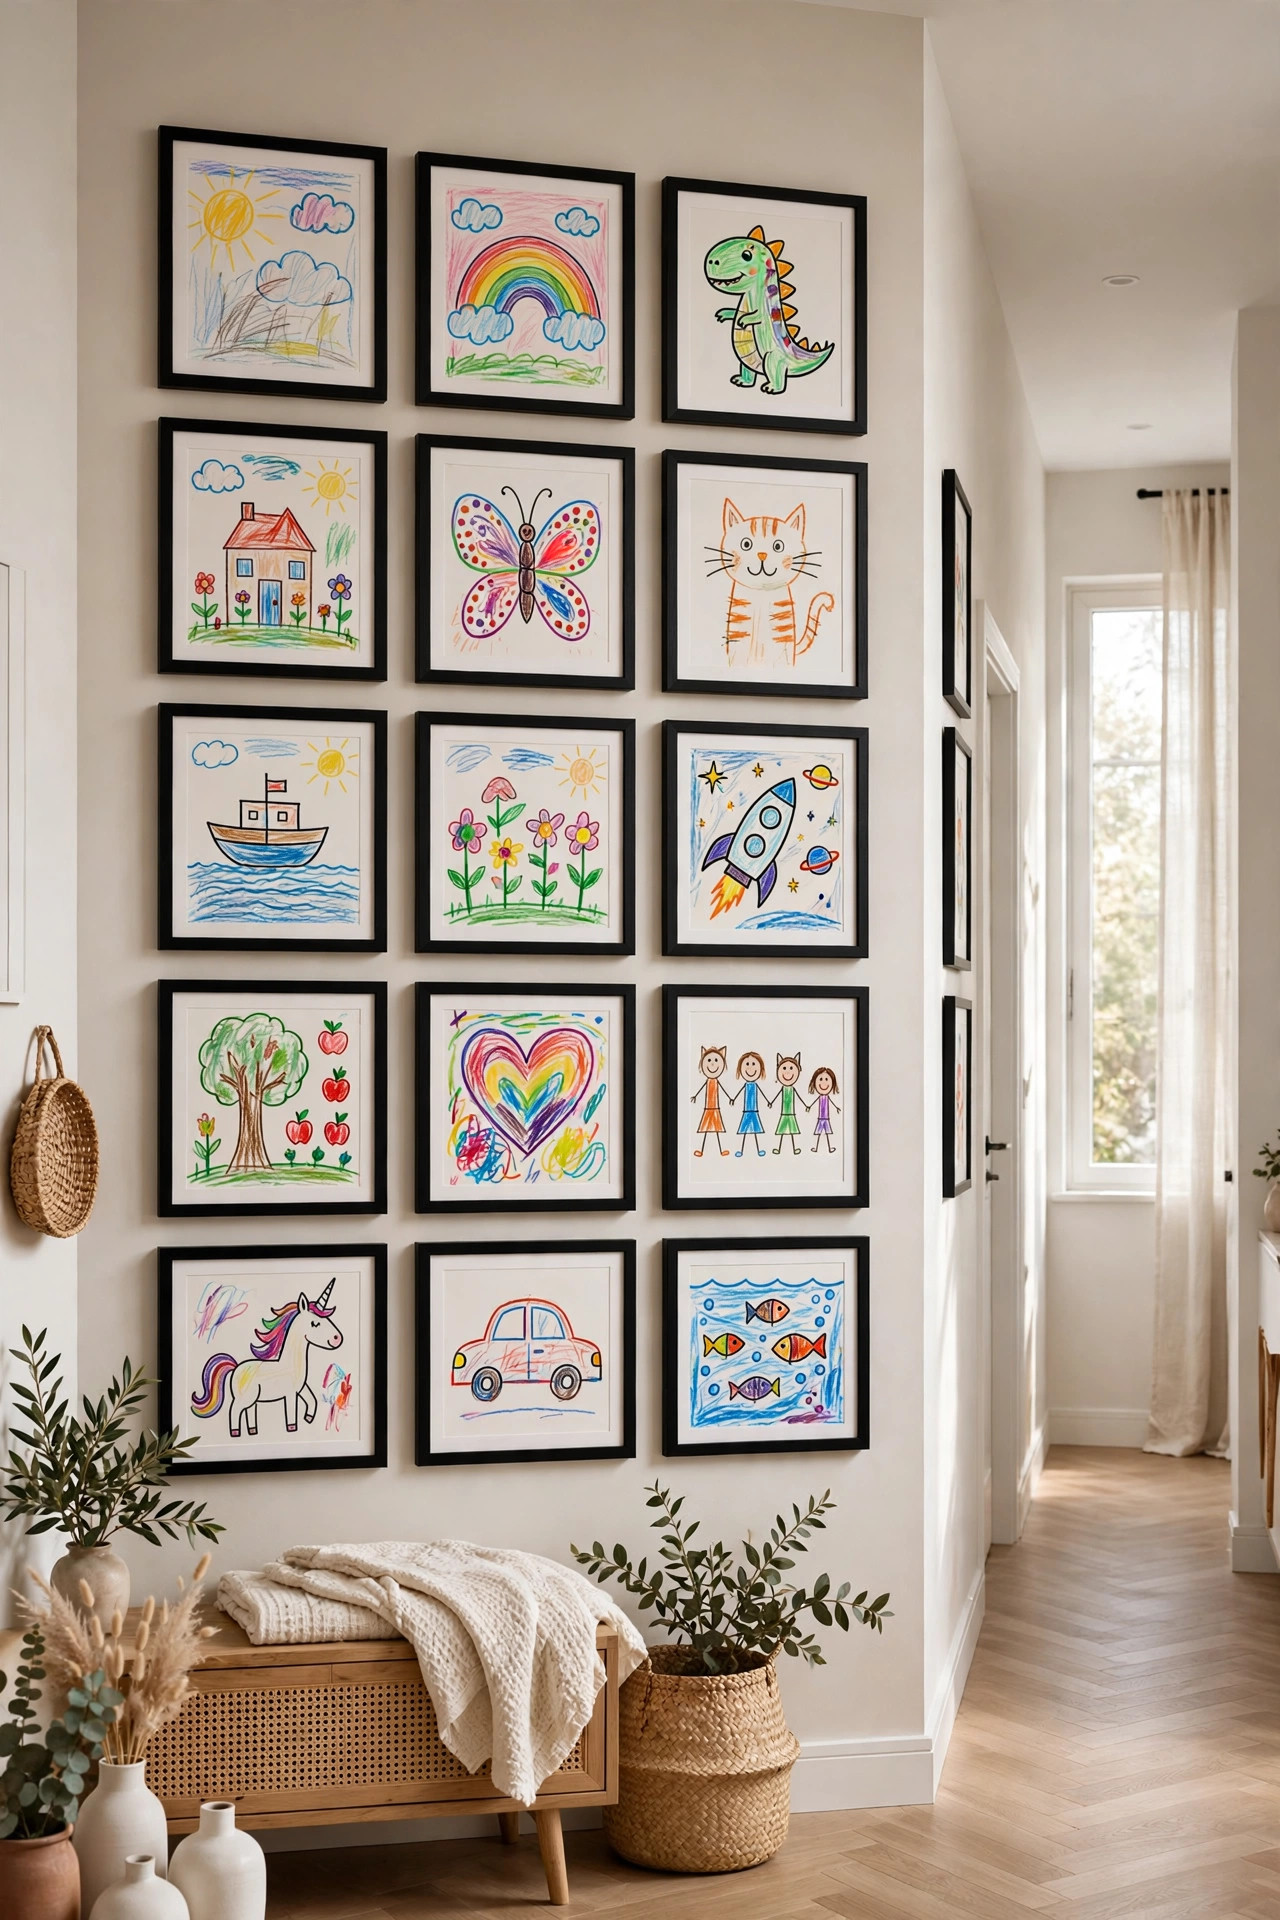
The most meaningful art in any home is made by small hands, and it deserves better than the refrigerator door. I turned one hallway wall into a dedicated gallery for my kids’ artwork, and it is the wall visitors photograph most. The trick is curation. Not every masterpiece makes the wall, or you end up with visual chaos. I let each child pick their two favorites per season, and we frame those in matching simple frames. The matching frames are what make it look like a real gallery instead of a classroom. I buy the same black frame in bulk when they go on sale, so the wall stays cohesive even as the art changes. My daughter’s rainbow unicorn phase hangs next to my son’s very serious drawing of our dog, and the whole wall makes me smile every single day. What I did not expect is how much the kids treasure this wall. My daughter brings friends straight to it to show her latest framed piece, standing a little taller with pride. It has genuinely boosted her confidence in her creativity. My son, who claims he does not care about art, quietly asked when his dinosaur drawing would get its turn. That moment melted me. A wall that tells your children their work matters is worth more than any decoration money can buy.
To keep it fresh without constant work, I set up the wall once and then just swap the art inside the frames. Most frames open from the back in seconds, so changing the display takes less time than making coffee. I keep a simple folder for each child where the runners up wait their turn. For three dimensional pieces like clay handprints, I use shadow box frames, which are deeper and handle chunky art beautifully. If your children are very young and their art is mostly scribbles, frame the scribbles anyway. A bold crayon scribble in a nice frame with a mat looks surprisingly like modern abstract art, and your child will stand a little taller knowing their work hangs in a real frame. Date the back of each piece lightly in pencil before you file it away. Years from now, those dates will matter more than the art itself. I also photograph the full wall every time we swap pieces, so we have a visual record of how their art evolved. Looking back at those photos is like watching them grow up in fast forward, from wild scribbles to careful drawings to surprisingly good portraits. Someday I will make a photo book of the wall through the years, and I know it will make me cry. For now, the hallway gallery is a living, changing piece of our family story. Start yours this weekend. Future you will be so grateful you did.
13. Painted Arch Accent Mural
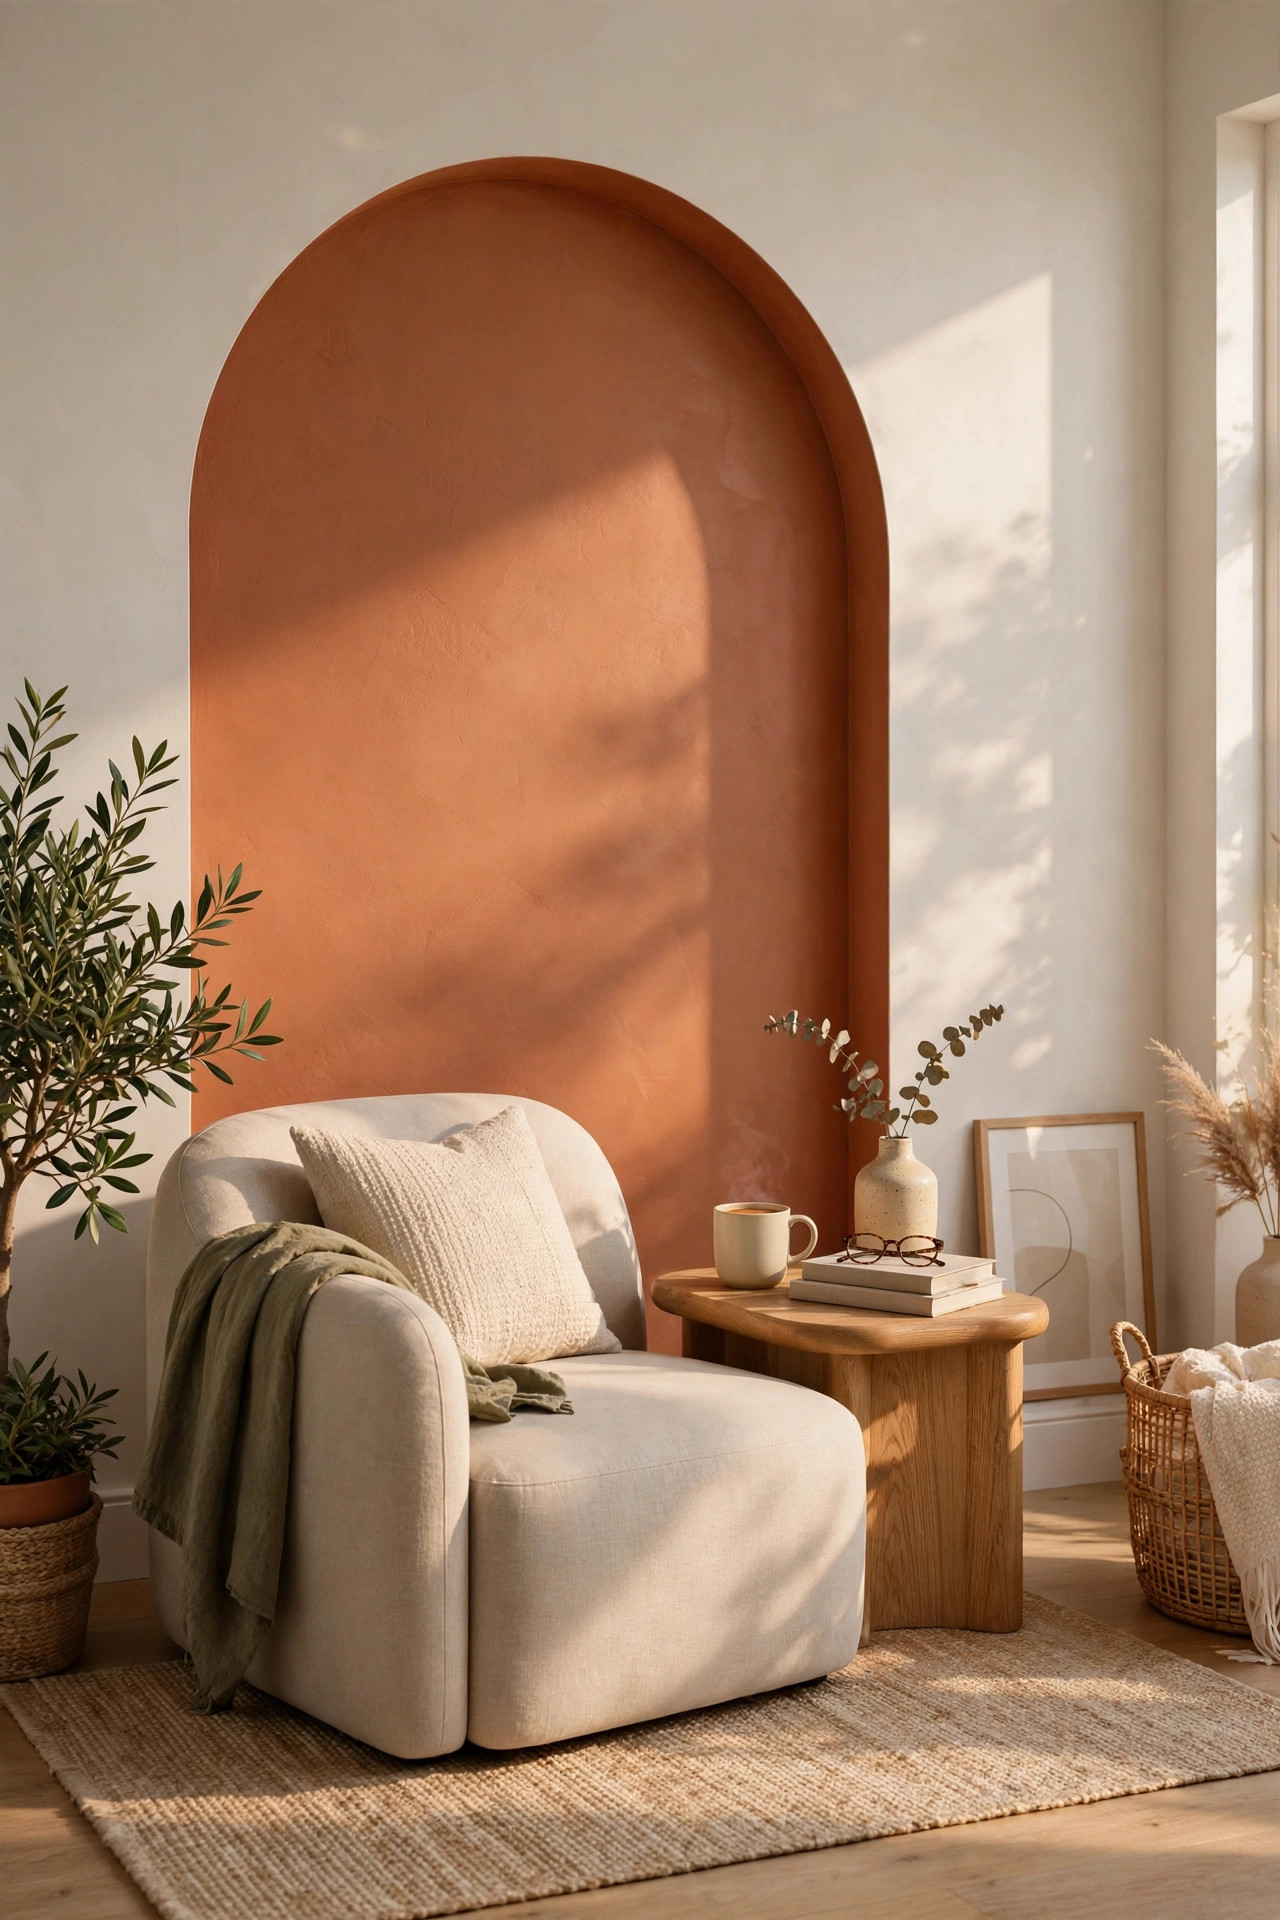
You do not need to paint a whole mural to get the mural effect. One simple painted arch behind a piece of furniture creates a gorgeous focal point that looks incredibly designed. I painted a large terracotta arch on the wall behind my reading chair, and it is the first thing people notice when they walk into the room. It took one Saturday morning, one quart of paint, and a steady hand with a brush. The arch frames the chair like a spotlight, making an ordinary corner feel like a styled vignette. If you can paint inside the lines of a coloring book, you can paint an arch. It is just one big curved line. What makes arches so magical is how they create architecture where none exists. My reading corner was just a chair against a flat wall before, completely forgettable. Now the arch gives it presence and purpose, like a little chapel of coziness. Visitors always pause there, and the chair has become the most fought over seat in the house. All from one curved line of paint. If an arch feels too bold, start with a simple painted circle behind a small plant or lamp. Same idea, smaller commitment.
The method is wonderfully low tech. Decide how wide and tall you want the arch, mark the center point at the top, and tie a piece of string to a pencil. Hold the string at the center mark, pull the pencil out to your desired width, and swing it in an arc to draw a perfect half circle. I used a thumbtack to hold the string, and the curve came out beautifully smooth. Paint just inside the line with a brush for the edges, then fill in with a roller. Two coats will give you rich, even color. The hardest part is choosing the color. I went with warm terracotta because it glows in afternoon light, but sage green, dusty blue, and even soft black all look stunning. If you are nervous, paint the arch in a color just two shades darker than your wall. It will be subtle, elegant, and completely renter friendly if you are willing to repaint later. For extra polish, paint a thin arch in a second color just inside the first one, like a border. I added a narrow cream line inside my terracotta arch and it looks incredibly professional. Use a small artist brush for the inner line and take your time. And here is a renter tip. Take a photo of your blank wall before you paint, so you can match the original color exactly when you move out. One quart of paint covers an arch easily with plenty left for touch ups.
14. Stenciled Linen Banner
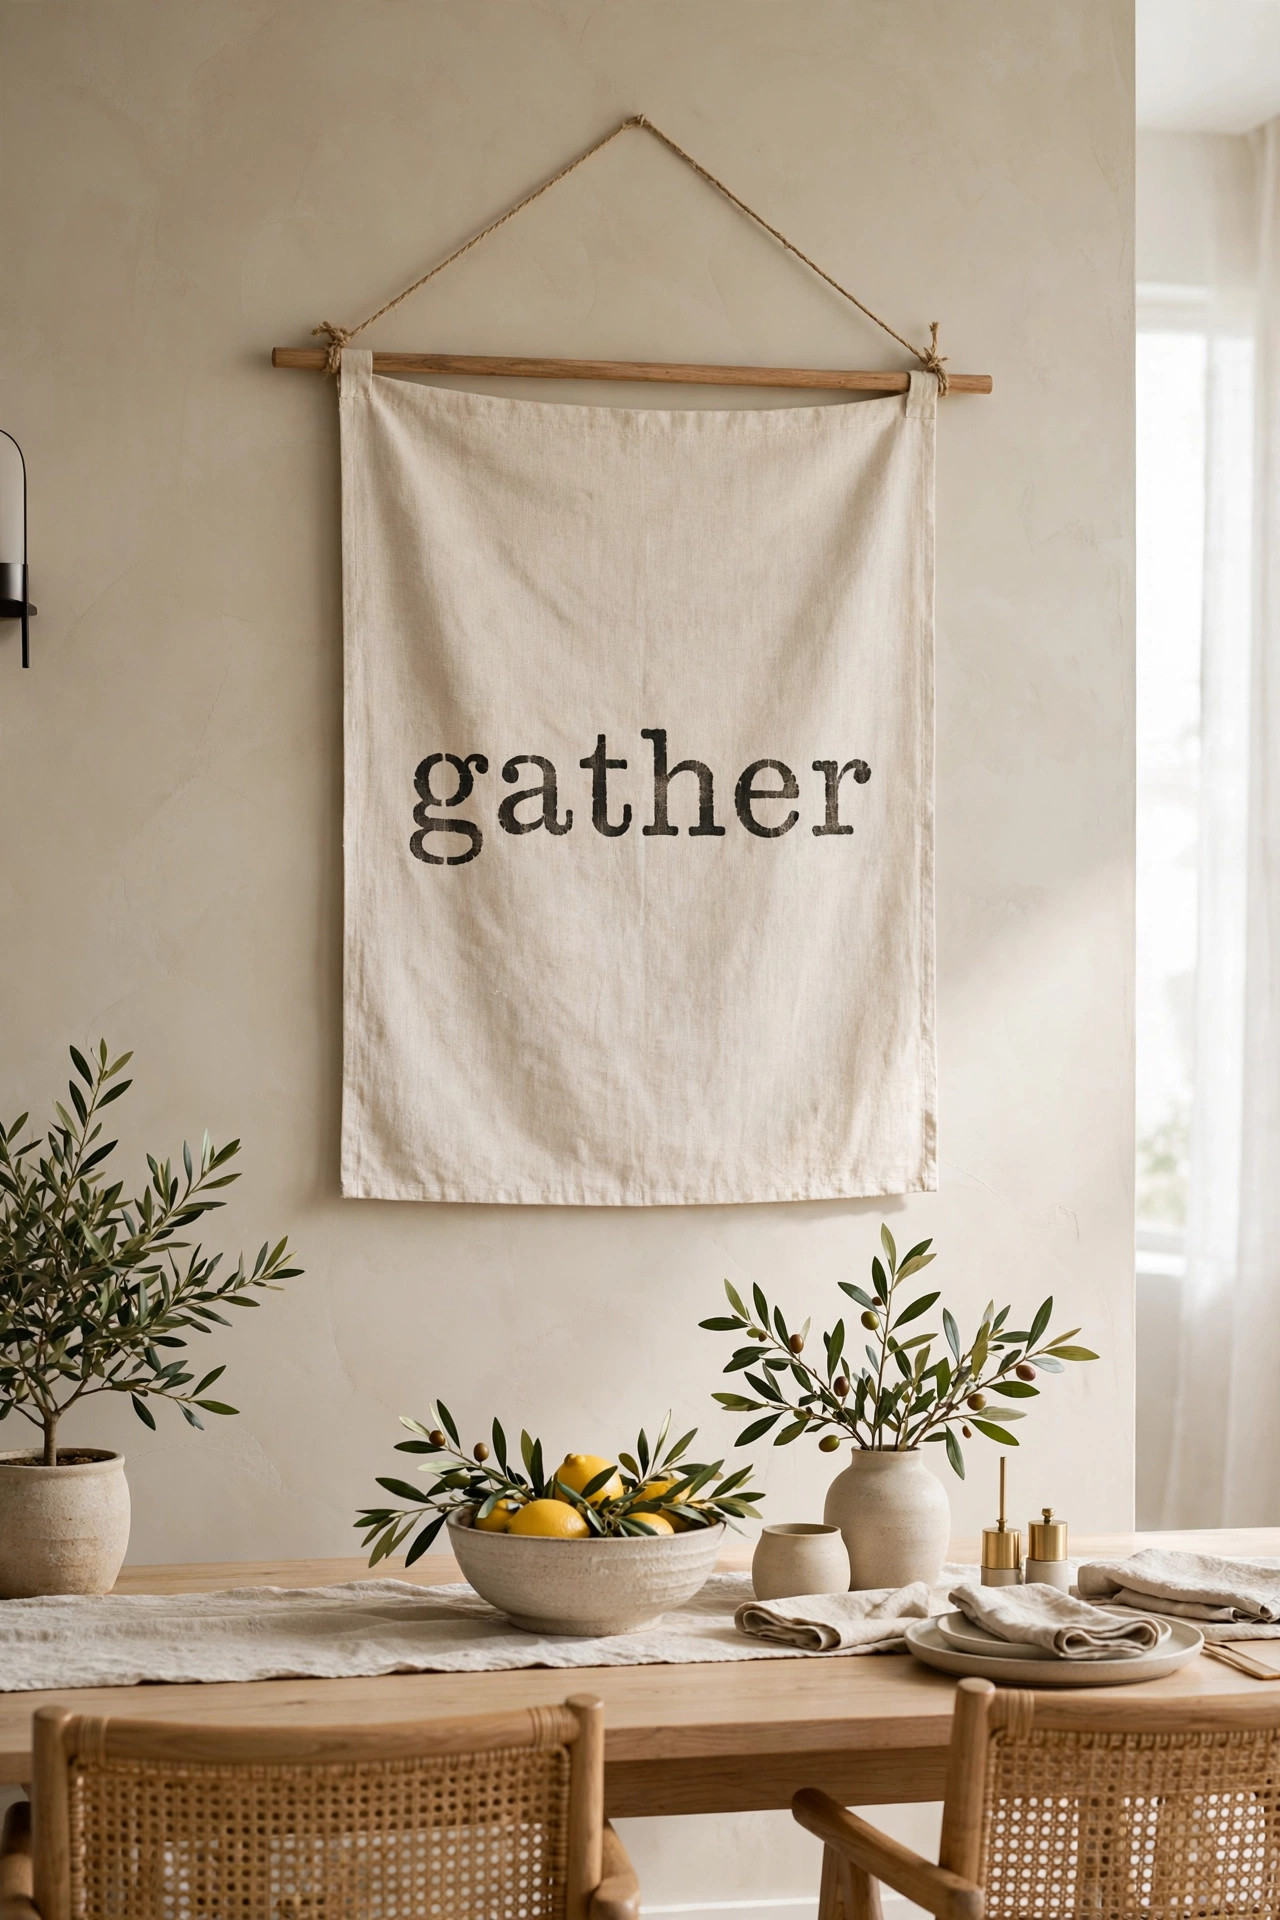
A long linen banner with a stenciled word or design brings softness and meaning to a wall, and it is far easier than it looks. I made one for my dining room that says gather in big serif letters on natural linen, and it sets the tone for every meal we share there. You need a piece of linen or canvas fabric, a stencil, and fabric paint or acrylic paint mixed with a little fabric medium. Cut the fabric to size, hem the edges with iron on hem tape if you do not sew, and stencil your design in the center. Hang it from a wooden dowel slipped through a folded pocket at the top. The whole project costs less than fifteen dollars and looks like something from a farmhouse decor shop. Linen is the ideal fabric because its natural texture hides small stenciling imperfections beautifully. If linen feels pricey, plain cotton canvas from the craft store works just as well and costs half as much. I actually prefer the heavier canvas because it hangs straighter without curling at the edges. Whatever fabric you choose, iron it well before you start. Wrinkles fight you at every step, from taping the stencil flat to getting clean letter edges. A smooth starting surface makes everything easier.
Stenciling has one golden rule. Less paint on the brush, always. Dab your stencil brush into the paint, then blot almost all of it off on a paper towel until the brush feels nearly dry. Then pounce straight up and down over the stencil, never brushing side to side, which pushes paint under the edges. I learned this the hard way when my first attempt came out blurry and I had to wash the whole banner and start over. Tape the stencil down firmly and do not move it until you are done. For the hanging, fold the top two inches of fabric over the back and iron it flat, then run a line of hem tape to make a pocket for the dowel. Tie twine to each end of the dowel for hanging. One nail in a stud holds the whole thing. Choose a word that means something to your family. Ours says gather, but home, love, or your family name all work beautifully. If words are not your thing, stencil a simple design instead. A sprig of olive branches, a row of stars, or a simple house silhouette all look wonderful on linen. I made a second banner for my bedroom with just three stenciled olive sprigs and no words at all, and it is somehow even prettier than the word banner. Keep a damp cloth handy while you work, because catching a small smudge immediately is easy, while fixing one after it dries is not.
15. Hanging Clipboard Gallery
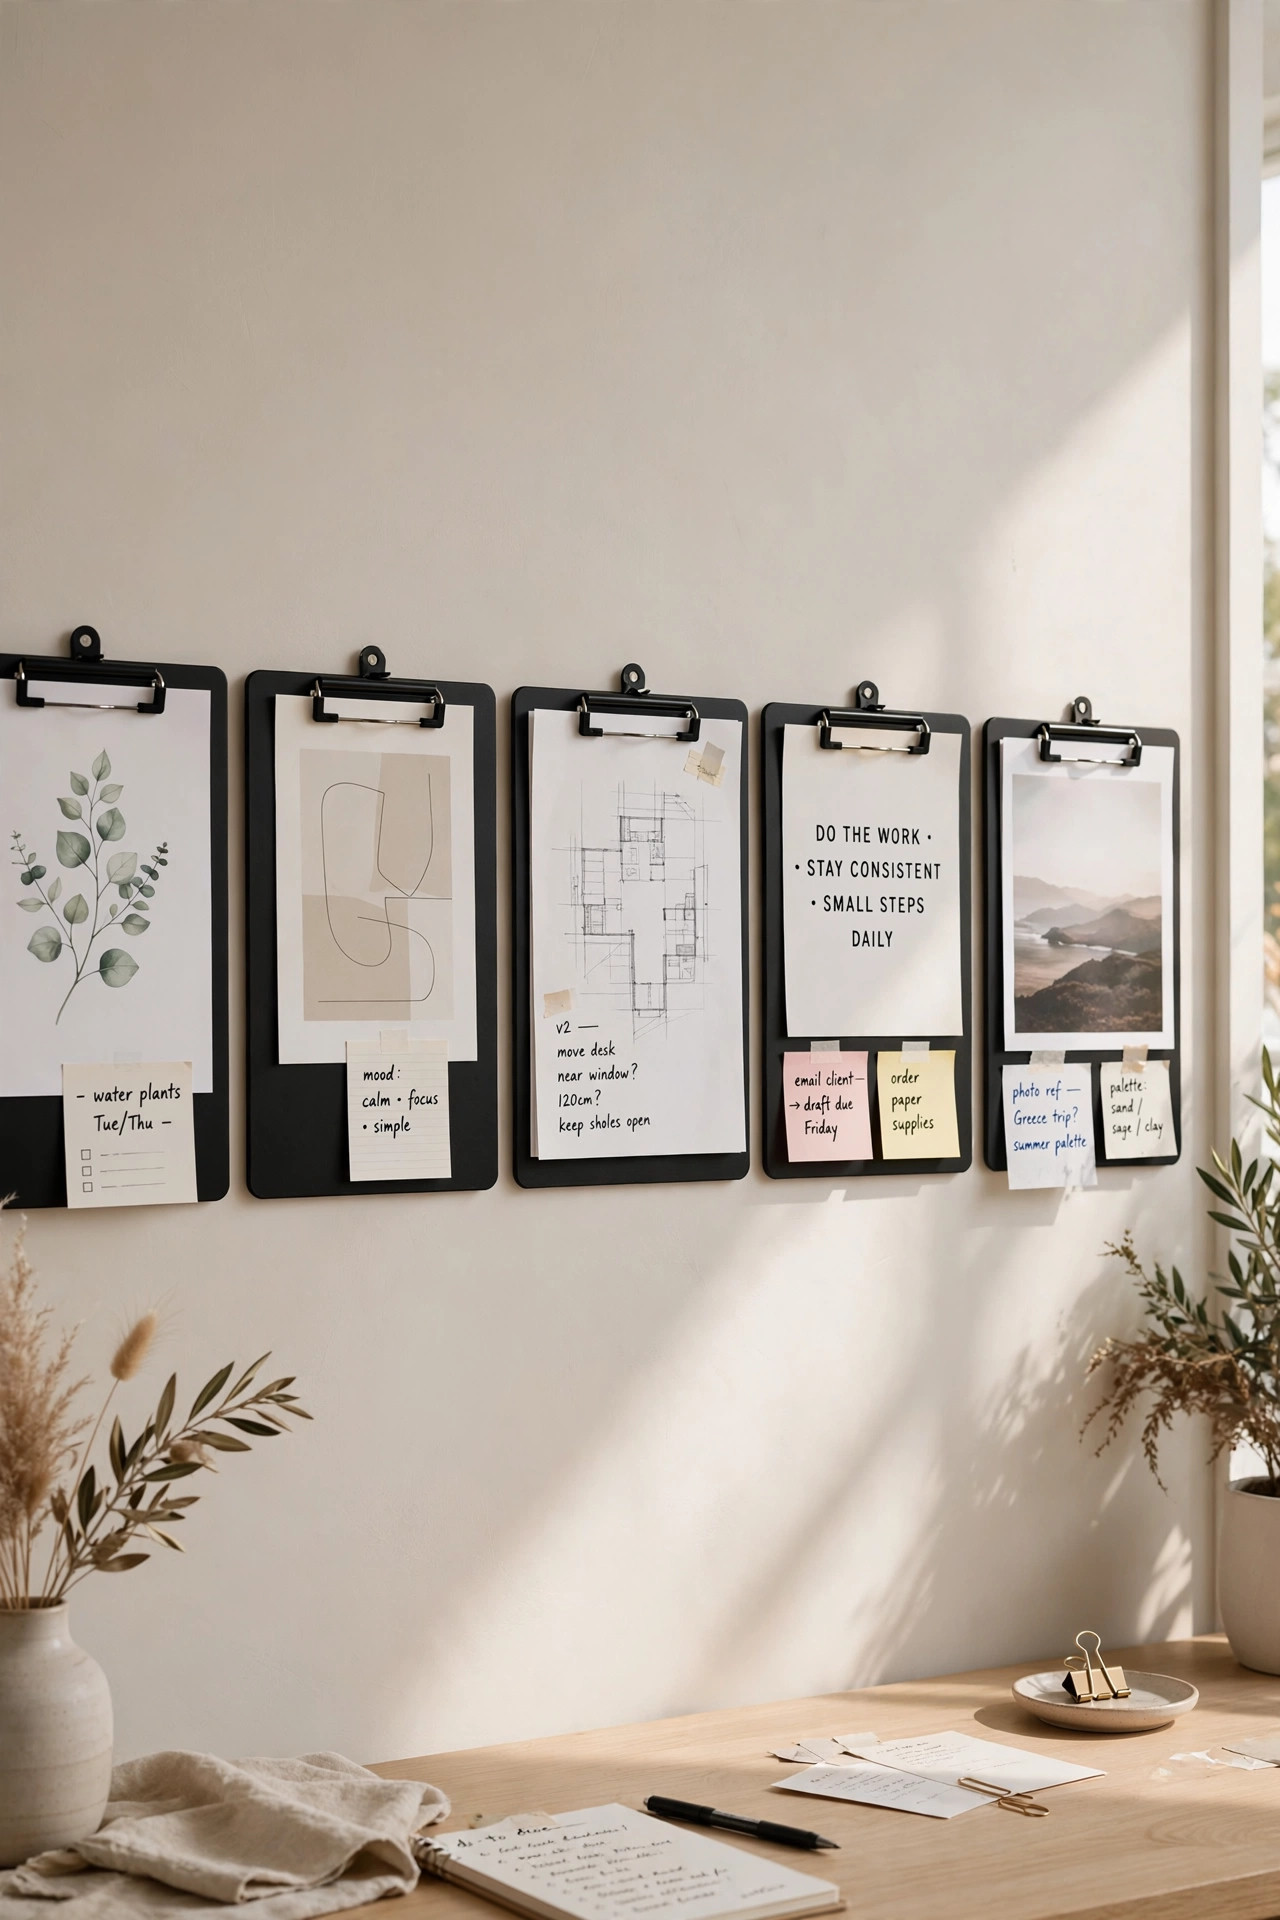
Clipboards are the ultimate lazy genius wall art system. Screw a row of clipboards to the wall, clip in whatever you want to display, and change it whenever the mood strikes. I have six clipboards in my home office holding a rotating mix of prints, my kids’ drawings, a calendar page I loved, and a postcard from a friend. When I get bored, I just unclip and swap. No new nail holes, no reframing, no commitment. It took twenty minutes to hang the whole row, and it has saved me from so many decorating decisions since. This is perfect for people who love change but hate patching walls. I am one of those people who rearranges furniture at midnight on a whim, so commitment free art is a lifesaver for me. The clipboards have also ended the great refrigerator art debate in our house. Instead of cluttering the fridge, the kids’ best pieces go straight to the clipboard wall where they look properly displayed. My fridge is finally clean, and the kids feel even more honored. It is a small change that made our kitchen feel calmer overnight, which tells you how much visual noise a crowded fridge really creates.
The key detail is spacing and alignment. Use a level and a pencil to mark a straight line, because crooked clipboards drive everyone crazy, including you, every time you walk past. I spaced mine six inches apart, which leaves enough breathing room for each piece to shine. Hang them with a single screw each, driven into a stud where possible, or use sturdy wall anchors. For the clips themselves, the standard brown masonite clipboards look great as is, but you can spray paint them any color. I painted mine matte black and they look surprisingly chic. Clip in art printed at home, pages torn from magazines, children’s drawings, or even fabric swatches. The clip mechanism holds everything flat and neat. This system shines in kids’ rooms and offices, anywhere the art should change as life does. When the holidays come, clip in seasonal prints and your wall decorates itself. I keep a small folder labeled with each season, and swapping the whole wall takes ten minutes with a cup of tea in hand. For an extra polished look, use all black clipboards and white paper for a crisp modern feel, or natural wood clipboards with cream paper for warmth. You can also clip in small three dimensional items like dried flower sprigs or ribbon, since the clip holds more than just paper. Just keep the weight light so the clipboard stays flat against the wall. This is hands down the most practical art display I own.
16. Terracotta Plate Wall
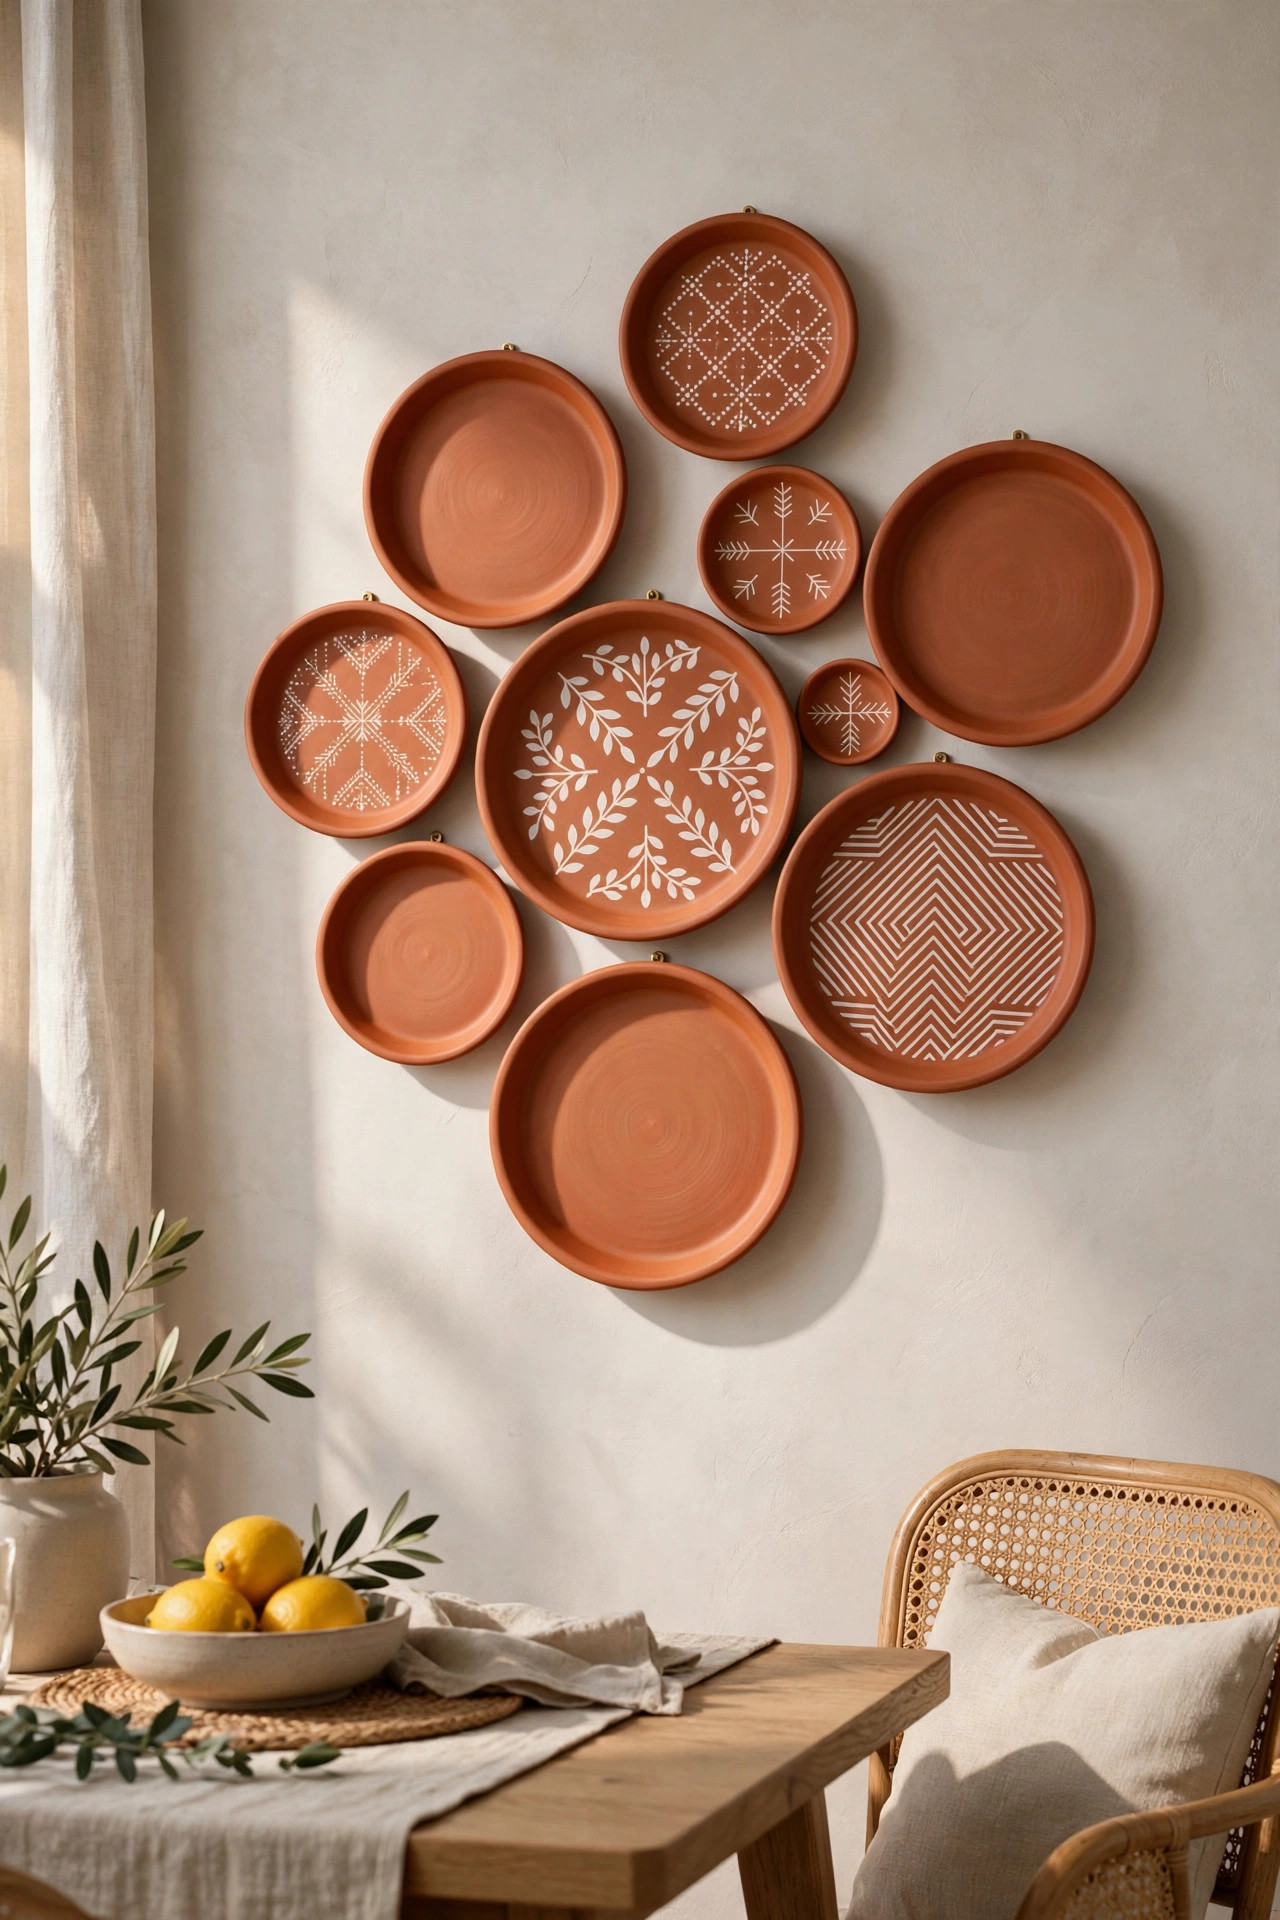
Plain terracotta saucers, the kind that go under flower pots, make the most charming wall display when you hang a whole collection of them. I covered one dining room wall with fifteen saucers in different sizes, and it looks like a sun baked Mediterranean dream. Each saucer cost less than a dollar at the garden center. Some I left plain, some I painted with simple white patterns, dots, stripes, little suns. Hung together in a loose cluster, they create texture and warmth that no flat print can match. The slight color variation between saucers is part of the charm. They are handmade from clay, so no two are exactly alike, and that imperfection is what makes the wall feel alive. I love how the saucers change personality with the light. In bright morning sun they look fresh and Mediterranean, all warm clay and white patterns. In the evening lamplight they glow golden and cozy. Few art pieces transform through the day like dimensional objects do, which is a big advantage of hanging things instead of flat prints. If you ever tire of the arrangement, the saucers go right back to garden duty under your plants. Try getting that flexibility from a framed poster.
Hanging plates safely is the part people worry about, but plate hangers solve it completely. These are simple wire or plastic grips made exactly for this purpose, and they cost a couple of dollars each at the craft store. Choose hangers sized to your saucers, hook them on, and hang each one from a single nail. Before you hammer anything, lay the whole arrangement on the floor and play with the layout. I photographed three different layouts before choosing one, and I am glad I took the time. Start hanging from the center saucer outward, checking with a level as you go. If you want to paint some of yours, use acrylic craft paint and keep the designs simple. White dots around the rim, a stripe near the edge, a tiny sun in the center. Seal painted saucers with a clear matte sealer so the paint stays put. Step back often, because a plate wall looks different from across the room than it does up close. I check mine from the doorway, which is how guests will actually see it, and adjust anything that looks off balance from there. A common mistake is hanging everything too high. The center of your arrangement should sit at eye level, around fifty seven inches from the floor, which is the museum standard. If your wall is above furniture, leave six to eight inches between the furniture top and the lowest saucer. That breathing room keeps the display from feeling crowded.
17. Black and White Sketch Series
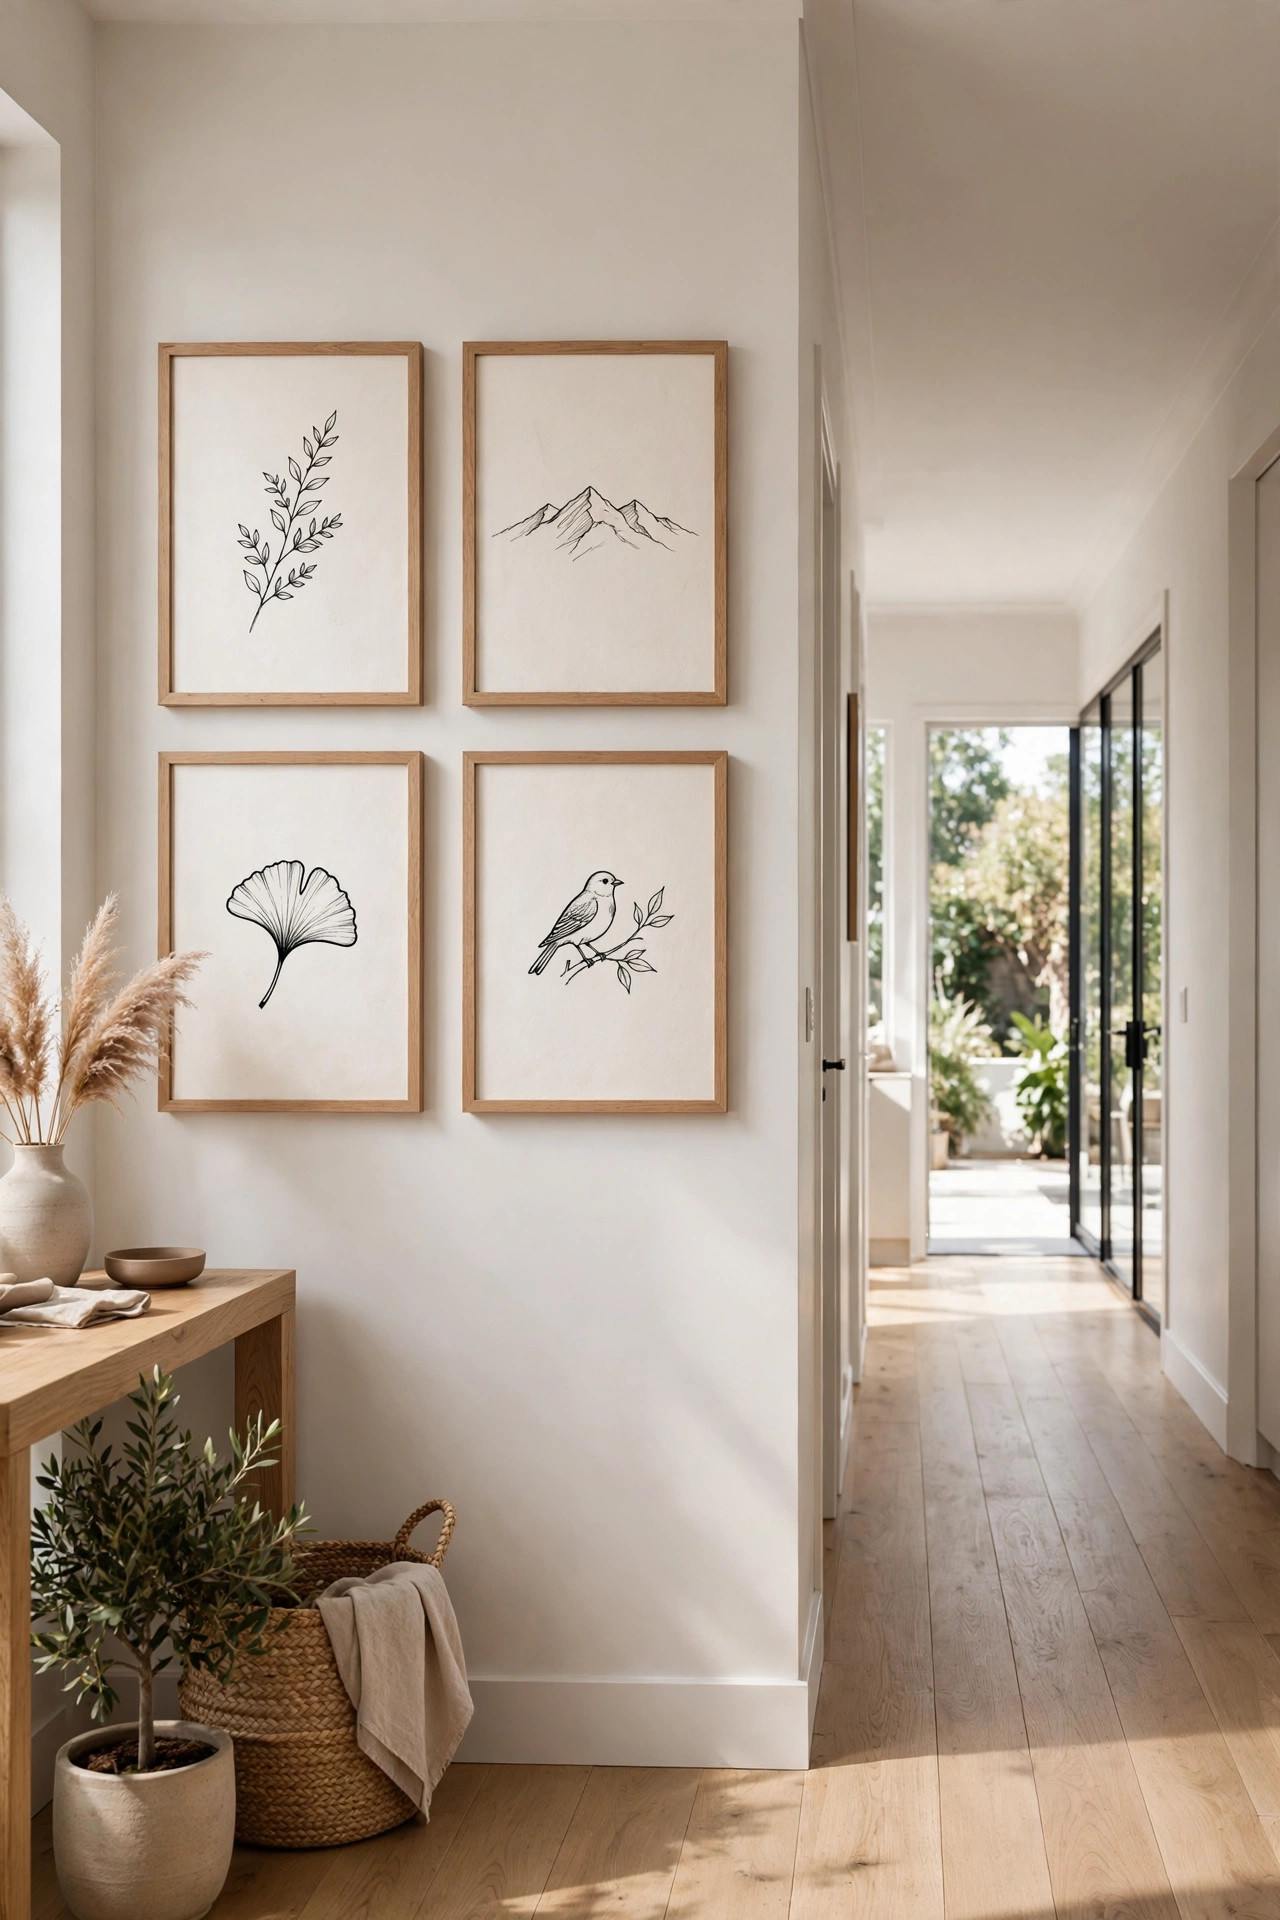
You do not need to be an artist to make a striking sketch series. You just need a black pen, white paper, and the courage to draw simple things badly on purpose. I filled four matching frames with my own ink sketches, a coffee cup, a houseplant, my dog sleeping, a pair of boots, and hung them in a grid in my hallway. They are not good drawings in any technical sense. The perspective is wrong and the lines wobble. But together in matching black frames, they look like an intentional minimalist art series, and I love them more than anything I could have bought. There is something deeply personal about your own hand on your own walls, even when that hand is shaky. I will admit something funny. I hid my first sketches in a drawer for a month because I was embarrassed by how amateur they looked. Then one day I framed them on a whim, hung them up, and my best friend asked which artist I had bought them from. I laughed for a full minute before telling her the truth. We are always our own harshest critics. What looks like wobbly mistakes to you looks like charming hand drawn character to everyone else. Hang them anyway.
The trick that makes amateur sketches look like real art is consistency. Use the same pen, the same paper, and the same simple style for every piece in the series. Draw only the outlines, no shading, no erasing. That constraint is freeing, because it removes every decision except what to draw. I drew one object per page, centered, with lots of white space around it. The white space is doing half the design work, so do not fill the page. If you truly cannot draw a straight line, trace. There is no shame in it. Print a simple line drawing, lay it over your paper against a bright window, and trace the outlines. Your hand still made the marks. Hang four or six in a tight grid with identical frames and identical mats. The repetition turns humble sketches into a gallery moment. Sign each one in the corner with the date, because future you will treasure these. For the grid layout, I use two inches between frames both horizontally and vertically, which gives a tight professional look. Measure once and use small pieces of painter’s tape to mark each frame position before you hammer anything. That ten minutes of prep prevents the slow drift that makes grids look messy. If you outgrow the series, the same approach works for leaf rubbings, pressed flowers, or even your children’s first attempts at drawing. Any humble collection becomes gallery worthy in matching frames.
18. Fabric Scrap Collage Canvas
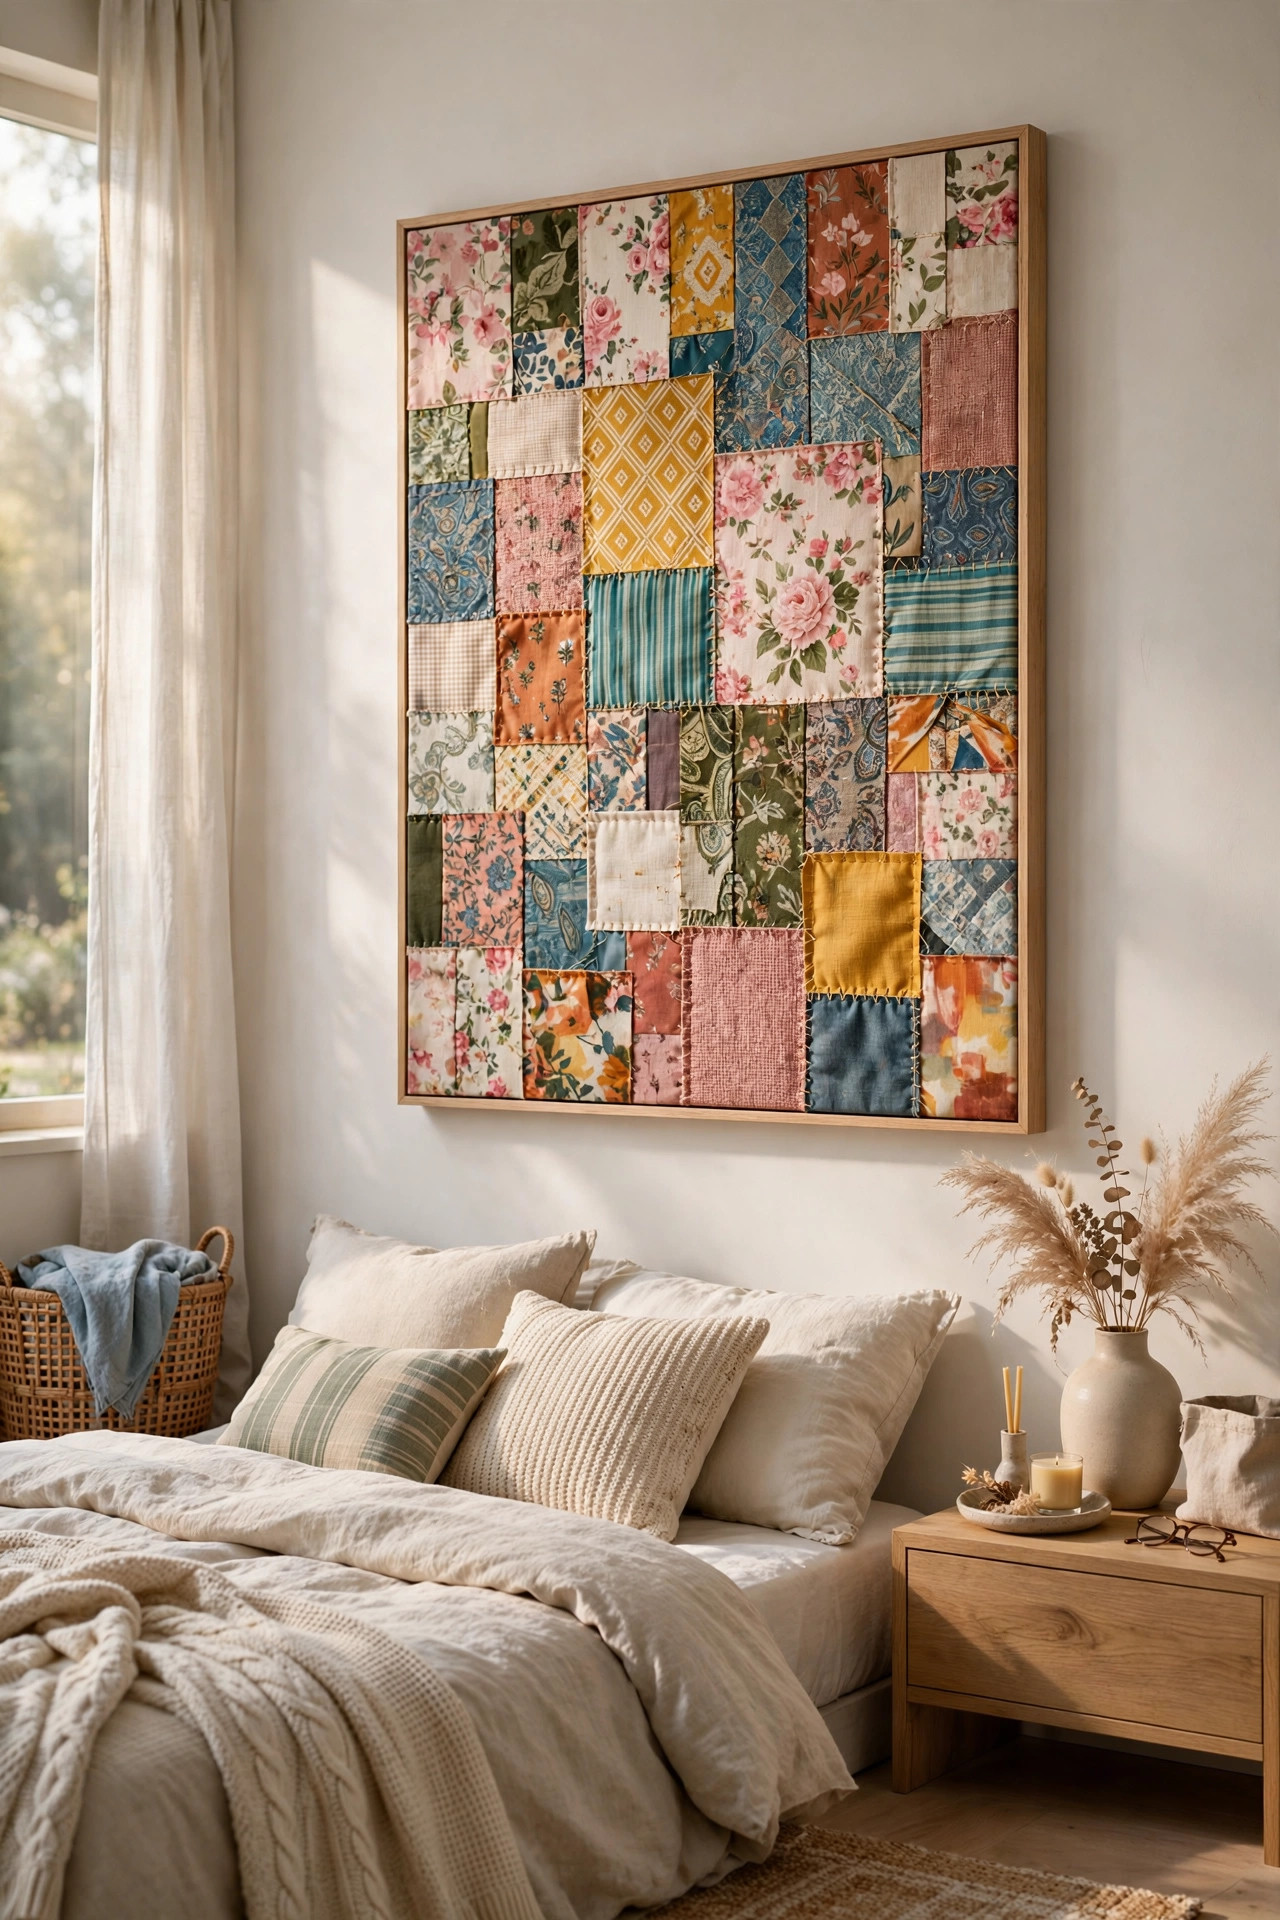
If you sew, you have a bag of fabric scraps. If you do not sew, ask someone who does, because those scraps are free art supplies. A fabric collage on canvas turns leftover bits into something genuinely beautiful. I made one from scraps of my grandmother’s old dresses, and it hangs in my bedroom where I see it first thing every morning. I cut the fabrics into simple shapes, leaves, circles, houses, and glued them onto a painted canvas background in a loose landscape design. It is part quilt, part painting, and entirely mine. Every scrap carries a memory, which makes this the most emotional piece of art in my home. When I look at it, I see the dress my grandmother wore to church, the curtains from my first apartment, and the baby blanket my daughter outgrew. It is a patchwork of my life, and making it felt like writing in a diary. I cried a little when I glued down the last piece, not from sadness but from that full heart feeling you get when everything meaningful is in one place. If you have sentimental fabrics tucked in a drawer somewhere, this is their moment. They deserve to be seen, not stored.
You do not need a plan to start, just a background color and a pile of scraps. Paint your canvas a solid color first and let it dry. I used warm cream, which makes every fabric pop. Then cut your scraps into shapes with sharp scissors. Simple shapes work best. Circles, leaves, triangles, strips. Arrange them on the dry canvas without glue first, sliding pieces around until the composition feels balanced. Take a photo when you love it, because you will forget the arrangement the second you start gluing. Use a thin layer of craft glue or gel medium under each piece, smooth it flat, and brush another thin layer over the top to seal it. That top coat is what makes it look finished instead of stuck on. Let it dry overnight. The next morning you will have a textured, colorful piece of art that cost you nothing but scraps and an afternoon. If you love the result, this technique scales beautifully. I made a set of three smaller collages for my hallway using the same method, and they look like a proper art series. Keep the background color consistent across the set so they read as a collection. You can also add small details with a permanent marker after the glue dries, like stitch lines around shapes or tiny dots for texture. Those hand drawn touches blend the fabrics together and make the whole piece feel even more personal.
19. Framed Vintage Book Pages
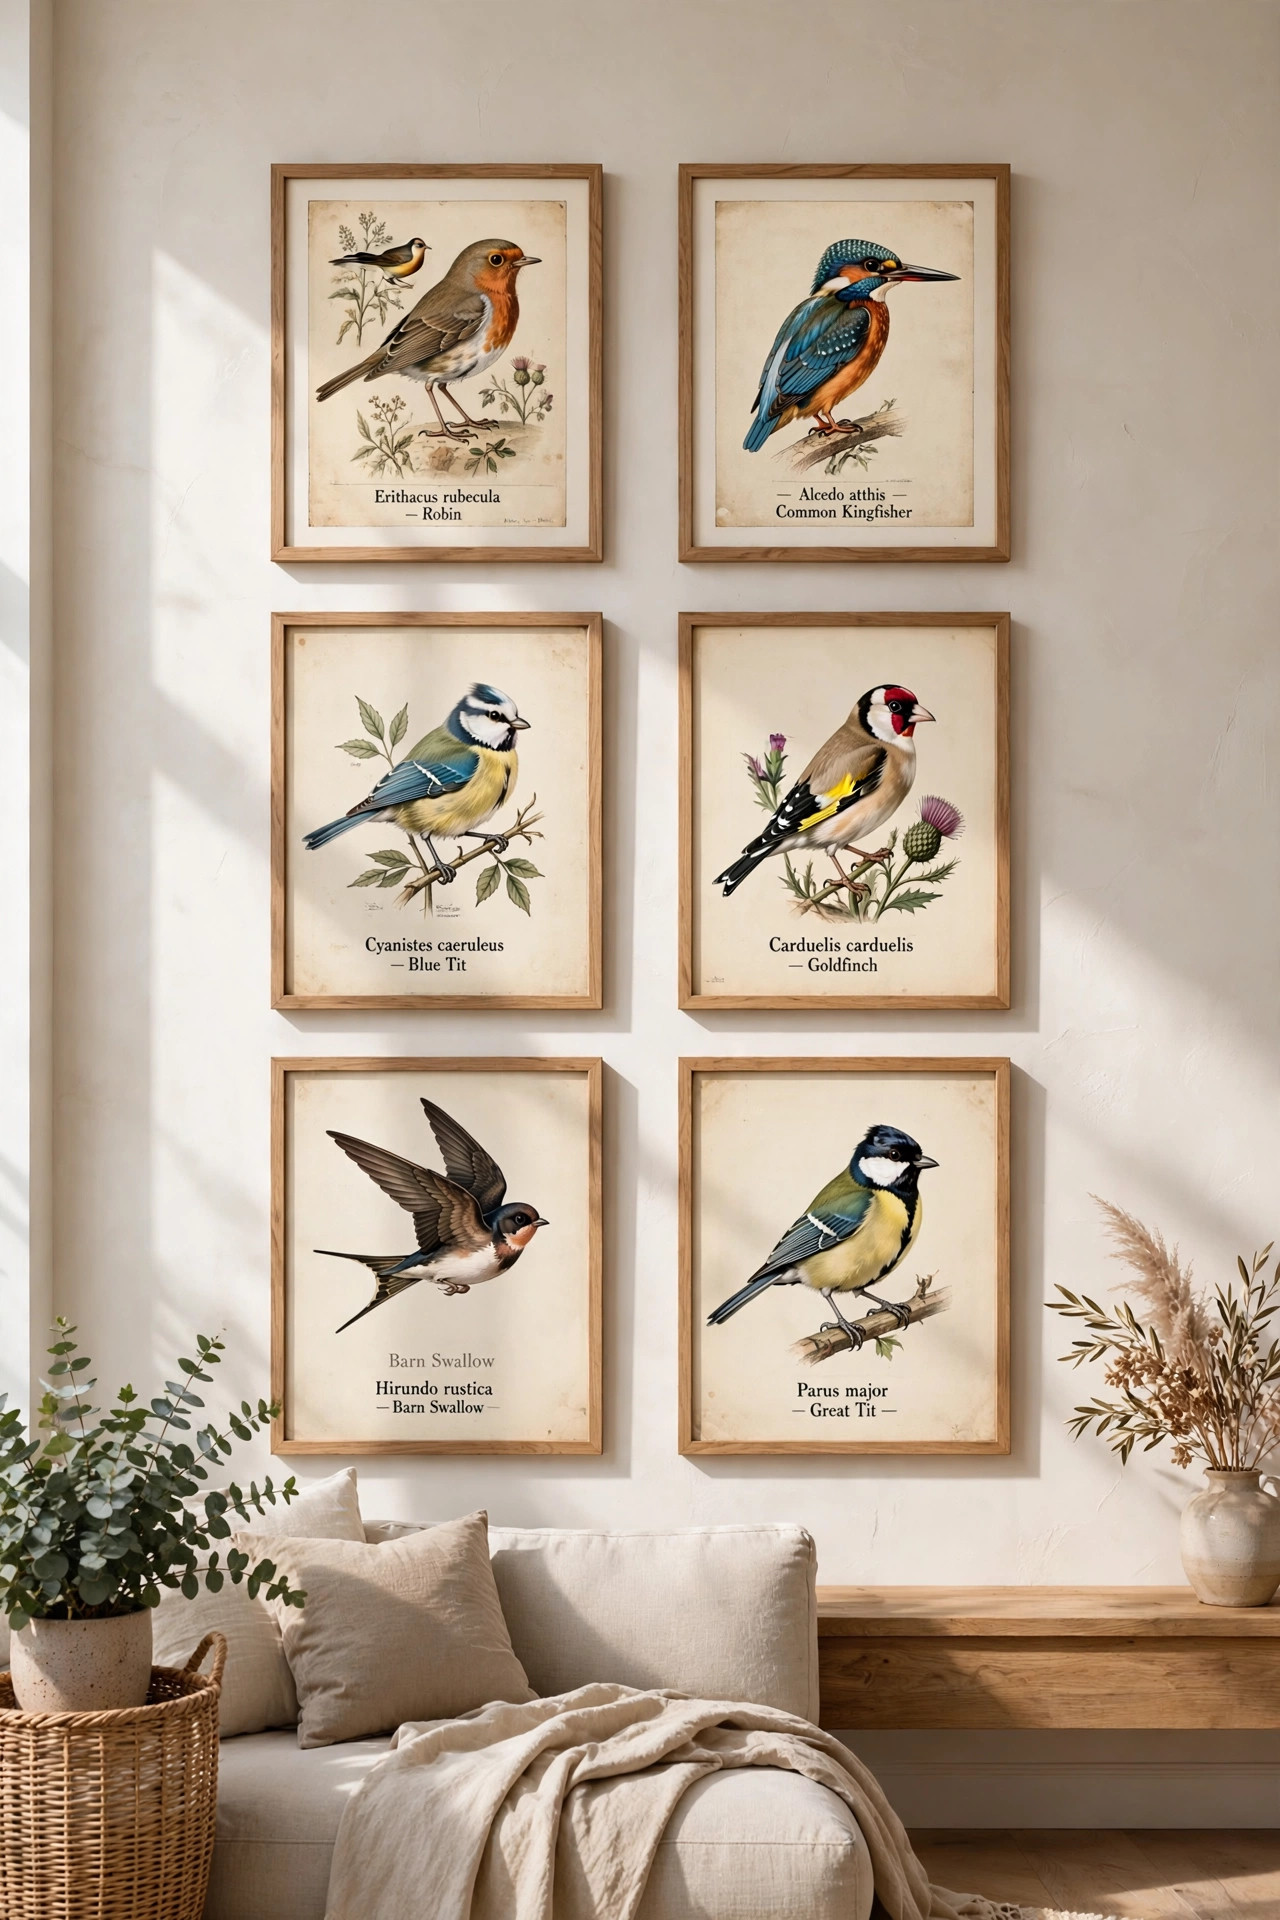
Old books with beautiful illustrations are treasures hiding in every thrift store, usually priced at a dollar or two. I found a falling apart nature guide from the 1960s with the most gorgeous bird illustrations, and its pages now fill six frames in my living room. Each page cost me about thirty cents. The paper has a warm aged tone that no new print can fake, and the illustrations have a charm that modern art often lacks. Dictionary pages, old maps, botanical prints, sheet music, poetry pages with pretty typography, all of it frames beautifully. This is rescue art. You are giving beautiful old paper a second life instead of letting it molder in a basement. There is something deeply satisfying about saving these pages. Every time I frame one, I think about the hands that printed it decades ago and the eyes that read it since. Old paper has a warmth that new prints try to fake and never quite manage. I have started checking the free box outside my local used bookstore, where damaged books often land. Some of my favorite pages came from books nobody wanted, which makes their rescue feel even sweeter. Keep an eye out at estate sales too, where box lots of old books often sell for pocket change.
A word of gentle caution. Do not tear pages from books that are rare or valuable. I only use books that are already falling apart, with broken spines and loose pages. If the book is intact and old, leave it alone or check its value first. For framing, pages work best with a mat, which keeps the paper from touching the glass. Old paper can stick to glass over time, especially in humid rooms, and the mat prevents that. I buy inexpensive frames that come with mats included. If a page is smaller than your frame, center it on a larger piece of cream cardstock first, then mat the whole thing. Old maps deserve special mention. Even a torn corner of a vintage map looks incredible in a frame. Hang a set of pages from the same book together, and the matching paper tone ties the whole display into a cohesive collection. For a striking modern contrast, try floating a vintage page inside an oversized mat with a huge white border. The tiny old illustration surrounded by all that white space looks incredibly chic and gallery like. I did this with a small botanical print in a sixteen inch frame, and it is the most complimented piece in the room. If a page is too fragile to handle, place it between two sheets of glass in a floating frame without ever touching the surface with glue or tape.
20. String Art Monogram
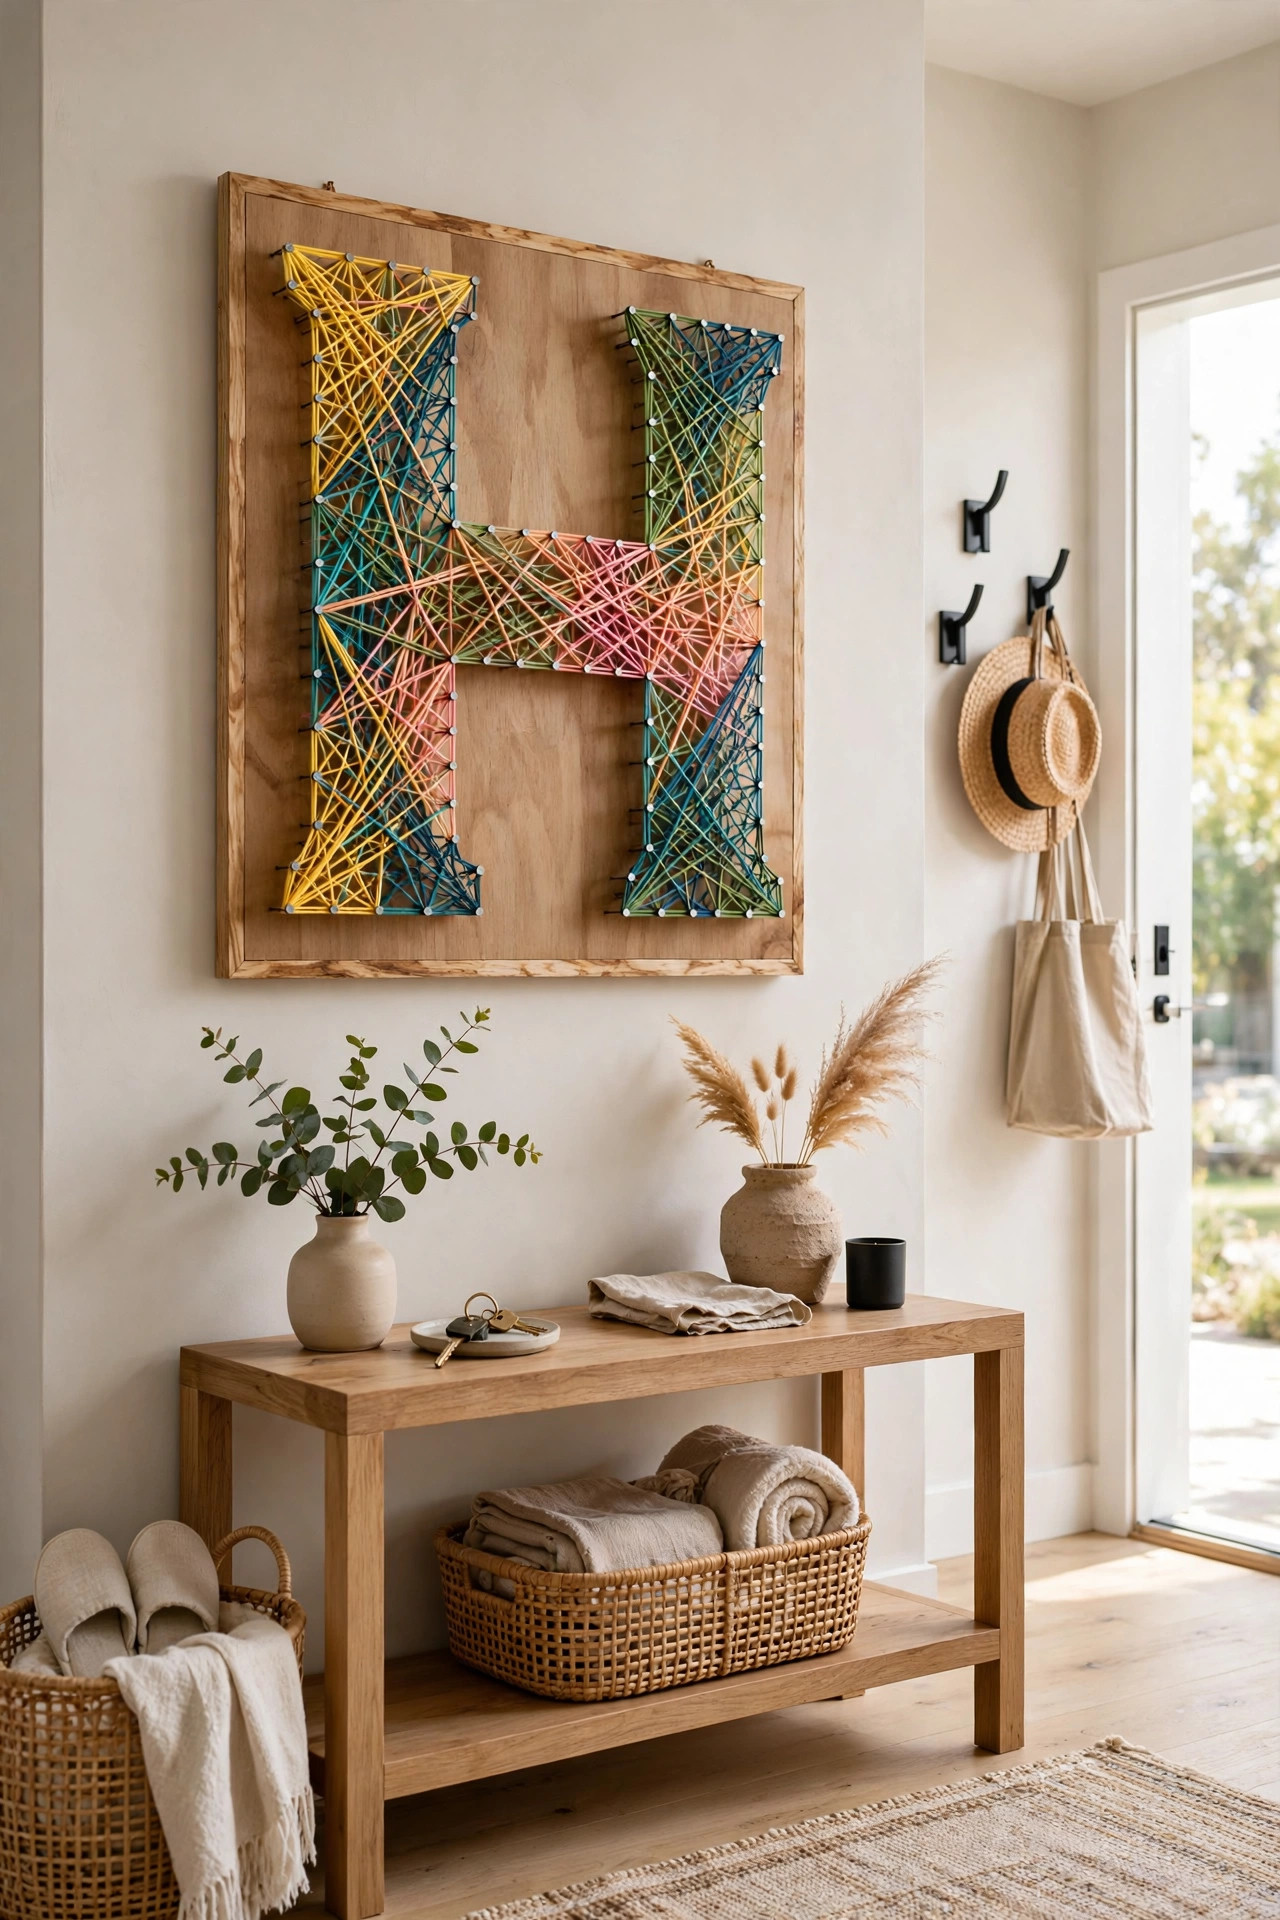
String art looks complicated, but it is just hammer, nails, and string, and the results are stunning. I made a large wooden monogram of our family initial for our entryway, and it stopped every guest at the door for a month. You hammer small nails around the outline of a letter drawn on a stained wood board, then weave colorful string back and forth between the nails until the letter fills in with a web of color. The string catches the light differently from every angle, so the piece seems to shimmer as you walk past. My kids helped with the stringing, which made it a family project, and now they point at it proudly whenever friends visit. What surprised me is how much they loved the hammering part too, with close supervision and safety glasses, of course. My son carefully placed every other nail while I held the board steady, and he still tells people he built it. Projects like this teach kids that beautiful things come from patience and effort, not from stores. The monogram has become more than decor. It is proof on our wall that we can make things together as a family. We now pick a new family craft project every few months.
Start with a smooth board, sanded and stained or painted your background color. Print your letter large on paper, tape it to the board, and hammer small nails every half inch along the outline, right through the paper. Then tear the paper away, leaving a perfect nail outline of your letter. Tie your string to one nail and start weaving. There is no wrong pattern. Go back and forth randomly, loop around the outline, crisscross the middle. The messier the weaving, the richer the final look. That surprised me. My careful first attempt looked stiff, but when I let go and just wove freely, it came alive. Use one color for a classic look, or blend two shades for depth. When the letter looks full, tie off the string and hammer each nail down just a little so the heads sit snug. Hang it with a sturdy sawtooth hanger, because a nail filled board is heavier than it looks. Wear safety glasses while hammering, because nails sometimes bend and fly. For the string, embroidery floss gives you the widest color choices, while thicker crochet thread fills the letter faster with fewer passes. I used a deep teal floss on a walnut stained board, and the contrast is gorgeous. If you want crisp edges on your letter shape, do one final round of string hugging tightly around the nail outline after the random weaving. That clean border makes the whole piece look sharp and deliberate. Take your time with the final tie off, weaving the end under several strands so it never unravels.
21. Painted Basket Wall Display
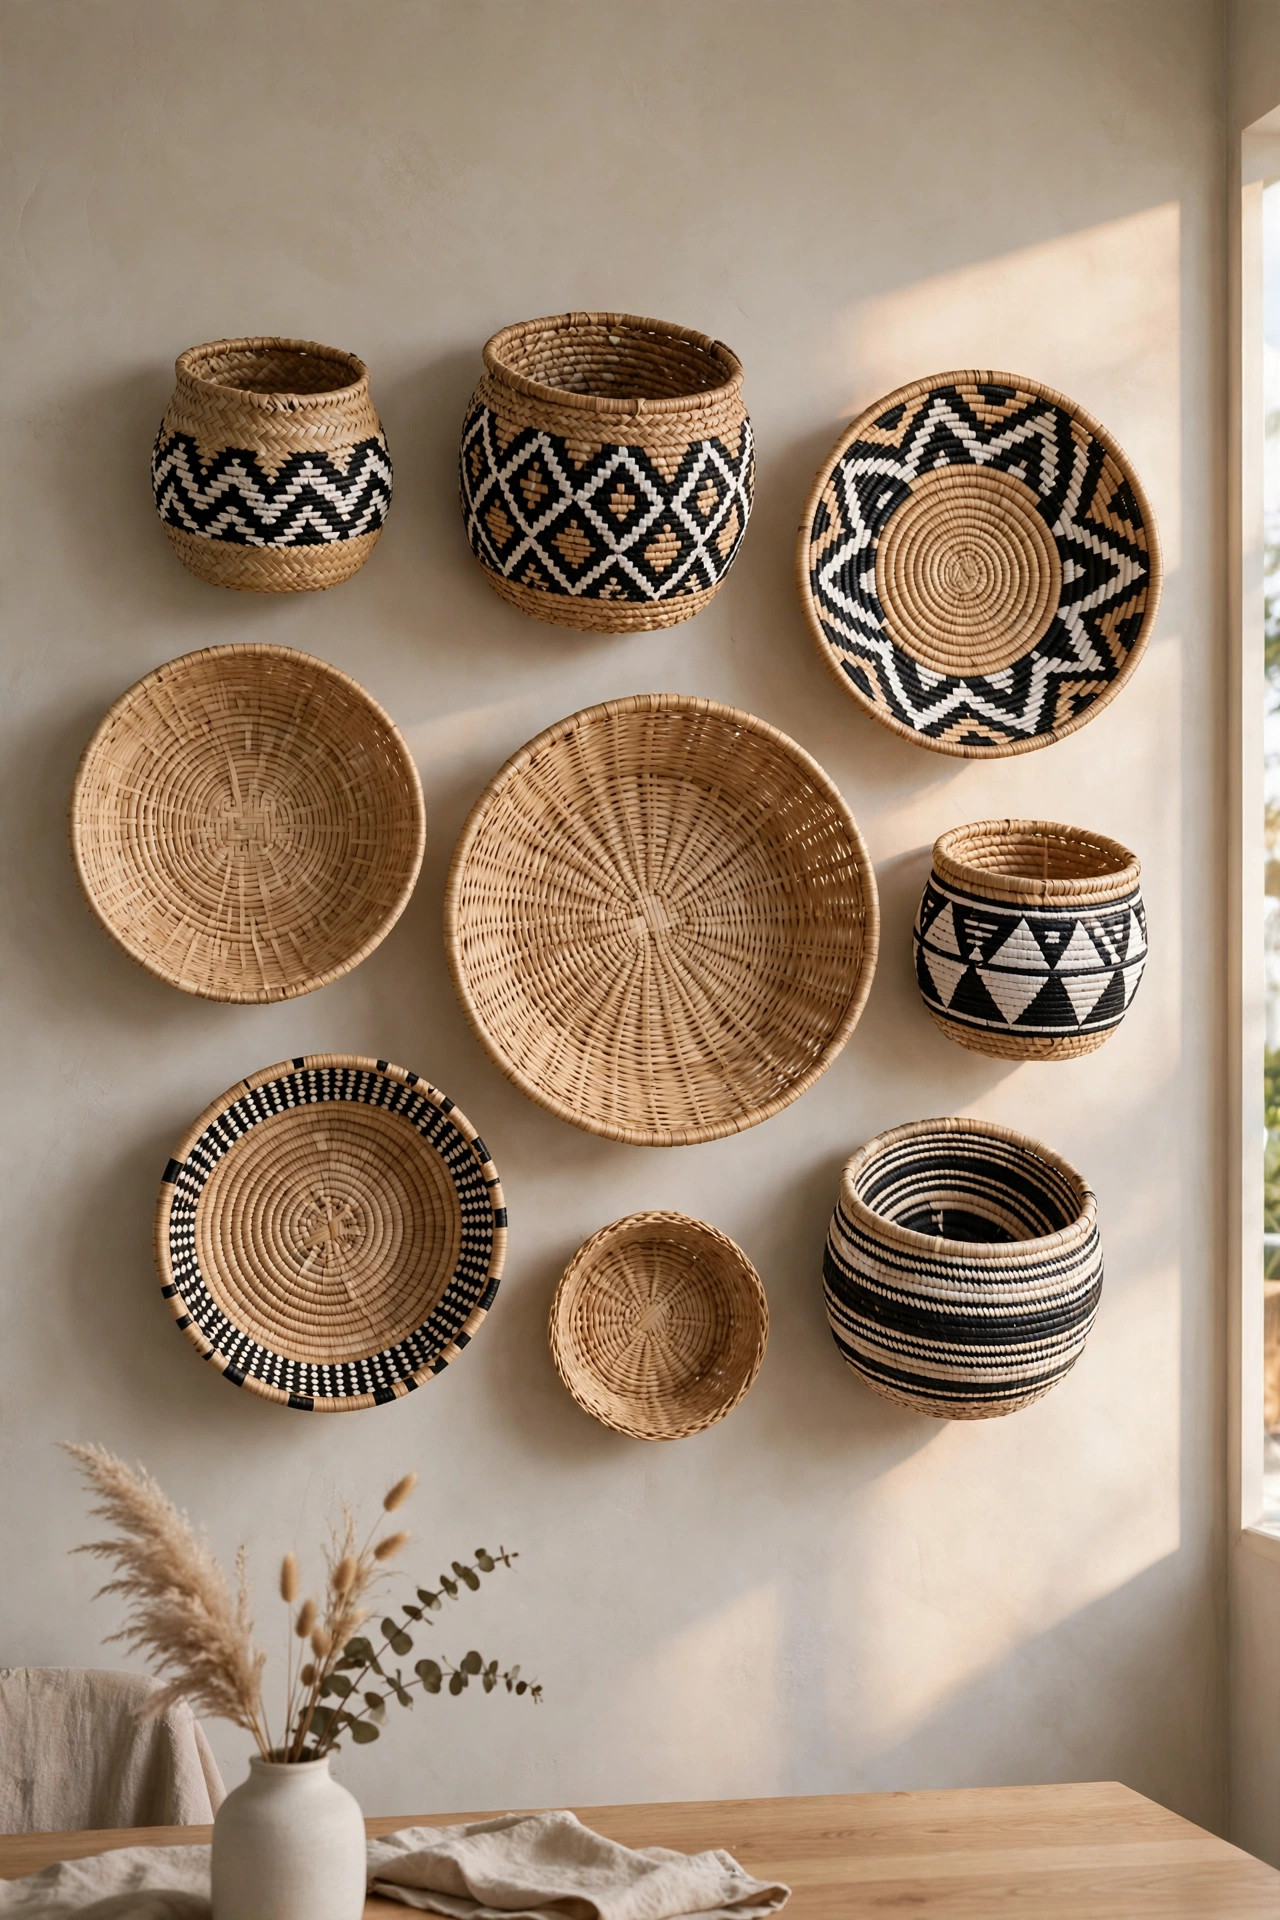
Flat woven baskets hung on a wall create the most gorgeous texture, and this trend looks far more expensive than it is. I covered the wall above my sideboard with nine baskets in different sizes, and the whole room suddenly felt warm and collected, like a home in a travel magazine. I found most of my baskets at thrift stores for a dollar or two each. A few were plain seagrass, a few I painted. The mix of natural and painted is what makes it interesting. Round baskets read as art when they leave the table and hit the wall. Nobody looks at a basket wall and thinks storage. They think style. What I love is how this display works in literally any style of home. In my farmhouse dining room it feels rustic and warm. My friend copied the idea in her modern apartment with all white baskets, and it looks sleek and sculptural there. The baskets themselves do the styling work, so the look adapts to whatever surrounds it. If you move, the whole display comes down in minutes and goes right back up in the new place. Try that with a painted mural. This is commitment free impact at its very best.
Painting some of the baskets is what takes this from nice to stunning. I painted bold black and white patterns on three of mine, simple tribal inspired lines and dots, using acrylic craft paint and a steady hand. The contrast between the painted and natural baskets is the whole design. If freehand patterns scare you, painter’s tape makes perfect stripes and triangles. Tape your design, paint, peel the tape while the paint is tacky, and you have crisp geometric patterns. Hang the baskets with a single nail each, starting with the largest basket slightly off center and building outward. I laid mine on the floor first and took a photo, then replicated the layout on the wall. Vary the sizes and leave a few inches between each basket so every one gets its moment. The shadows the baskets cast on the wall add even more depth, especially in lamplight. This display works beautifully in dining rooms, entryways, and anywhere that needs warmth without color. For hanging, I use a single sturdy nail per basket, driven into a stud wherever possible. Baskets are light, but a whole wall of them adds up, so solid anchors matter. If you are renting, large removable hooks hold medium baskets perfectly and leave no marks. I tested one hook for a month before committing to the full wall, and it never budged. Dust the baskets twice a year with a soft brush or a quick blast from a hair dryer on cool. Woven textures collect dust, but a little maintenance keeps them gorgeous.
22. Dried Branch Wall Sculpture
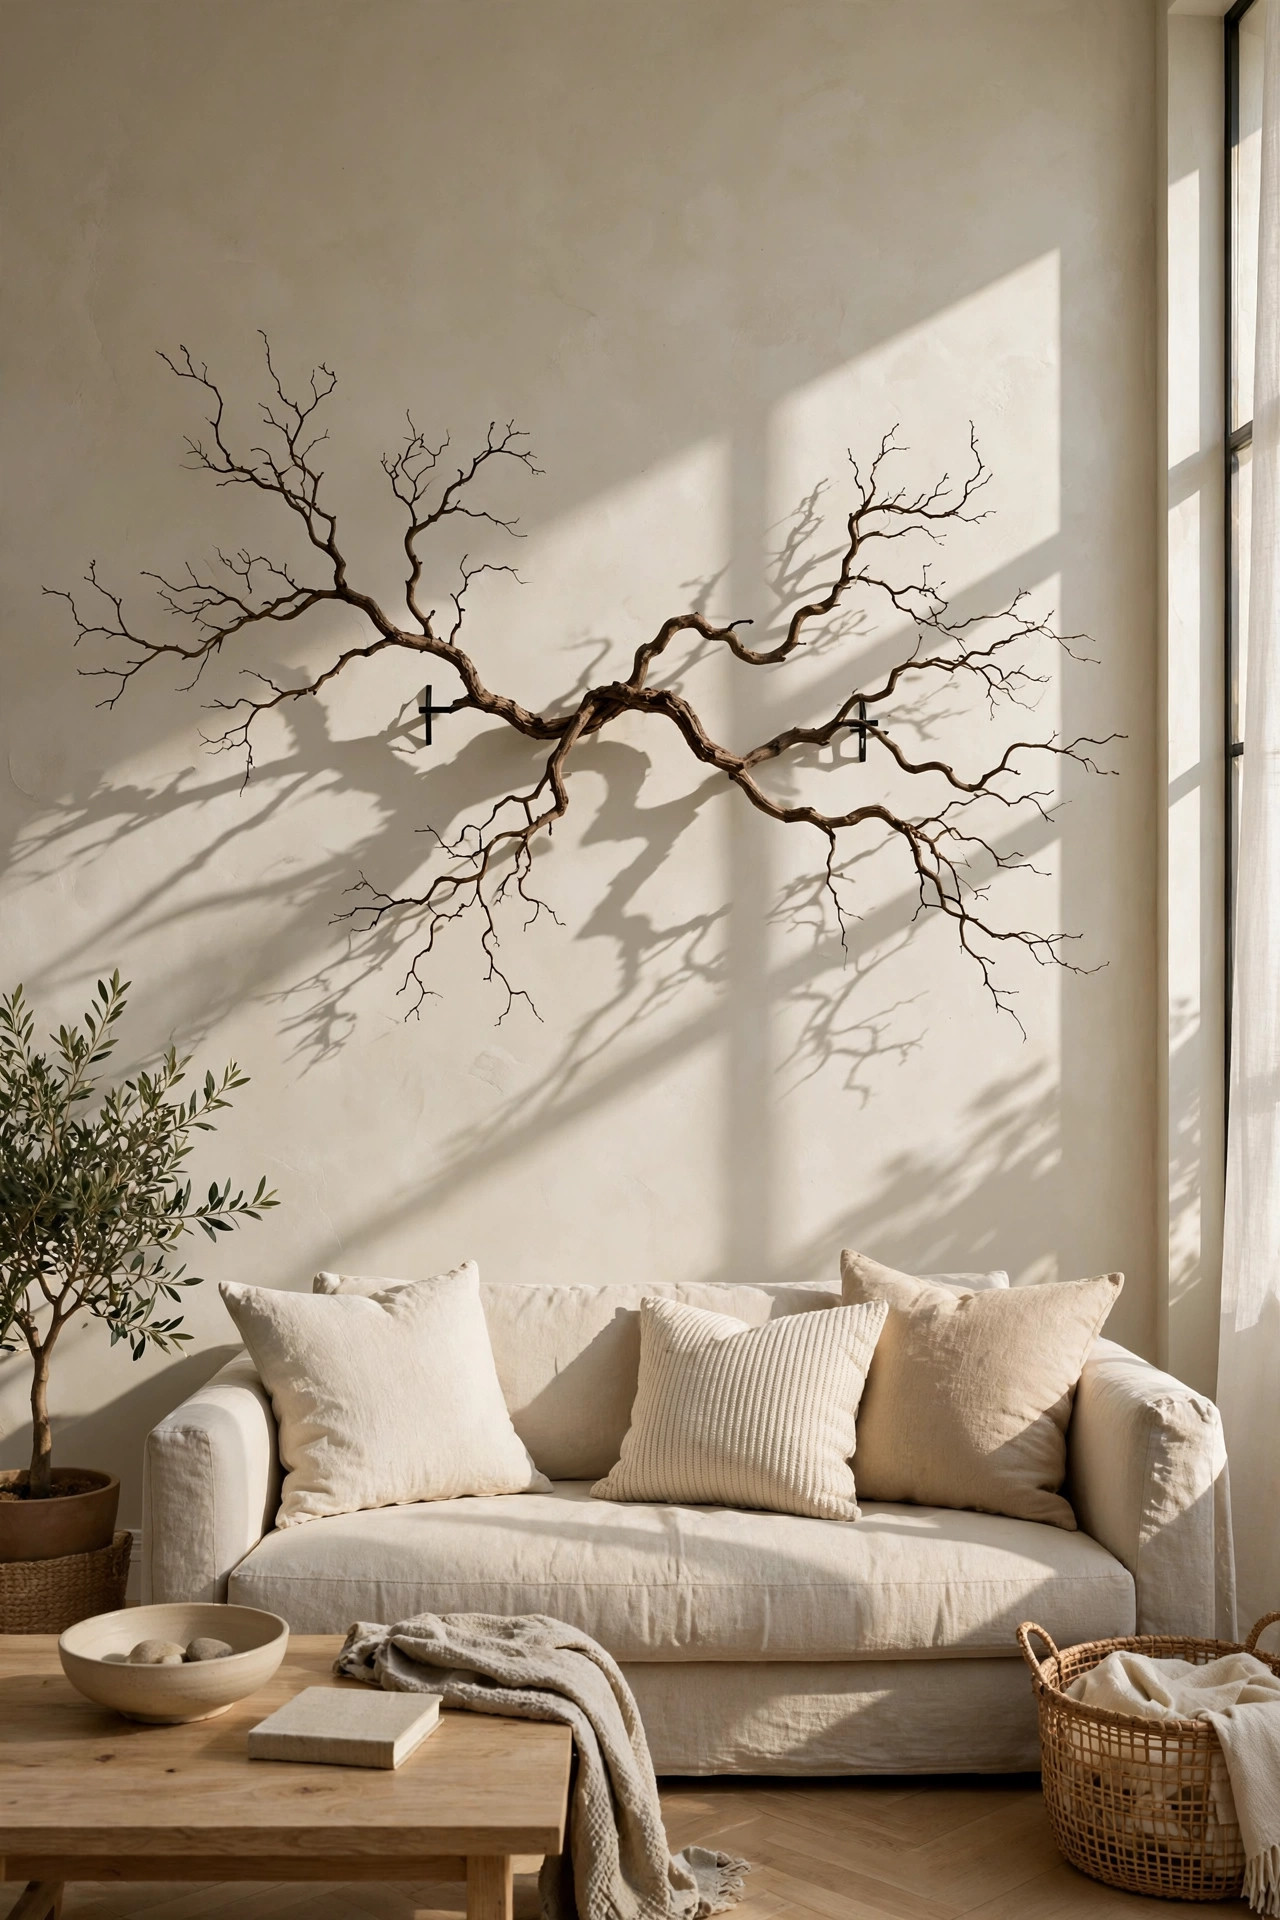
The most dramatic piece of art in my home cost me exactly zero dollars and a walk in the woods. A beautiful bare branch, mounted on the wall like a sculpture, has the presence of a gallery installation. I found a gorgeous twisted branch after a windstorm, all interesting angles and delicate twigs, and mounted it on my living room wall with two discreet brackets. It looks like art that belongs in a museum of natural history. The shadows it casts in afternoon light are half the beauty. Every guest asks about it, and nobody believes it was free. Nature is the original artist, and sometimes the best thing you can do is frame what it already made. I have started noticing interesting branches everywhere now, on walks, in parks, after storms. My family teases me because I cannot pass a good fallen branch without stopping to examine it like a sculpture critic. Once you train your eye, you will see potential art in the most ordinary places. A friend found her branch on a beach vacation, and now her living room holds a permanent souvenir of that trip. Free, meaningful, and completely one of a kind. Start looking on your very next walk outside.
Choosing the right branch matters more than anything else. Look for interesting shapes, twists, forks, and delicate small twigs, but avoid anything rotting or buggy. I soaked mine in the bathtub with a little bleach for an hour, then let it dry in the sun for a week. That kills any hitchhikers and keeps the wood sound. You can leave the bark on for a rustic look or peel it for something more sculptural. I peeled mine and rubbed it with a little wood oil, and the grain glows beautifully. Mount it with two small L brackets screwed into studs, positioned so the branch sits a few inches off the wall. That gap is what creates the gorgeous shadows. If you want, spray the whole branch matte black or white for a more modern look. I kept mine natural, but a black branch against a white wall is striking. Hang a small spotlight or picture light above it if you really want drama after dark. Battery operated picture lights are perfect for this because they need no wiring and many come with timers. I set mine to glow every evening from six to ten, and the branch becomes a completely different piece of art at night. The long shadows stretch across the wall like something from a theater set. If your branch is especially large, have someone help you lift it into the brackets. An awkward heavy branch and a ladder is not a solo job. Step back, dim the main lights, and enjoy your free masterpiece.
Conclusion
Here is what I want you to take away from all of this. Your walls do not need expensive art. They need your art, the wobbly, handmade, slightly imperfect kind that carries a story. Every idea on this list started as nothing, a blank canvas, a bare wall, a pile of scraps, and became something worth looking at because someone sat down and tried. That someone can be you, this weekend, with whatever you already have in the house. You do not need permission, you do not need talent, and you definitely do not need to spend a fortune.
So pick the one idea that made you think, I could do that, and start there. Maybe it is the fabric panels, maybe the sponge painting, maybe just framing something your kid drew. Hang it crooked the first time if you must. I certainly did. Then step back, look at what you made, and feel that little lift that comes from filling a blank wall with something of your own. That feeling is the whole point. Your home is already full of stories. Now let the walls tell a few of them too.
FAQs
How much does DIY wall art really cost?
Most of the ideas on this list cost under ten dollars, and several cost nothing at all. Fabric panels, pressed leaves, painted branches, and framed book pages use materials you probably already have or can find for free. Your biggest expenses will be frames, which you can buy cheap at dollar stores and thrift shops, and basic supplies like paint and glue. Even if you buy everything new, a single project rarely costs more than fifteen dollars. Compare that to store bought art, where one framed print can easily cost fifty dollars or more, and the savings are enormous.
What basic tools do I need to get started?
You need far less than you think. A hammer, a level, a tape measure, and a stud finder will handle nearly every hanging job on this list. For making the art itself, add scissors, a craft knife, a few paintbrushes, and a hot glue gun. That small kit covers fabric panels, painted canvases, wreaths of dried flowers, stenciled banners, and most everything else here. Buy tools as projects demand them rather than all at once. I built my whole toolkit one five dollar purchase at a time, and I have never regretted a single one.
How do I hang heavy DIY art so it stays put?
Always anchor into a wall stud when you can, using a stud finder to locate the solid wood behind your drywall. For heavy pieces like wood signs and branch sculptures, use two screws into studs or heavy duty wall anchors rated for the weight. My midnight frame crash taught me never to trust sticky strips on textured walls or for anything heavier than a small frame. When in doubt, choose hardware rated for twice the weight of your piece. A two dollar anchor is cheap insurance against a two in the morning disaster like mine.
Can I make good wall art if I cannot draw or paint?
Absolutely, and most of the ideas on this list require zero drawing skill. Fabric panels, framed wallpaper, pressed leaves, photo ledges, and basket walls need no artistic ability at all, just an eye for what you like. Sponge painting, stenciling, and string art all use techniques that look impressive but are genuinely foolproof. The secret the art world does not advertise is that grouping, framing, and color choices matter far more than technique. Put anything in a nice frame with a mat and it instantly looks intentional.
What is the easiest way to arrange a gallery wall?
Lay everything on the floor first and arrange it there, where moving things costs nothing. Start with your largest piece slightly off center, then build outward, keeping two to three inches between frames. Take a photo of the layout you like, then transfer it to the wall one piece at a time. Cut paper templates the size of each frame and tape them to the wall to test the arrangement before you hammer a single nail. This extra twenty minutes of planning saves you from a wall full of holes you have to patch later.
How do I make cheap DIY art look expensive?
Three things make the biggest difference. First, use matching frames or a consistent color palette so the display looks curated instead of random. Second, add mats inside your frames, because that white border instantly makes anything look like gallery art. Third, hang pieces with care, level, evenly spaced, and at eye level, since sloppy hanging cheapens even beautiful art. Good lighting helps too. A five dollar picture light or a well placed lamp makes your DIY pieces glow. Expensive art is mostly about presentation, and presentation is free.