

Walk into any room that feels finished and you will notice something right away. One wall is doing all the talking. It might be warm wood, or old brick, or a wall covered in art, and it gives the whole space a clear focal point that pulls your eye in.
An accent wall does not have to mean a bucket of paint and a roller. Some of the prettiest ones use texture, pattern, and real materials that you can actually touch. Those surfaces catch the light in a way flat paint never can, and they make a room feel layered and complete.
Below are 18 ideas that go beyond a basic painted wall. Each one is doable on a normal budget, many are weekend projects, and every single one makes a room look pulled together. Find the one that fits your style and give it a try.
1. Reclaimed Wood Plank Wall
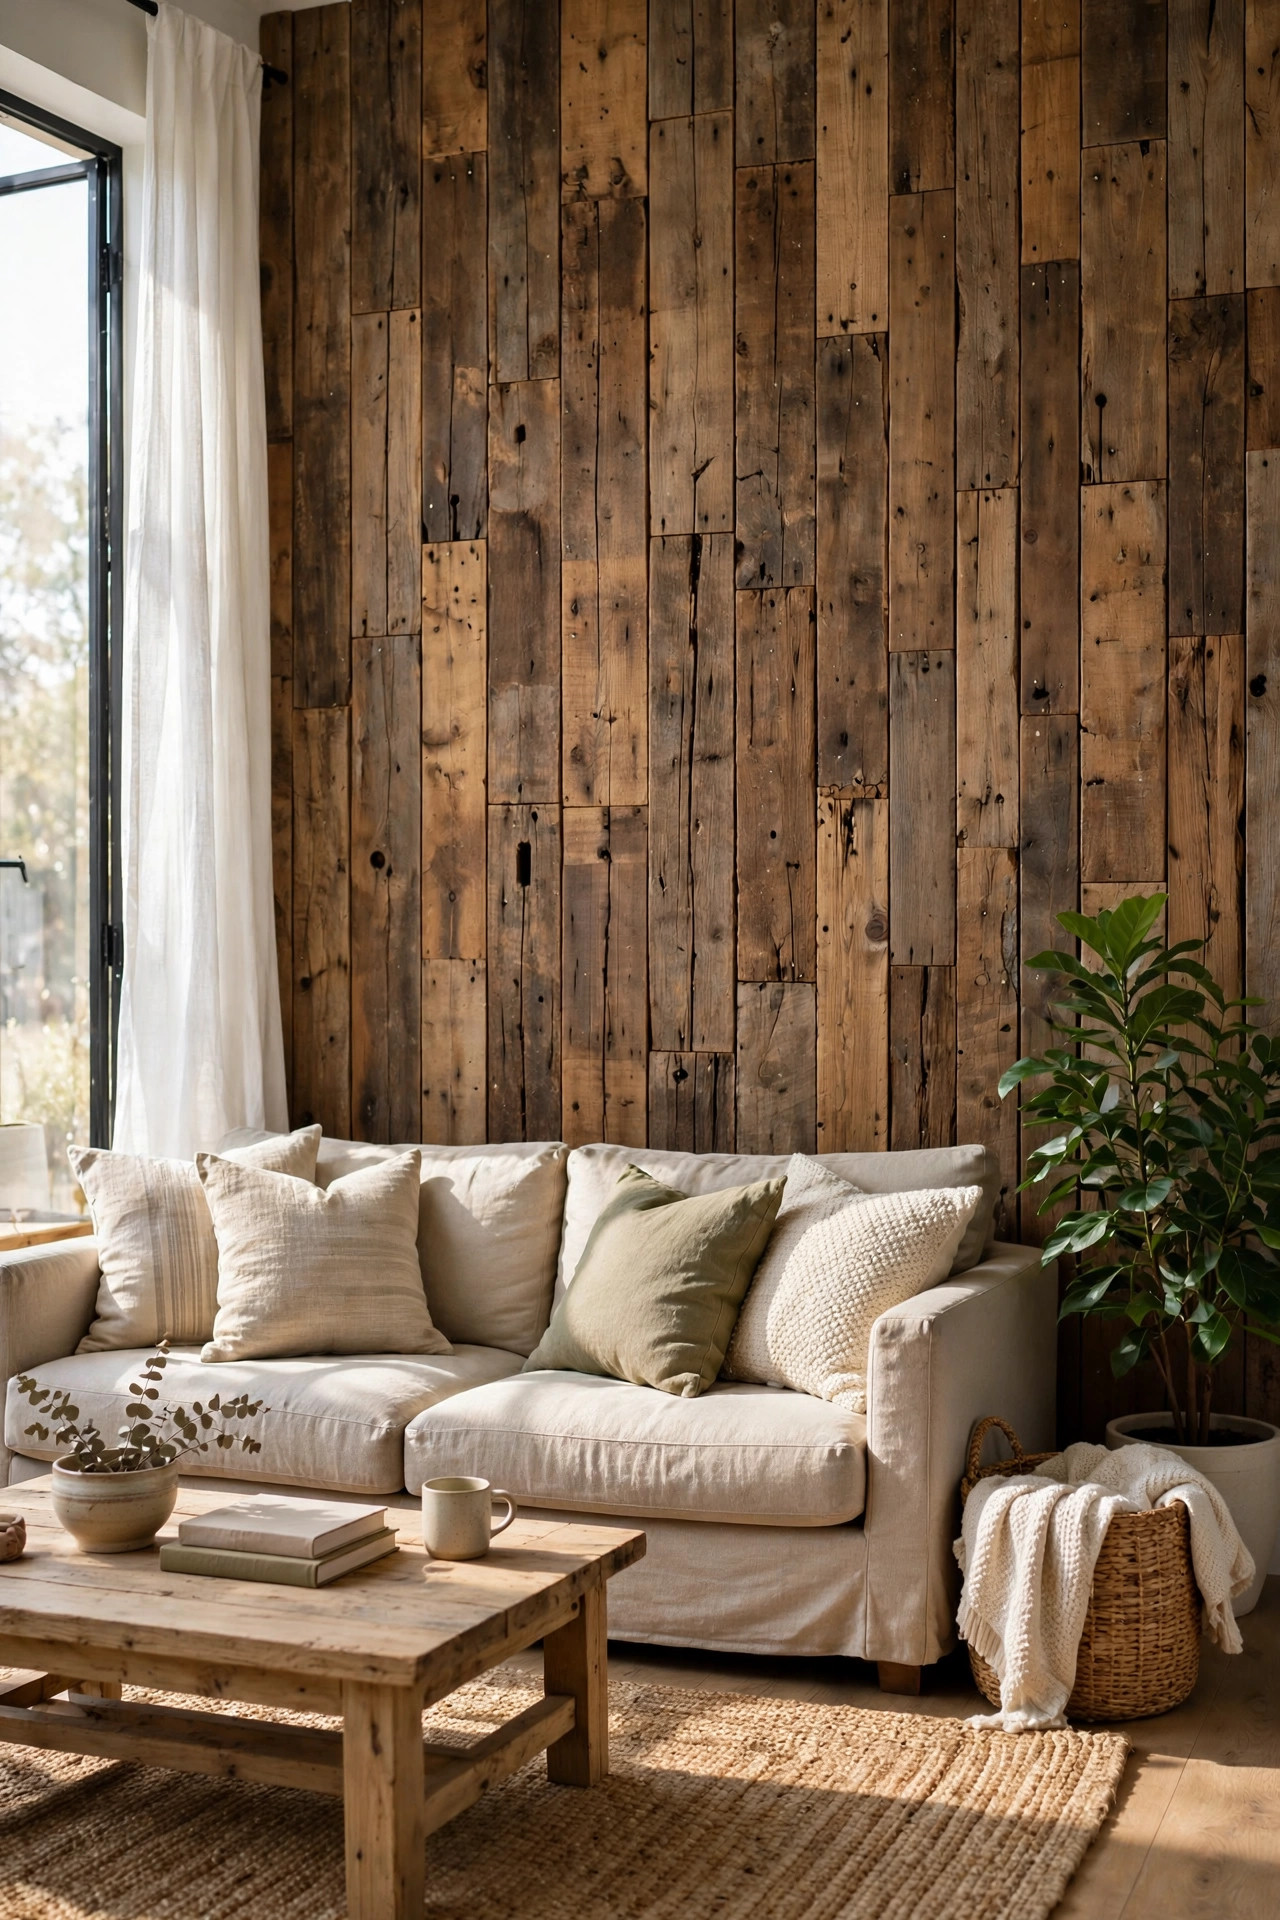
There is something about old wood that new materials just cannot copy, no matter how clever the factory finish. Reclaimed planks carry nail holes, saw marks, knots, and color changes that tell a quiet story, and when you cover one wall with them, the whole room gets warmer in an instant. You can buy genuine reclaimed barn wood from salvage yards and architectural reuse stores, where each batch has its own history and mix of tones. If that is out of budget, new pine boards stained in three or four mixed tones will fake the aged look surprisingly well. Run the planks horizontally to make a narrow room feel wider, or go vertical to draw the eye up and make a low ceiling feel taller. Either direction works, because the texture itself does the decorating for you, and you will not need much else on that wall. A wood plank wall looks wonderful behind a bed, where it replaces a headboard, or behind a sofa in the living room, or in a dining room where you want a cozy lodge feeling without going overboard. Keep the rest of the walls calm and simple so the wood stays the star. Start your hunt at salvage yards, Habitat ReStores, and local online listings, where old barn wood and fencing often sells for a fraction of new lumber prices. Mix boards from two or three different sources so the tones vary naturally instead of looking like one flat stain color. Before you buy, check that the wood is dry, solid, and free of active insects, and skip any boards that smell musty or crumble at the edges. If you love the look but not the hunt, many lumber yards now sell new boards pre finished in weathered gray and brown tones. Keep the other wood in the room, like floors and furniture, in a similar warmth family so everything feels related and calm.
Installing a plank wall is simpler than most people expect, and it is a classic weekend project that two people can finish in a day. Most homeowners attach thin boards directly to the drywall with construction adhesive plus a few finishing nails driven into the studs for real holding power. Start at the bottom and work your way up, staggering the end seams like brickwork so the pattern looks natural instead of lined up. Leave a tiny shadow gap between boards for a rustic feel, or butt them tight together for a cleaner modern look. Sand any rough spots or splinters before you hang each board, and seal the finished wall with a clear matte polyurethane to keep dust out of the grain and make cleaning easy. The whole job usually costs less than a high end wallpaper, and unlike paint, it adds real depth you can feel with your hand. Once it is up, decorate the wall sparingly, because the wood already gives the eye plenty to enjoy. Good lighting takes a wood wall from nice to truly stunning, so aim a picture light or a pair of small wall washers across the surface to bring out the grain. Keep furniture pulled a few inches off the wall so the texture reads clearly and dust does not collect in the grooves. For styling, less is truly more here, so one large round mirror or a single piece of bold art is plenty. Dust the wall every few months with a dry microfiber cloth or the soft brush attachment on your vacuum. If a board ever loosens over time, a dab of construction adhesive behind it plus one finishing nail will put it right back.
2. Vertical Shiplap
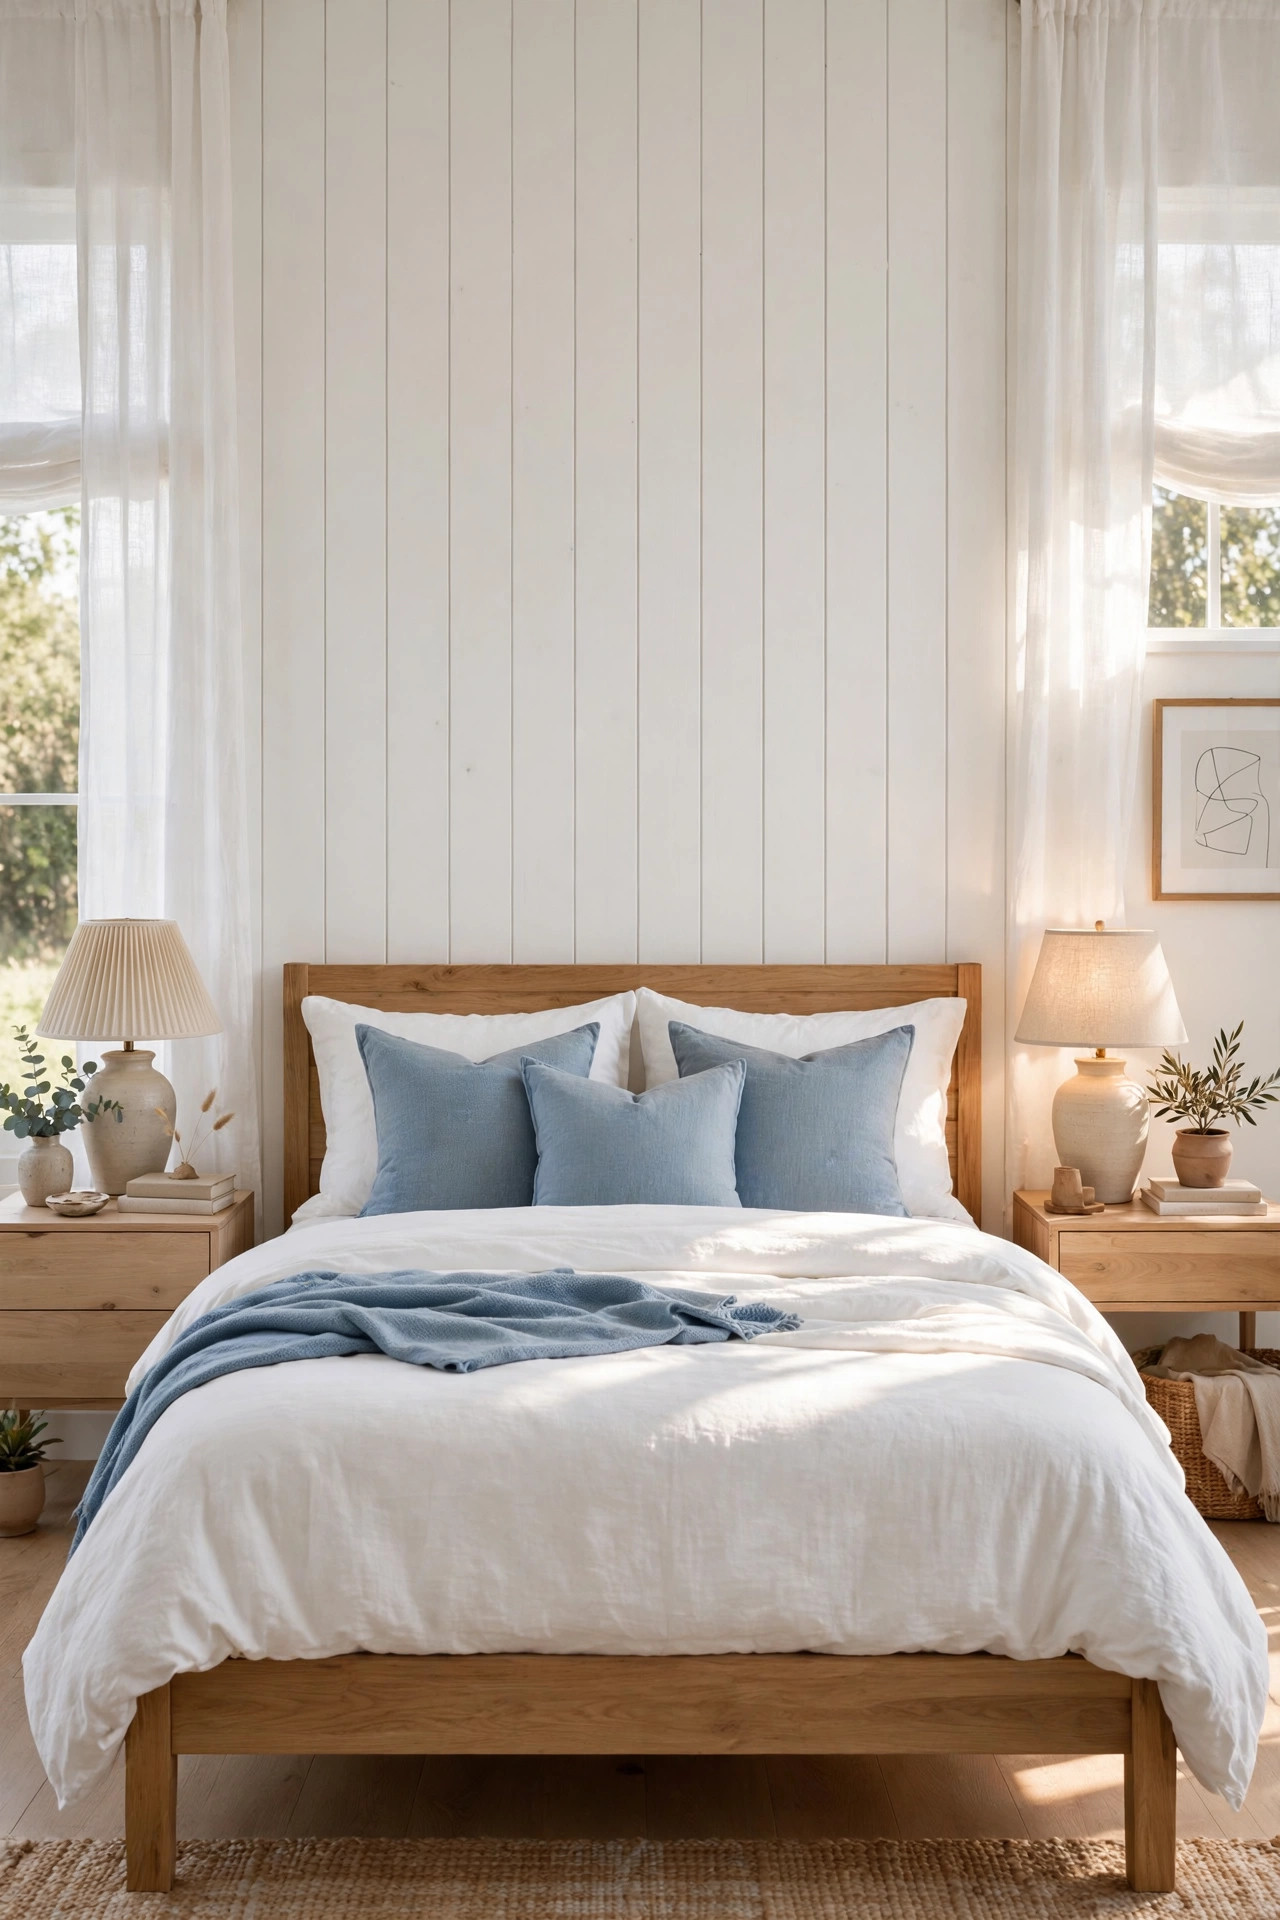
Shiplap has been popular for years, but most people only picture the horizontal kind you see in farmhouse kitchens and television makeovers. Turning the boards vertical changes the whole feeling of the material and makes it feel fresh again. Vertical lines pull the eye upward, which makes low ceilings feel taller and small boxy rooms feel less cramped. It is a small change with a big payoff, and it works beautifully in bedrooms, bathrooms, hallways, and entryways, anywhere a little height would help. Paint it white or warm cream for a clean coastal look, or go dark with charcoal, navy, or deep green for something moodier and more dramatic. The narrow grooves between the boards create soft shadows that shift as the daylight moves across the wall, so the surface never looks flat or boring the way plain drywall does. This vertical trick shines brightest in rooms that need height the most, like basements, hallways, and small bathrooms where every inch of perceived space counts. Try it behind a bathroom vanity or in a busy mudroom, where the texture stands up to daily life far better than flat paint. For a bolder designer move, paint the shiplap, trim, and ceiling all the same deep color, a technique called color drenching, which makes the grooves read as pure texture. Pair it with simple unfussy furniture so the wall remains the main event. Even renters can fake the look with removable peel and stick panels that convincingly mimic the grooves.
You can buy real shiplap boards with the classic rabbeted edge, or use simple plywood strips spaced evenly for nearly the same look at a much lower price. Installation is straightforward because you are nailing straight boards to the wall in one long row. Use a level on the very first board, since every board after it will follow that line, and drop in a small spacer block to keep the gaps even all the way across the wall. Fill every nail hole with wood filler, caulk the edges where the boards meet the ceiling and trim, and then paint everything one single color so it reads as one clean surface. The paint job is what makes inexpensive boards look expensive, so do not rush it, and plan on two full coats with light sanding between them. When it is done, you get a wall with quiet texture that plays well with almost any furniture style, from modern to traditional to coastal. In bathrooms or laundry rooms, choose moisture resistant boards or PVC shiplap so steam and splashes never cause swelling or warping. A satin or semi gloss paint finish wipes clean easily and highlights the groove shadows better than flat paint. Budget wise, simple plywood strips cost a fraction of milled shiplap and look nearly identical once caulked and painted. Borrow or rent a brad nailer if you can, because hand nailing dozens of boards gets old very fast. Work from the top down so each new board rests on the last, and keep a damp rag handy to wipe away caulk smears before they dry.
3. Board and Batten Grid
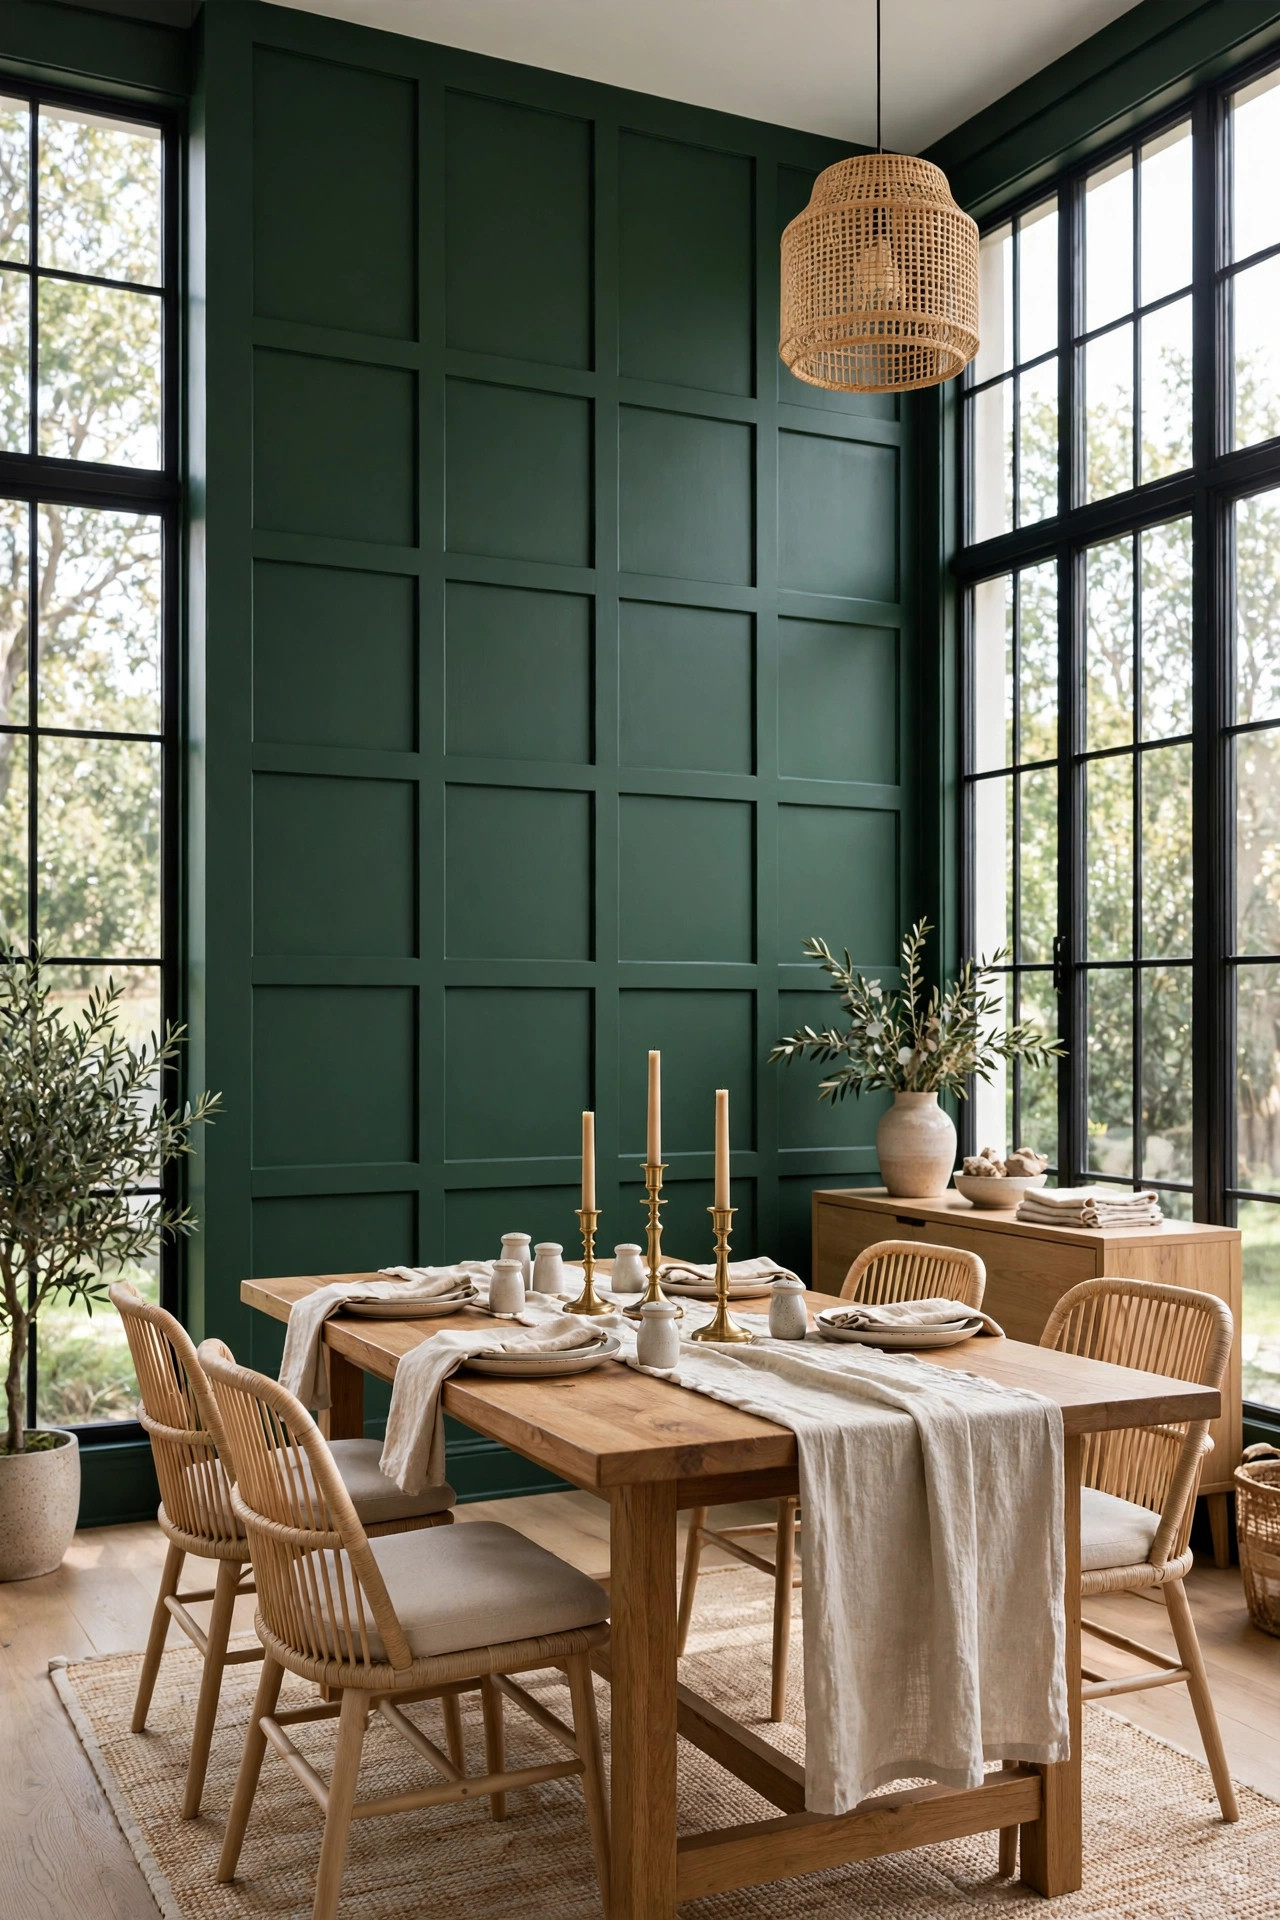
If you love the look of paneled walls in old homes but do not want a full renovation, a board and batten grid gives you that feeling for very little money. Thin strips of wood are applied over the existing wall in a grid pattern, usually even squares or rectangles, and then the whole thing gets painted one color. The result looks like classic wainscoting that runs from floor to ceiling, and it adds instant architecture to a plain flat wall that had nothing going for it. It is especially pretty in dining rooms, nurseries, and home offices, where it makes the space feel tailored and finished rather than builder grade. White is the timeless choice that suits every style, but a deep color like navy, forest green, or even black turns the grid into a real statement wall with presence. Box size matters more than people realize, so go bigger in large rooms and smaller in cozy ones to keep the proportions feeling right. A good rule of thumb is boxes roughly as tall as they are wide, somewhere between eighteen and thirty inches per side. You can also run the grid only two thirds up the wall with a chair rail on top, which gives the classic wainscoting look for less money and less weekend work. Inside the boxes, some people add wallpaper or a contrasting paint color for extra interest, though a single color always looks the most tailored. Sketch your plan on paper first and live with the drawing for a day before you cut a single board.
The project is mostly measuring and cutting, so a little patience goes a long way toward a professional result. Plan your grid on paper first, aiming for boxes that are roughly the same size, and mark the wall lightly with a pencil before you cut anything. Cut thin MDF or pine strips to length, attach them with construction adhesive and brad nails, and fill every nail hole before you even think about painting. Caulk along every edge where the strips meet the wall, because those crisp clean lines are what sell the finished look and hide any small gaps. Two coats of paint in a satin or eggshell finish will make the grid look like it was always part of the house. The whole wall usually takes one weekend and costs less than a nice area rug, yet it changes the room as much as buying new furniture would. The only power tools you truly need are a saw for cutting the strips and a nail gun for attaching them, and both can be rented cheaply for a single weekend. A miter box and a simple hand saw work fine if you prefer quiet tools, since every cut here is a basic straight ninety degree angle. Choose a satin sheen paint because it highlights the grid lines beautifully and stands up to everyday bumps and scuffs. Expect the measuring and planning to take longer than the actual nailing, which is completely normal for this project. Invite a friend for hanging day, because an extra pair of hands makes holding long strips level so much easier.
4. Limewash Finish
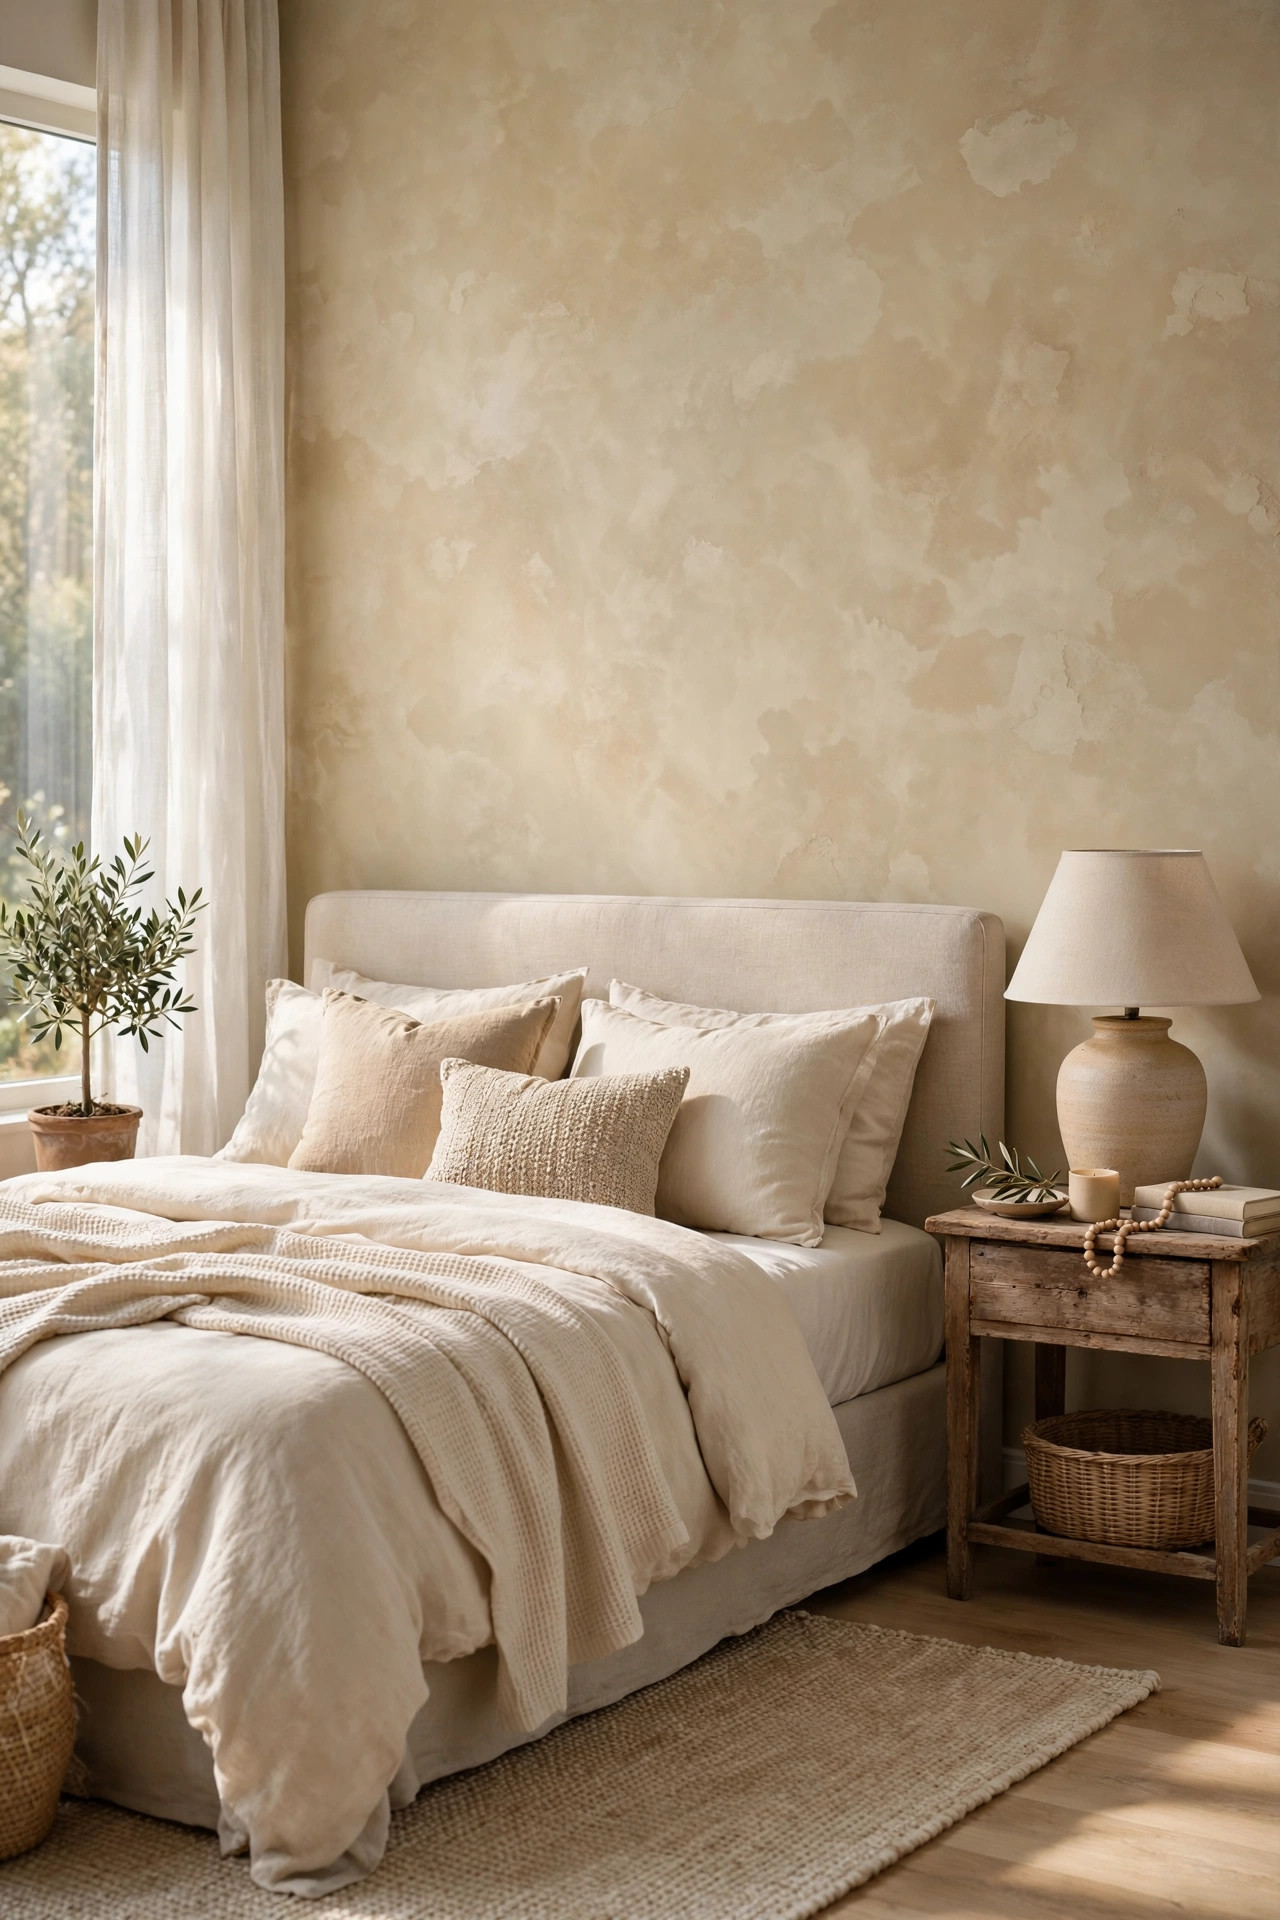
Limewash looks like paint from across the room, but up close it is a completely different animal with a life of its own. It is made from crushed limestone, and it dries with soft cloudy movement that no roller or brush technique with regular paint can fake. The finish has real depth and variation, with lighter and darker patches that seem to shift as the light changes through the day. It gives walls an old European plaster feeling that works beautifully in bedrooms, living rooms, and dining spaces where you want calm with character. Because the color is never perfectly even, it kindly hides small wall flaws and patch marks instead of showing them off, which makes it very forgiving in older homes. Choose warm whites, soft beiges, or muted earth tones like clay and stone for the most natural and timeless look, and keep the other walls simple so the texture stands out. You can buy ready made limewash from specialty paint companies, or mix your own from hydrated lime and natural pigments if you enjoy a hands on approach. Always test your color on a large sample board first and view it in morning, noon, and evening light, because limewash shifts noticeably through the day. It suits renters better than you might think, since a coat of primer and regular paint covers it completely when you move out. Avoid very dark colors for your first attempt, because lighter tones show off the cloudy movement most gracefully. One single accent wall is the perfect low risk place to try it before committing to a whole room.
Applying limewash is different from regular painting, but it is not hard once you learn the basic motion. You brush it on in loose crisscross strokes with a large block brush, working in small sections and always keeping a wet edge so you do not get hard lines. The cloudy effect comes from those overlapping strokes, so do not try to make it perfect, because perfect would actually ruin the look you are after. Most walls need two coats for full depth, and the color always dries lighter than it looks when wet, so test a patch and let it dry fully before you judge it. Limewash is naturally breathable and very low odor, which is a real plus if you are sensitive to paint fumes or painting a bedroom you sleep in that night. The result is a wall that feels soft and alive, like old plaster in a villa, and it photographs beautifully in natural daylight. Touch ups are wonderfully easy with limewash, because fresh strokes melt right into the cloudy finish instead of flashing like regular paint touch ups do. Let the first coat dry a full day before deciding whether you even need a second, since the true color only appears when fully dry. Clean your big block brush with plain water immediately after use, because dried limewash ruins bristles very fast. Work in natural daylight whenever possible so you can see the true variation developing as you go. Step back every twenty minutes to check the overall cloud pattern, and resist the urge to overwork any one spot into flatness.
5. Grasscloth Wallpaper
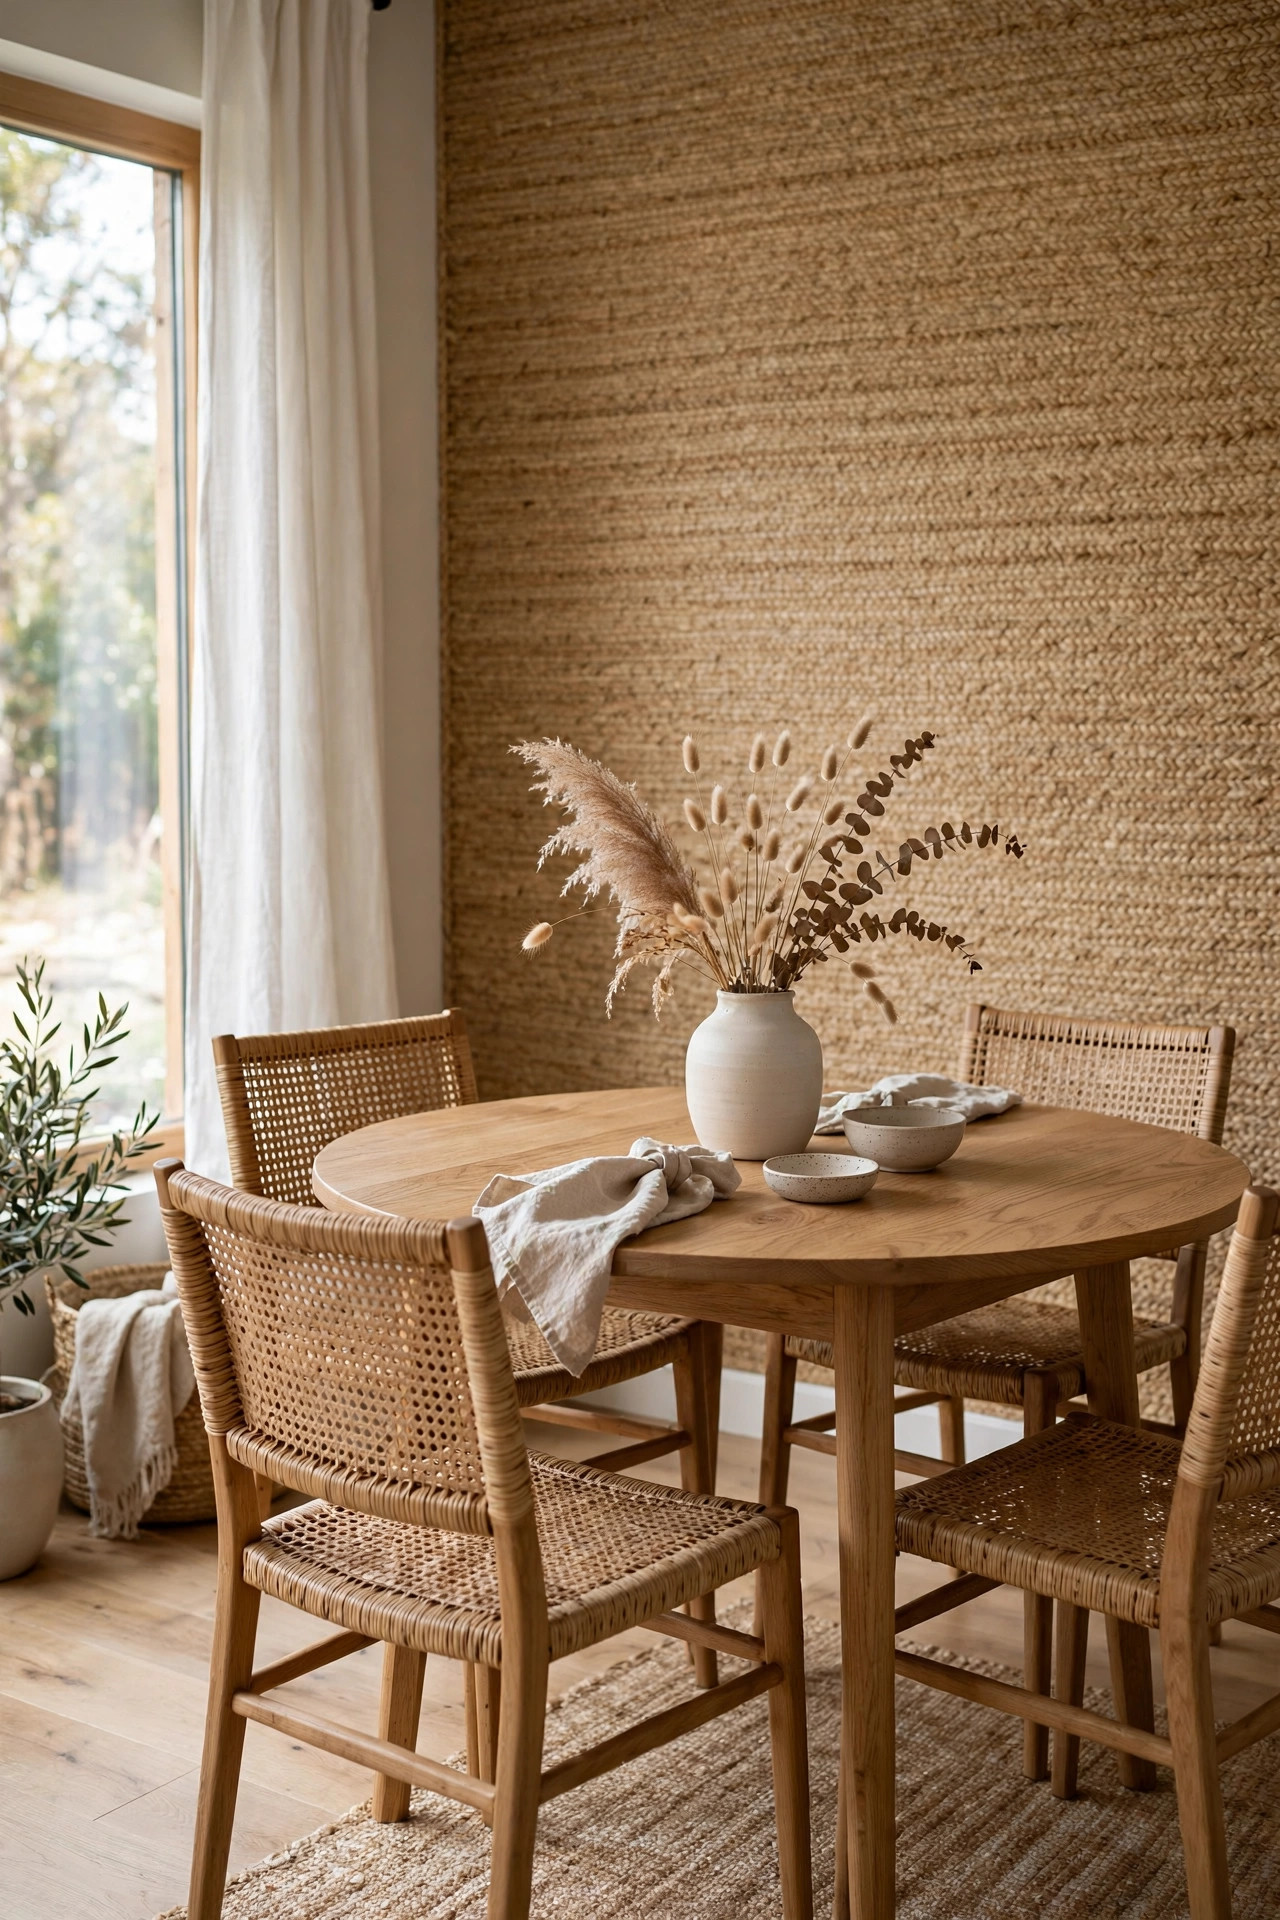
Grasscloth is wallpaper woven from natural fibers like jute, sisal, seagrass, and hemp, and it brings a warmth that printed paper simply cannot match. Each roll has slight color variation and visible texture, so the finished wall looks handcrafted rather than mass produced. It is a favorite of interior designers for bedrooms and dining rooms because it makes a space feel calm, collected, and quietly expensive without any pattern at all. The neutral tones work with almost every color scheme, from warm whites and creams to deep moody hues on the surrounding walls. Up close, the woven fibers catch the light and give the surface a gentle shimmer that changes as you move through the room. It is the kind of wall people touch when they walk past, because texture you can feel is deeply satisfying. Grasscloth comes in natural undyed tones as well as soft dyed colors like misty blue, warm gray, and pale gold. Designers love it in dining rooms where candlelight plays across the fibers, and in bedrooms where the texture feels calm and restful behind the bed. Pair it with simple linen curtains and solid wood furniture to build a complete natural material story in the room. Because every roll is slightly different, buy all your rolls at once from the same dye lot to avoid surprises. The subtle variation between installed panels is a feature to celebrate, not a flaw, so embrace the handmade character.
Hanging grasscloth takes more care than regular wallpaper, so many homeowners hire the job out, but a patient do it yourself attempt is absolutely possible. The paper is thicker and less forgiving than standard rolls, so the wall underneath must be smooth, clean, and primed before you start. Panels are hung edge to edge with no overlap at all, and because each panel can vary slightly in color, professionals recommend working from two or three rolls at once to blend the differences across the wall. Do not use grasscloth in steamy bathrooms or directly behind a kitchen sink, since natural fibers and constant moisture do not mix well over time. Everywhere else it is a durable and timeless choice that will look good for many years. Once it is up, the room gains a layer of richness that paint alone could never give it. Expect to pay more per roll than standard wallpaper, since you are buying real woven plant fibers, and most single accent walls need three to five rolls. Professional hanging usually costs extra as well, because installers charge more for the fussy and unforgiving material. The investment pays off in longevity, though, since quality grasscloth looks beautiful for a decade or more with minimal care. Keep a leftover scrap tucked away for future patch repairs, because matching dye lots years later is nearly impossible. With reasonable care, this is one accent wall you will still love long after trends have moved on.
6. Hand-Painted Mural
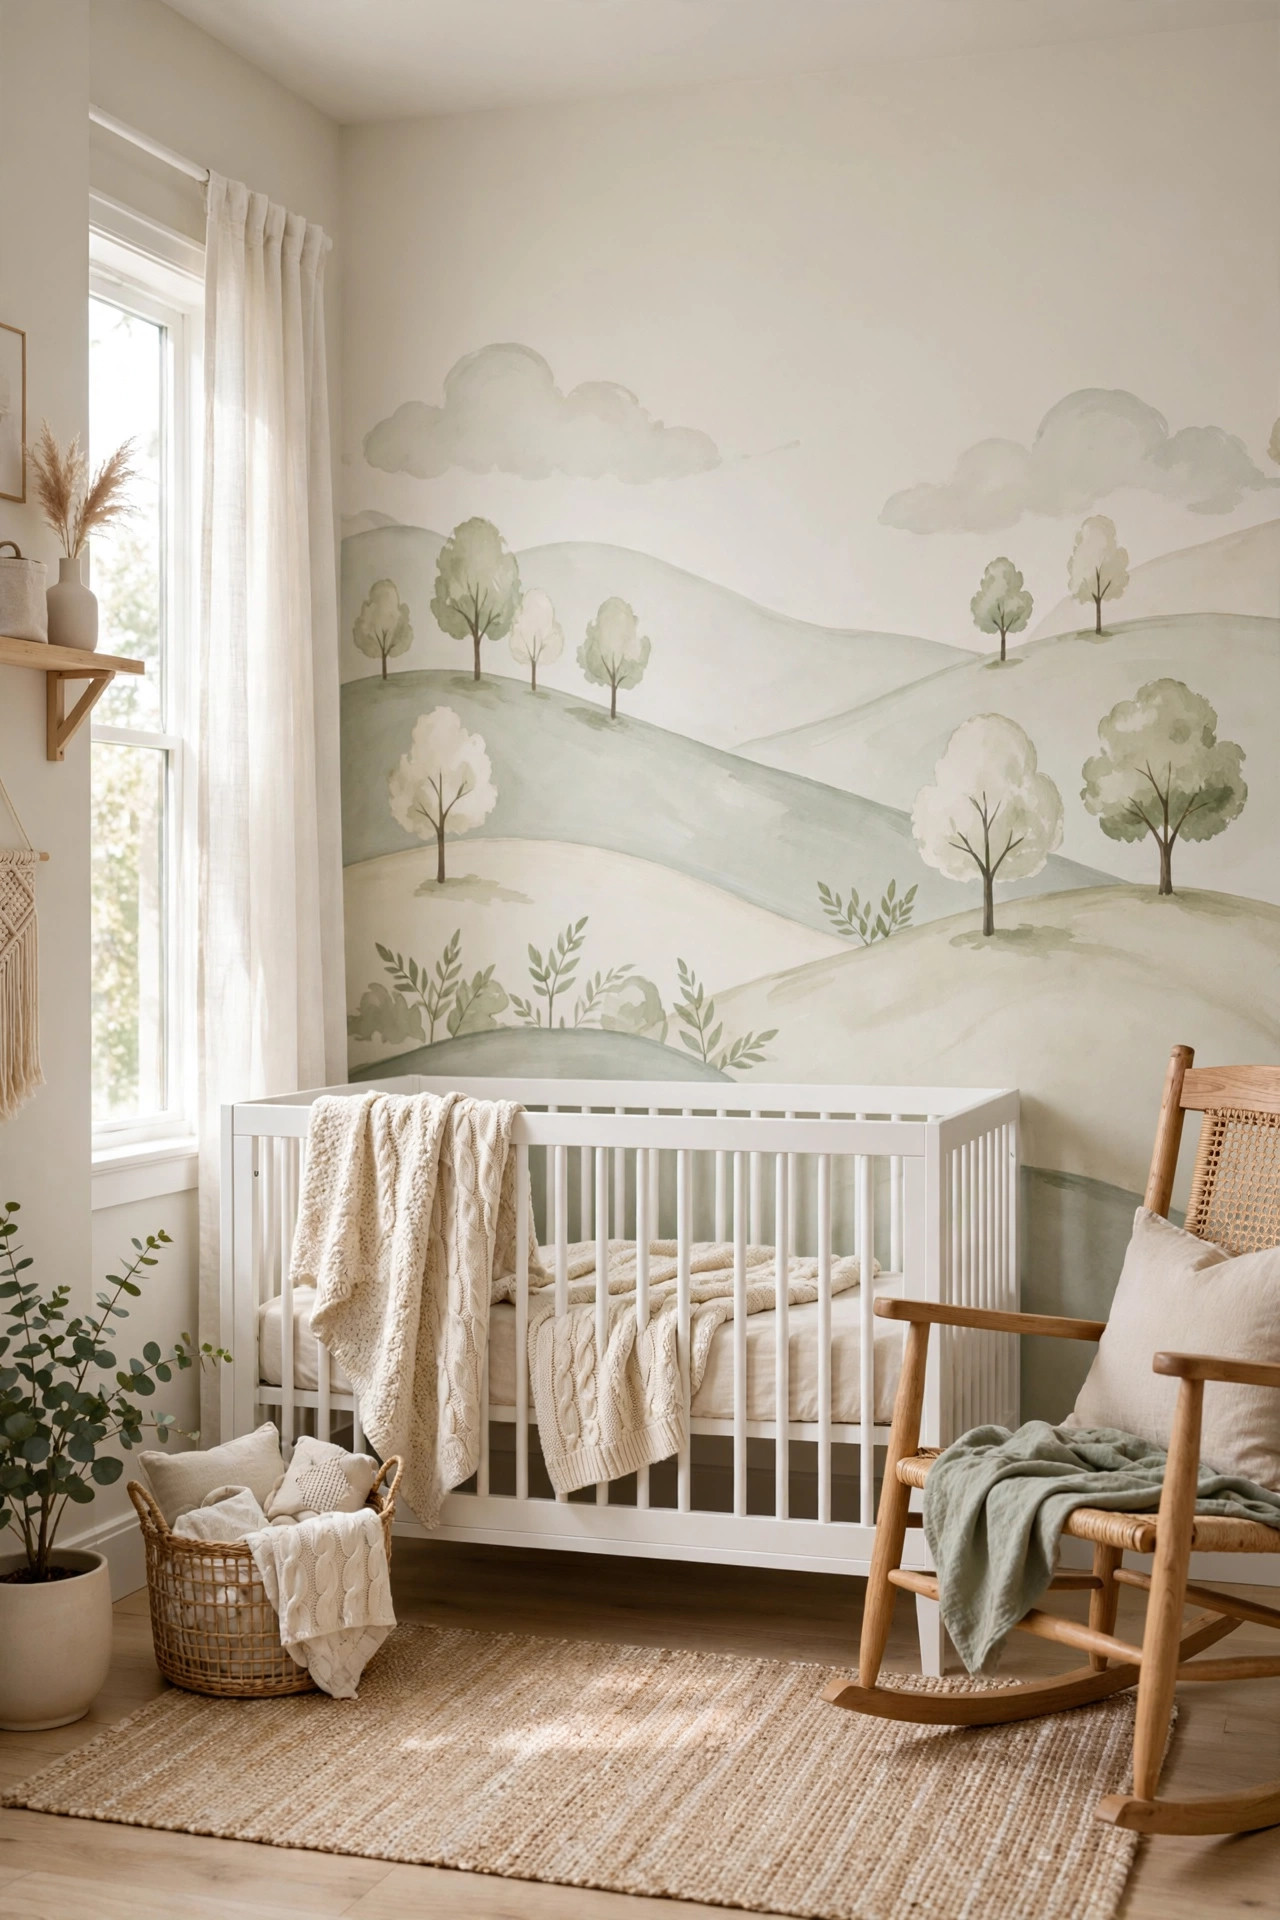
A mural turns one wall into a piece of art that exists nowhere else in the world, made just for your home. It can be as simple as soft rolling hills in muted tones or as detailed as a full garden scene with birds, branches, and butterflies. Unlike a framed print, a mural has no edges or frame lines, so it melts right into the room and can make the wall feel bigger than it really is. It is a wonderful choice for a nursery, a home office, a playroom, or any space where you want personality that cannot be bought off a shelf. The most successful murals use a limited color palette that ties into the bedding, rugs, or furniture already in the room, so the wall feels designed rather than random. When guests ask where you found it, you get to say you made it. Popular mural themes include soft abstract arches, misty mountain landscapes, oversized botanical leaves, and simple color blocked shapes that even total beginners can manage. Scale your design generously to the wall, since tiny fussy details get lost on a big surface and bold simple shapes read best from across the room. Kids’ rooms are perfect for playful murals like mountain ranges, rainbows, or outer space scenes that can grow with them for years. Keep your palette to three or four colors pulled directly from the room’s existing decor for a cohesive pulled together look. Photograph the finished wall in good light, because you will want to remember your very first mural.
You do not need to be a trained artist to pull off a beautiful mural. Many people start by projecting an image onto the wall with an inexpensive projector and tracing the main shapes lightly in pencil, then filling them in with regular wall paint or craft paint. Others use large stencils or simple geometric shapes that only need painter’s tape and a steady hand. Work from the background forward, painting the sky or base color first and letting each layer dry before adding details on top. Keep a damp cloth nearby for quick fixes, because small wobbles and wavy lines disappear once you step back and see the whole composition. Seal the finished mural with a clear matte topcoat if it sits somewhere that gets touched a lot, like a hallway. The result is a one of a kind wall with your fingerprints all over it. You can rent a small projector for a weekend for very little money, which makes tracing large designs accurate and surprisingly fast. Use matte or eggshell finish paint for the mural itself so it does not glare under the room lights. If a line goes wobbly, simply wait for it to dry and paint right over it, since murals are very forgiving of corrections. Sign and date a bottom corner like a real artist, because this genuinely is your original artwork. Invite the kids to help fill in simple background areas, and the wall becomes a family memory as well as a decoration.
7. Exposed Brick Wall
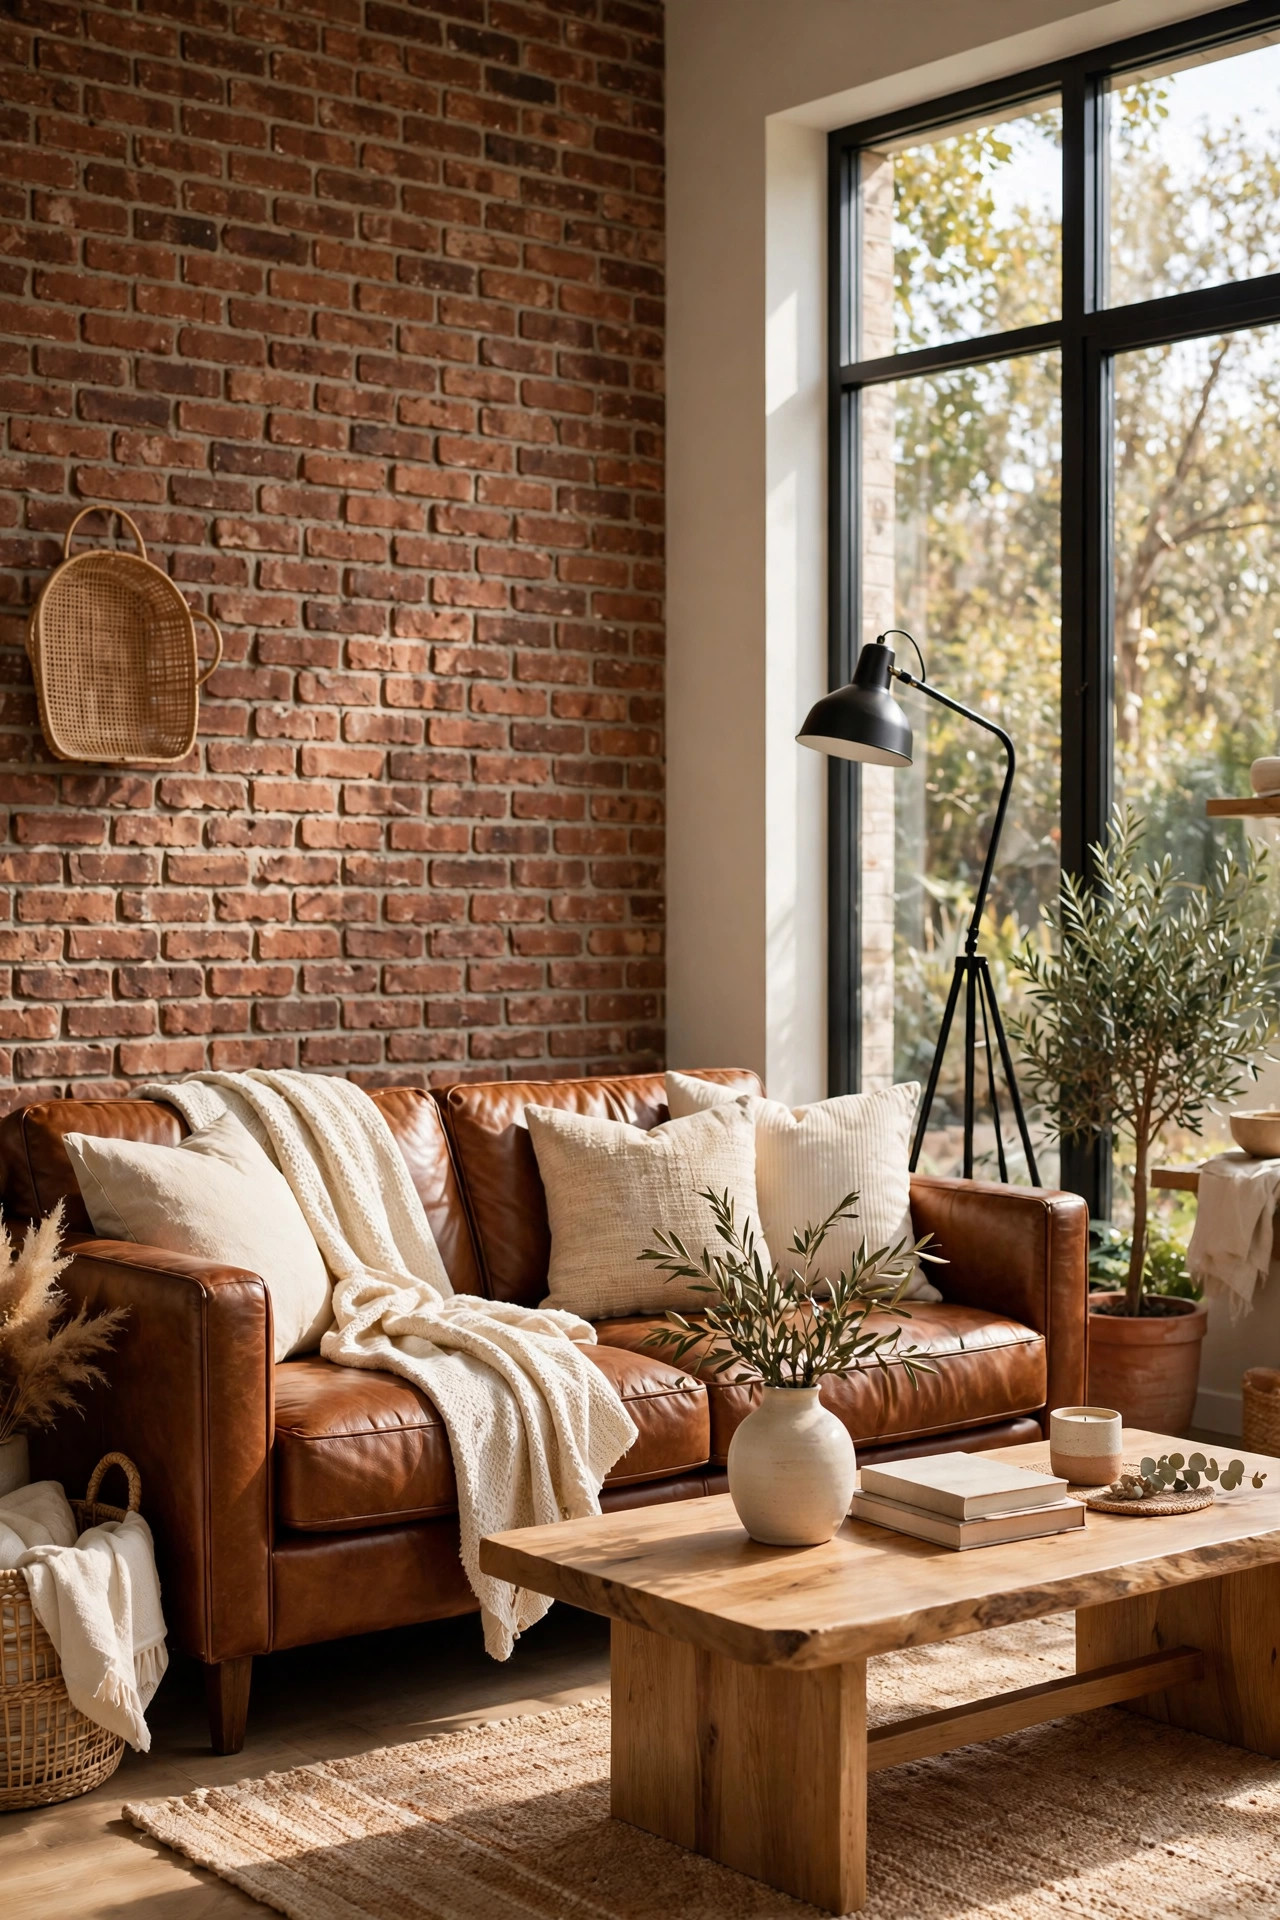
Few building materials have as much built in character as real brick. The rough surface, the varied reds and browns, the slightly uneven mortar lines, all of it gives a room instant history, even in a brand new house. A brick accent wall works in living rooms, kitchens, bedrooms, and home offices, and it pairs beautifully with both sleek modern furniture and collected vintage pieces. The texture is the decoration, so you do not need much else on the wall. A simple piece of art, a round mirror, or a floating shelf is plenty, because the brick already gives the eye so much to look at. In the evening, warm lamplight raking across the surface makes every bump and groove stand out, and the wall glows in a way flat paint never will. Style a brick wall with warm cognac leather, dark stained wood, black metal accents, and trailing green plants for a combination that always works. A German schmear finish, where thin mortar is smeared across the brick faces, softens the red tones while keeping every bit of the texture. Clean real brick gently with a stiff brush and mild soapy water, avoiding harsh acids that can eat away at old mortar joints. In kitchens, seal the brick thoroughly so cooking grease never soaks into the porous surface. The wall only grows more beautiful as it ages and settles, which is a rare quality in home decor.
If your home already has brick hiding behind drywall or plaster, uncovering it is a project worth considering, though you should check with a contractor first to make sure it is in good shape. For everyone else, thin brick veneer gives the genuine look without the weight, cost, or mess of full bricks. These are real slices of brick that attach to the wall with mortar or heavy duty adhesive, and once the joints are filled and tooled, even experts have to look twice to tell the difference. Seal the finished wall with a matte brick sealer so it does not shed fine dust onto your floors and furniture. Whitewashing or painting brick is also an option if you love the texture but want a softer, lighter color. However you get there, a brick wall brings a sense of permanence that makes a whole room feel grounded and established. Thin brick veneer typically costs just a few dollars per square foot for materials, putting a single accent wall comfortably within a modest budget. Most handy homeowners can install it over a long weekend, though very large walls go much faster with a helper mixing and carrying. Always confirm your wall framing can support the added weight, especially with denser real thin brick rather than the lightest faux panels. Reseal every few years in high traffic areas to keep the surface looking fresh and dust free. This is a fairly permanent style commitment, so be sure you truly love brick before you start mixing mortar.
8. Fluted Wood Slats
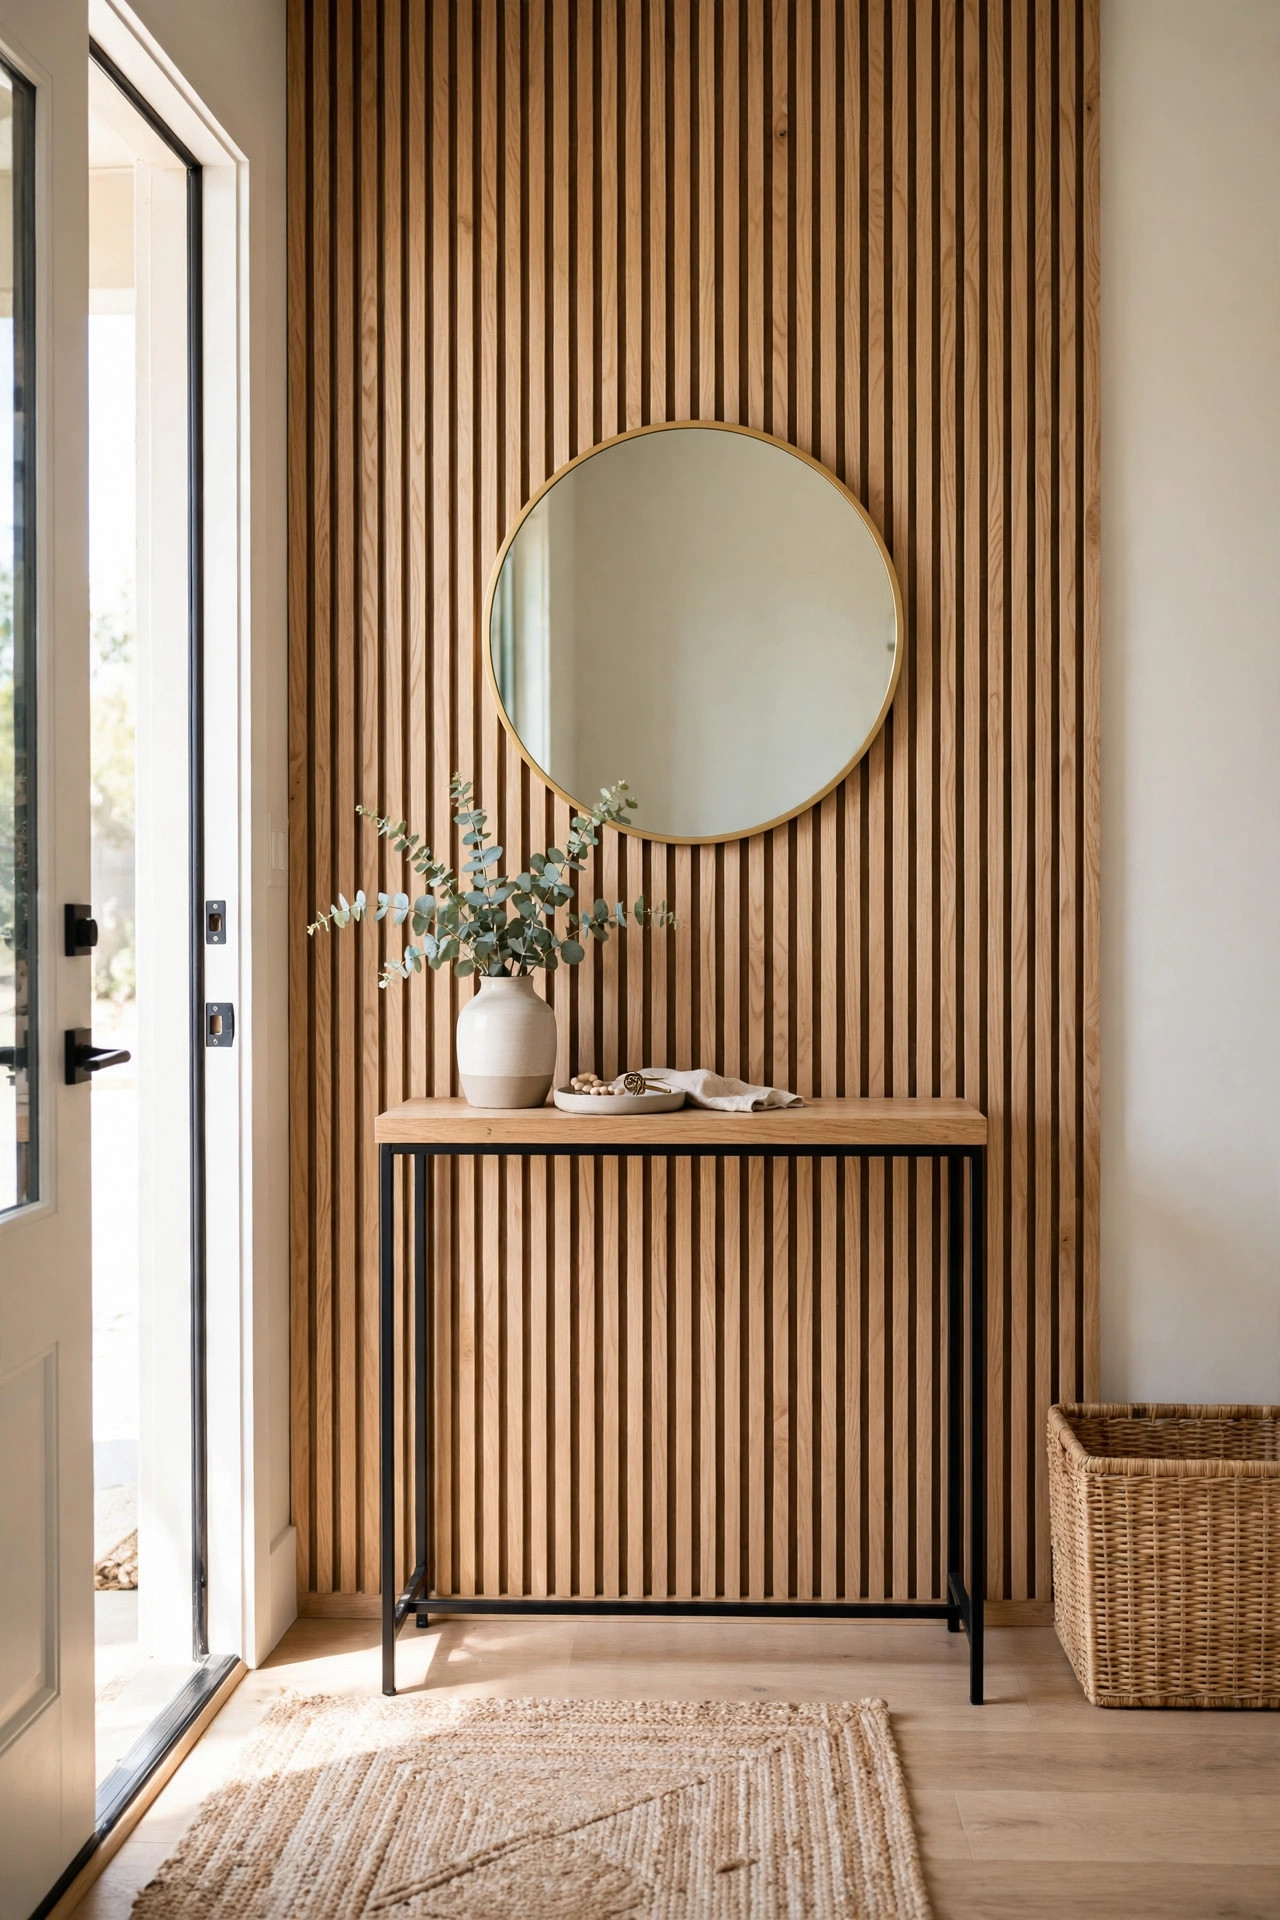
Fluted slat walls are those beautiful ribbed wood panels you see in high end hotels, restaurants, and design magazines, and they are easier to get at home than you might think. Narrow vertical strips of wood are spaced evenly across the wall, creating deep grooves that cast thin elegant shadows. The effect is modern and warm at the same time, and it works especially well behind a television, in an entryway, as a headboard wall in the bedroom, or along a dining room wall. Natural oak tones keep the look light and airy, while dark stained slats in walnut or charcoal feel dramatic and cozy. The steady rhythm of the repeating lines gives the room a tailored, custom built feeling that flat walls cannot offer. Behind a television, the vertical grooves cleverly hide cables and create a custom media wall that looks professionally built in. The slats also improve room acoustics slightly by breaking up large flat reflective surfaces, a welcome bonus in echoey modern spaces with hard floors. Stain colors range from pale white oak to deep espresso, so match the tone to your existing floors for a pulled together feel. In smaller rooms, run the slats on just the lower two thirds with a slim shelf ledge on top for extra function and display space. The strong linear pattern naturally draws the eye along the wall, making narrow rooms feel longer than they are.
You can buy ready made fluted panels that install in large sheets, which makes this one of the faster accent walls on the entire list. The panels attach with construction adhesive, and many people add a few finishing nails into studs for extra long term hold. For a budget version, rip thin strips from plywood sheets or buy pre cut battens and space them evenly using a small wood block as a guide. The key to the expensive look is absolute consistency, so take your time and keep every single gap exactly the same width. Finish the wood with a clear coat or stain before installation to save yourself from fiddly brushwork down in the grooves later. Once it is up, the wall practically decorates itself, and visitors will assume it cost far more than it did. Ready made fluted panels are sold at most home improvement stores and online retailers, usually in four by eight foot sheets that go up fast. Use a fine tooth saw blade for the cleanest cuts, and always cut with the finished face up to prevent chipping along the edges. Plan carefully around electrical outlets by marking their exact positions on the back of each panel before cutting the openings. A small bead of paintable caulk along the top and bottom edges gives a crisp built in finish with no shadow gaps. Order about ten percent extra material to cover cutting mistakes, because every project has at least one.
9. Curated Gallery Wall
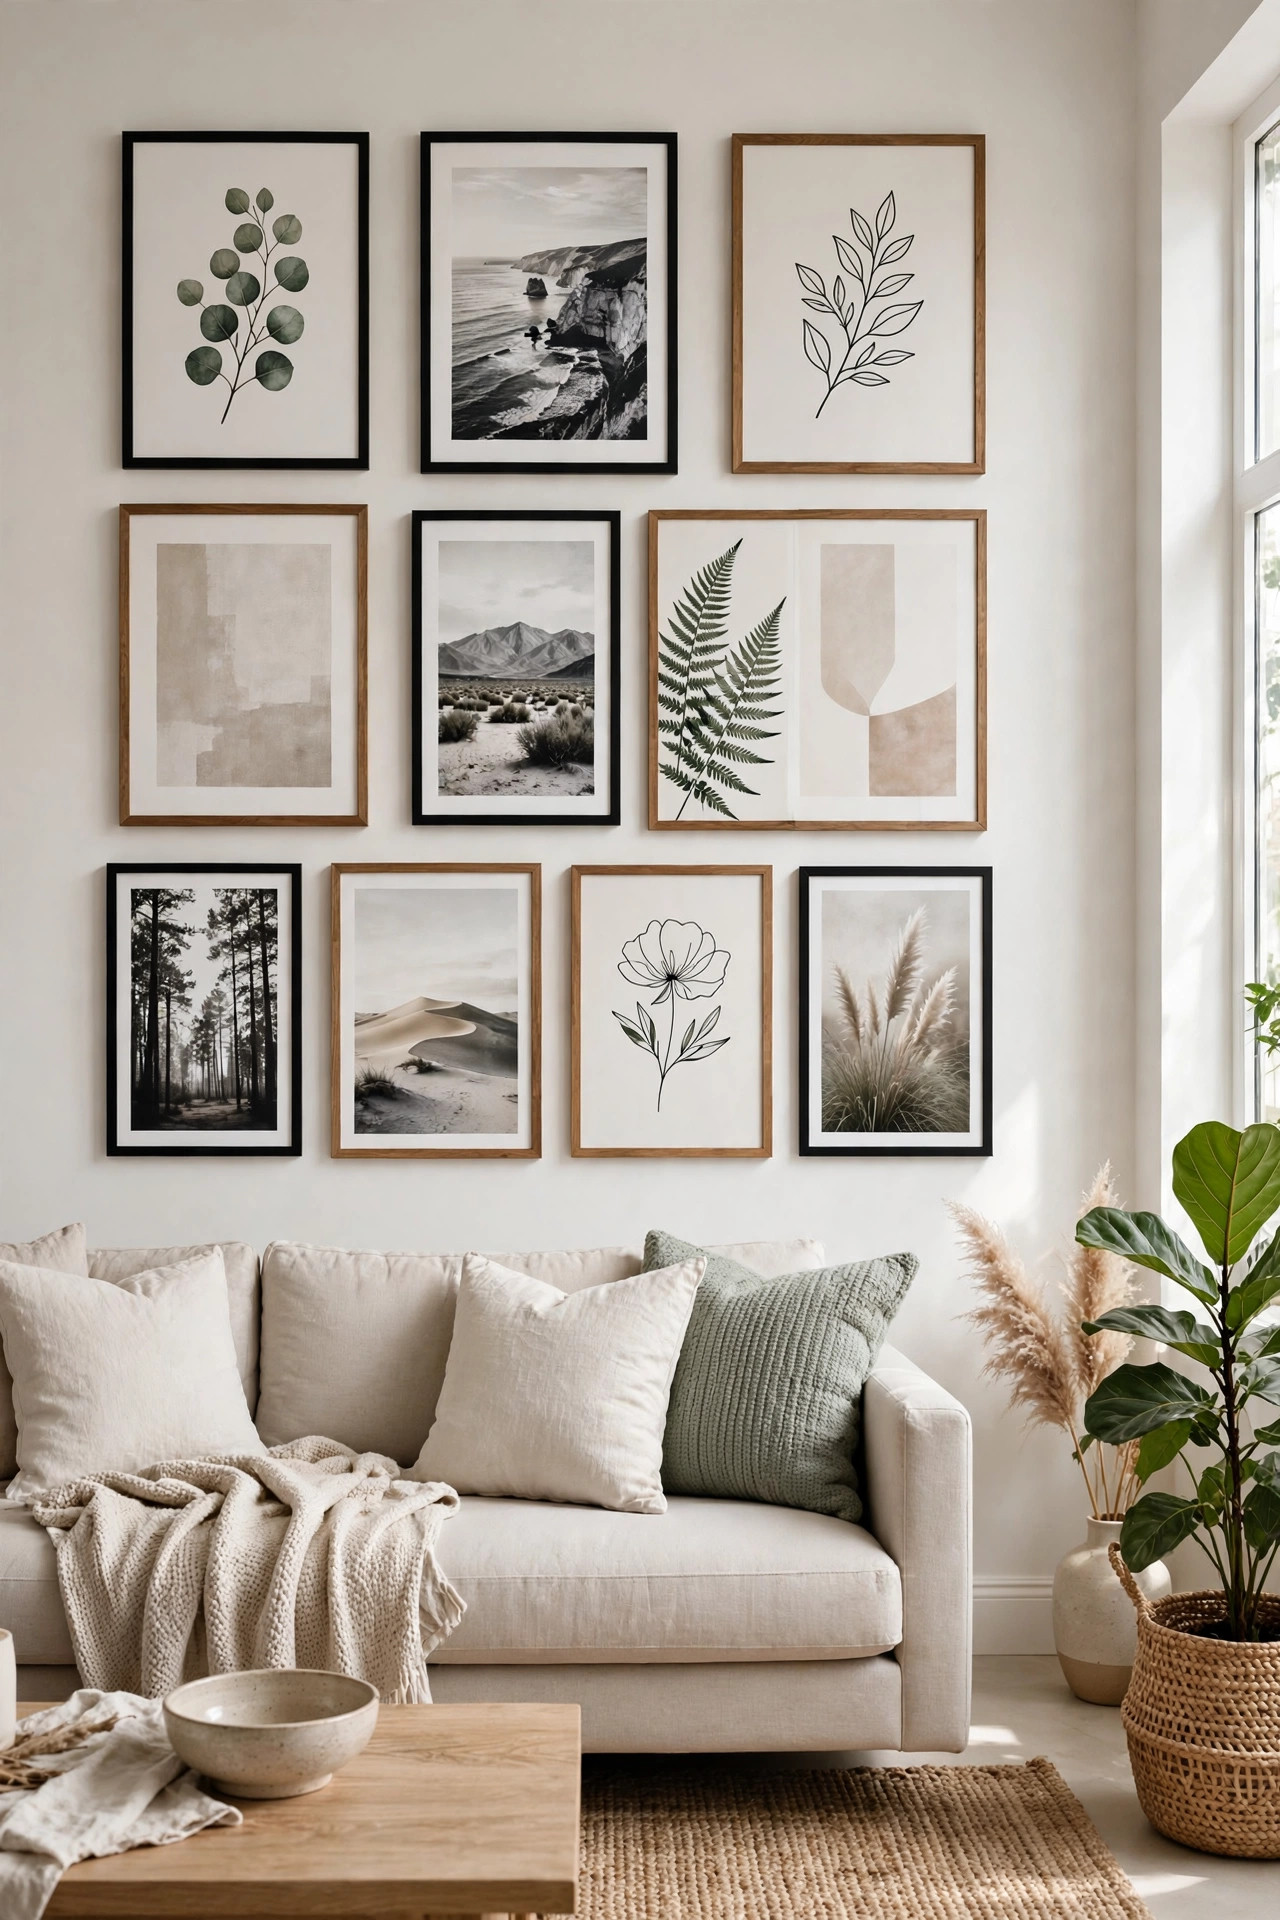
A gallery wall is an accent wall made from art instead of building materials, and it might be the most personal option on this entire list. A thoughtful collection of framed prints, family photos, and small objects turns a blank wall into a story about your life, your travels, and your taste. The trick is treating the whole arrangement as one single composition rather than a random scattering of frames. Mix frame sizes for interest, but keep the frames to two or three finishes, like black, natural wood, and brass, so it looks collected instead of chaotic. Leave roughly the same amount of space between every piece, and the eye will read the entire wall as one intentional piece of art rather than clutter. A well balanced mix includes large anchor pieces, medium prints, small personal photos, and one or two dimensional objects like a small round mirror or a woven disc. Stick to two or three frame finishes at most, since too many competing frames is exactly what makes gallery walls look messy and chaotic. Black frames with white mats give a classic museum gallery feel, while natural wood frames feel warmer and more relaxed. Include genuine personal photos among the art prints so the wall tells your own story rather than a home store’s. Step back frequently while arranging, because the overall composition matters far more than any single frame.
Planning on the floor first saves a lot of unnecessary holes in your wall. Lay out all your frames on a rug or a big sheet of craft paper, moving pieces around until the arrangement feels balanced and pleasing. Take a photo of the final layout with your phone so you can copy it onto the wall exactly. Start hanging with the largest piece placed slightly off center, then build outward in all directions, stepping back every few frames to check the overall shape. Paper templates taped to the wall let you adjust spacing without extra nail holes. Include a mix of art prints, personal photos, and maybe a small mirror or woven wall sculpture to keep the textures interesting. A gallery wall grows over time, which is part of its charm, so leave a little breathing room for future finds. Hang the visual center of the whole arrangement at about fifty seven inches from the floor, which is standard eye level in museums and galleries. Monkey hooks or French cleats hold even heavy frames securely while leaving minimal damage to the wall. Add a small plug in picture light above the arrangement to make it glow softly in the evening like a real gallery. Keep a small torpedo level in your pocket while hanging, because even slightly tilted frames catch the eye immediately. Photograph the finished wall in daylight, since you will want the reference photo when adding new pieces later.
10. Oversized Photo Mural
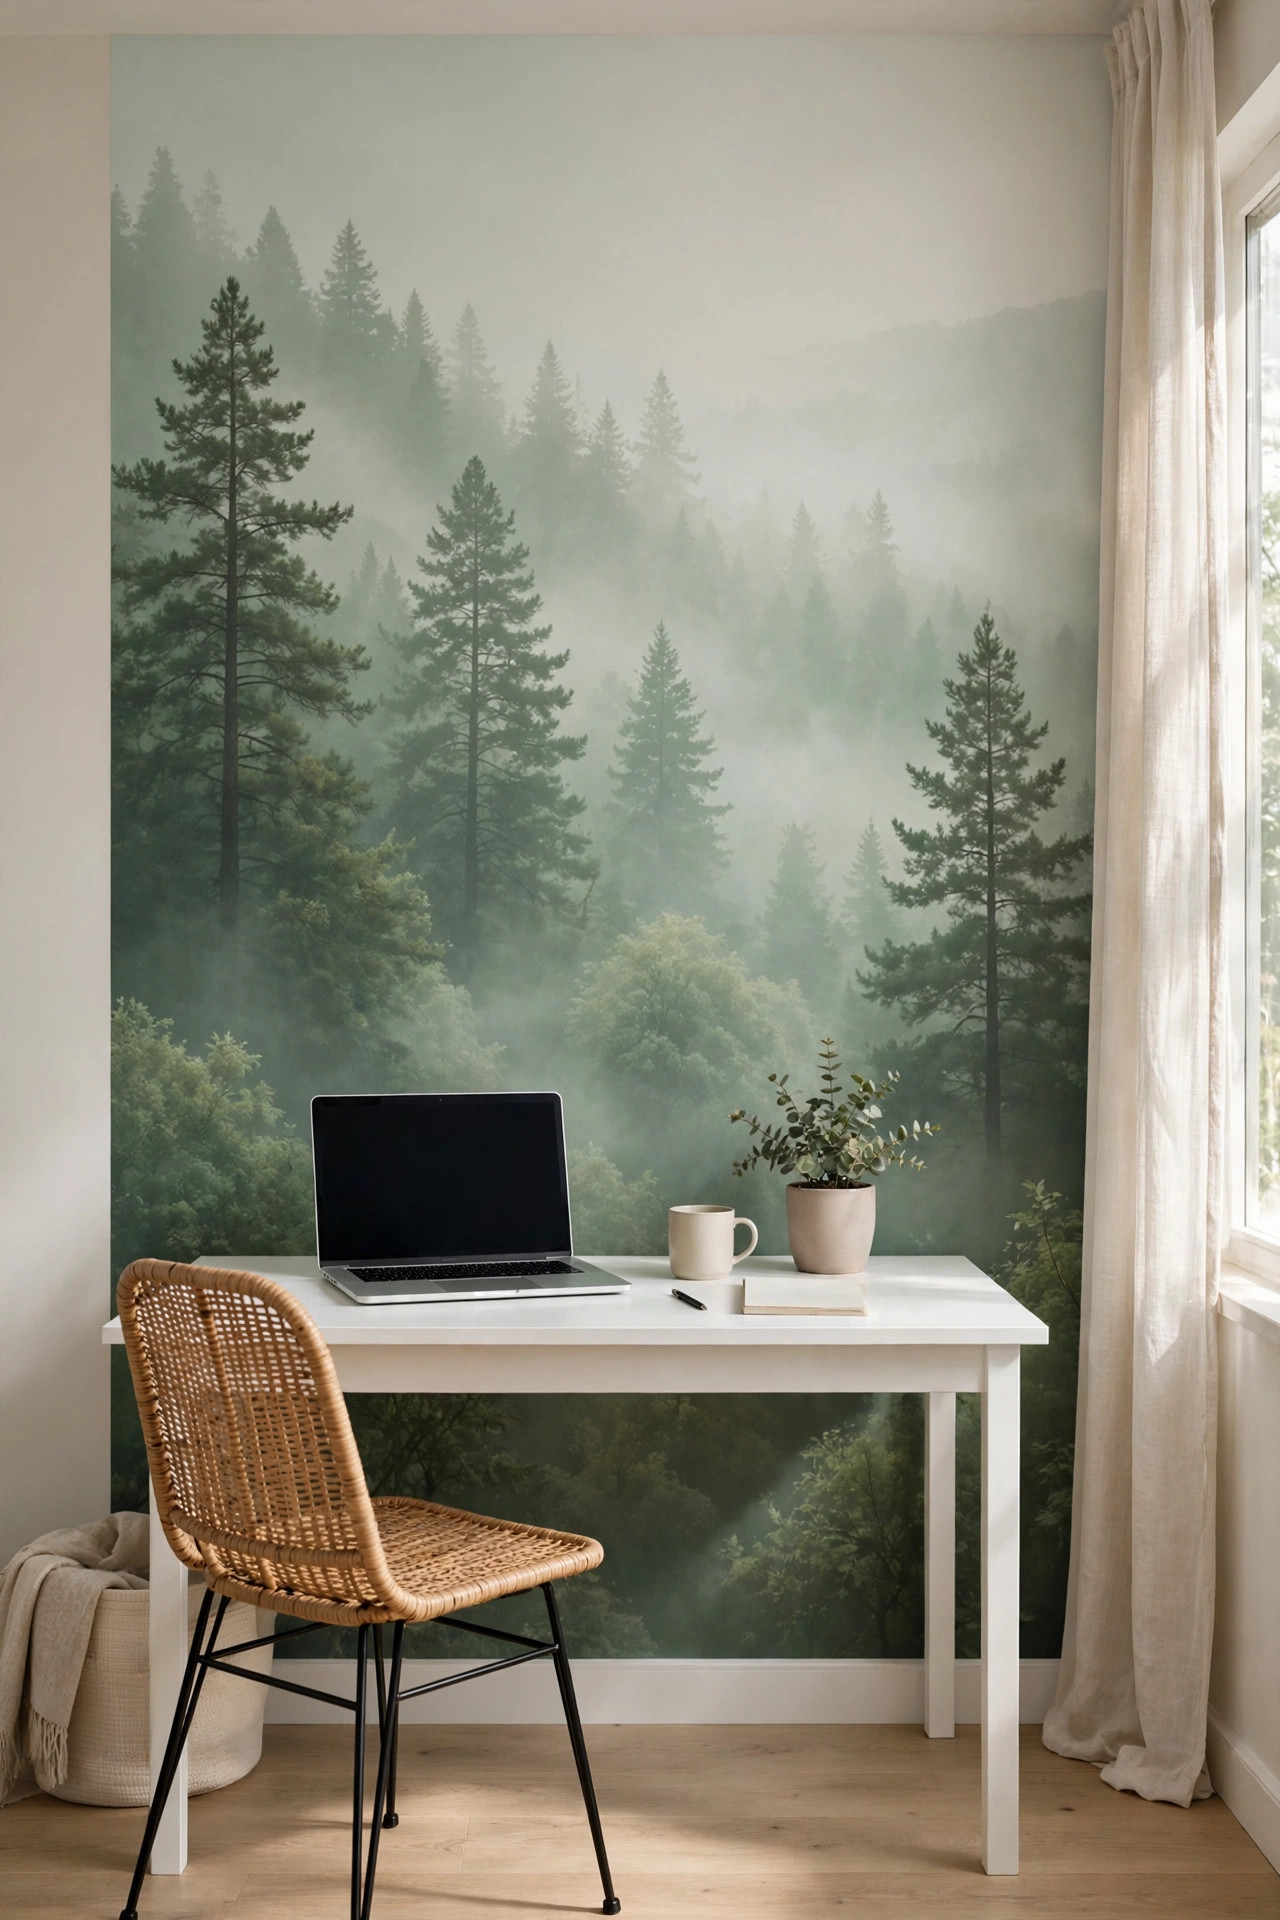
Some walls deserve to go big, and an oversized photographic mural is exactly how you do it. A single huge image, like a misty forest at dawn, a calm ocean horizon, or a moody mountain range, turns the wall into a window to somewhere else entirely. It works best in rooms where you want a sense of escape and calm, like a bedroom, a home office, or a basement that needs some life breathed into it. Because the image covers the wall edge to edge with no frame, the room feels larger, as if the space continues right past the wall into the scene. Choose images with soft colors and gentle detail rather than anything loud or busy, since you will be living with this view every single day. Shop for murals from specialty wallpaper companies that print at very high resolution, because a blurry giant image ruins the entire effect. Soft focus nature scenes work best since they stay restful and calm even at enormous scale. Peel and stick mural versions exist now and are genuinely renter friendly, lifting off cleanly when it is time to move out. Measure your wall twice and order once, because custom printed murals are rarely returnable. If the room gets strong direct afternoon sun, choose fade resistant inks so your misty forest does not turn pale and ghostly within two years.
Modern wall murals come as large printed panels that paste up much like wallpaper, and the print quality these days is excellent. Measure your wall carefully and order slightly more than you need so you can trim for a perfect edge to edge fit. Most murals hang left to right in numbered panels, and lining up the seams so the image flows is the fussiest part of the whole job. Work with a partner if you can, keep each panel straight with a long level, and smooth out air bubbles as you go with a plastic smoother. Keep the furniture in front of the mural simple and low so the image stays the undisputed star of the room. A photographic mural is a bold move, but in the right room it feels less like decoration and more like a view you get to keep forever. Removing a fully pasted mural later takes steam, patience, and a wide scraper, so be confident about placement before you commit. Keep window treatments simple and light so natural daylight, not heavy curtains, frames your new view. Low streamlined furniture lets the mural breathe, while tall bookcases would chop the image into awkward pieces. A dimmer switch on the room lights lets you shift the mural from bright daytime backdrop to moody evening scene with one slide. Friends will ask which window has that amazing view, and you will just smile.
11. Woven Macrame Hanging
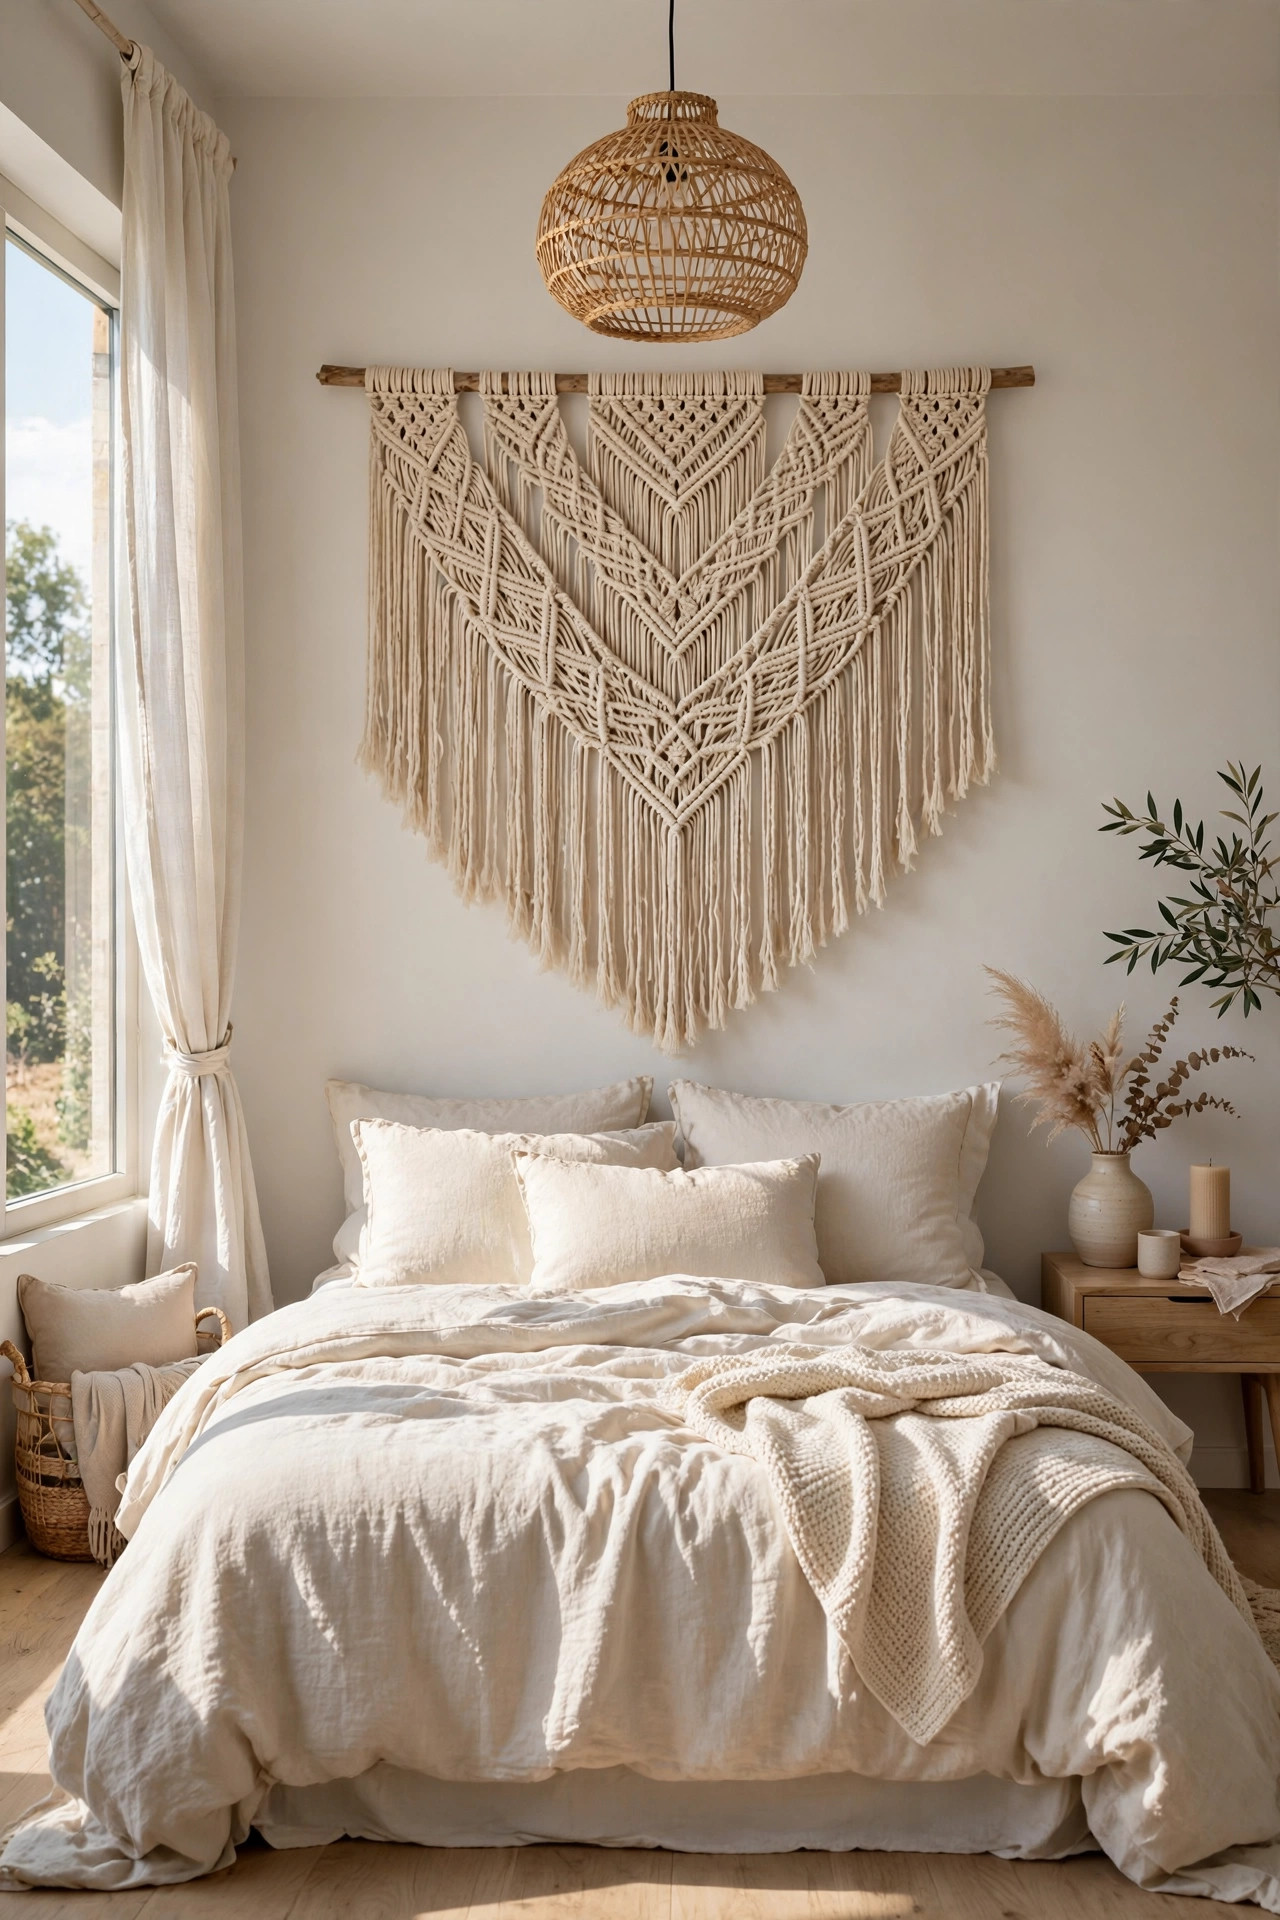
For a softer and gentler take on an accent wall, one oversized woven hanging can do the work of an entire renovation. A large macrame piece in natural cotton adds texture, warmth, and a handmade feeling without a single nail hole beyond the one hook it hangs from. The knotted patterns and long flowing fringe catch the daylight beautifully and bring a crafted touch that flat printed art cannot match. It is perfect centered over a bed, above a sofa, or in a reading corner where you want the wall to feel cozy and inviting rather than blank and cold. Because it is just one single piece, it reads as calm instead of busy, which suits simple relaxed rooms that do not need more visual noise. Size your hanging to about two thirds the width of the furniture beneath it, whether that is a bed, a sofa, or a console table. Layer it over a painted wall in a soft contrasting tone so the natural cotton color really pops forward. Look for pieces with mixed textures like chunky hand tied knots, smooth wooden beads, and cascading layered fringe for the most visual richness. In boho or coastal styled rooms, one large macrame can replace several smaller art pieces and calm the entire wall down. It also softens room acoustics a touch, which is a quiet bonus in spaces with hard floors and high ceilings.
Scale matters more than anything else with this idea, so go bigger than your first instinct tells you. A small hanging centered on a big wall looks lost and timid, while an oversized piece fills the space with real presence. Look for pieces with interesting texture to them, thick chunky knots, layered fringe, wooden beads mixed into the design, or an interesting asymmetrical shape. Hang it so the visual center sits at about eye level, and give it plenty of room to breathe with nothing crowded up against it. The natural cotton color works with every palette imaginable, from warm neutrals to deep moody tones. It is also one of the most renter friendly ideas here, since the whole thing comes down with one hook and leaves almost no mark behind. Etsy and local craft markets are full of handmade macrame at every price point, and buying directly from a maker supports real craftsmanship. Dust your hanging every few months by shaking it gently outdoors or blowing it with a hair dryer on the cool setting. Keep it well away from curious cats, who find dangling fringe completely irresistible. If the fringe arrives wrinkled from shipping, a light pass with a garment steamer relaxes it beautifully. Choose natural cotton over synthetic fibers for the softest drape and the most authentic handmade appearance.
12. Antique Mirror Tiles
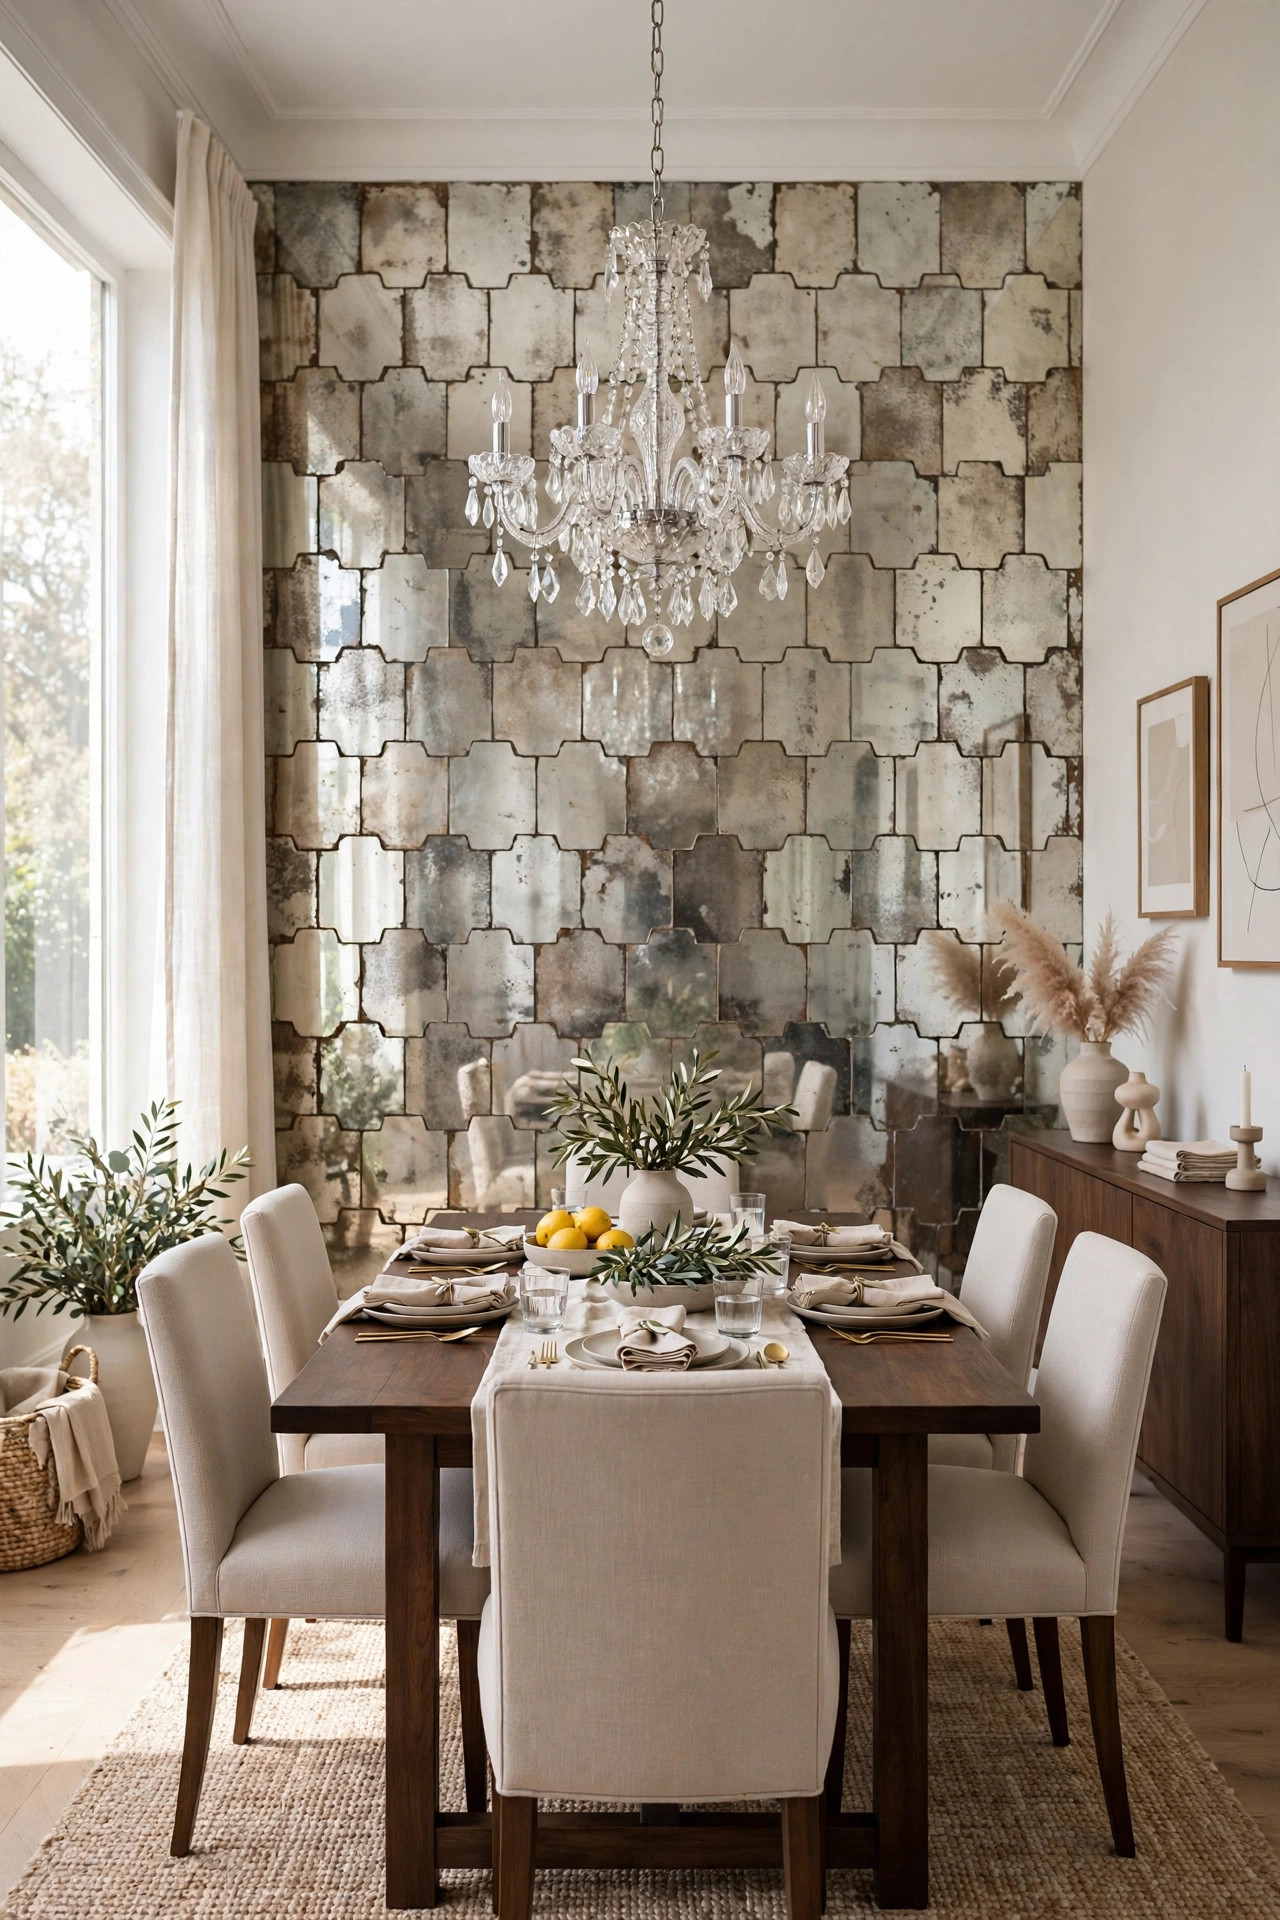
A wall of antique mirror tiles makes a room feel twice as big while adding instant old world glamour. Unlike regular mirrors, antiqued glass has a soft mottled finish with gentle foxing and spotting that looks vintage and collected rather than stark and new. The tiles bounce light around the room, which brightens dark corners and makes small spaces feel open and airy. It is a stunning choice for dining rooms, entryways, powder rooms, and bedrooms where you want drama without adding any color. The patchwork of slightly varied tiles creates a quilt like pattern that stays interesting even before you notice your own reflection in it. Candlelight and lamplight look especially magical dancing across the aged surface. Position a mirror tile wall opposite or beside your windows to double the natural daylight, which is the oldest designer trick in the book. Dining rooms gain instant evening glamour when candlelight multiplies itself across dozens of softly aged tiles. In a small dark entryway, a mirror wall makes the space feel twice as deep the moment you step inside. Keep whatever the mirrors reflect neat and intentional, because mirrors faithfully double everything they see, including clutter. The vintage mottled finish keeps the whole effect soft and romantic rather than stark, bright, and commercial.
Mirror tiles usually come with strong adhesive backing or attach with mirror mastic, and installation is mostly about careful measuring and patience. Plan the layout on paper first so that cut tiles land in the least visible spots, like tucked behind furniture or up near the ceiling line. Use a level constantly as you work, because even a slightly crooked tile shows clearly in the reflections. Wear work gloves when handling the tiles, since the cut edges can be sharp and fingerprints on the back are nearly impossible to clean later. Once the wall is finished, keep the decor in front of it minimal, because the reflections are already doing all the visual work. A slim console table with a lamp or a simple vase of branches is all you need to complete the look. Clean the installed tiles with a soft microfiber cloth and plain glass cleaner, avoiding anything abrasive that could scratch the delicate antiqued finish. Butt the tiles tightly edge to edge for a seamless contemporary look, or leave a thin grout line for a more traditional tiled feeling. Check that your wall is genuinely flat before you begin, since wavy walls make mirror tiles look distorted like a funhouse. For households with small children, consider tempered mirror tiles for added safety. The finished wall reads as expensive custom millwork and draws compliments from every visitor.
13. Chalkboard Wall
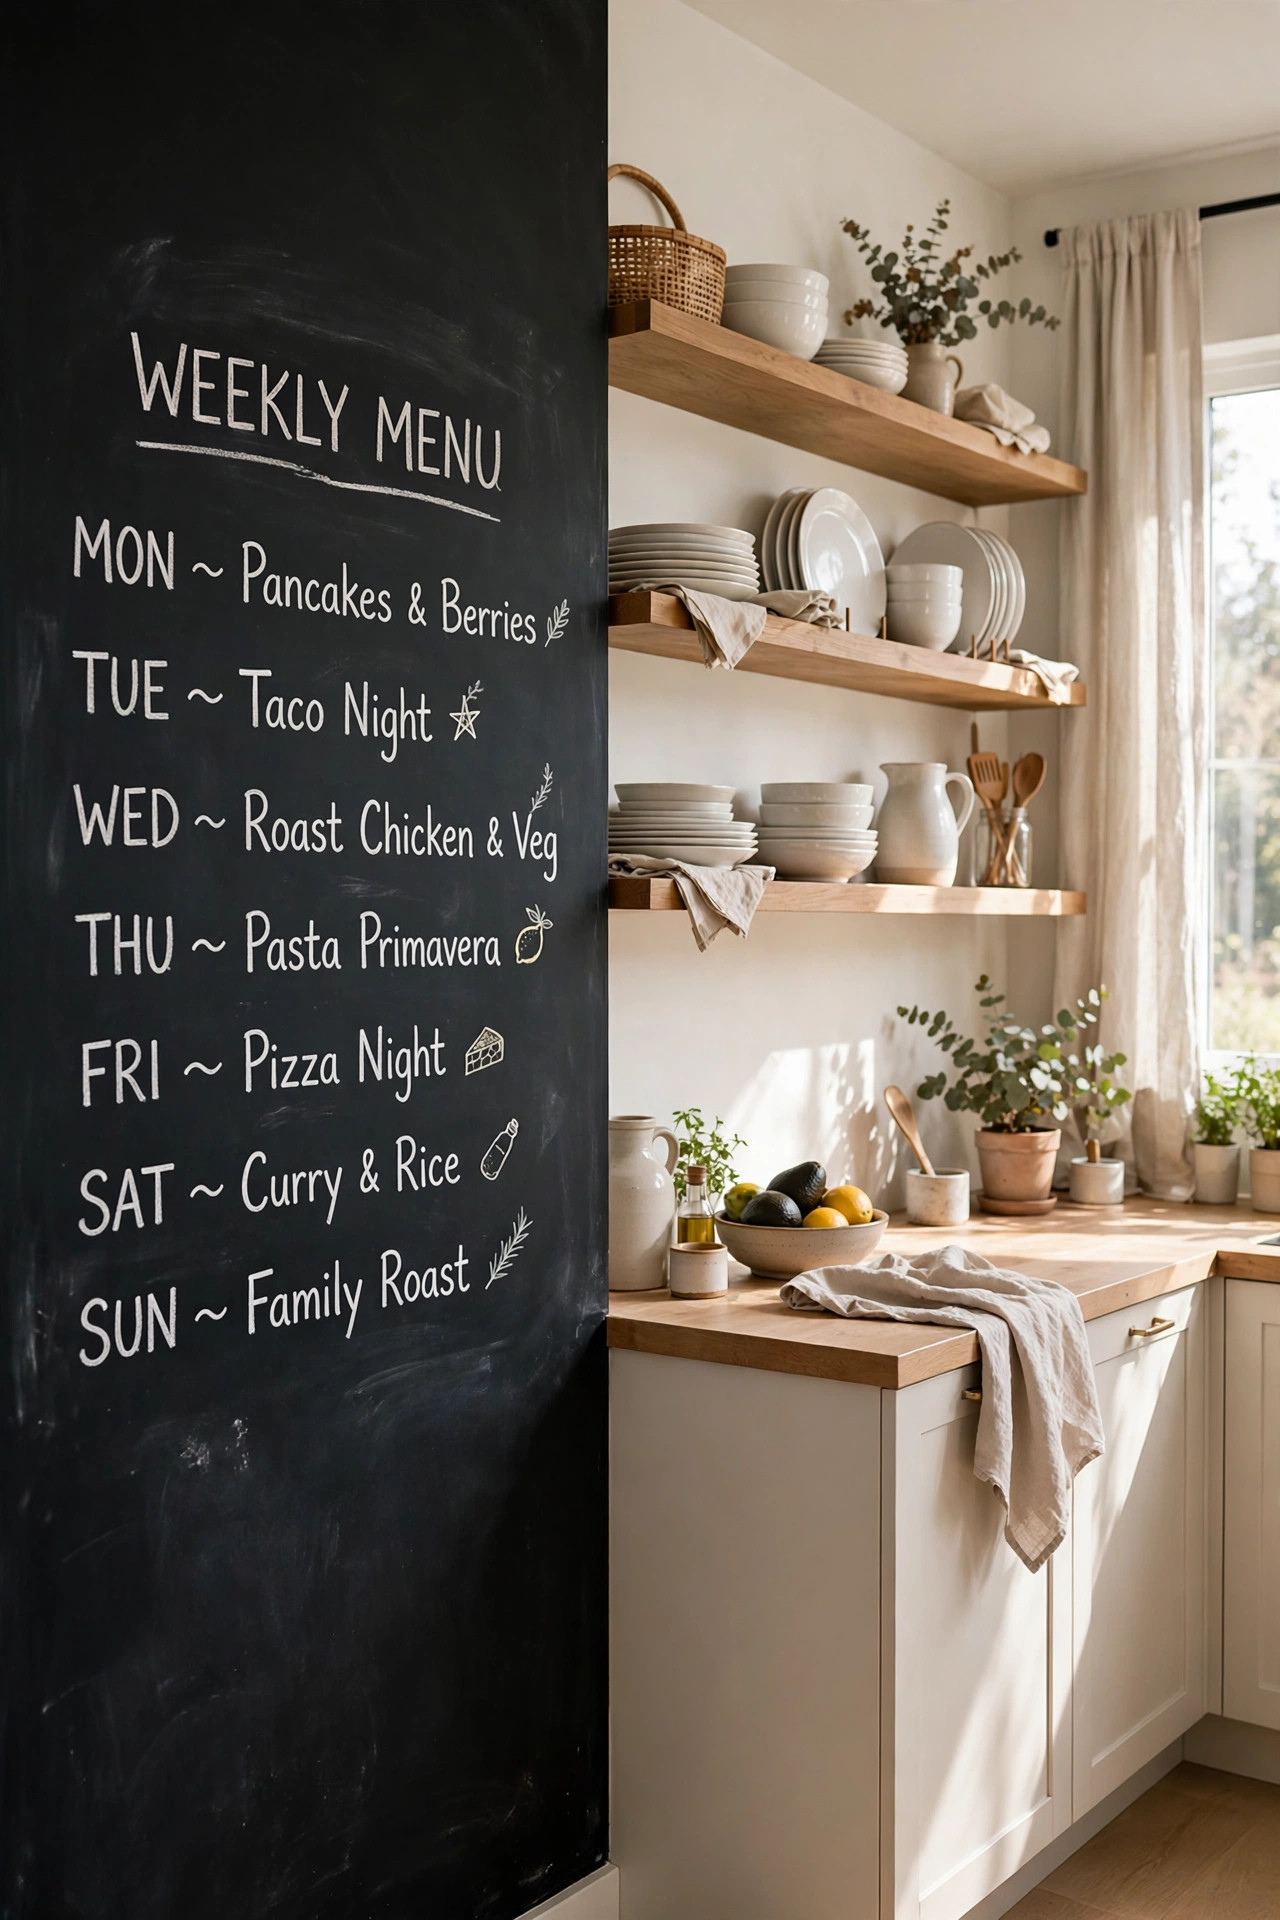
A chalkboard wall is an accent wall that never sits still, and that changing nature is exactly its charm. One day it holds a hand lettered inspirational quote, the next it is a grocery list, a child’s drawing, a countdown to vacation, or a menu for Saturday dinner guests. It is a natural fit for kitchens, home offices, mudrooms, playrooms, and kids’ bedrooms, anywhere a busy family actually lives and works. The matte black surface also looks sharp as a pure design choice on its own, giving the room a bold graphic anchor that grounds lighter furniture around it. Framed with simple wood trim, it reads as intentional and tailored decor rather than a leftover classroom. Beyond classic black, chalkboard paint now comes in deep forest green, navy blue, and even soft blush pink for a gentler less stark look. Frame the chalkboard zone with simple stained wood trim to make it feel like a deliberate architectural feature. In a home office, dedicate it to brainstorming sessions and weekly project planning that wipes clean every Monday. Children absolutely adore having an entire wall as their personal canvas, and it beats crayons on the hallway drywall every single time. Refresh the artwork with the seasons, from spring flowers to holiday menus, to keep the wall feeling alive all year.
You can get the look with chalkboard paint, which rolls on much like regular paint and now comes in black plus a few muted colors like green and navy. Surface prep matters more here than with normal paint, so sand the wall smooth and use a quality primer first, because every bump and ridge shows clearly on a dark matte surface. Two to three thin coats give the smoothest writing surface, and you must let the paint cure fully, usually about three days, before the first piece of chalk touches it. Season the new wall by rubbing chalk over the entire surface and wiping it off, which prevents ghost images from haunting you later. Use chalk markers for crisp lettering that guests will admire, and keep real chalk sticks for the kids’ masterpieces. When you are finally tired of it, one coat of primer and regular paint takes you right back to a normal wall. Chalk markers give crisp bright opaque lines perfect for quotes and dinner menus, while classic chalk sticks feel more authentic for children’s drawings. Erase with a barely damp microfiber cloth, then let the wall dry completely to prevent ghost images. Chalk dust is extremely fine, so position the wall away from electronics and wipe nearby surfaces now and then. Teach kids to keep the chalk sticks in a small wall mounted tray so they do not roll across the floors. When the novelty eventually fades, the whole wall repaints easily, making this a refreshingly low risk experiment.
14. Natural Cork Tiles
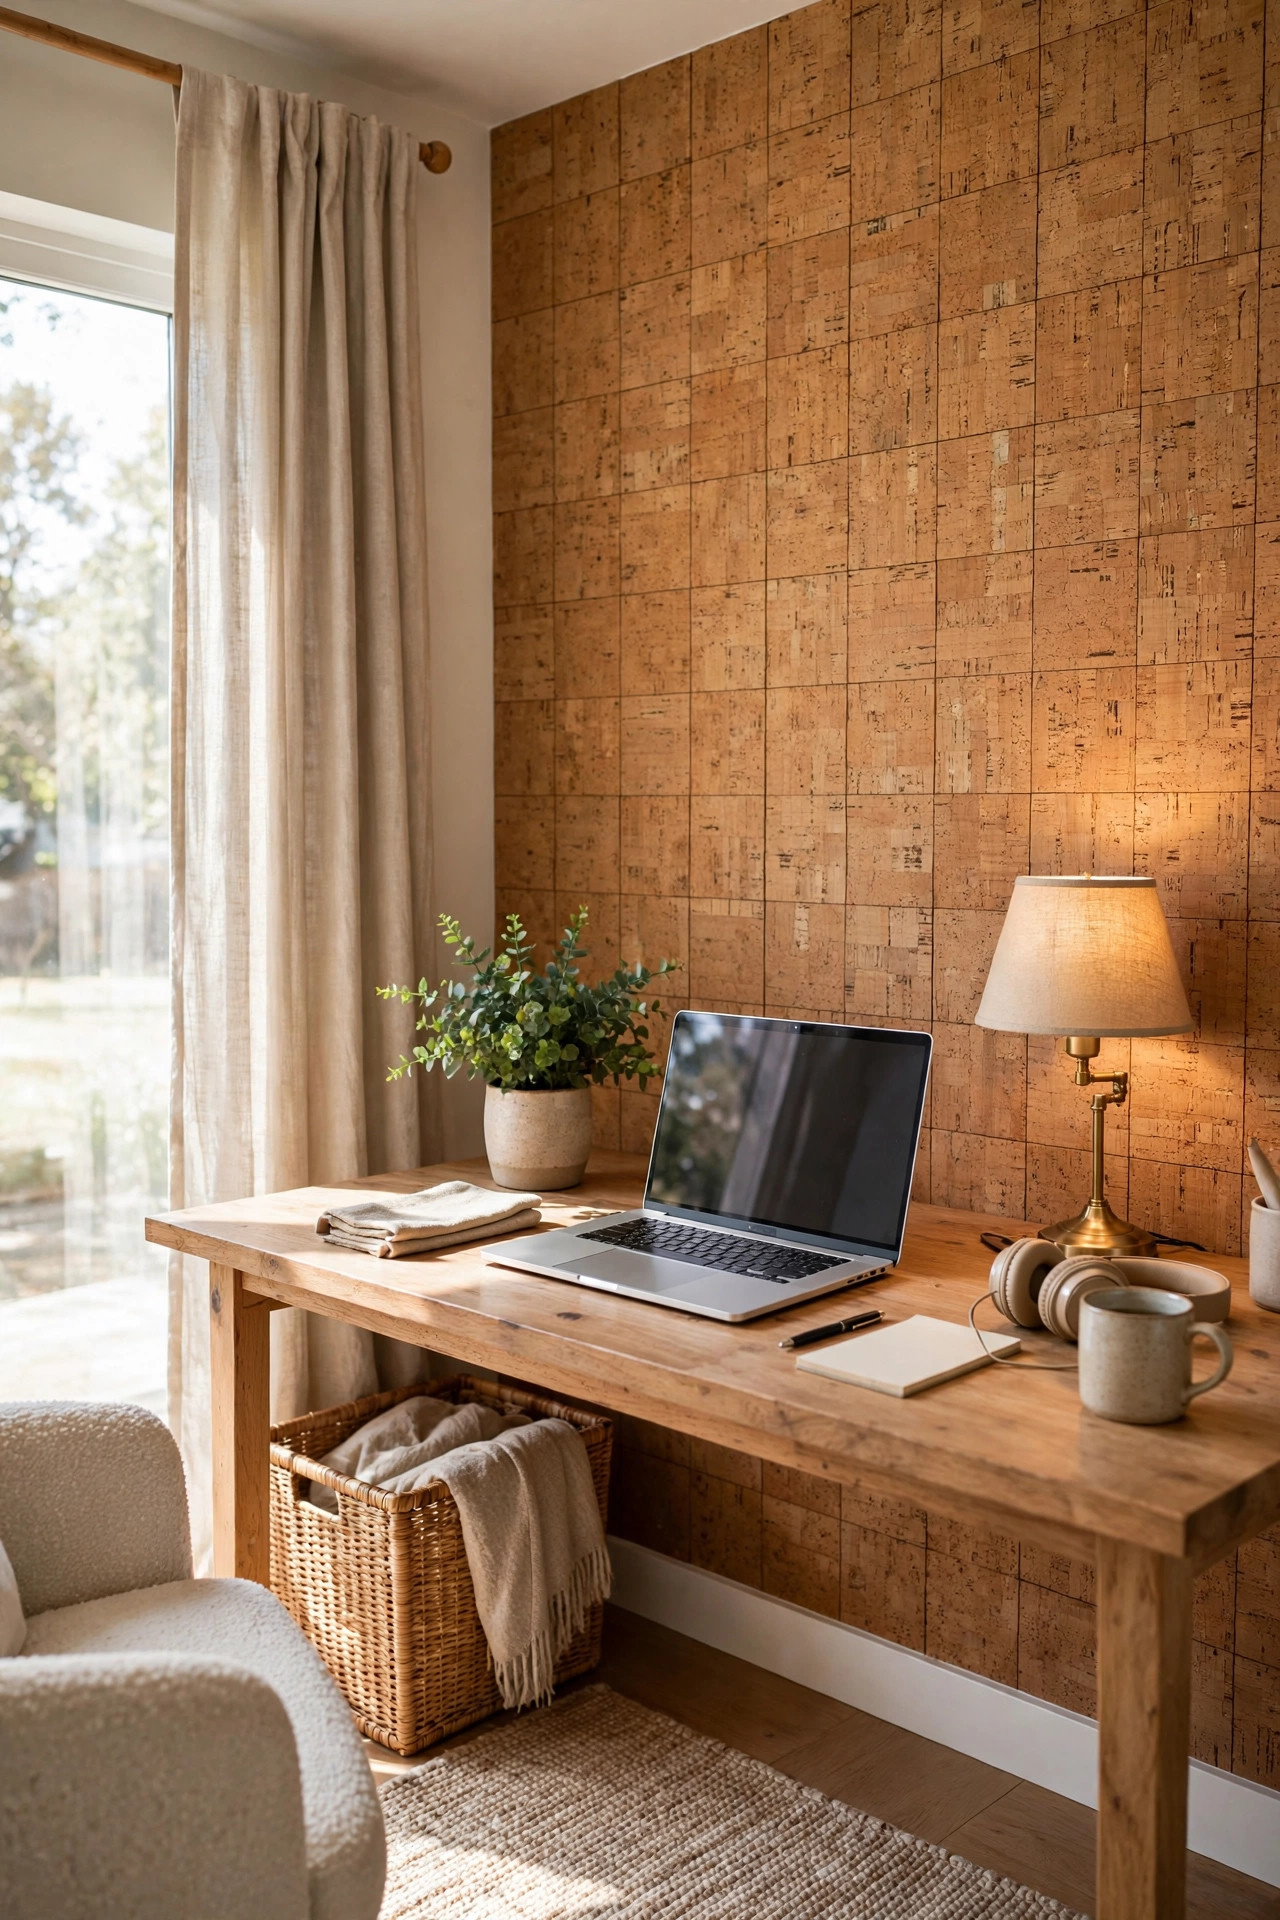
Cork is one of those materials people forget about until they see it done well, and then they wonder why every wall in the house is not cork. The warm honey tones and nubby natural texture make a room feel instantly cozy and welcoming, and the tiles add real sound softening that flat drywall cannot offer. It is a brilliant choice for home offices, music rooms, nurseries, and bedrooms, anywhere a quieter and calmer feeling is welcome. Cork also works as one giant pinboard, so you can pin up notes, photos, and reminders right on the wall, which makes it practical as well as pretty. The earthy color plays beautifully with houseplants, wood furniture, and natural fabrics, pulling the whole room into a grounded natural palette. Home offices benefit the most from cork, since it quiets keyboard clatter and video call echo while looking warm and professional on camera. Use the wall as one giant mood board for fabric swatches, paint chips, sketches, and inspiration photos pinned right where you work. The warm honey tones pair beautifully with black metal shelving and leafy green plants for a modern natural office look. In children’s bedrooms, cork walls become ever changing display space for art projects and awards without a single nail hole. It is one of the very few wall treatments that is both beautiful to look at and genuinely useful every single day.
Cork tiles usually come with adhesive backing and go up much like peel and stick floor tiles. Start in the center of the wall and work outward in all directions so the cut pieces land evenly at the edges instead of all on one side. Press each tile firmly into place and roll over it with a small roller to make full contact, because edges that lift will catch the eye and collect dust. Tiles can vary in tone from box to box, so mix pieces from different boxes as you go for a nicely blended finish. Seal the finished wall with a clear matte sealer if it might see splashes or heavy touching, though in most living spaces raw cork is perfectly fine. Step back when you are done and notice how the room even sounds different, softer and calmer. That quiet warmth is cork’s secret gift. Trim edge tiles neatly with a sharp utility knife and a metal straightedge for clean cuts around outlets, switches, and corners. If you ever decide to remove the tiles, gentle heat from a hair dryer softens the adhesive for much easier peeling. Touch up any torn drywall paper with lightweight spackle before repainting the wall underneath. Seal the cork with a clear matte finish in kitchens or bathrooms where moisture is a concern, but leave it beautifully natural in dry living spaces. The tiles are light and easy to handle alone, making this a comfortable and satisfying solo weekend project.
15. Stacked Stone Veneer
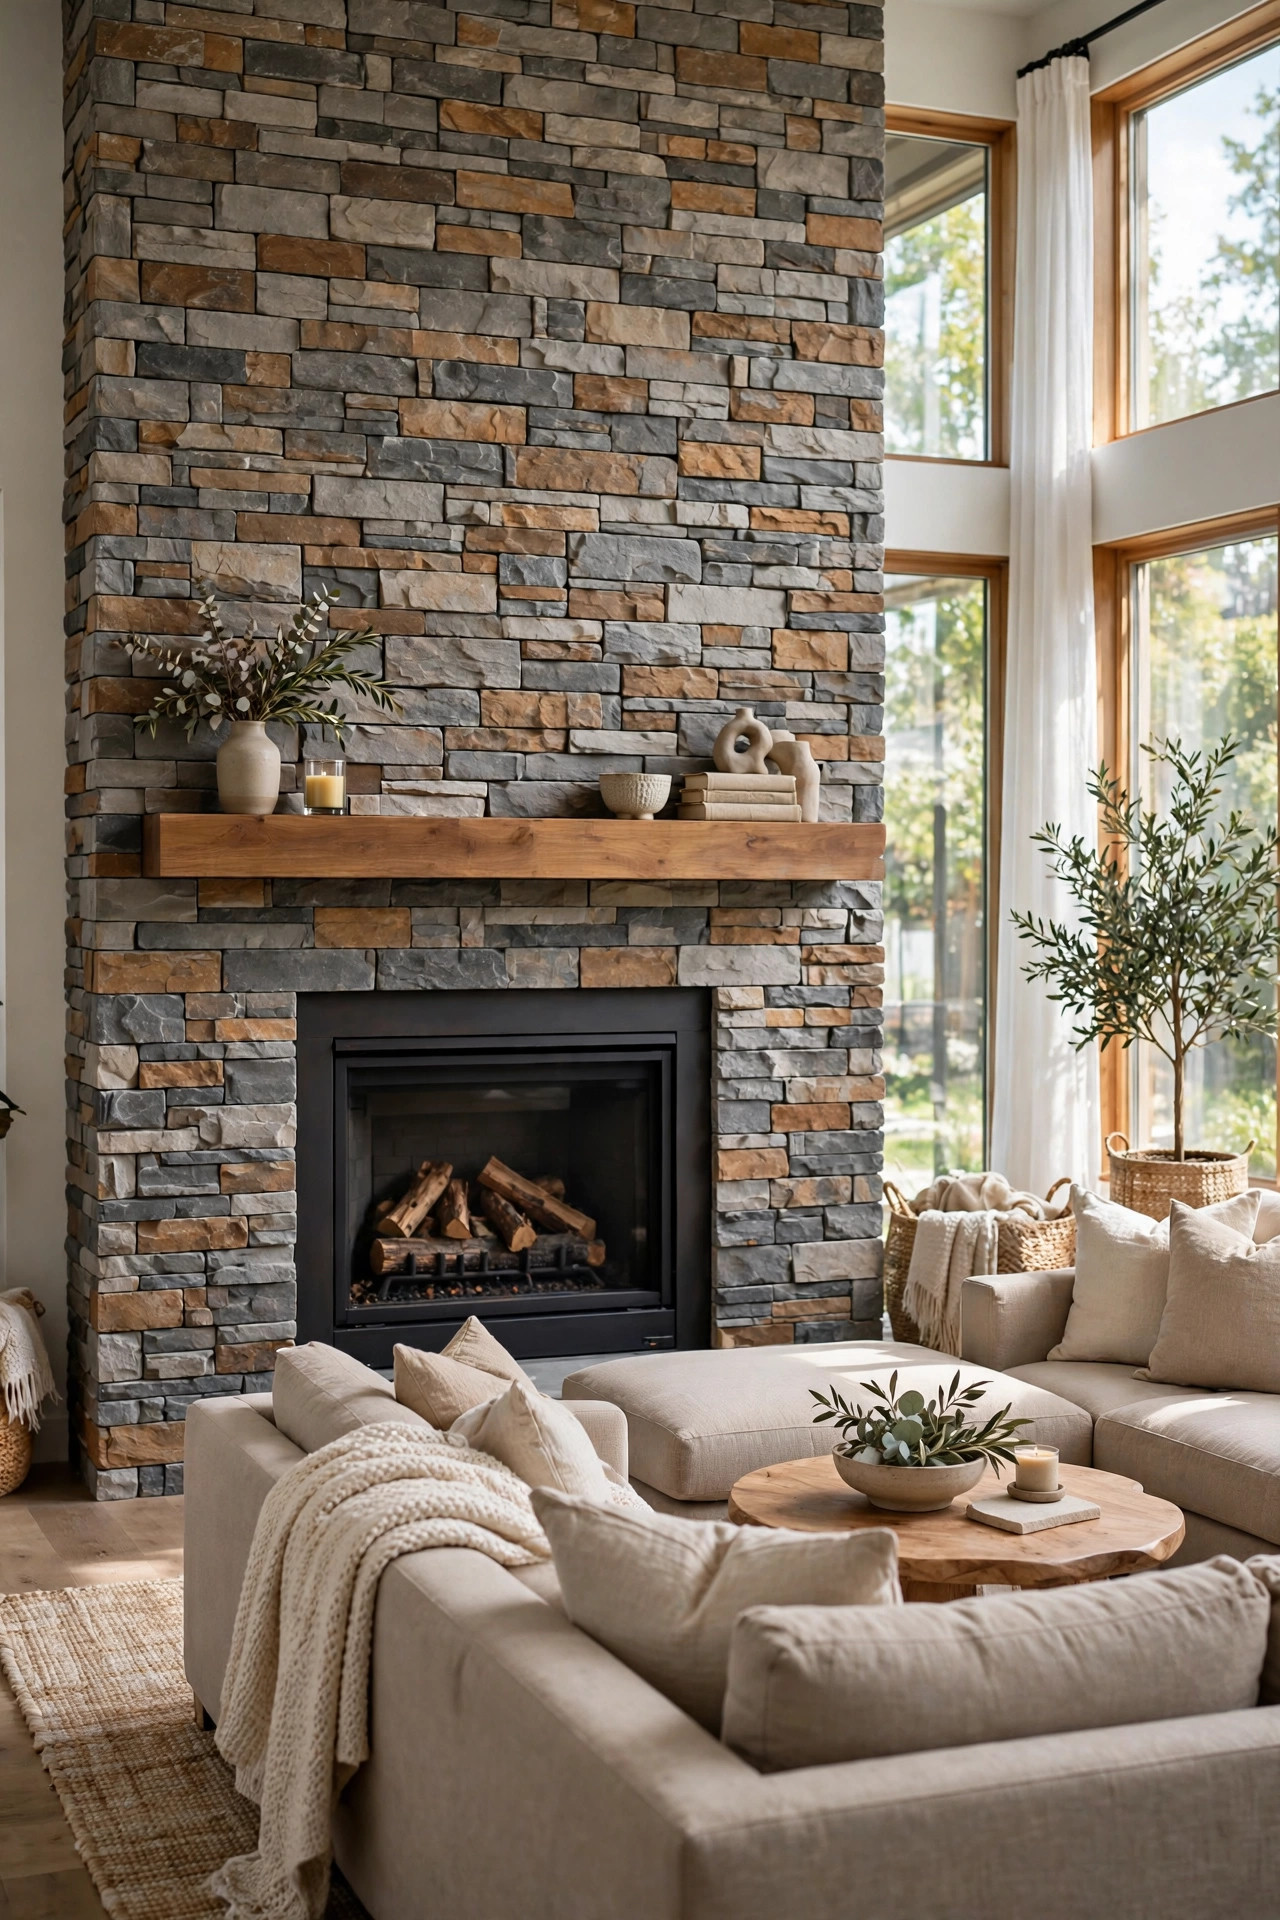
Stacked stone brings the outdoors inside with a ruggedness that makes a room feel solid, sheltering, and permanent. Thin panels of real or manufactured stone are layered in a dry stack pattern with no visible mortar lines, creating deep natural shadows between the stones. It is an absolute showstopper behind a fireplace, in a grand entryway, on the wall behind a soaking tub, or in a dining room that needs some muscle. The natural color variation, soft grays, warm tans, and earthy browns, means it works with almost any color palette you already own. Like brick, the texture is the entire decoration, so the rest of the room can stay quiet and simple while the stone does all the talking. A stone fireplace surround running from floor to ceiling is the classic application and it never fails to impress guests. Wash the finished wall with warm recessed spotlights or adjustable picture lights to make the deep texture glow dramatically after dark. In a primary bathroom, natural stone behind a freestanding soaking tub creates a spa like retreat that feels truly expensive. Choose ledgestone profiles for the most authentic dry stack appearance with the deepest most interesting shadows. Keep all nearby finishes calm and simple, because the stone brings more than enough visual weight and drama on its own.
Manufactured stone veneer is much lighter than full depth stone, so most standard interior walls can handle it without extra structural support. Panels attach with mortar or a heavy duty adhesive rated for the weight, and you always work from the bottom up so each new row rests securely on the one below it. Cut panels with an angle grinder fitted with a masonry blade, wearing a dust mask and eye protection, and keep the pattern random by mixing light and dark pieces. A random layout looks like genuine hand laid stonework, while a repeating pattern gives away the manufactured origin. Seal the finished wall to keep dust out of the many crevices. A stone wall is not a small weekend project, but it is the kind of feature that makes a house feel like a true home for decades to come. Always confirm with a professional that your wall framing can safely support the added weight, especially with denser real stone veneer products. Many homeowners save money by hiring out just the skilled mortar work while handling the simpler surface prep themselves. Expect the project to stretch across several days rather than one weekend, since mortar needs proper curing time between stages. Budget for about ten percent extra material beyond your measurements to cover cuts, chips, and breakage, which is standard for all stonework. The finished wall adds genuine perceived value to the home, something both appraisers and future buyers notice immediately.
16. Upholstered Fabric Panels
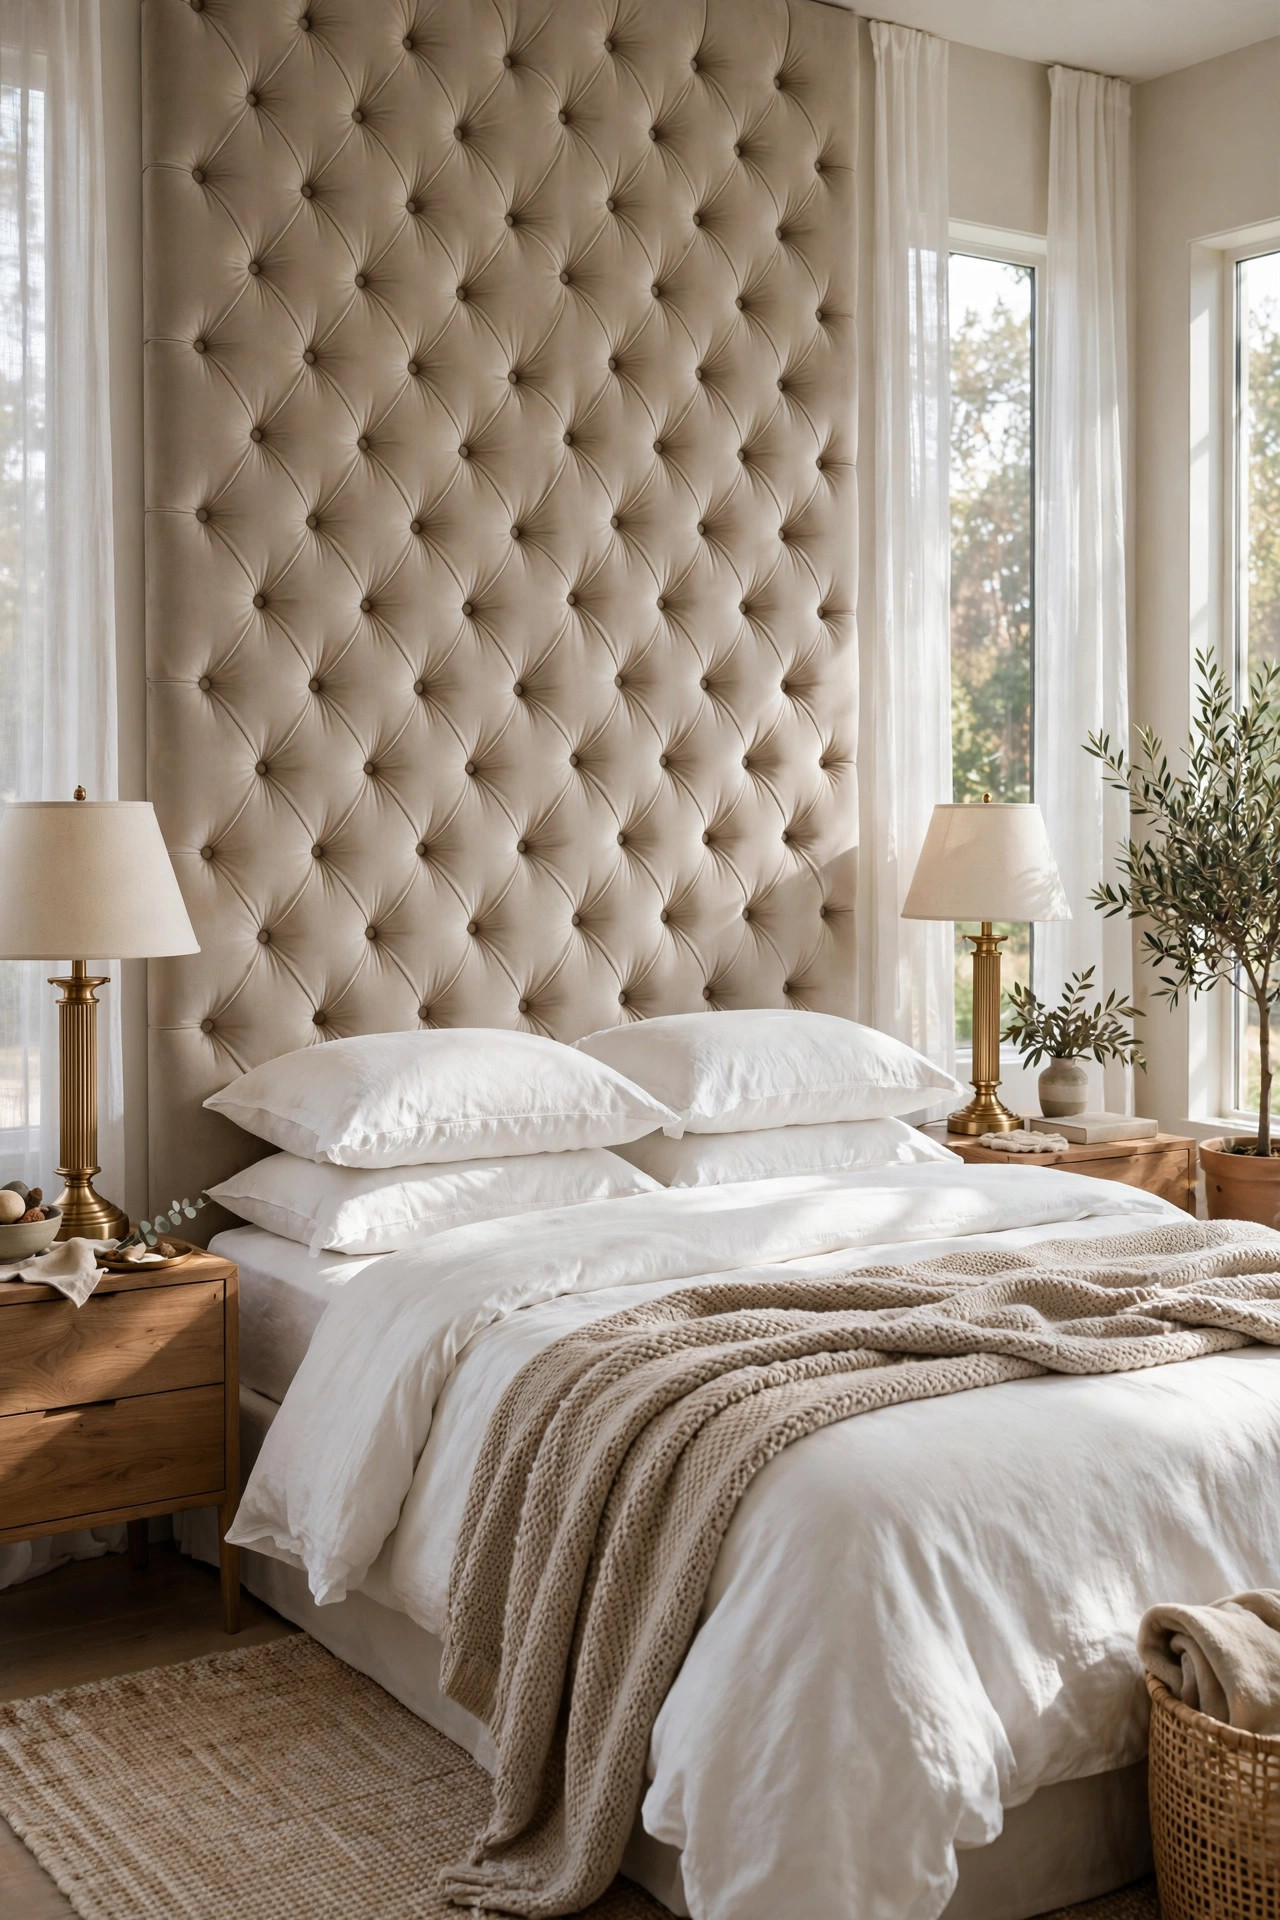
An upholstered wall is the most luxurious idea on this entire list, and it is pure comfort from floor to ceiling. Padded fabric panels, usually arranged in a diamond tufted pattern or simple tailored squares, turn an ordinary bedroom wall into something that looks and feels like a high end boutique hotel. The soft surface absorbs sound, so the room feels noticeably quieter and more restful the moment you walk in, which is exactly what a bedroom should do. Velvet, linen, and bouclé are the classic fabric choices, each giving a different mood from glamorous to relaxed to cozy. Installed behind a bed, the panels replace the need for a headboard entirely, and the whole wall becomes one grand headboard. It is the kind of feature that makes guests ask which designer you hired. Velvet reads glamorous and formal, washed linen feels relaxed and coastal, and nubby bouclé brings trendy cozy texture that everyone wants to touch. Choose performance grade fabrics if the wall sits behind a bed where heads, hands, and pets make daily contact. The padded panels also work beautifully in dining rooms behind a built in banquette or in a home theater where they soften sound like a real cinema. Deeper traditional button tufting suits classic rooms, while flat tailored panels without buttons suit clean modern spaces. Whatever fabric you fall in love with, order extra yardage now for future repairs, because dye lots change and matching later is difficult.
The panels are simpler to build than they look, and handy homeowners make them all the time. Most people start with plywood squares cut to size, then layer foam and soft batting on top before wrapping the fabric drum tight and stapling it securely on the back side. A French cleat or heavy duty adhesive strips hold each finished panel to the wall, and the panels butt together tightly for a seamless tailored look. Choose a fabric with some stain resistance if little hands will touch it, and keep a gentle fabric cleaner on hand for accidents. The grid of panels adds soft geometry even in a solid color, and the padded surface invites you to lean back with a book and stay awhile. It is a bigger project than hanging a picture, but the result feels truly custom, cocooning, and worth every minute. Cut all your plywood panel bases at exactly the same time for perfectly consistent sizing, since even tiny differences show clearly in the finished grid. A pneumatic staple gun makes wrapping the fabric go dramatically faster than a manual hand stapler. Pull the fabric drum tight and perfectly even on all four sides to avoid puckers, sags, and wrinkles. French cleats are the smartest hanging method because they let you lift off individual panels later if one gets stained or damaged. Vacuum the finished wall occasionally with a soft upholstery attachment to keep the fabric fresh, clean, and dust free.
17. Beadboard Wainscoting
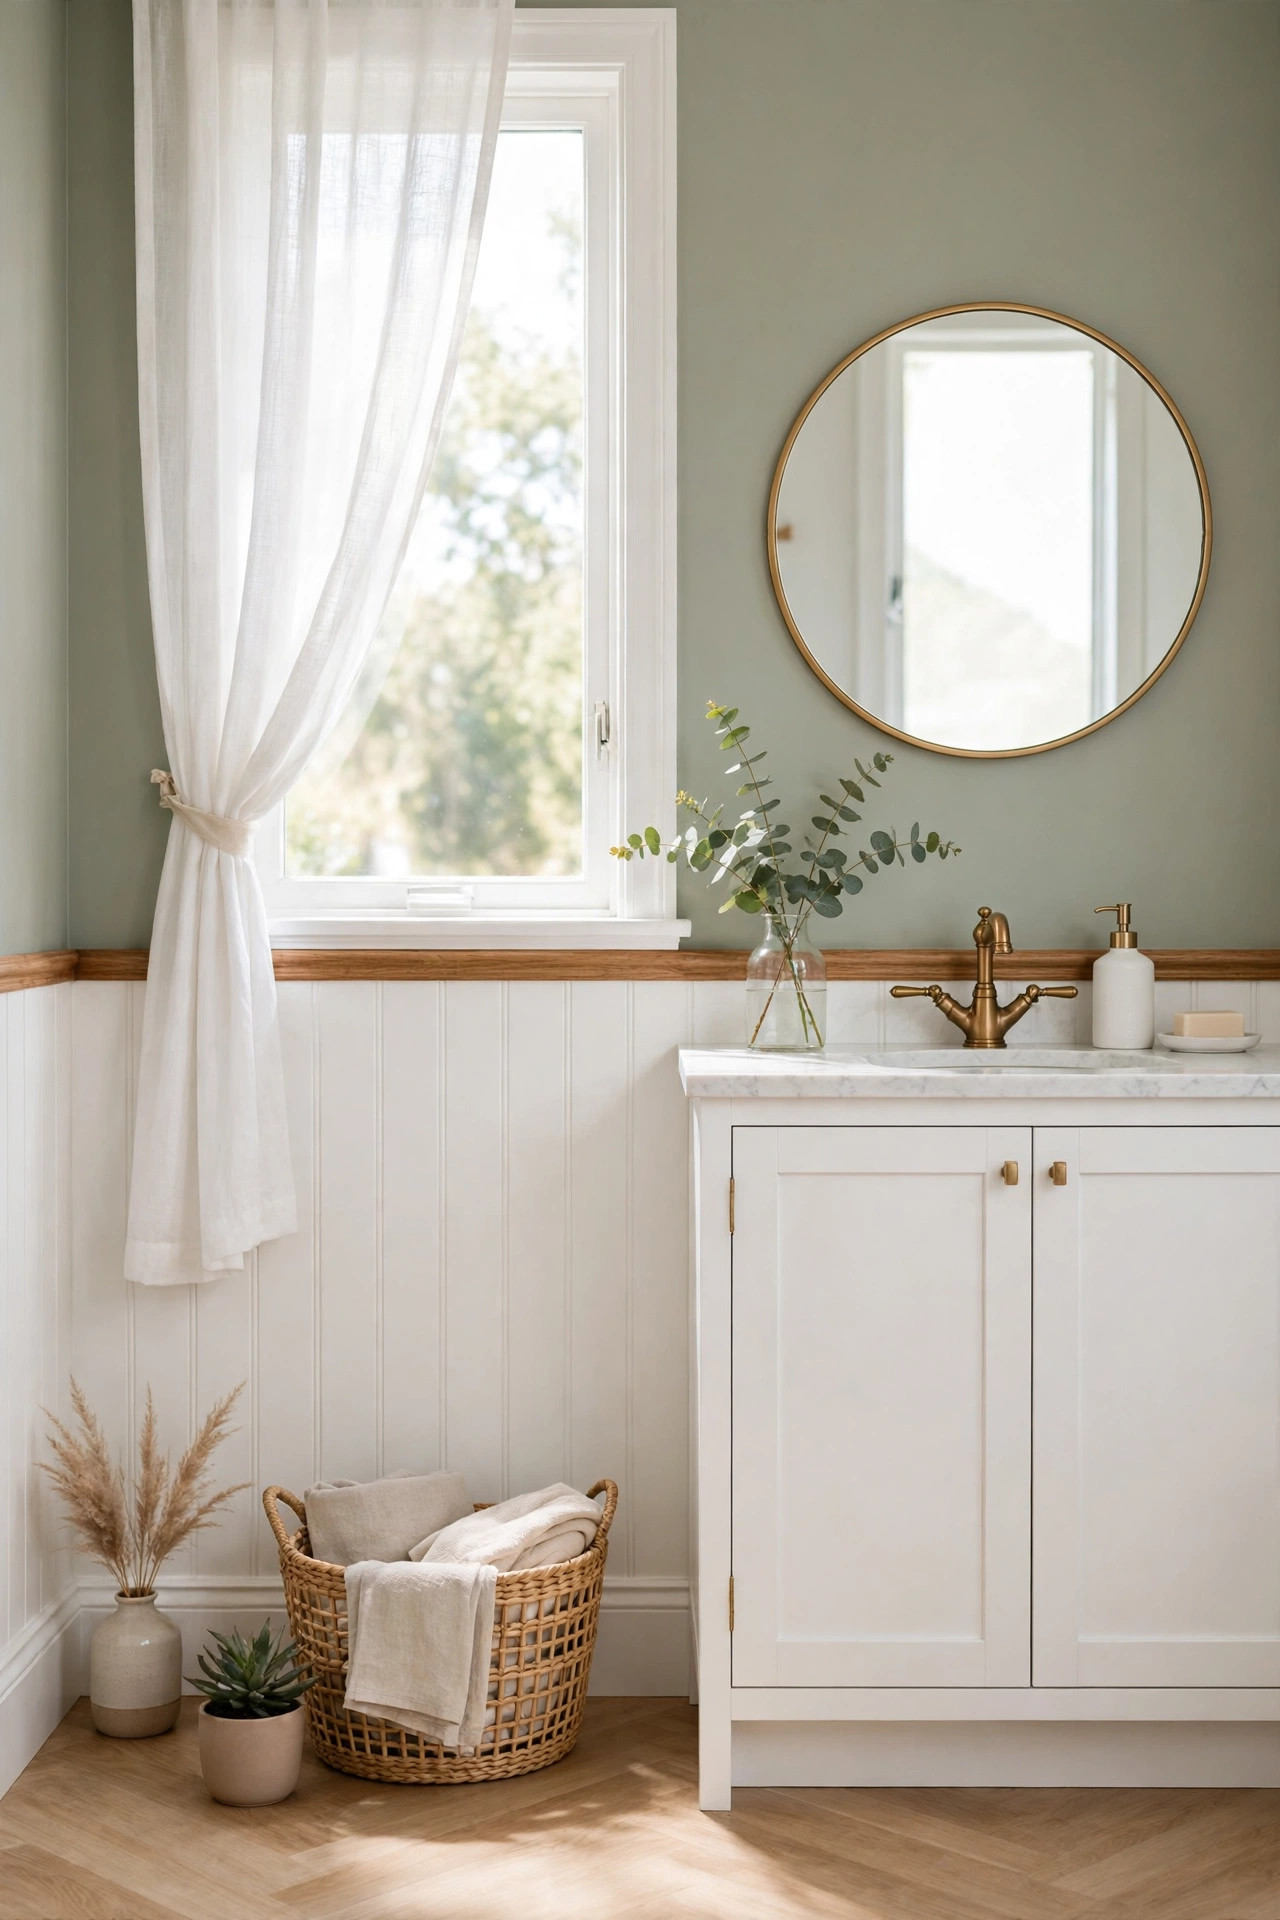
Beadboard brings instant cottage charm to any room, and it is one of the friendliest accent walls for beginners. The narrow vertical grooves give walls a tailored finished look that flat drywall simply cannot match, and the bead detail along each board catches the light in a pretty rhythmic way. Paint it classic white for a fresh coastal cottage feel, soft sage for a calm vintage look, or deep navy for a moody dramatic statement. It shines in bathrooms, mudrooms, laundry rooms, and dining rooms, anywhere you want texture that also stands up to daily life. Full height beadboard makes a bold statement, while the classic two thirds height with a chair rail on top feels timeless and traditional. Pair it with simple Shaker style trim and a classic chair rail for the most timeless traditional look. Soft sage green beadboard in a bathroom feels calm and vintage at the same time, especially with brushed brass fixtures. For a modern twist, paint full height beadboard in one deep moody color from floor to ceiling and skip the chair rail entirely. In a busy mudroom or laundry room, the wipeable painted surface handles daily scuffs far better than flat drywall. Keep the grooves consistent and even, because the rhythmic bead pattern is the entire beauty of this wall.
Installation is very beginner friendly, which is why beadboard is often the first paneling project people try. You can buy individual tongue and groove boards or large four by eight sheets that go up much faster and cost less. Sheets attach directly to the wall with construction adhesive and a few brad nails, and the seams between sheets hide behind the groove pattern. Add a simple chair rail on top and baseboard at the bottom to frame the panels like a professional. Caulk every edge, fill the nail holes, and paint two coats in a satin or semi gloss finish that wipes clean. The whole project usually takes a single weekend and transforms a plain room completely. It is hard to go wrong with this one, which makes it perfect if you are nervous about your first wall project. Four by eight beadboard sheets cost far less than individual tongue and groove boards and install in a fraction of the time. The groove pattern cleverly hides the seams between sheets, so nobody will know you used panels instead of single boards. A satin or semi gloss paint finish is essential in bathrooms and mudrooms because it resists moisture and wipes clean easily. Take your time with the caulking, since crisp clean edges are what separate a professional looking job from an amateur one. Step back often to admire the rhythm of the beads, which is deeply satisfying as the wall comes together.
18. Living Plant Wall
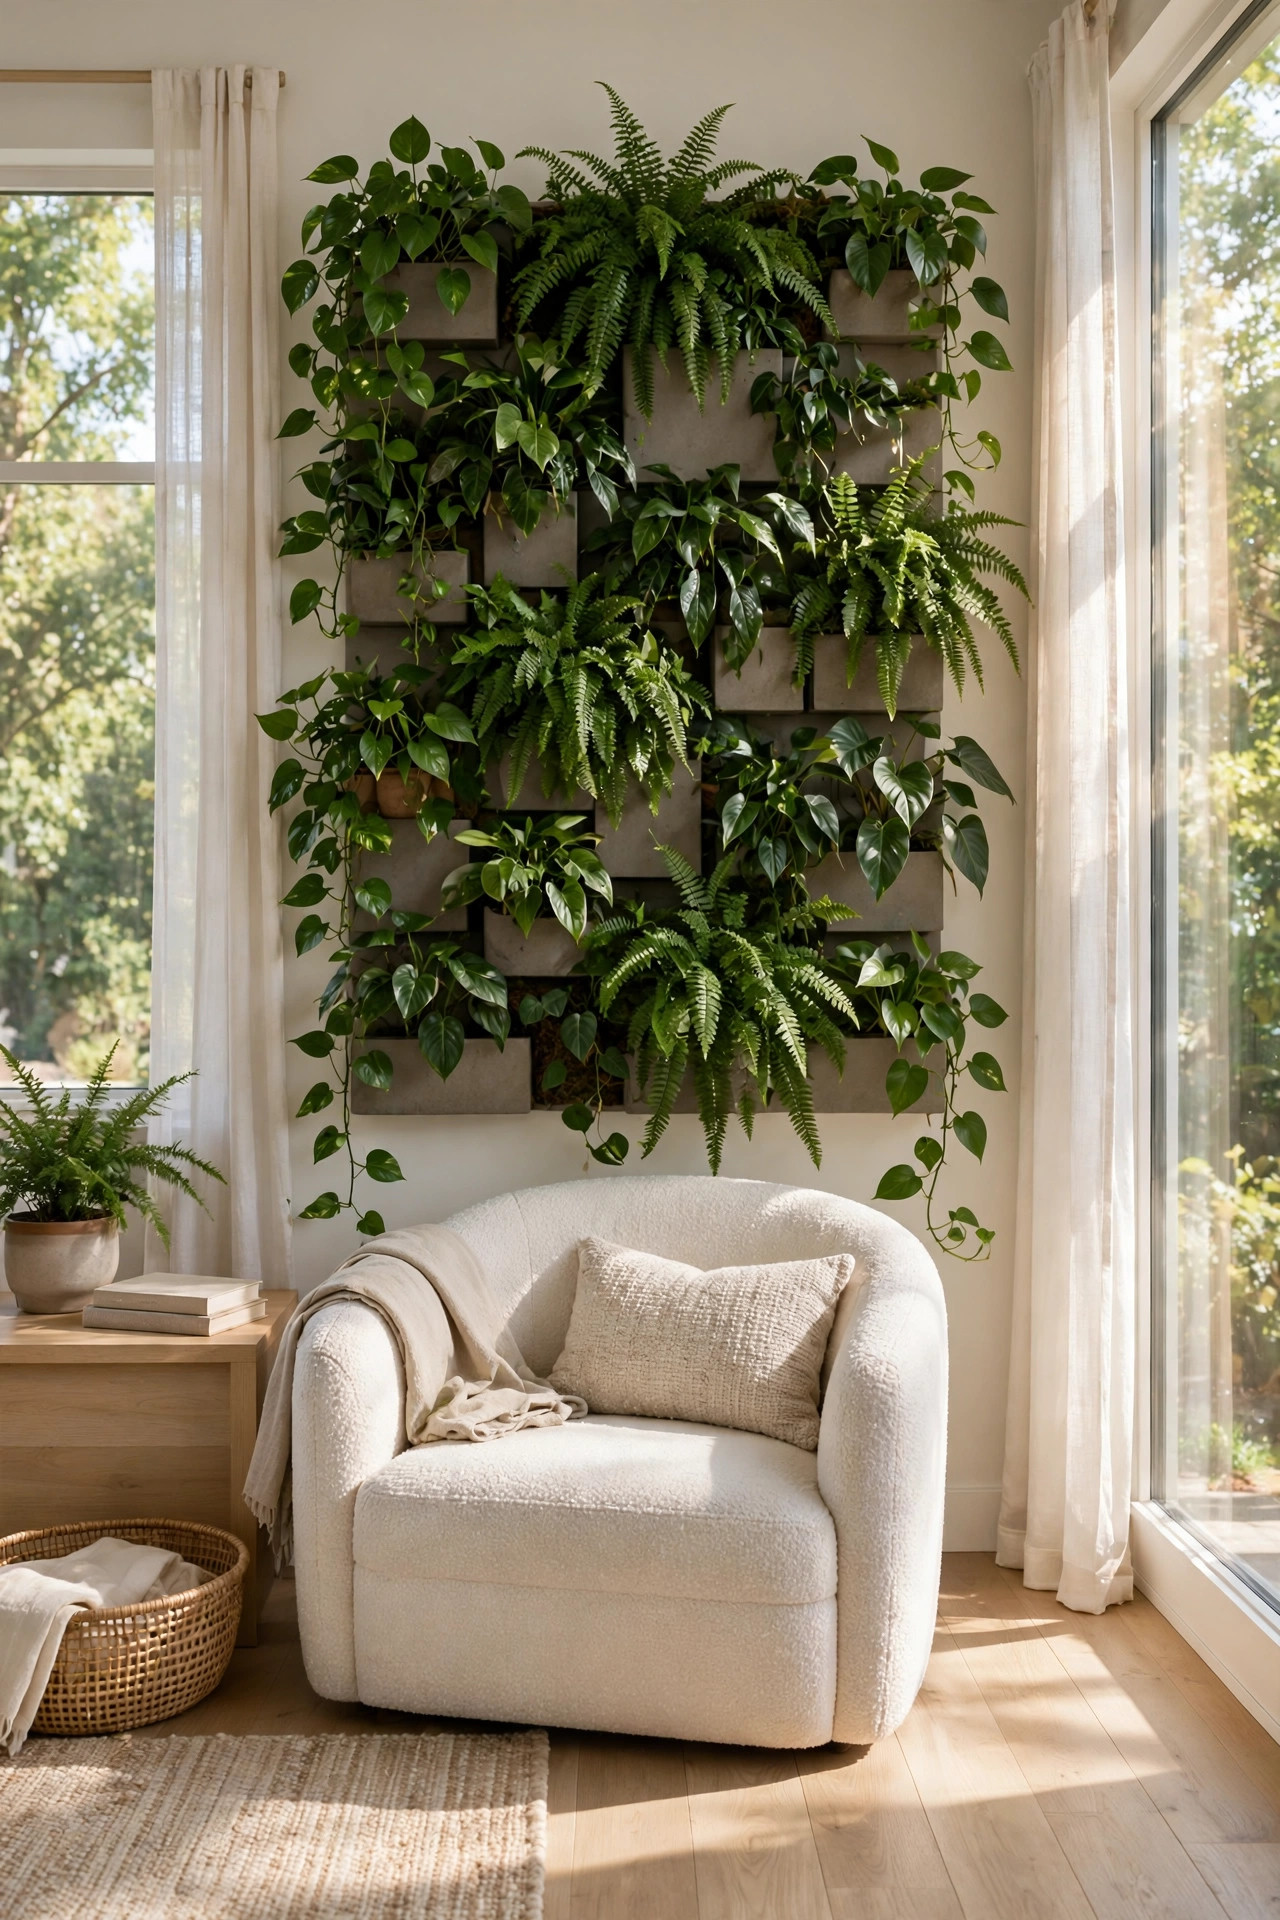
A living plant wall is the boldest accent wall on this list, and it is literally alive. Hundreds of green plants growing vertically on one wall turn a room into a jungle retreat that changes a little every single day. The wall cleans the air, softens noise, and gives off a calm energy that no paint or wallpaper can match. It is a showstopper in living rooms, home offices, and sunrooms, anywhere with enough natural light to keep the plants happy. Ferns, pothos, philodendrons, and trailing ivy are the classic choices because they grow lush and forgive beginner mistakes. Start with easy forgiving plants like pothos, philodendrons, and ferns before attempting anything fussy or rare. A simple drip irrigation system on a timer takes the daily watering chore off your plate completely. Good grow lights supplement weak natural light and keep the wall lush through dark winter months. Mix leaf shapes and sizes for a rich layered jungle look rather than a flat wall of identical plants. Place the plant wall where you will see it every day, because watching it grow and change is half of the joy.
Real living walls need planning, but modular systems have made them much easier than they used to be. Pocket planters that hang on a frame, felt planting systems, and self watering panels all work well for beginners. Each pocket gets its own small plant in lightweight potting mix, and a simple drip line or hand watering keeps everything alive. Good light is non negotiable, so place the wall near a bright window or add full spectrum grow lights on a timer. Start small with one framed section and expand as your confidence grows. If real plants feel like too much commitment, high quality faux plants in the same modular system give you the jungle look with zero watering. The result is an accent wall that guests will talk about long after they leave. Faux plant panels have become remarkably realistic, and mixing a few real trailing plants among them fools almost everyone. Budget for the irrigation and lighting upfront, because skimping there is what kills most living walls. Check the wall structure before you start, since a fully planted and watered system gets surprisingly heavy. Mist the leaves weekly to keep them dust free and glossy, which also discourages spider mites. This is the one accent wall that genuinely gets better with time as the plants fill in and mature.
Conclusion
An accent wall is the fastest way to give a room a clear focal point, and now you have 18 ways to do it without touching a paint roller. From warm wood planks to a living wall of green plants, every idea here adds texture, depth, and personality that flat paint cannot match. Pick the one that fits your budget, your skill level, and the room you use most. Start this weekend, take it one wall at a time, and enjoy watching a plain room turn into a space that feels finished and pulled together.
FAQs
What is the cheapest accent wall idea?
A board and batten grid or a curated gallery wall usually costs the least, since both use inexpensive materials you may already own. Paint based finishes like limewash are also budget friendly. Most of the ideas on this list can be done for less than the price of a nice rug.
Can renters do an accent wall?
Yes, many of these ideas are renter friendly. Peel and stick wallpaper, a large woven hanging, a gallery wall with minimal nails, and freestanding plant shelves all come down cleanly. Always check your lease first, and keep the original paint color on hand for touch ups.
Which accent wall adds the most value to a home?
Classic choices like board and batten, shiplap, and beadboard tend to appeal to the most buyers because they read as upgrades rather than personal taste. Natural materials like wood and stone also photograph well for listings. Very bold or personal choices are better enjoyed while you live there.
How do I choose which wall should be the accent?
Pick the wall your eye lands on first when you enter the room, often the one behind the bed, the sofa, or the fireplace. Avoid walls broken up by many doors and windows, since interruptions chop up the effect. One strong wall always beats two competing walls.
Do accent walls make rooms look smaller?
A dark or busy accent wall can make a small room feel cozier, which is not always a bad thing. To keep a small room feeling open, choose lighter tones, vertical lines, or mirrors, which draw the eye up and bounce light around. The other three walls should stay light and simple.
How do I light an accent wall properly?
Texture looks best with light that rakes across it, so place lamps or picture lights to the side rather than straight on. A dimmer lets you shift the mood from bright daytime to soft evening glow. Avoid harsh overhead spots aimed directly at the wall, which flatten the texture you worked to create.