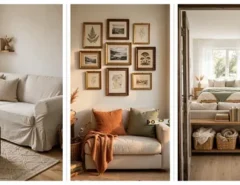
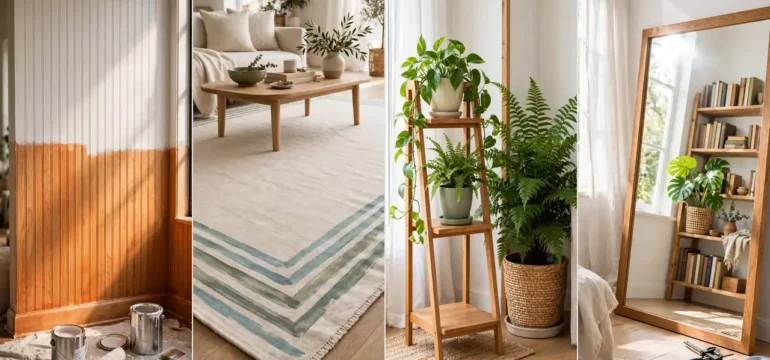
You want a living room that looks like you made it, because you did. Not a room full of flat-pack furniture and matching sets, but one with a wall you painted, a shelf you built, and a rug you hemmed on the floor last weekend.
The trouble is that most makeover advice starts with a shopping cart. It tells you what to buy, and the budget is gone before the first nail goes in. Hands-on decorators know the best part is the building.
This list of 30 DIY living room makeover ideas skips the big spending and gets you into the work. You will find walls to paint and panel, furniture to build from plain boards, lighting to rewrap, and windows to dress. Every idea comes with real steps, simple materials, and basic tools like a drill, a level, and a paintbrush.
Pick one small project to start. A free Saturday morning is enough for many of these, and each finished piece makes the next one easier to tackle.
1. Paint a Color-Block Accent Wall Using Only Painter’s Tape
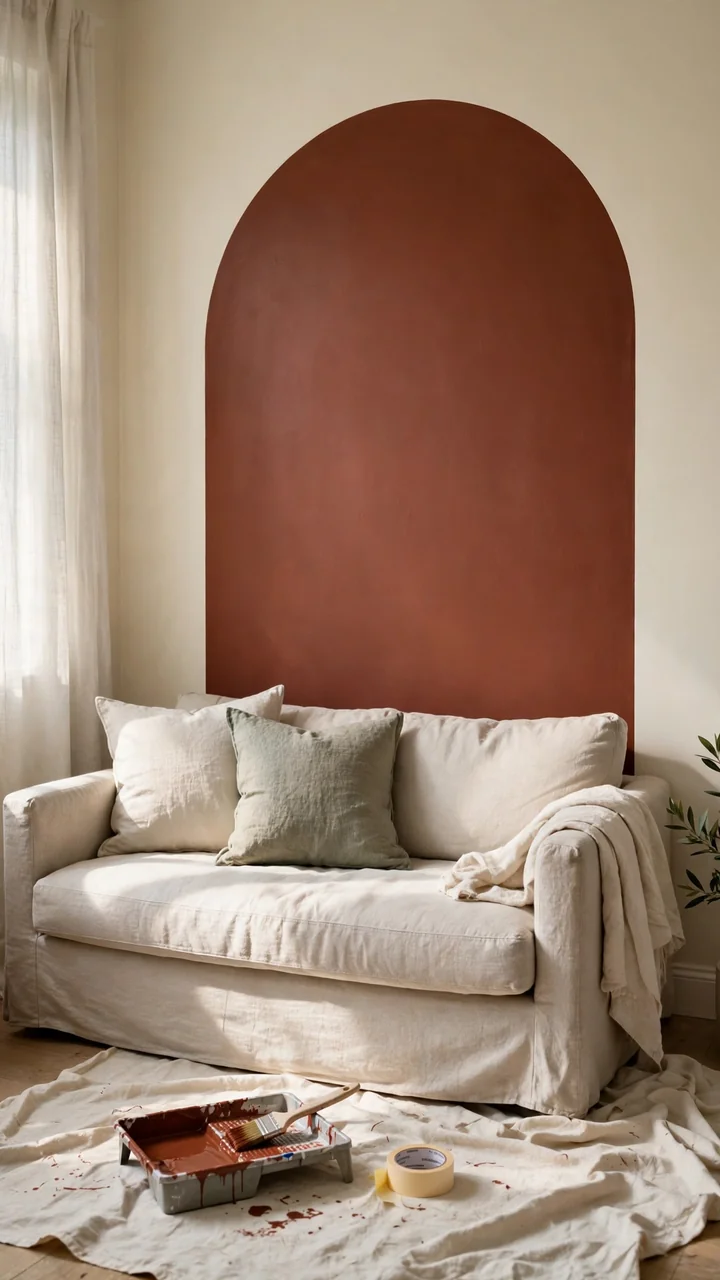
One roll of painter’s tape and two paint colors can give a flat wall a bold, graphic look. The only real skill is patience at the taping stage.
- Pick a pale shade and a deeper one from the same color family
- Paint the whole wall in the pale shade and let it dry overnight
- Tape off a big arch, a half wall, or a tall rectangle
- Press the tape edges down with a credit card
- Paint the second color, then pull the tape while the paint is still slightly wet
Keep the shapes large. Small blocks look busy, and big ones look calm. Place the block right behind the sofa so the furniture sits in front of it.
A plain white wall behind the sofa that fades into the rest of the room.
A deep block of color with crisp edges that frames the seating area.
2. Build a Slat Wood Feature Wall From Thin Pine Strips

Bare walls behind a sofa can make the whole room feel unfinished.
Thin pine strips fix that, and the build is mostly one step repeated. Stain or paint the strips on the floor first. It is much easier than brushing between slats once they are up.
What you need:
- Pine strips about 1 inch wide
- A brad nailer or construction adhesive
- A level
- A scrap of wood to use as a spacer
Start at one edge and check level every third strip, because small slants add up fast.
Draw a straight guide line with a level at the edge where you will start.
Glue and nail the first strip right against the line.
Set the spacer beside it and fix the next strip. Repeat across the wall.
Measure the last gap and trim the final strip to fit.
3. Add Board and Batten With MDF Strips and a Level
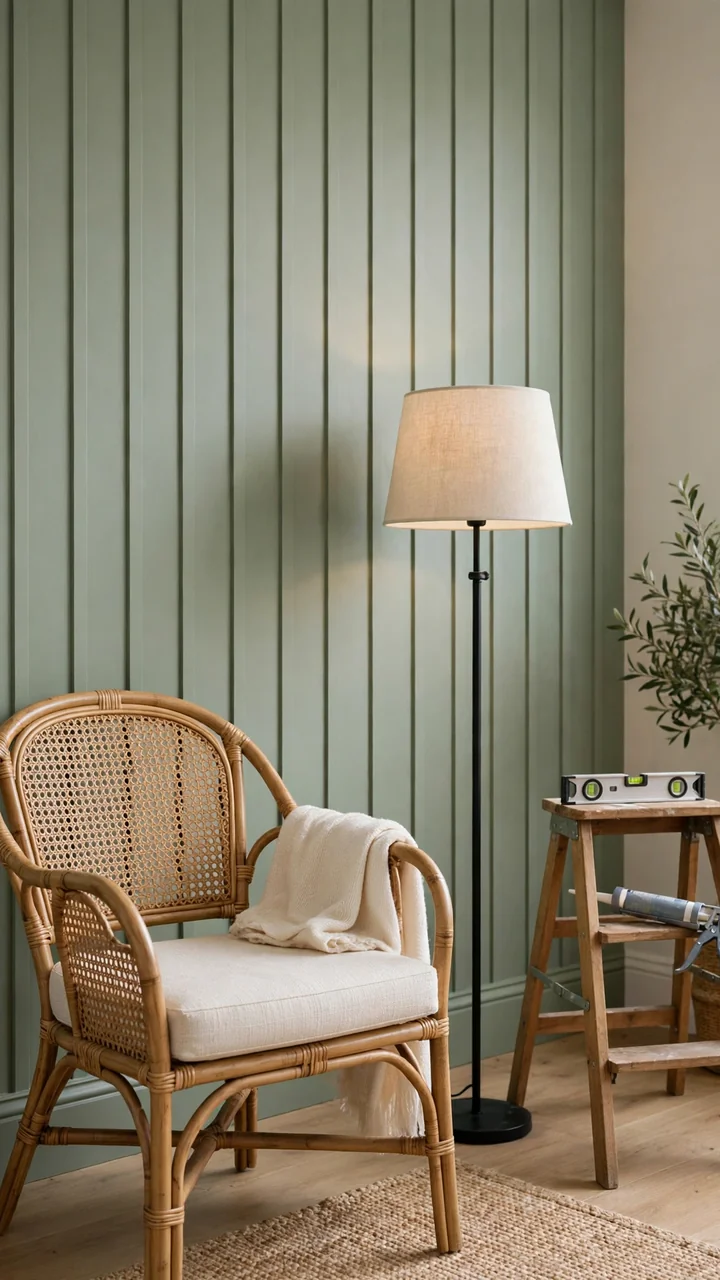
Make the gaps between battens equal, and the rest of the wall forgives you. Divide the wall width by the spacing you like, then adjust until the math comes out even.
Cut the MDF strips to height, glue them on, and nail them in. Fill every nail hole and run a thin bead of caulk along each edge. Caulk is the step that makes the wall look built in instead of stuck on.
Paint in a satin finish so the shadow lines show. Plan around outlets, and notch a batten instead of covering the plate.
4. Plan a Gallery Wall With Paper Templates Before You Drill
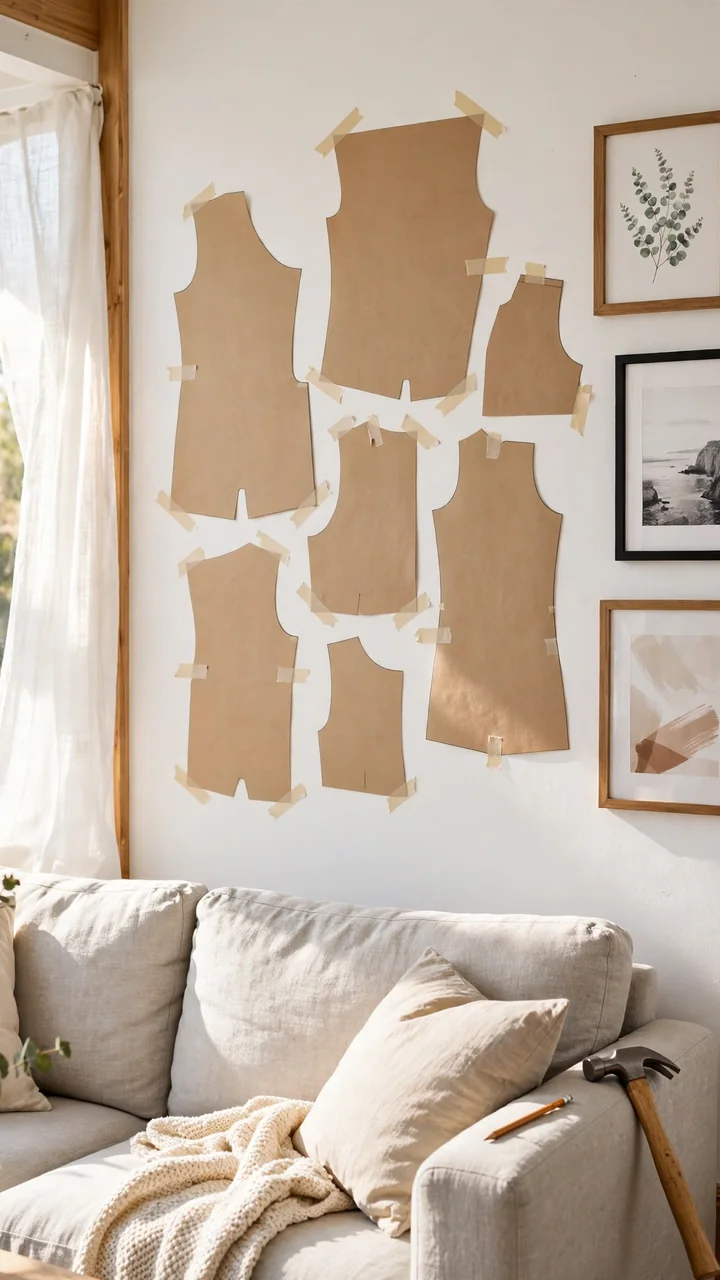
Most gallery walls go wrong at the hammer, not at the design. People hang the first frame and then run out of room for the rest.
Cut brown paper to the size of each frame and write the frame’s name on it. Tape the sheets to the wall and shuffle them until the spacing feels right. Mark the nail spot through the paper, tear it off, and hang.
- Leave two to three inches between frames
- Mix black and wood frames for a collected look
- Keep the group low enough that it connects with the sofa
💡 Quick Tip
Hold the paper templates up with low tack painter’s tape. It peels away without lifting the paint underneath.
5. Paint Over Dated Wood Paneling Without Peeling or Streaks
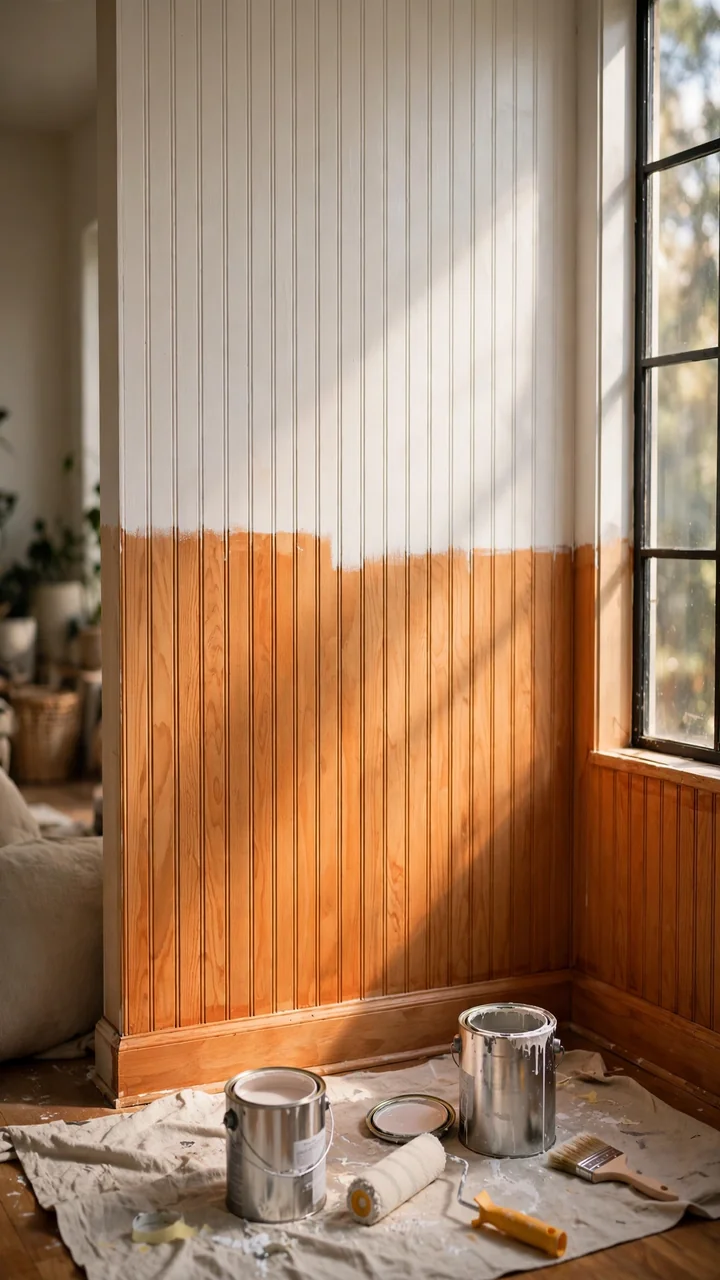
Dated wood paneling does not have to come down. Pulling it off can damage the wall behind it, and painting it takes far less effort than most people expect.
Clean it with a degreaser first, because years of dust and kitchen air leave a film. Sand lightly to dull the shine, then prime with a bonding primer.
Brush the grooves first, then roll the flat parts. That order keeps drips from running down the lines. Two thin coats beat one thick coat every time.
Use a bonding primer on glossy wood.
Brush the grooves before rolling.
Let each coat dry fully.
Painting straight over a greasy surface.
One heavy coat to save time.
Rolling first and brushing later.
6. Make Textured Canvas Art With Joint Compound
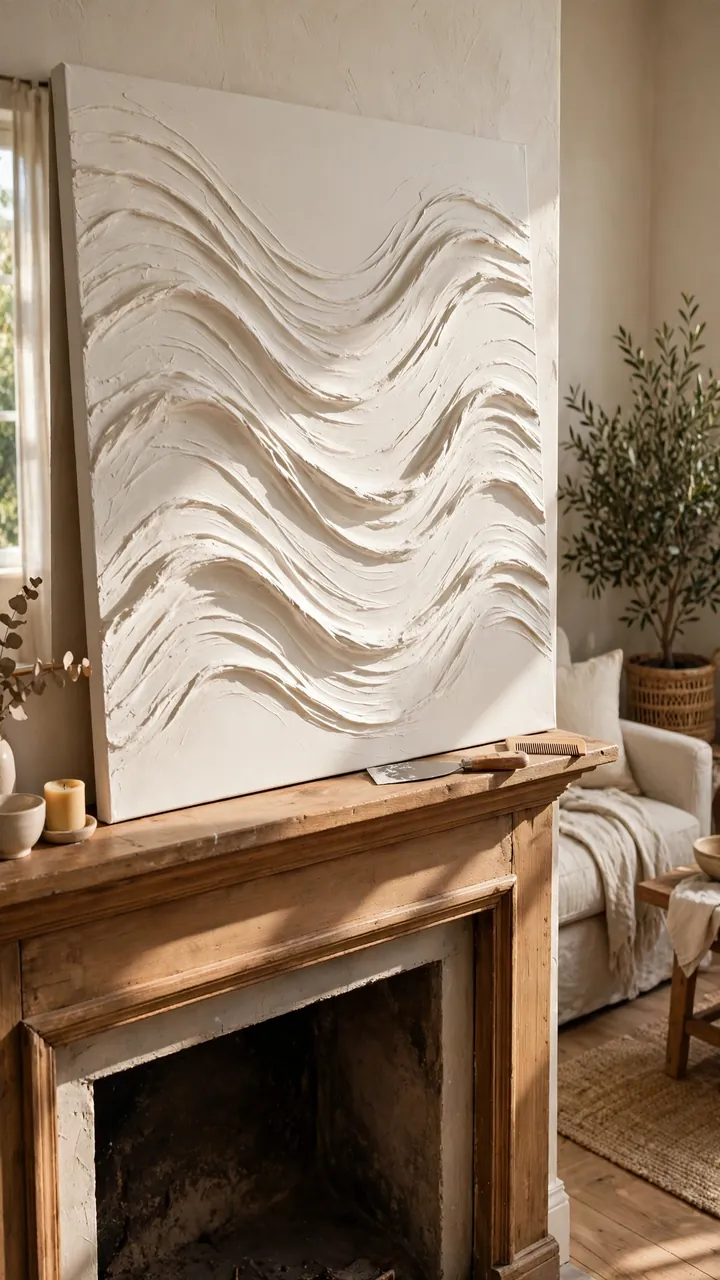
Run your fingers over good art and you can feel the ridges before you see them.
You can get that look with joint compound, the same paste used on drywall seams. Spread it across a blank canvas with a putty knife, then drag a comb or fork through it to make lines or waves. Let it dry for a full day.
Paint it one soft color or leave it raw white. Keep it to a single shade so the texture does the talking. It makes easy DIY living room wall decor, and it looks right leaning on a mantel or hanging over the sofa.
What to grab first
7. Build Floating Shelves Beside the TV From Plain Boards
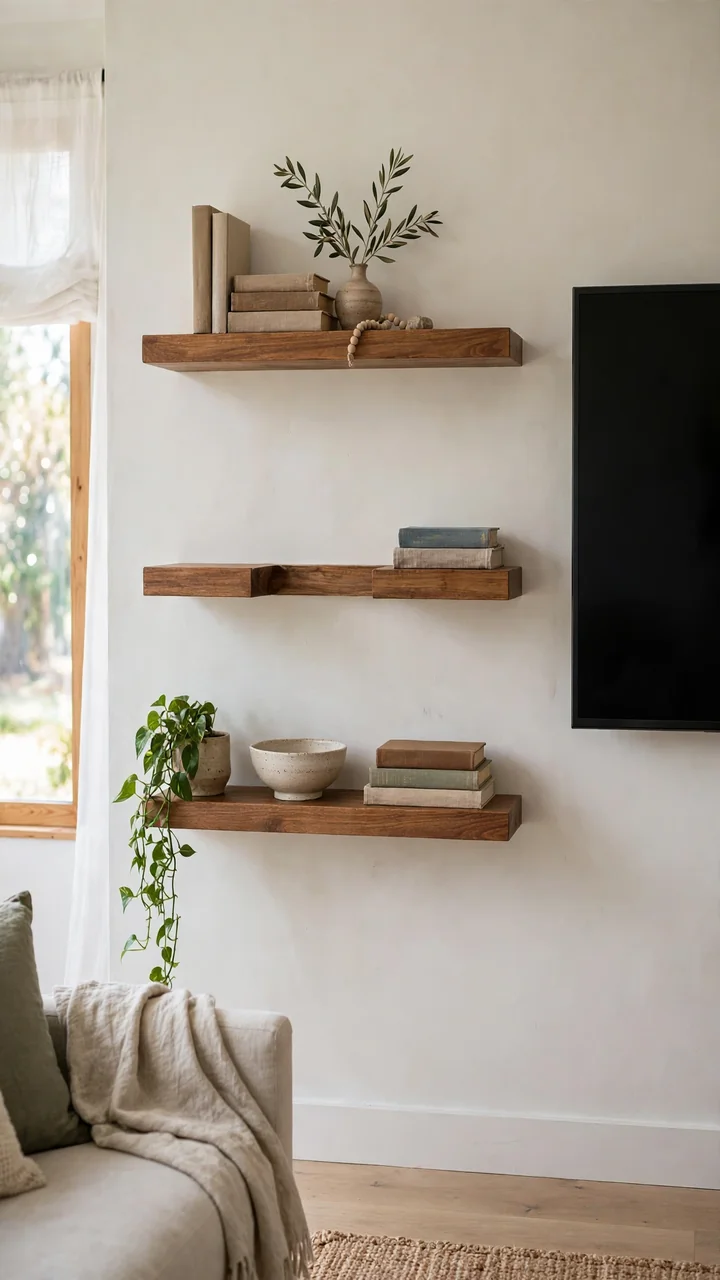
A bare strip of wall next to a black screen looks lonely, and it is usually where the clutter lands.
Two or three plain boards can fix it. Cut them to the same length, sand the edges round, and stain or paint them to match your other wood. Find the studs with a stud finder and screw the brackets into them, not into drywall alone.
- Leave about 10 to 12 inches between shelves so books fit
- Keep heavy items on the lowest shelf
- Mix a few books, one plant, and one empty gap
Build your own living room decor this way and the shelves will match the room.
8. Pick the Right Paint Sheen for Each Part of the Room
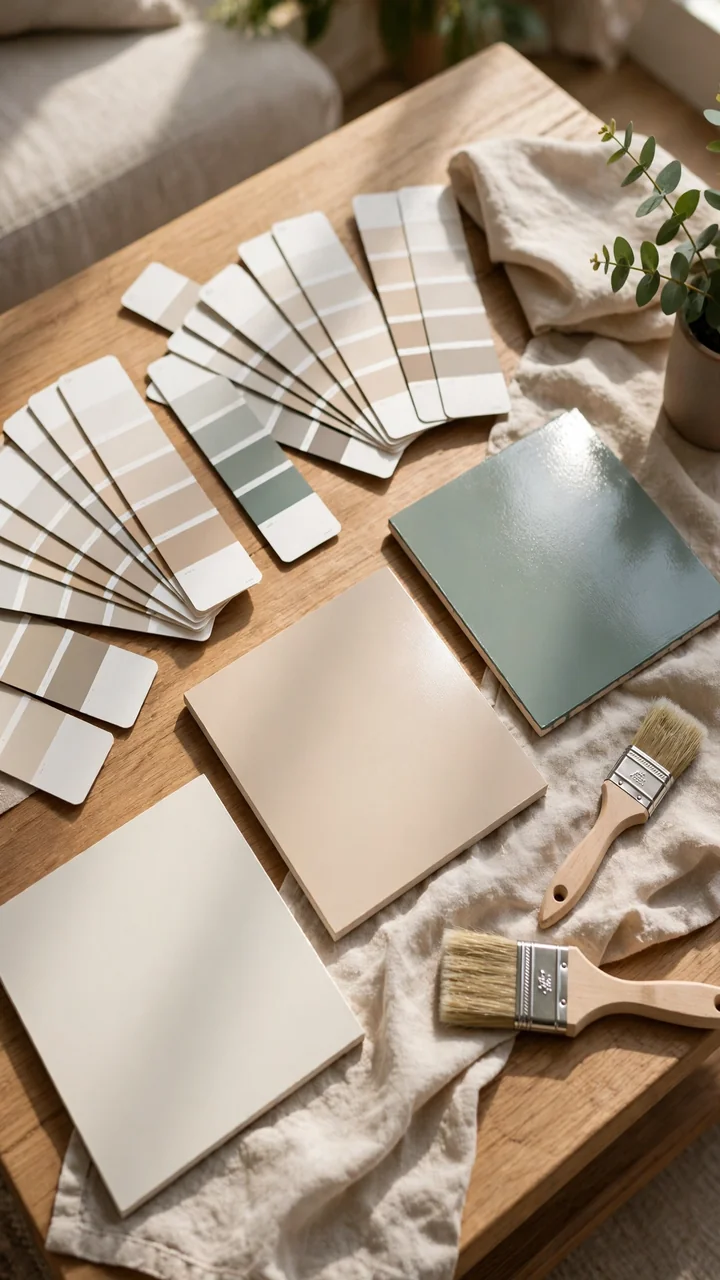
Here is the tiny rule: flat paint where nobody touches, shinier paint where hands go.
Sheen decides how a finish looks in side light and how well it wipes clean. A shiny wall shows every bump, and a flat door frame holds fingerprints for years. Pick the sheen before you buy a single can, and tell the paint store which surface it is for.
Use the table below as a shopping list for your living room makeover DIY projects.
| Sheen | Use it on |
|---|---|
| Flat or matte | Ceilings and walls with bumps |
| Eggshell | Main walls with normal traffic |
| Satin | Battens, trim, and doors |
| Semi-gloss | Window frames and built-in shelves |
9. Paint the Ceiling One Shade Lighter Than the Walls
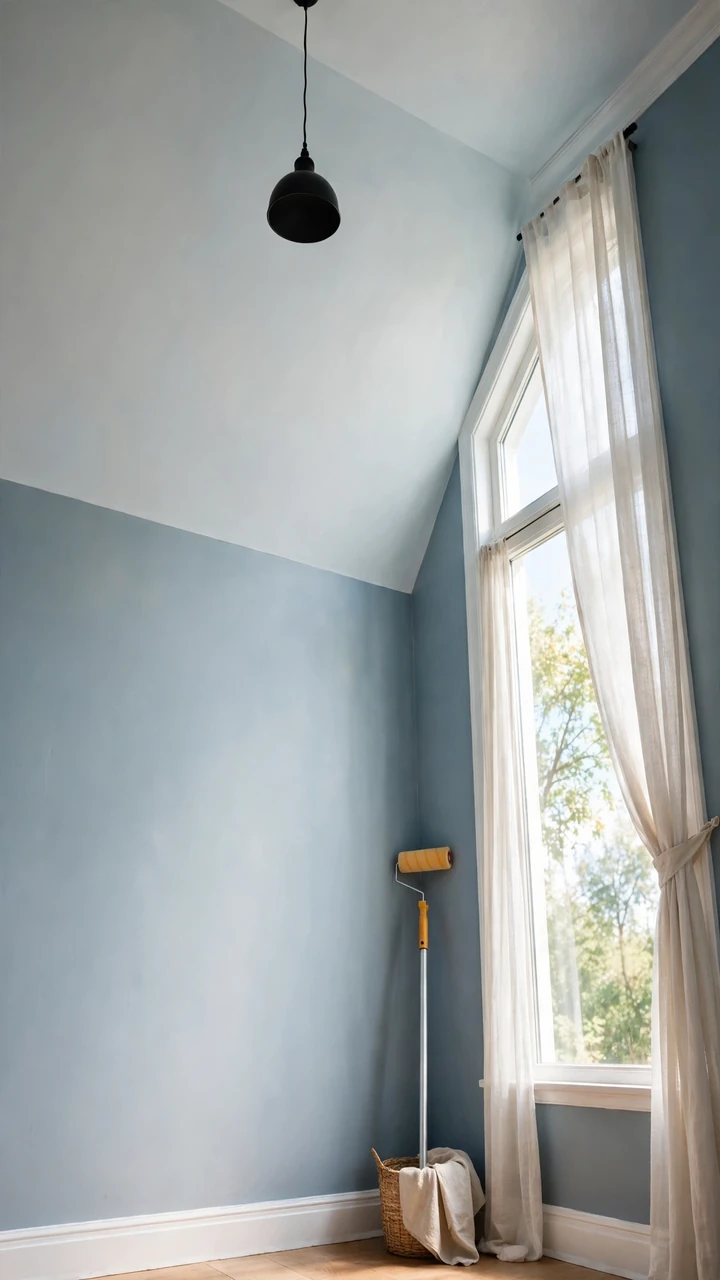
White ceilings are the default, and a lot of rooms would look softer without one.
Take your wall color chip and look at the same card. Pick the strip one or two steps lighter and ask the store to mix the ceiling paint in that shade. The ceiling will still feel bright, but the room will not have a hard white line at the top.
Paint the ceiling first and the walls second. Any drips land on bare wall that you are about to cover anyway.
Choose the ceiling color from the same paint card as the walls, just one strip lighter.
10. Build a Narrow Sofa Table From Basic 2x4s
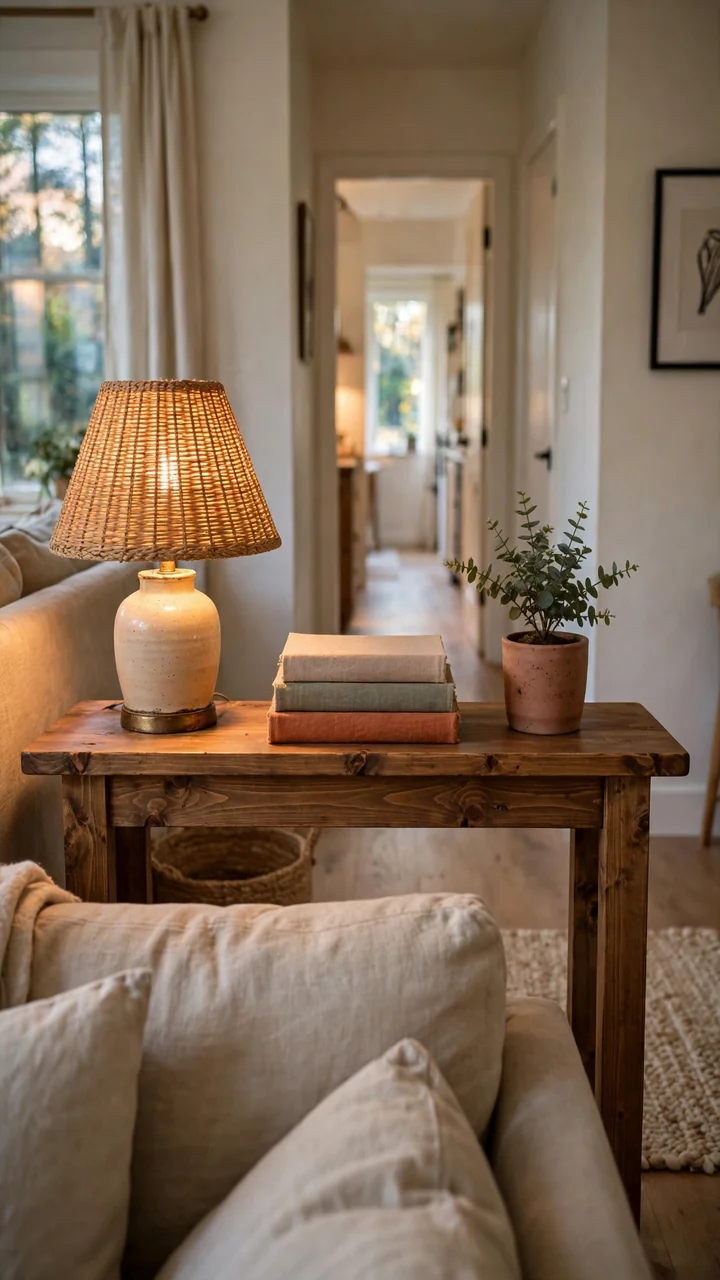
A sofa table is one of the easiest DIY living room furniture ideas to start with. It is just four legs and a top.
Aim for a height close to the sofa back and a depth of about 10 to 12 inches, so it slips behind the sofa without crowding the walkway. Use straight 2x4s from the rack, not warped ones. Look down each board like a rifle barrel before you buy.
You will need wood glue, 2.5 inch screws, sandpaper, and stain or paint.
Cut four legs and four short crosspieces. Join them into two matching end frames.
Stand the frames up and connect them with two long rails, front and back.
Lay 2x4s side by side across the top and screw them down from underneath.
Sand every edge smooth, then stain or paint and add a coat of clear sealer.
11. Revive a Thrifted Coffee Table With Paint and Wax
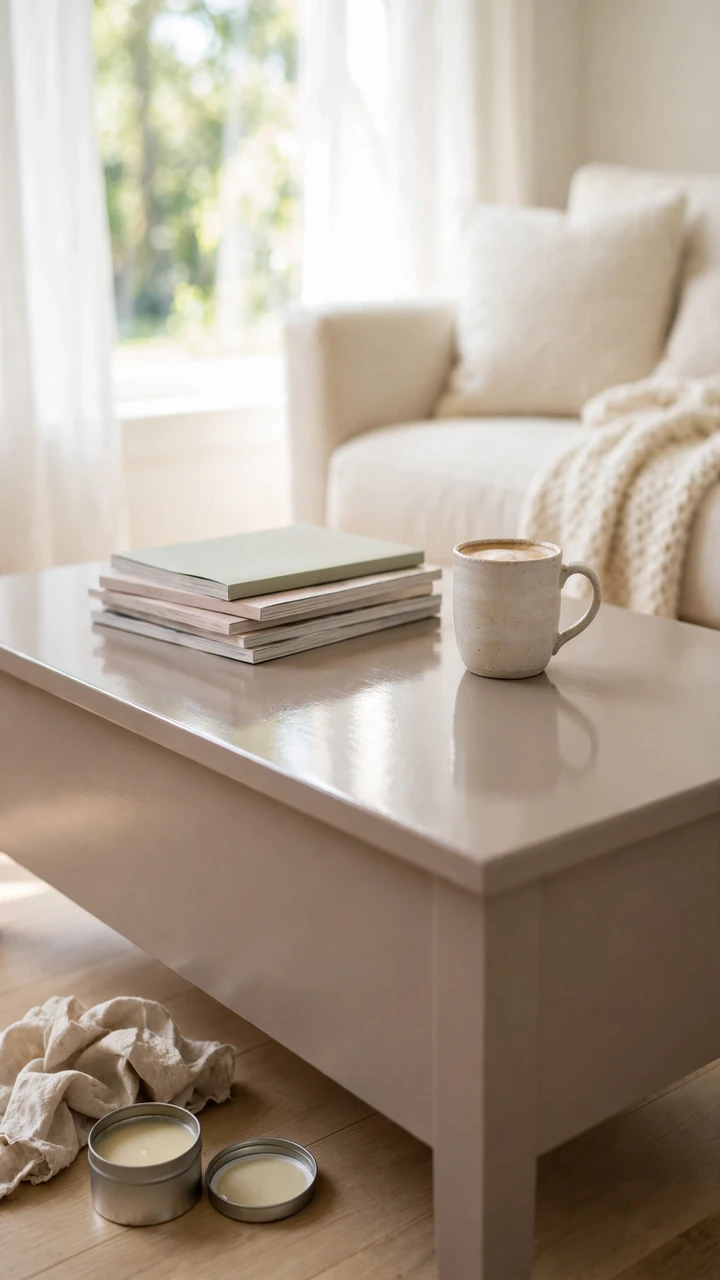
Thrift store coffee tables often have solid bones and a tired finish. Scratches and water rings are the main problems, and both are easy to fix.
- Wipe the table with a degreaser and let it dry
- Sand the top until the shine is gone
- Brush on one coat of bonding primer
- Paint two thin coats, sanding lightly between them
- Seal with a soft furniture wax and buff it with a rag
Pick a chalk-style paint if you want less prep. The wax gives a smooth, hand-rubbed feel that a spray can will not.
An orange-toned top with ring stains and a chipped edge.
A soft, even color with a smooth waxed top that hides small scuffs.
12. Turn a Wooden Crate Into a Storage Ottoman

Blankets, remotes, and kids’ toys all need a home, and an ottoman can hold them while you rest your feet. A sturdy wooden crate is the whole base.
You will need:
- One large crate with a flat bottom
- A piece of plywood cut to fit the top
- A 2 inch foam cushion
- Fabric and a staple gun
- Four furniture legs or casters
Screw the legs to the bottom of the crate first. Wrap the foam and fabric around the plywood, staple underneath, and set it on as a loose lid so the inside stays reachable.
💡 Quick Tip
Screw a small rope handle to one side of the lid. It gives you something to grab when you lift it off.
13. Build a Chunky Coffee Table From Lumber Store Boards
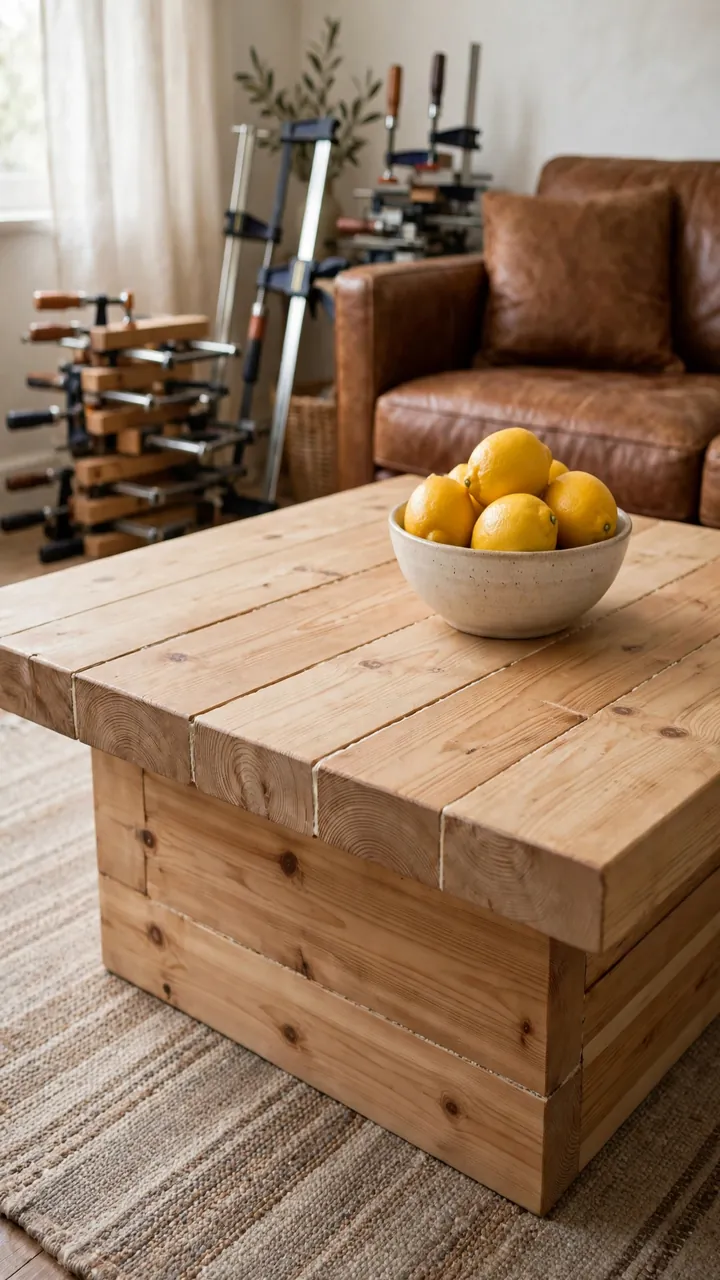
Buy boards that are already planed smooth, and half the sanding is done before you leave the store. Look for 2x6s or 2x8s with tight grain and no big knots.
Cut the boards for the top and glue them edge to edge. Clamp them overnight so the seams stay flat. Build a simple box frame underneath with 2x4s, then attach the legs inside each corner.
A thick top makes a room feel grounded. This is one of the DIY living room furniture ideas that looks expensive and costs mostly lumber and time.
Finish with a matte clear coat so the wood grain stays visible.
14. Sew Simple Envelope Pillow Covers With No Zipper

Most pillow cover projects stall at the zipper, so skip it. An envelope back is just two overlapping pieces of fabric.
Cut the front the same size as your pillow insert. Cut two back pieces as tall as the front and about two thirds as wide. Hem one long edge of each back piece. Place the front face up, lay the backs on top with the hems overlapping in the middle, and sew around all four sides.
Turn it right side out and push in the pillow. The overlap holds it closed.
Linen, canvas, and cotton are the easiest fabrics to handle.
Gather before you sew
15. Slipcover a Tired Armchair With a Canvas Drop Cloth
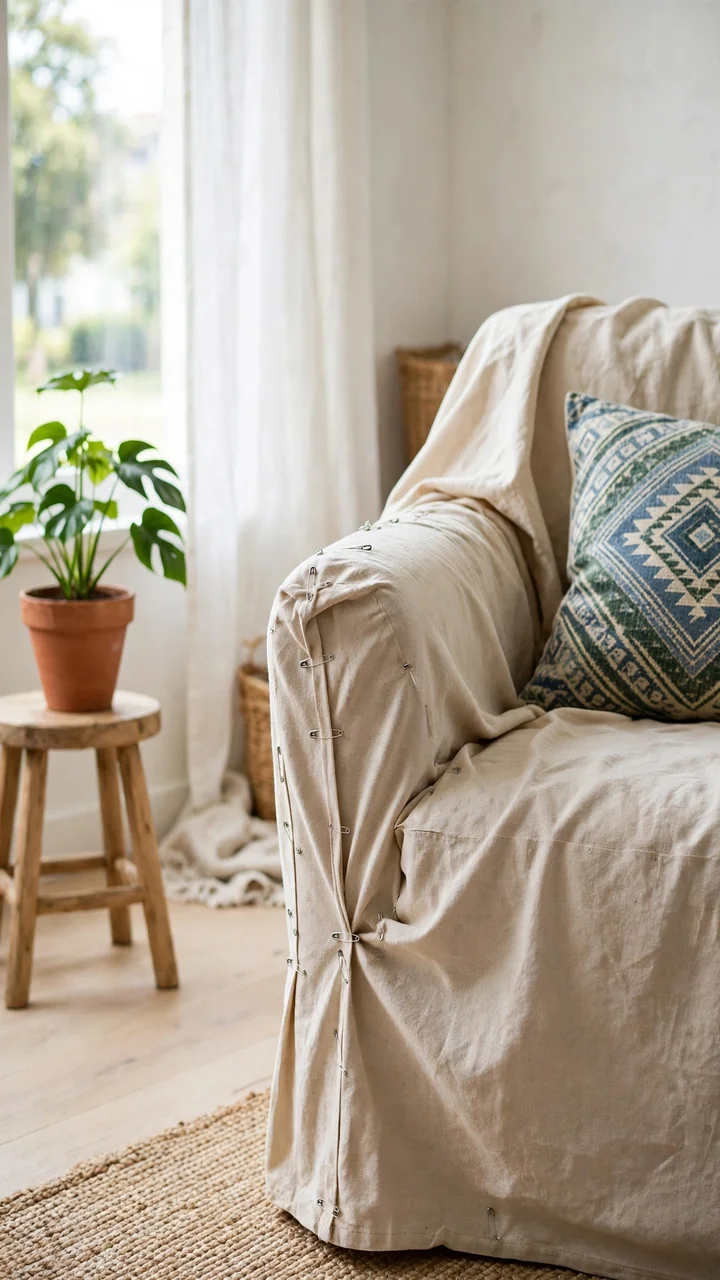
A slipcover does not need real sewing skills. A large canvas drop cloth, some pins, and a good tuck will do the job.
Wash and dry the cloth first, because canvas shrinks. Drape it over the chair, pin the seams along the arms and back, and trim the extra fabric later. Tuck the edges deep into the crevices of the seat so they hold in place.
- Use upholstery pins or safety pins for a no-sew version
- Add fabric ties at the back for a snug fit
- Sew the seams only if you want it permanent
Plain canvas works well with a patterned throw pillow.
Pre-wash and dry the canvas.
Pin the fit while the cloth is on the chair.
Push the edges deep into the seat gaps.
Cutting before you wash the fabric.
Pulling the cloth tight over the cushions.
Trimming the excess too early.
16. Stencil a Geometric Pattern on a Plain Flat-Weave Rug
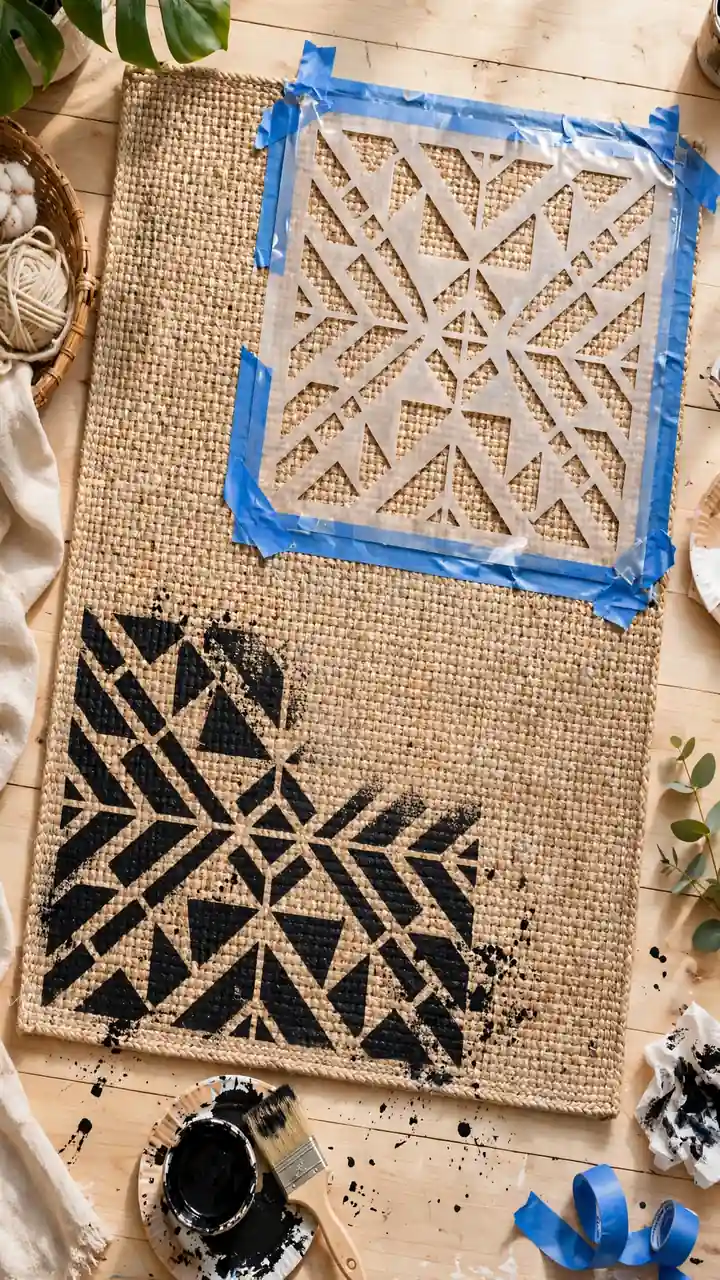
A plain rug can look like a blank page, and a stencil lets you write on it. Flat-weave rugs take paint best because the surface is smooth and tight.
Tape a large stencil down, dab paint through it with a stiff brush, and lift it straight up so the edges stay sharp. Skip the roller, since it pushes paint under the stencil.
- Use less paint than you think you need
- Work from the middle outward
- Let each section dry before moving the stencil
Test your paint on the rug’s back corner first. That one small square tells you how the color will look and feel.
| Fabric paint | Latex paint plus fabric medium |
|---|---|
| Ready to use from the bottle | You mix it yourself |
| Smaller color range | Any color you can have mixed |
| Best for small patterns | Best for big, bold patterns |
17. Hem a Canvas Drop Cloth Into a Large Area Rug
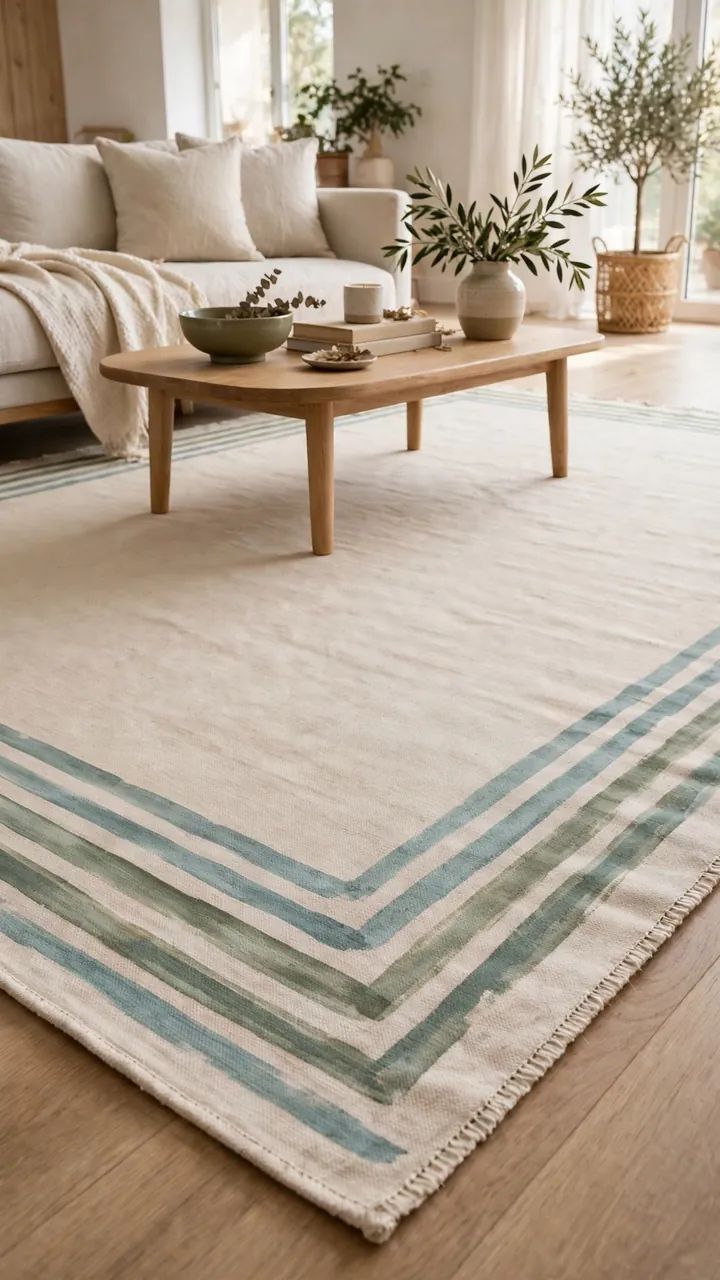
A big rug anchors a room, and the price tag on a big rug is usually the problem. A canvas drop cloth is a cheap way around it.
Buy one that is large enough for your seating area, then wash and dry it twice so it shrinks before you cut anything. Iron it flat. Fold the edges under about an inch and fix them with iron-on hem tape or a straight stitch.
Paint a simple border or stripe if you want a pattern. Lay a non-slip pad underneath so the edges stay put.
Leave the front legs of the sofa on the rug. It ties the whole seating area together.
18. Wrap a Basic Pendant Shade in Jute Rope
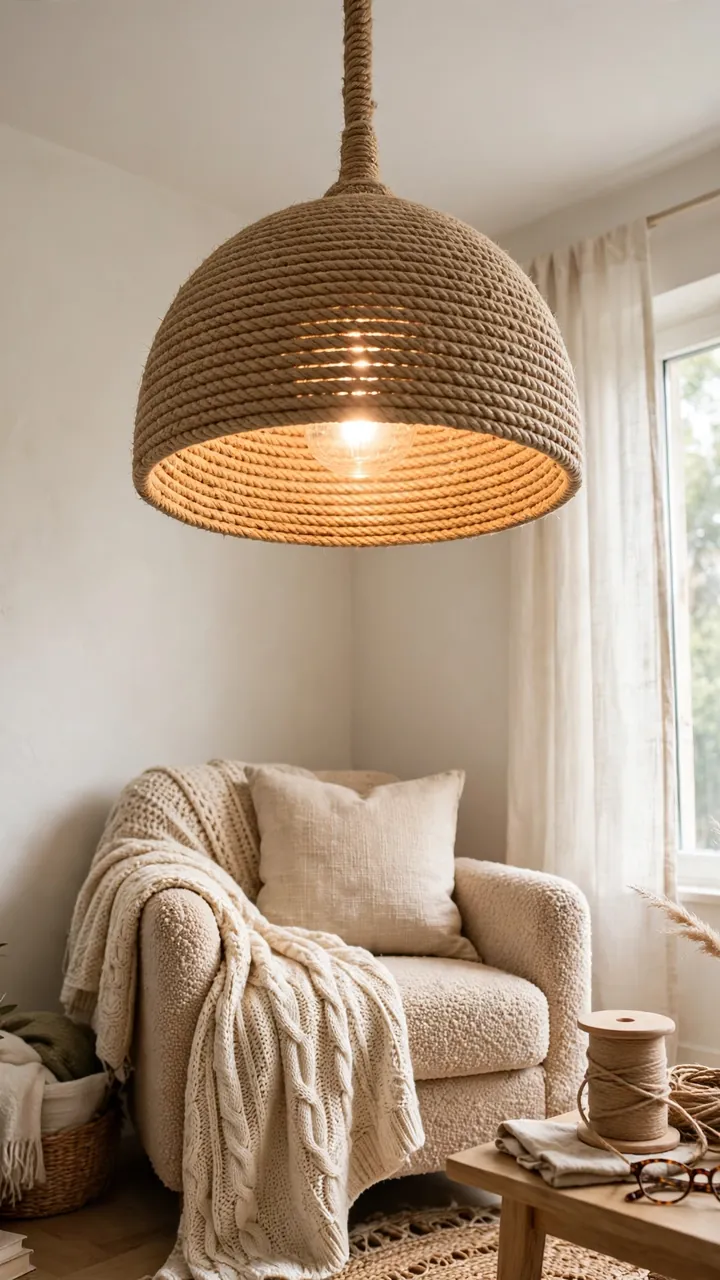
Start with a plain dome or drum shade and a spool of jute rope. Use a cool LED bulb so the rope never sits against real heat.
The whole project is winding and gluing, and it makes a good handmade living room idea for a dark corner.
Take the shade off the fixture and wipe it clean.
Glue the rope end at the bottom edge, inside the shade.
Wind upward in tight rows, adding a dot of glue every few inches.
Tuck the last end inside, trim it, and hang the shade back up.
Leave a few gaps between rows if you want light to peek through. Wrap tightly if you want a solid look.
19. Re-cover a Plain Lampshade With Fabric and Spray Adhesive
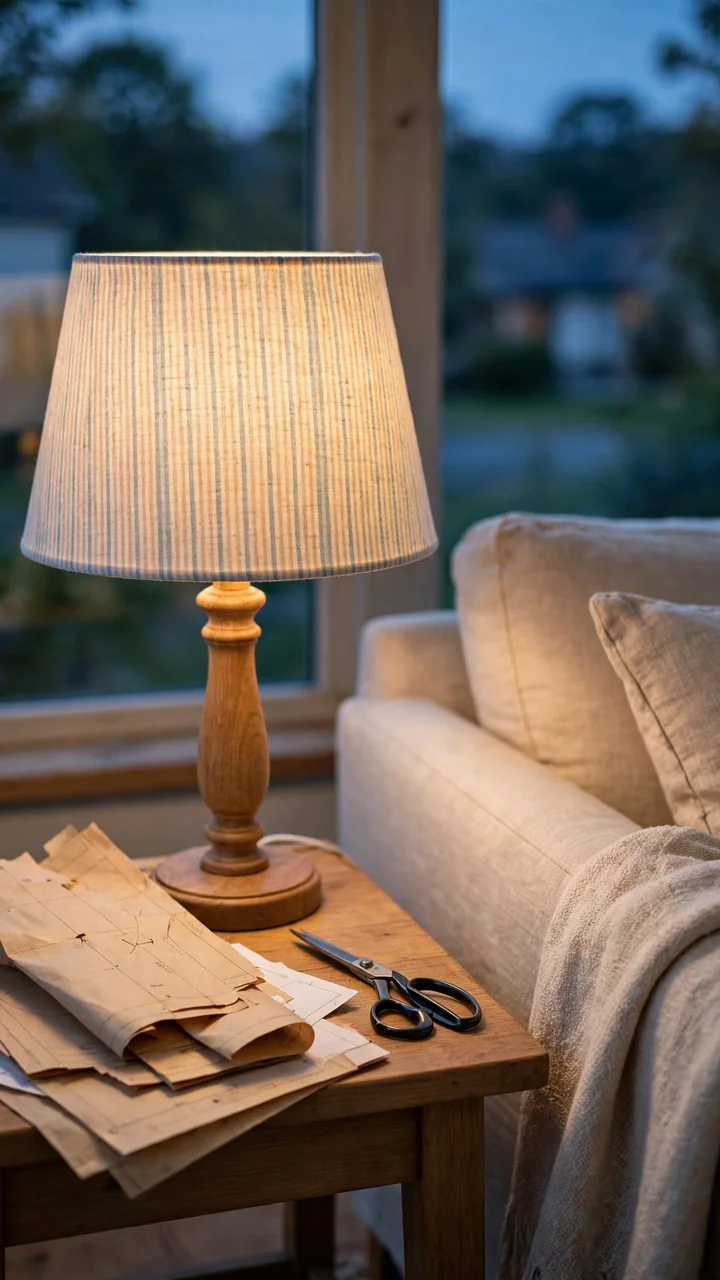
The common mistake is cutting fabric by eye. It ends up too small, or it wrinkles at the seam.
Make a paper pattern first. Roll the old shade across a sheet of paper, tracing the top and bottom edges as it turns. Cut out the shape and pin it to your fabric, leaving an extra half inch all around.
- Spray the shade, not the fabric
- Press the fabric on slowly, smoothing from the center out
- Fold the extra edges inside and glue them down
A thin cotton or linen works best because light shows through it.
Trace the old shade onto paper first, then cut your fabric from that pattern.
20. Make Plug-In Wall Sconces With a Cord Cover
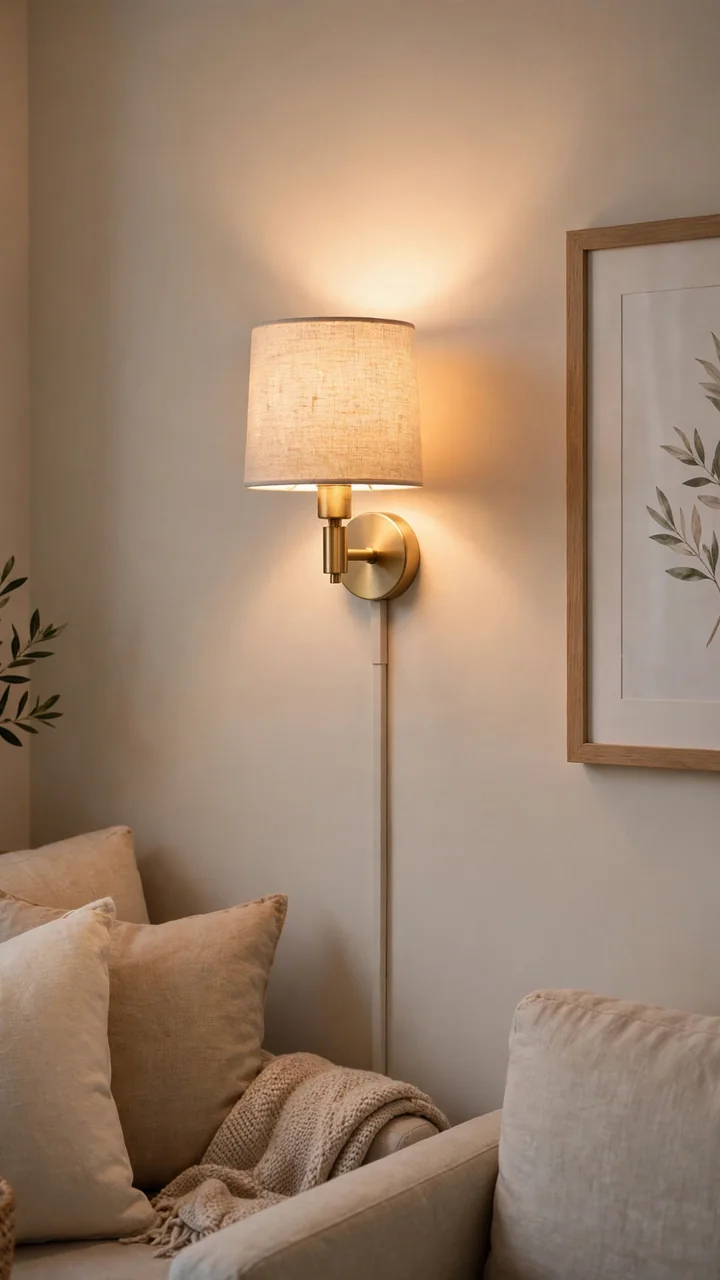
A wall without a ceiling light can leave a corner dim all evening, and running new wiring is a job for an electrician. A plug-in sconce skips that.
Hang a plug-in sconce at eye level beside the sofa or on each side of the TV. Run the cord down the wall, then hide it in a paintable cord cover. Paint the cover the same color as the wall so it nearly disappears.
Pick sconces with an on and off switch on the cord. You will use it every night.
⚠️ Watch Out
Stick with plug-in sconces unless you hire an electrician. Check the bulb wattage on the label, and keep the cord away from heat and walkways.
21. Build a Wood Cornice Box to Frame Plain Windows
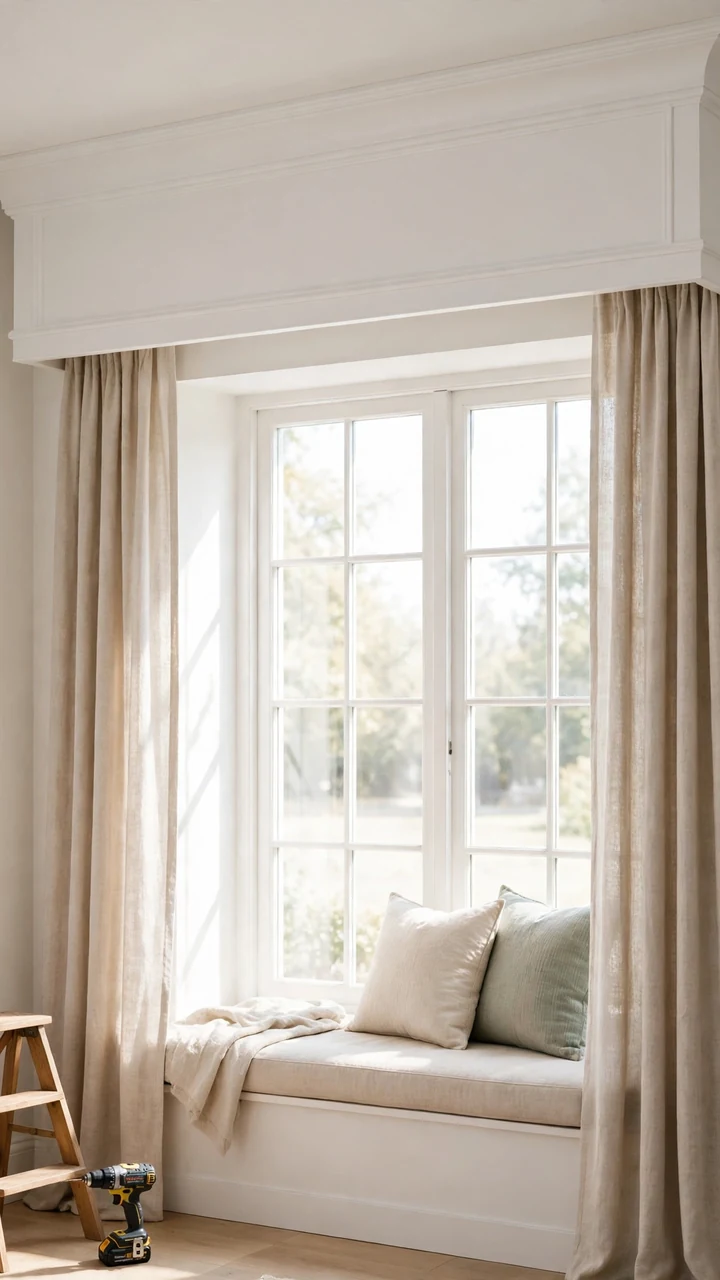
Bare windows with a rod and curtains can look thin, and a cornice box fixes that with three pieces of wood. It sits above the window like a frame and hides the curtain rod behind it.
Cut one front board and two short side boards from 1×6 pine. Glue and nail them into a three-sided box, then paint it to match the trim. Mount an L-bracket on each end and screw the brackets into the wall above the window.
Make the box a few inches wider than the window on each side. Wider boxes make the window look larger.
A metal rod and curtain rings that sit exposed above the glass.
A clean painted box that hides the hardware and adds height.
22. Hang No-Sew Curtains With Clip Rings and a Tension Rod
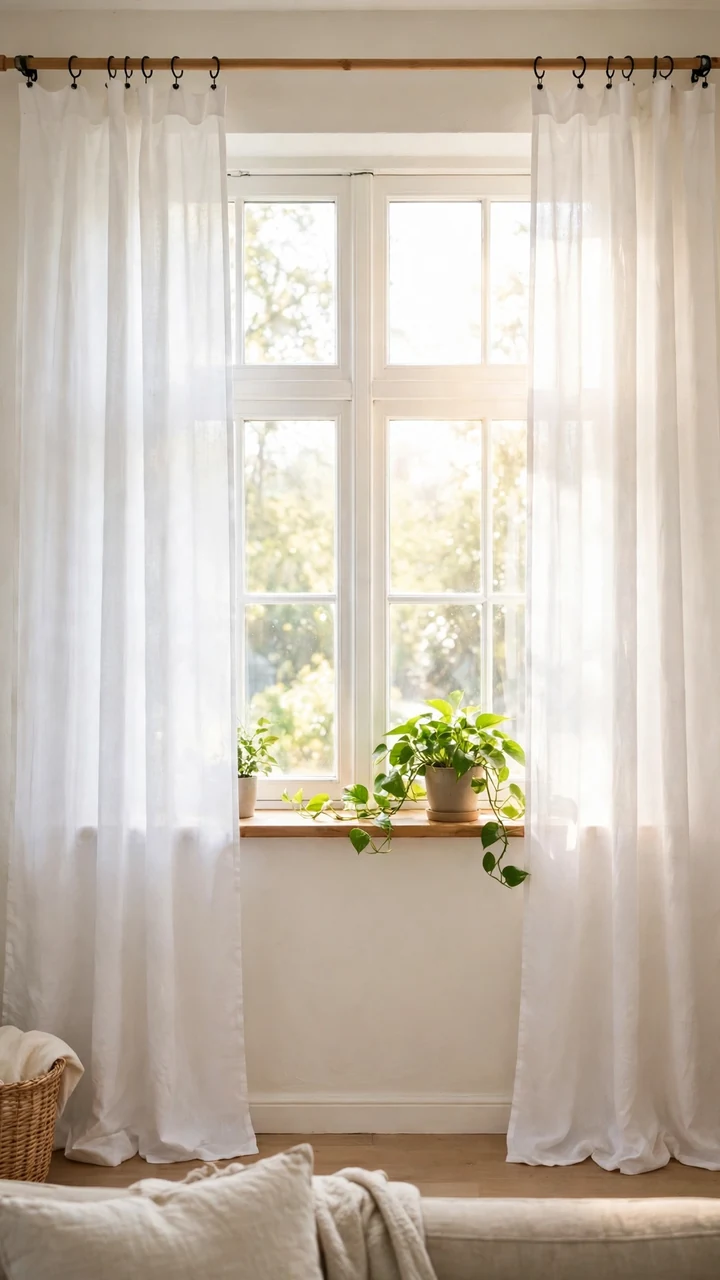
Clip rings turn any flat fabric into a curtain. A bed sheet, a linen tablecloth, or a length of drop cloth all work.
Slide the rings along a rod, clip them to the top edge of the fabric, and you are done. A tension rod fits inside the window frame with no drilling at all, which suits renters.
- Space the clips about 6 inches apart
- Hang the rod as high as it will go
- Let the fabric reach the floor, or just brush it
Iron out the folds first. Wrinkles show more on a long curtain than anywhere else in the room.
- ▸Measure from the rod to the floor before you buy fabric.
- ▸Buy fabric about twice as wide as the window.
- ▸Use iron-on hem tape if the length needs shortening.
23. Turn Old Mini Blinds Into a Fabric Roman Shade
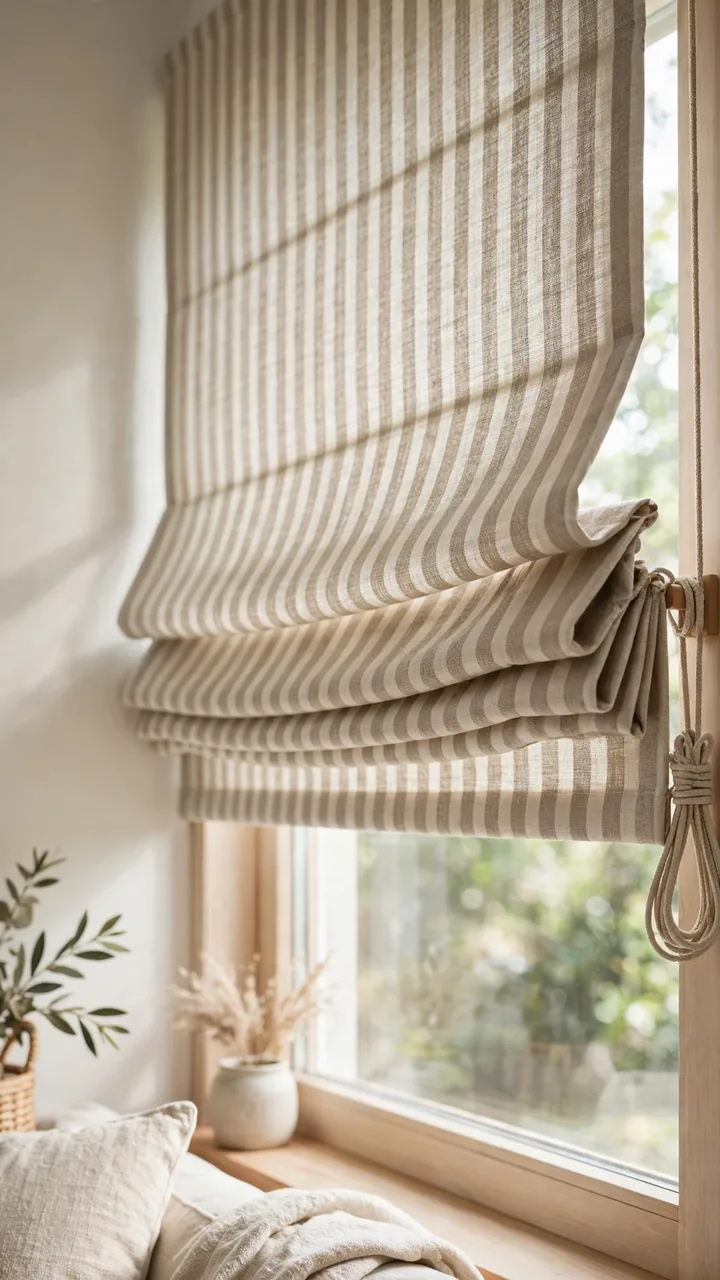
Dusty mini blinds are easy to get for free, and they make a handy frame for a Roman shade. The slats become the folds.
Remove every slat except a few spaced evenly down the blind. Cut fabric an inch wider than the headrail and as long as the window, then glue it flat to the front of the blind. Glue each remaining slat to the back of the fabric, keeping the rows level.
The lift cords still work, so the shade folds up as you pull. Choose a medium weight fabric. Thin fabric sags and thick fabric will not fold neatly.
24. Build a Simple Bookcase From 1×12 Boards
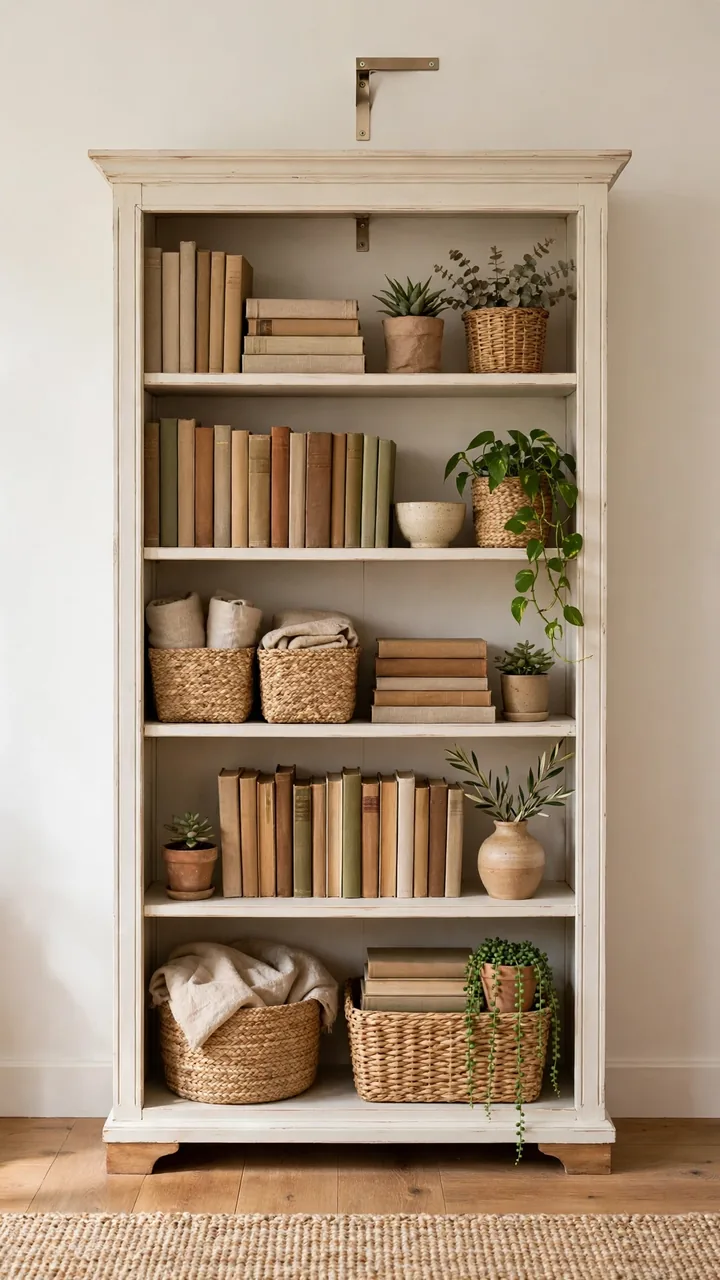
A bookcase is a box with shelves, and 1×12 boards are the right size for most books. Most home stores will cut the boards to length for you if you ask.
Join two side boards to a top and a bottom with wood glue and screws. Drill small guide holes first so the wood does not split. Add a thin plywood back and nail it on, because the back keeps the whole frame square.
Set the shelves on small pegs so you can move them later. Anchor the top to the wall with a bracket. Tall furniture should never be left free standing.
Shopping list
25. Hide Clutter Behind Cane-Front Cabinet Doors
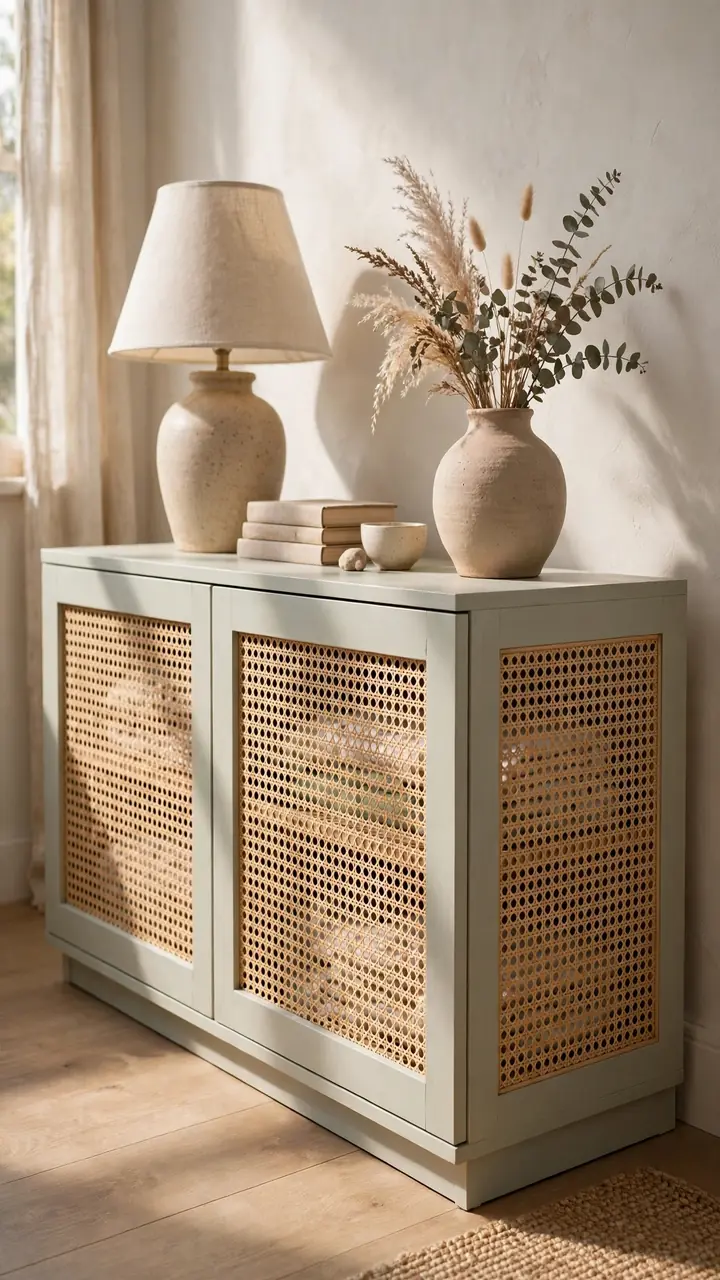
A cheap cabinet with plain doors can look bland, and cane webbing is an easy way to change that. The weave lets air through but hides what is inside.
Remove the door panel, or cut a window in the center of a flat door with a jigsaw. Cut the cane webbing a bit larger than the opening. Soak it in warm water for about 20 minutes so it stays flexible, then glue it into place and press the edges down with a strip of trim.
Let it dry fully. The webbing tightens as it dries and pulls itself flat.
Soak the cane before you glue it.
Cut it larger than the opening.
Hold the edges down while the glue sets.
Gluing dry cane that cracks.
Stretching it tight when wet.
Skipping the trim strip.
26. Mount a Floating Shelf With a Hidden Bracket
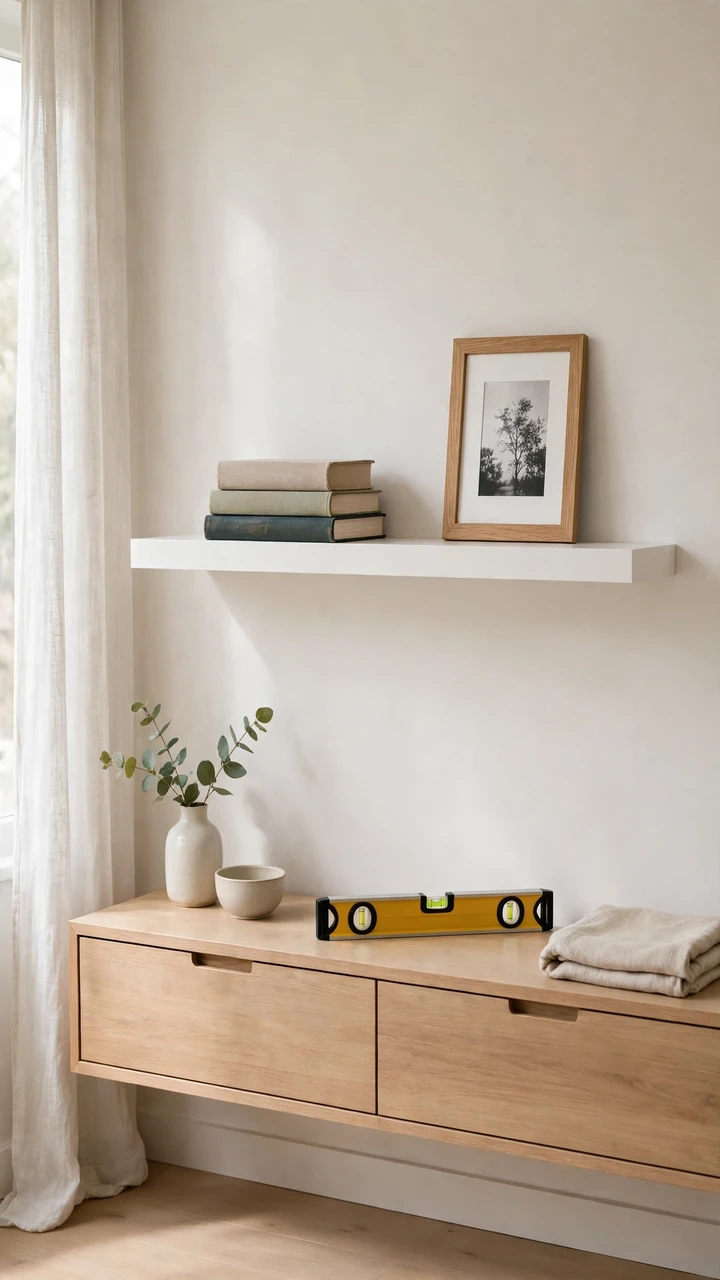
A floating shelf looks like it grows out of the wall, and the trick is a bracket nobody can see.
Buy a hollow-core shelf blank, or build one as a plywood box with an open back. Screw a metal hidden bracket into the wall studs, then slide the shelf over the rods. The bracket does the holding, so the front stays clean.
Mark your studs with painter’s tape before you start. Check level on the bracket, not on the shelf, since fixing a crooked bracket later means new holes.
Keep the load light. Books and small frames are fine, but heavy pottery belongs on a sturdier shelf.
Find the studs and mark the shelf height with a level.
Screw the bracket into the studs and check that it sits level.
Slide the shelf over the rods until it meets the wall.
Add a small screw up through the bottom to lock it in place.
27. Build a Tiered Plant Stand for a Bare Corner
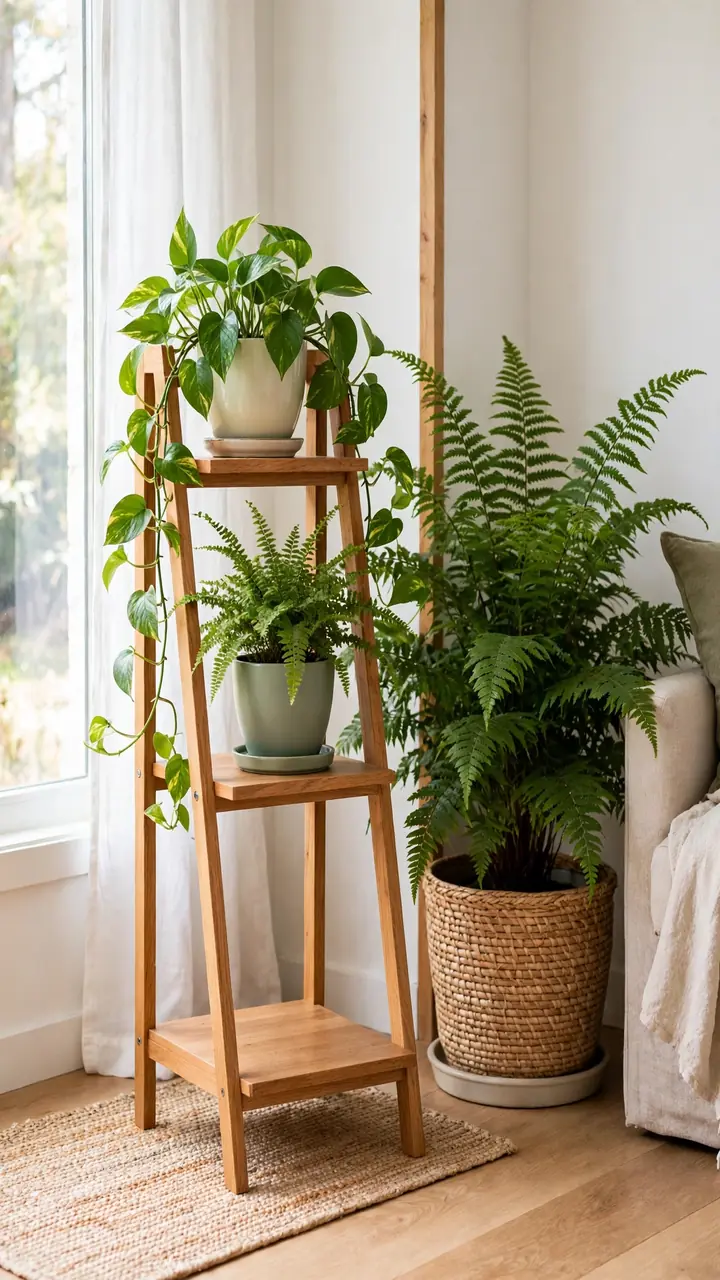
Corners are where rooms go quiet. A plant stand with three levels fills one without eating floor space.
Cut three boards in different lengths, the longest for the bottom and the shortest for the top. Attach each board to two upright 2×2 posts, stepping them up like stairs. Screw the posts to a base rail so the whole stand holds steady.
- Sand every edge so nothing snags a sweater
- Seal the wood, since watering leaves rings
- Put trailing plants up high and heavy pots down low
Saucers under each pot protect the finish.
28. Frame In a Faux Mantel Shelf Over a Blank Wall
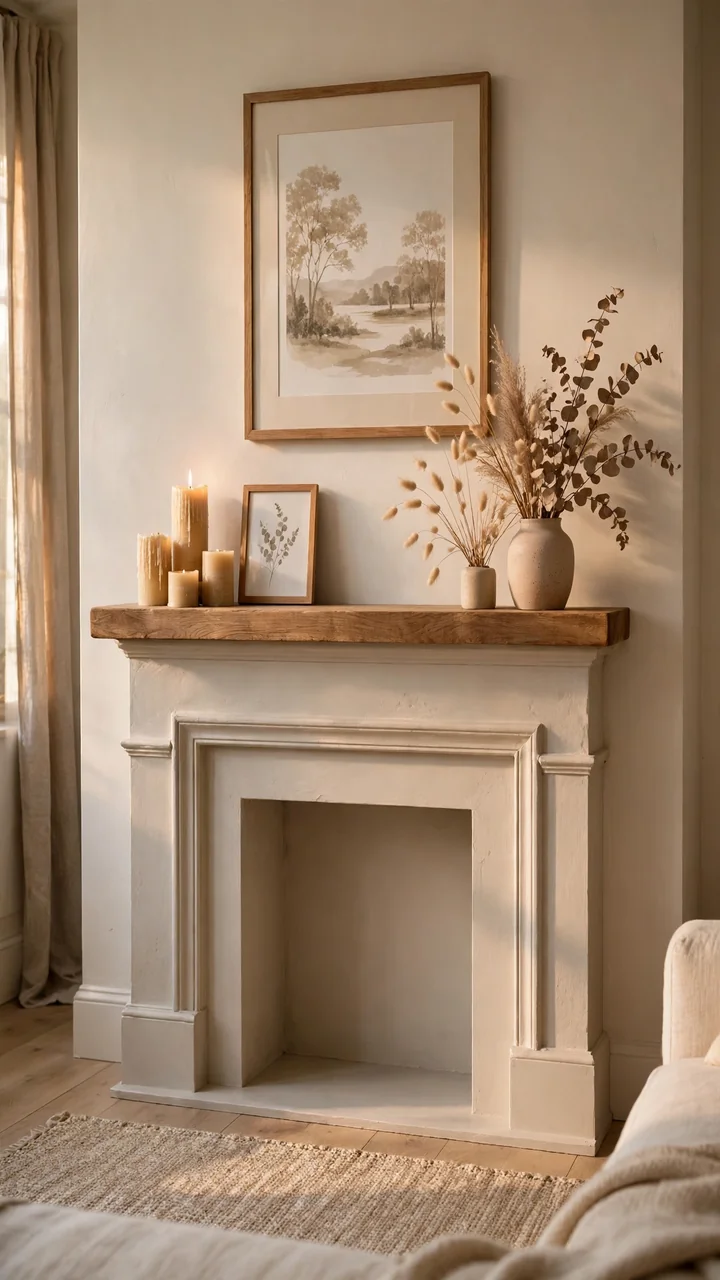
No fireplace? You can still have a mantel. A faux mantel gives a blank wall a focal point and gives you a ledge for frames and candles.
Pick a solid board for the shelf and a box build for the base. The solid board is the quick route. The box build looks heavier and more like the real thing.
Mount it about 54 inches above the floor, then hang art above it. Keep this living room DIY on a budget by buying one thick board and using scrap for the supports.
| Solid board shelf | Box-built mantel |
|---|---|
| One cut, one mount | Frame, face, and cap to build |
| Slim, light look | Thick, solid look |
| Done in an afternoon | Takes a full weekend |
29. Limewash a Plain Brick or Stone Surface
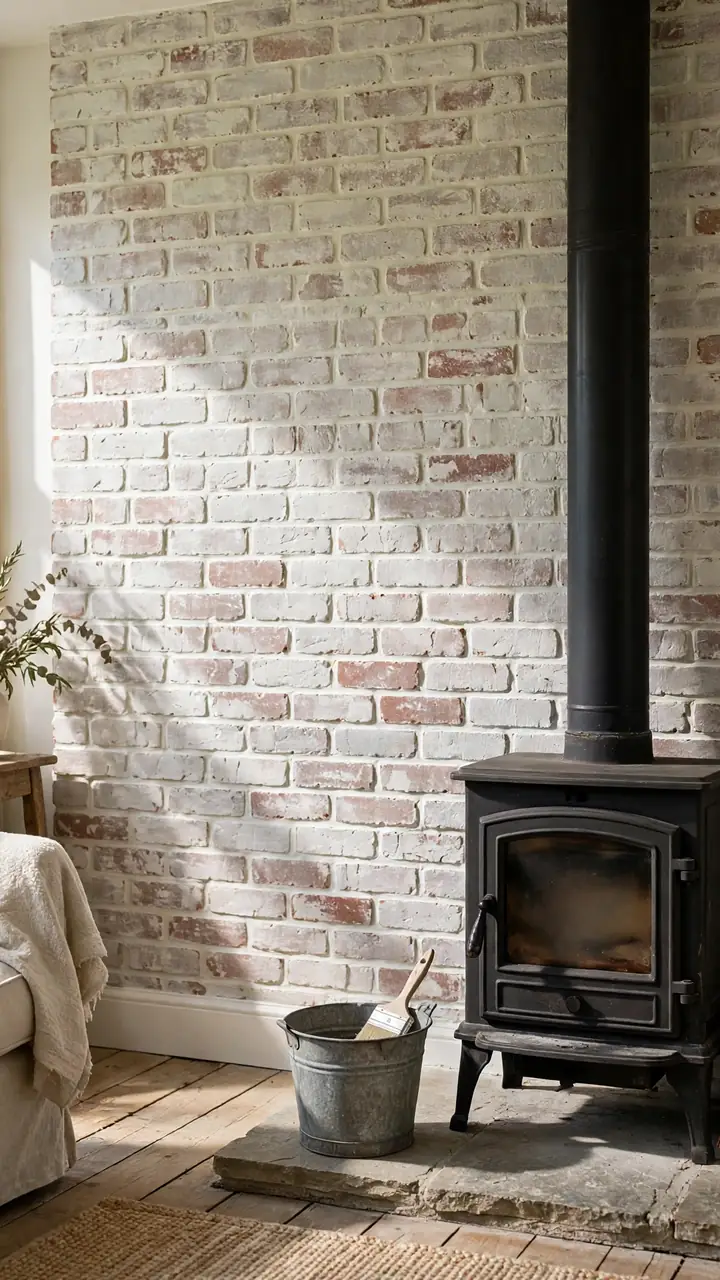
Limewash gives brick a soft, chalky finish that paint cannot copy. It soaks in instead of sitting on top, so the texture of the surface stays.
Brush the wall clean and wet it with a spray bottle before each coat. Mix the limewash with water until it looks like thin cream, and brush it on in loose, crossing strokes. It will look streaky and dark when wet. It lightens as it dries, so wait before adding more.
Wear gloves and safety glasses. Limewash is caustic and can burn skin and eyes.
Plan on two or three thin coats.
Wet the wall first, brush thin coats, and judge the color only after it dries.
30. Make a Wood-Framed Mirror From Trim Boards
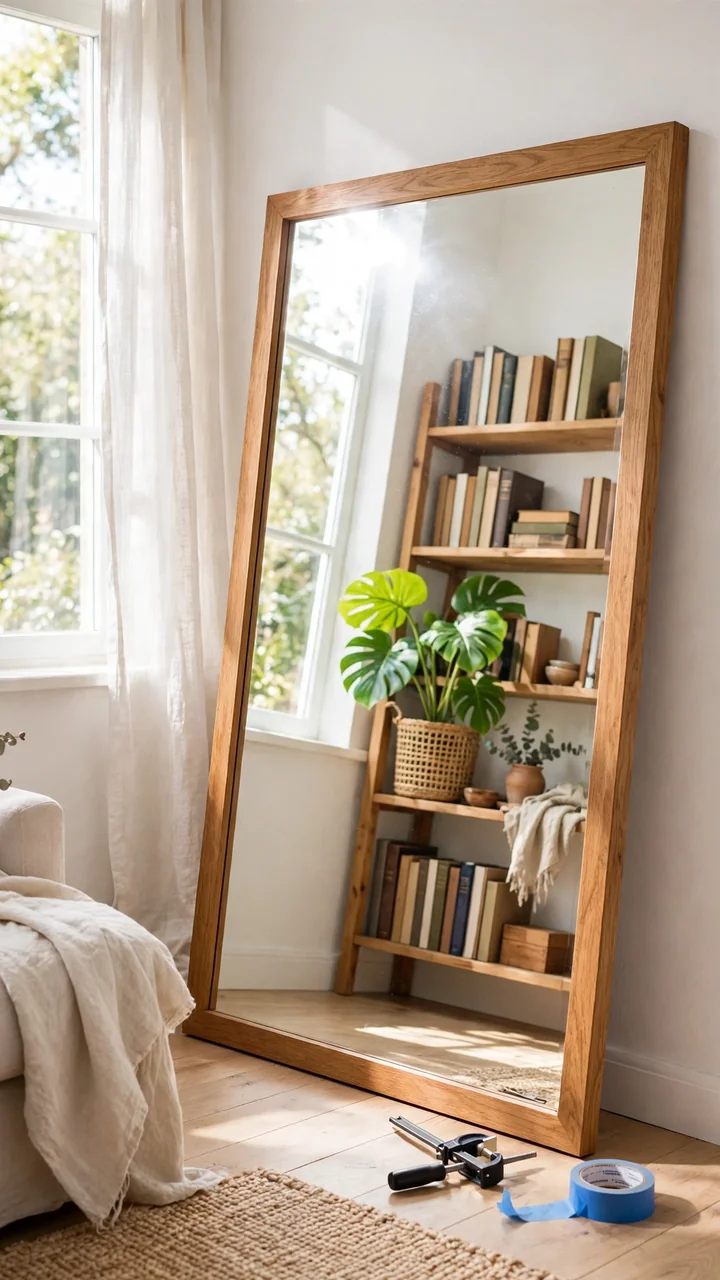
A plain mirror from the hardware store is cheap, and a frame makes it look like it belongs to the room.
Cut four trim boards with 45 degree angles at each end. Glue the corners and hold them with a band clamp or tape until dry. Stain or paint the frame, then fix it to the mirror with mirror adhesive.
A mirror across from a window bounces daylight deeper into the room. Hang it where it reflects something worth seeing, like a plant or a bookshelf.
💡 Quick Tip
Mirrors are heavy. Screw heavy-duty hanging hardware into a stud, and use two hooks instead of one.
Conclusion
A living room feels different when you made part of it yourself. The shelf holds your books and the wall holds your paint, and every scuff and straight line is yours.
You do not need to tackle all 30 DIY living room makeover ideas at once. Start with the one that bugs you most, maybe a bare wall or a dull coffee table, and finish it before you pick the next. Small wins add up fast, and each project teaches you something the next one needs.
Keep a level, a drill, and a few paintbrushes close by. Most of these builds take only basic tools and a free weekend.
Save this list to your Living Room Makeover Ideas board so it is ready for your next free Saturday.