
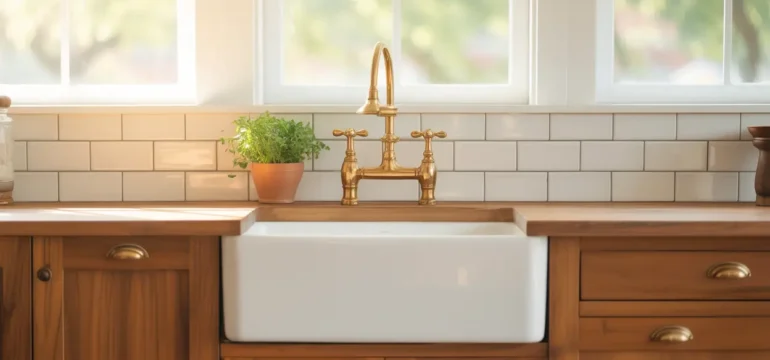
My neighbor spent three years staring at her plain white kitchen wall before she finally did something about it. She didn’t have a big budget, and she wasn’t about to tear out cabinets or hire a contractor for six weeks. What she found out, and what a lot of homeowners eventually discover, is that a backsplash is one of the few kitchen updates that can make the whole room look pulled together without draining a savings account. Some of the best looking backsplashes I have seen in real homes cost less than a nice dinner out. The trick is knowing which materials fake the look of stone, tile, or metal without the matching price tag. Below are sixteen ideas that homeowners have actually used, in real kitchens, with real results. Each one can be done in a weekend or less, and most of them do not require ripping anything out first.
1. Peel-And-Stick Marble
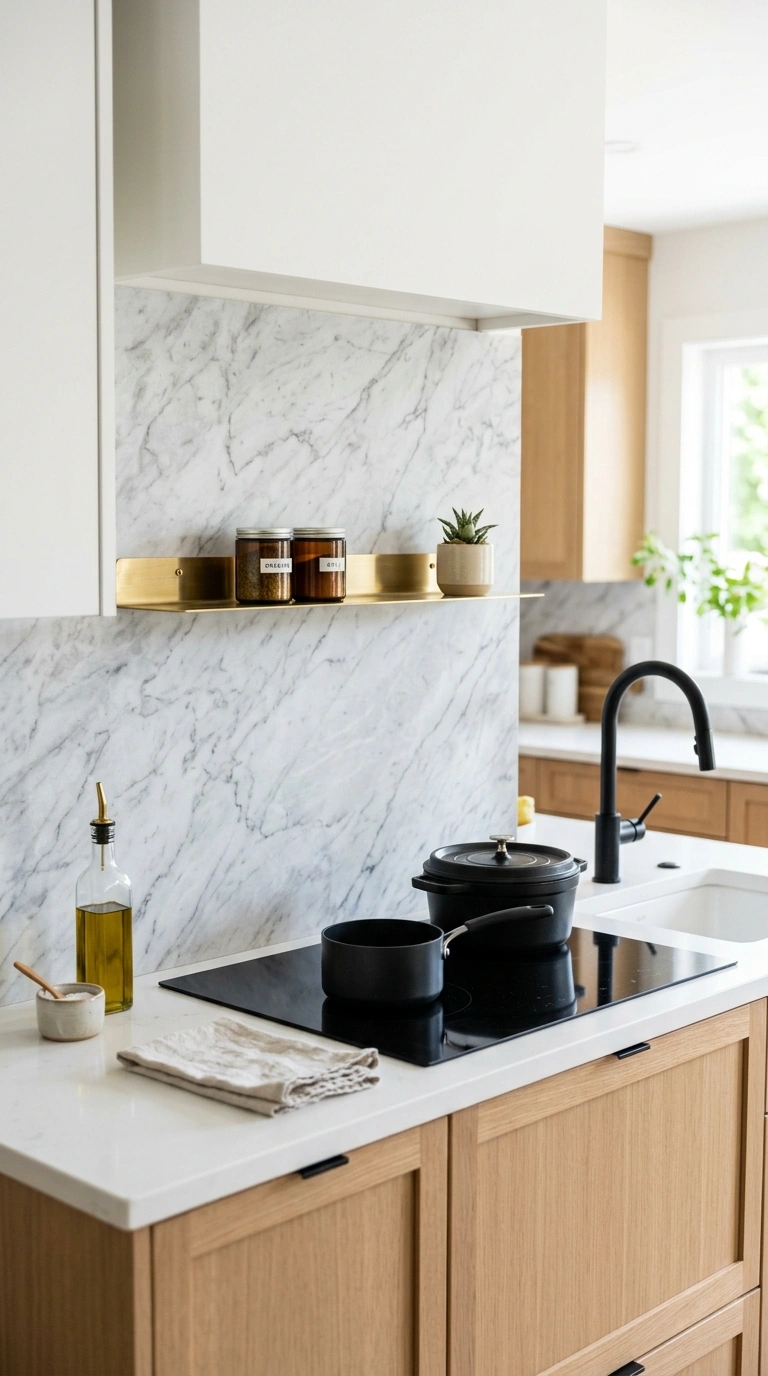
Peel and stick marble sheets have come a long way from the shiny plastic versions people remember from years ago. The newer options have soft veining, matte finishes, and realistic gray or beige tones that photograph almost exactly like real slab marble. They work best behind a stove or sink where the wall gets the most attention, and they go on cleanly over painted drywall or old tile as long as the surface is smooth and clean first. A sharp utility knife and a metal ruler make cutting around outlets much easier than scissors ever will.
For the most convincing look, choose a large panel size instead of small tiles, since fewer seams means it reads as one solid surface from across the room. Wipe the wall down with rubbing alcohol before applying so the adhesive grips properly, and press firmly from the center outward to avoid bubbles. Add a thin brass or matte black shelf ledge along the bottom edge and the whole wall suddenly looks like a finished, styled kitchen rather than a quick fix.
2. Faux Tin Panels
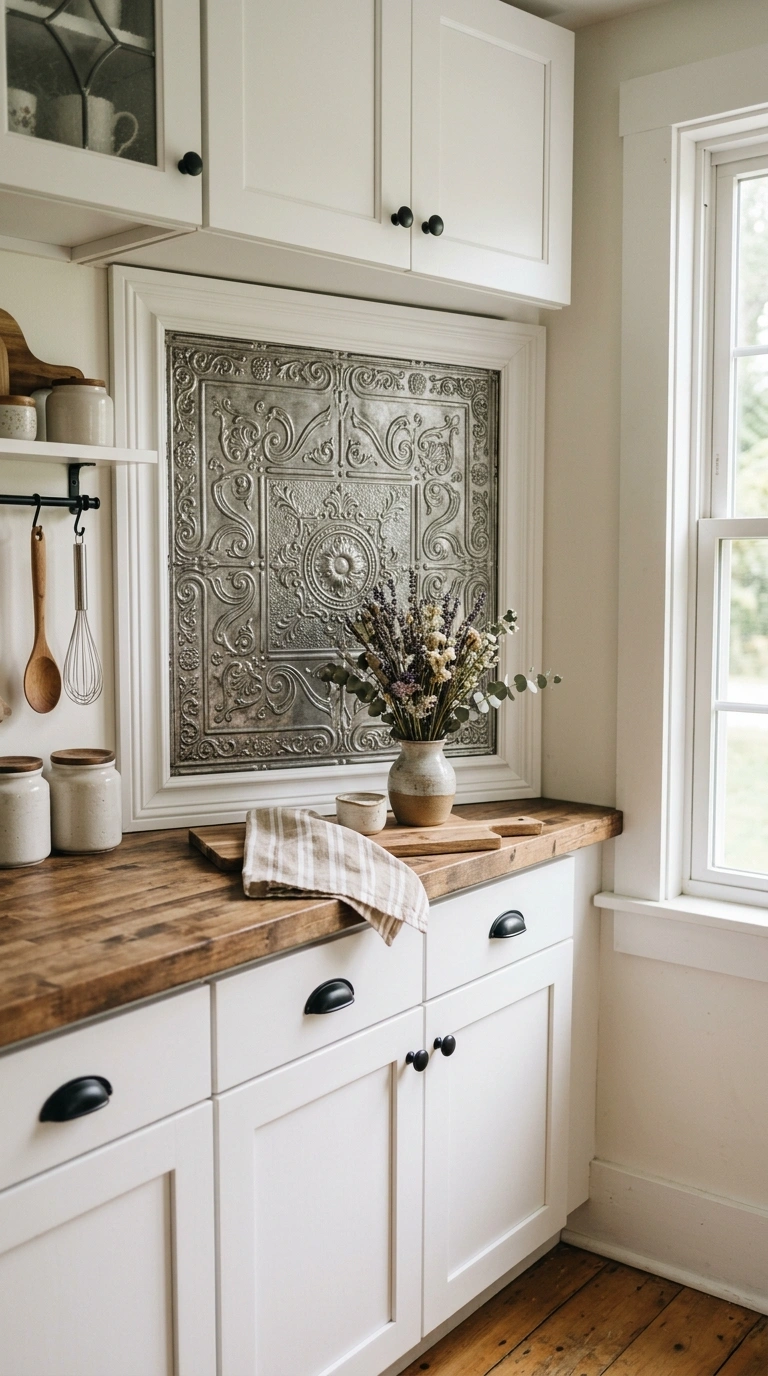
Pressed tin backsplash panels bring texture and shine into a kitchen without the cost of real metal ceiling tiles. These lightweight panels come in classic diamond, floral, or square patterns and can be painted any color, though a soft pewter or antique copper finish tends to photograph the best. They are ideal for kitchens with a cottage or vintage feel, especially paired with white shaker cabinets and simple black hardware.
Installation usually involves cutting the panels to size with tin snips and attaching them with construction adhesive or small brad nails along the trim edges. A coat of clear matte sealer keeps the finish from tarnishing over time and makes cleanup easier since grease wipes right off. To finish the look, frame the panel edges with thin wood molding painted to match the trim in the room, which hides raw edges and gives the whole thing a built in, custom appearance.
Also read: 19 Cottagecore Kitchen Ideas Full of Cozy Vintage Charm
3. Beadboard Paneling
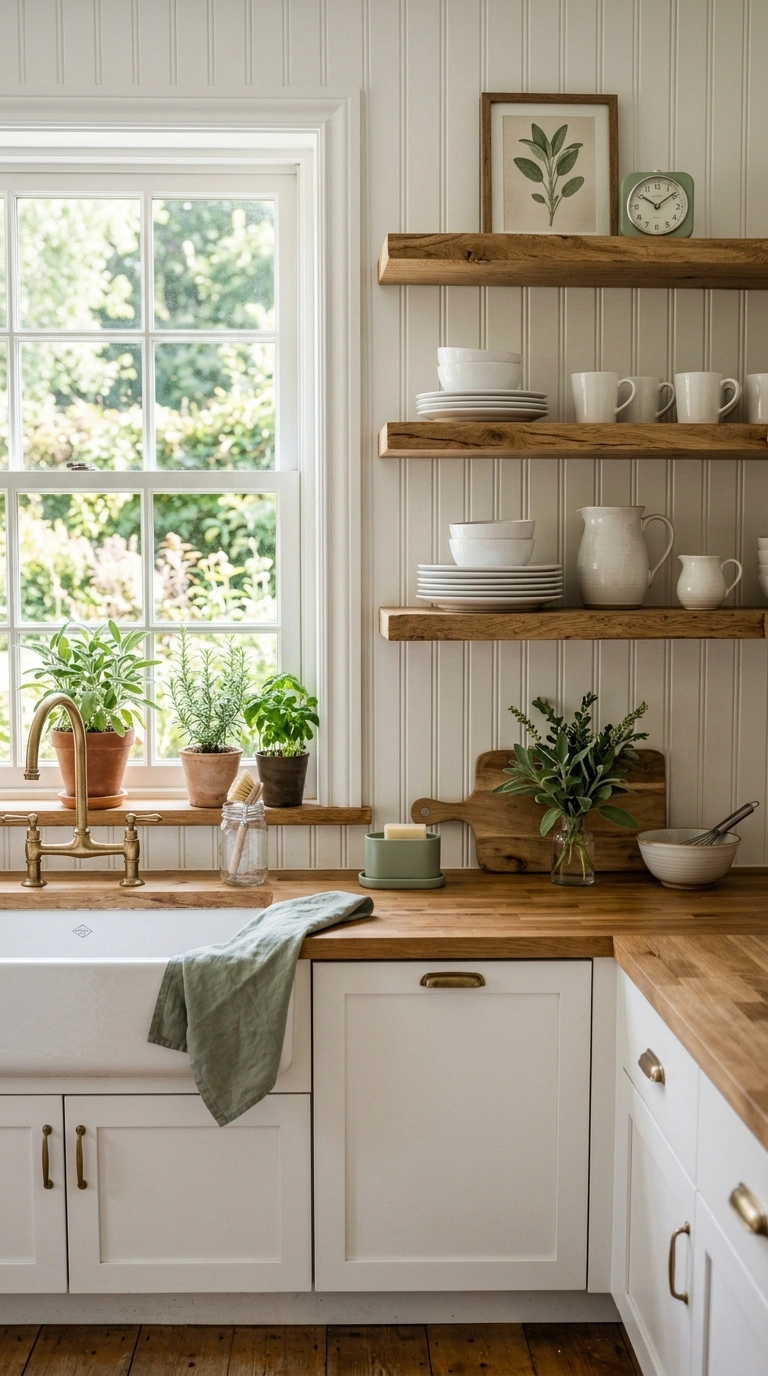
Beadboard is one of those materials that instantly reads as intentional and charming, even though it is one of the cheapest wall coverings available at any hardware store. Installed as a backsplash, it adds vertical grooves and soft shadow lines that catch natural light beautifully, which is part of why it photographs so well for farmhouse and cottage style kitchens. It works especially well behind open shelving or around a window over the sink.
To install, cut sheets to fit the wall space, glue them in place, and finish the top edge with a simple wood cap rail for a clean, furniture like line. Paint it the same white as your cabinets for a seamless look, or choose a soft sage or blue to add contrast against white counters. Sealing the surface with a satin finish paint makes it wipeable, which matters a lot near a stove or sink where splashes happen daily.
4. Herringbone Subway Tile
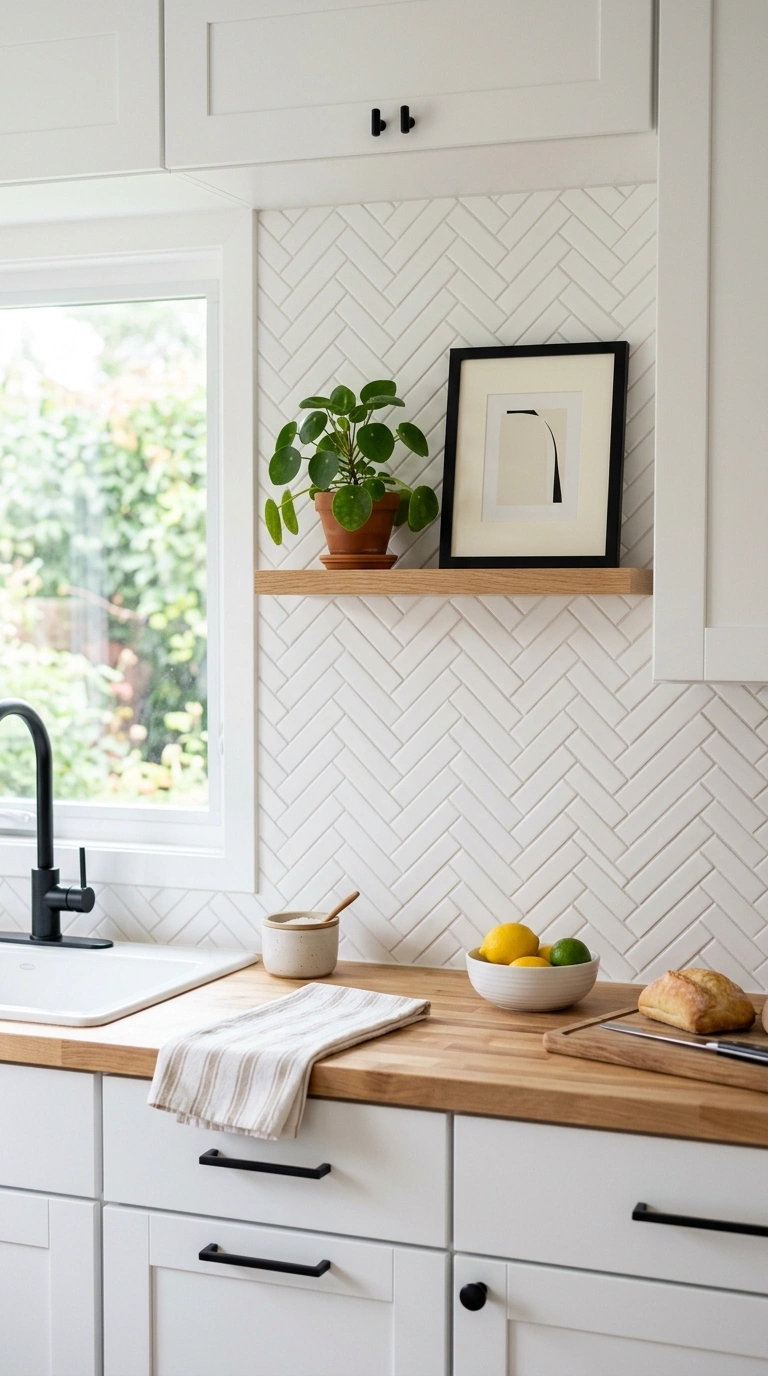
Herringbone patterns turn an ordinary subway tile, which is already one of the most affordable tile options, into something that looks custom designed. The zigzag arrangement creates movement and visual interest that a plain grid pattern simply cannot match, and it works in kitchens of every style from modern to traditional. White or soft gray tile in this layout looks especially clean against wood cabinets or black hardware.
Because the angled cuts take more time, many homeowners hire a tile setter just for this one wall while doing everything else themselves, which keeps the labor cost low. Choosing a matching grout color instead of a contrasting one keeps the pattern looking sleek rather than busy. Adding a thin picture ledge shelf at counter height lets you display a few plants or cutting boards, which gives the wall a styled, magazine ready finish.
5. Stainless Steel Sheeting
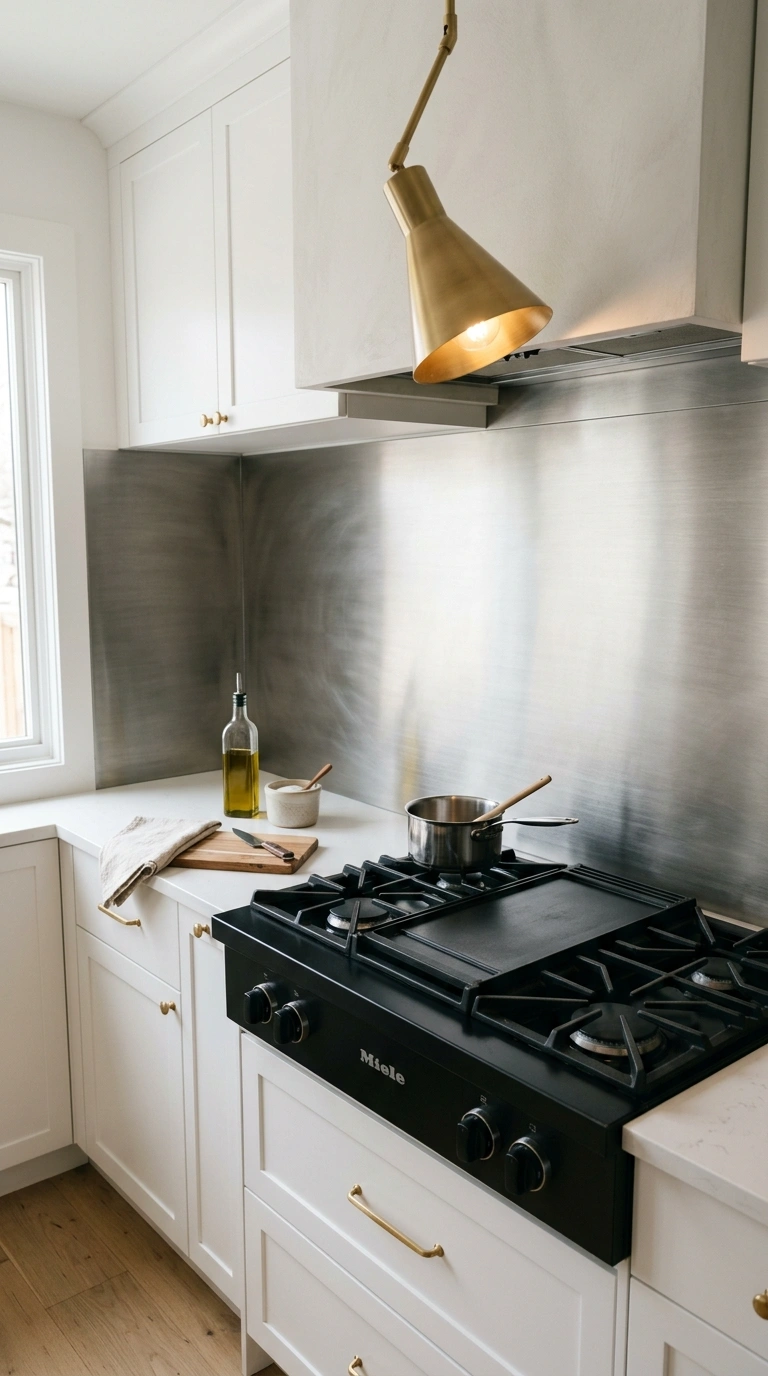
Stainless steel sheeting gives a kitchen that professional, restaurant style edge without needing an actual commercial installation. Thin gauge sheets sold at metal supply stores or online can be cut to size and mounted directly onto the wall, and they hold up extremely well to grease, steam, and heat near the stove. This look pairs beautifully with black cabinets, brass fixtures, or an all white kitchen for contrast.
To keep fingerprints and smudges from showing constantly, choose a brushed finish rather than a mirror polish, since it hides small marks much better in daily use. Mounting the sheet with construction adhesive and finishing the edges with matching metal trim strips gives it a seamless, built in appearance rather than a slapped on panel look. A single pendant light angled toward this wall makes the surface shimmer softly, which photographs beautifully for a Pinterest style kitchen shot.
6. Removable Wallpaper
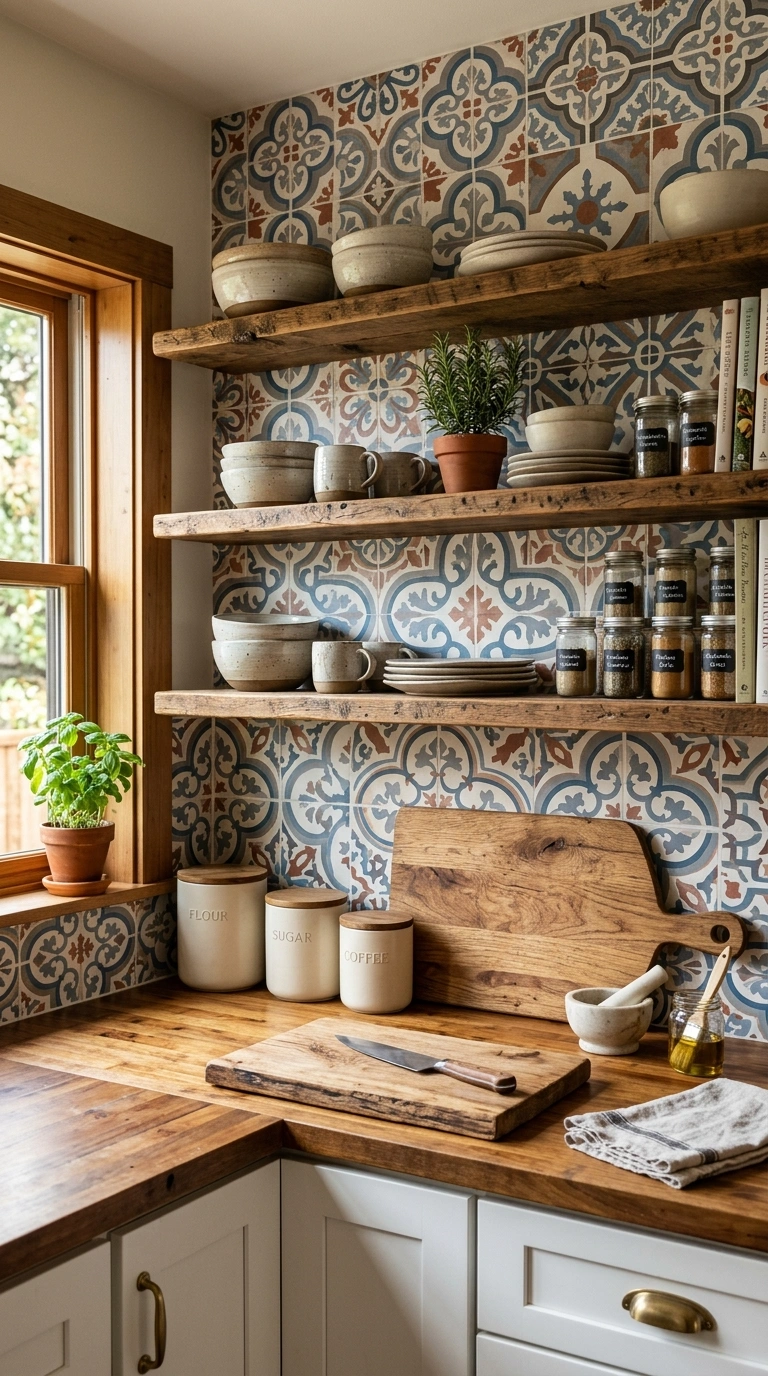
Removable wallpaper has become one of the most popular ways to fake an expensive tile look for a fraction of the price, and the patterns available now include convincing renditions of cement tile, hand painted ceramic, and Moroccan style designs. Because it is removable, renters and budget conscious homeowners alike can commit to a bold pattern without permanent regret. It works especially well on a small accent wall behind open shelving rather than a full stove wall exposed to constant grease.
Applying it requires a smooth, clean wall, a squeegee tool to push out air bubbles, and patience when lining up pattern repeats at the seams. Sealing the top with a clear peel and stick laminate sheet protects it from water splashes near a sink. Styled with a few ceramic canisters or a wood cutting board leaned against it, this backsplash idea photographs like a designer chose real tile.
7. Large Format Tile
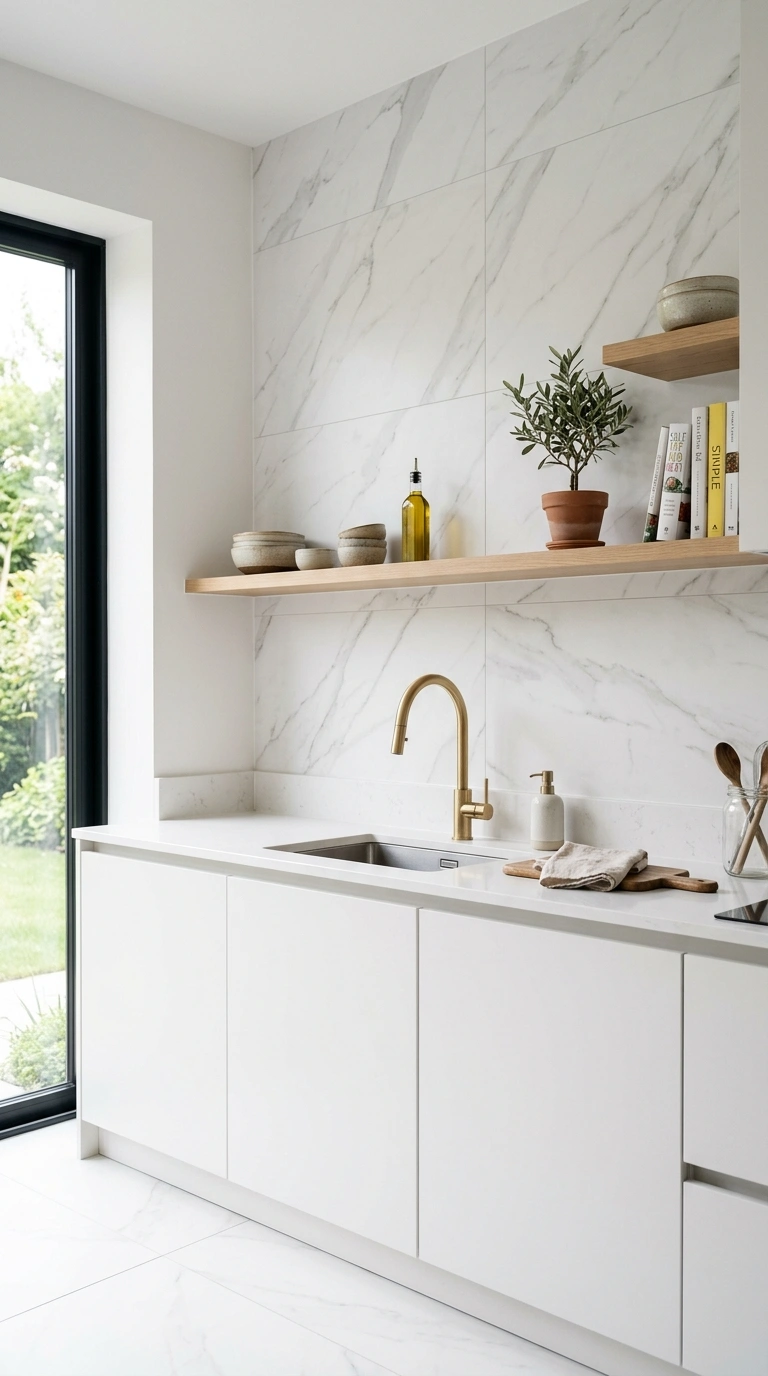
Large format tiles, meaning anything bigger than the standard subway size, reduce the number of grout lines on a wall, and fewer grout lines almost always read as more expensive and modern. A twelve by twenty four inch tile in a soft marble look or matte white can cover an entire backsplash with just a few pieces, which also cuts down on installation time and labor cost. This works particularly well in minimalist or contemporary kitchens.
Because the tiles are large, a professional installer is often worth the small extra cost to avoid cracking during cutting, though many hardware stores now offer easier to cut porcelain versions for confident do it yourselfers. Keeping the grout color as close to the tile color as possible enhances the seamless, high end look. Pairing this backsplash with simple, unadorned cabinet fronts lets the tile itself be the star of the room.
8. Penny Tile Accent
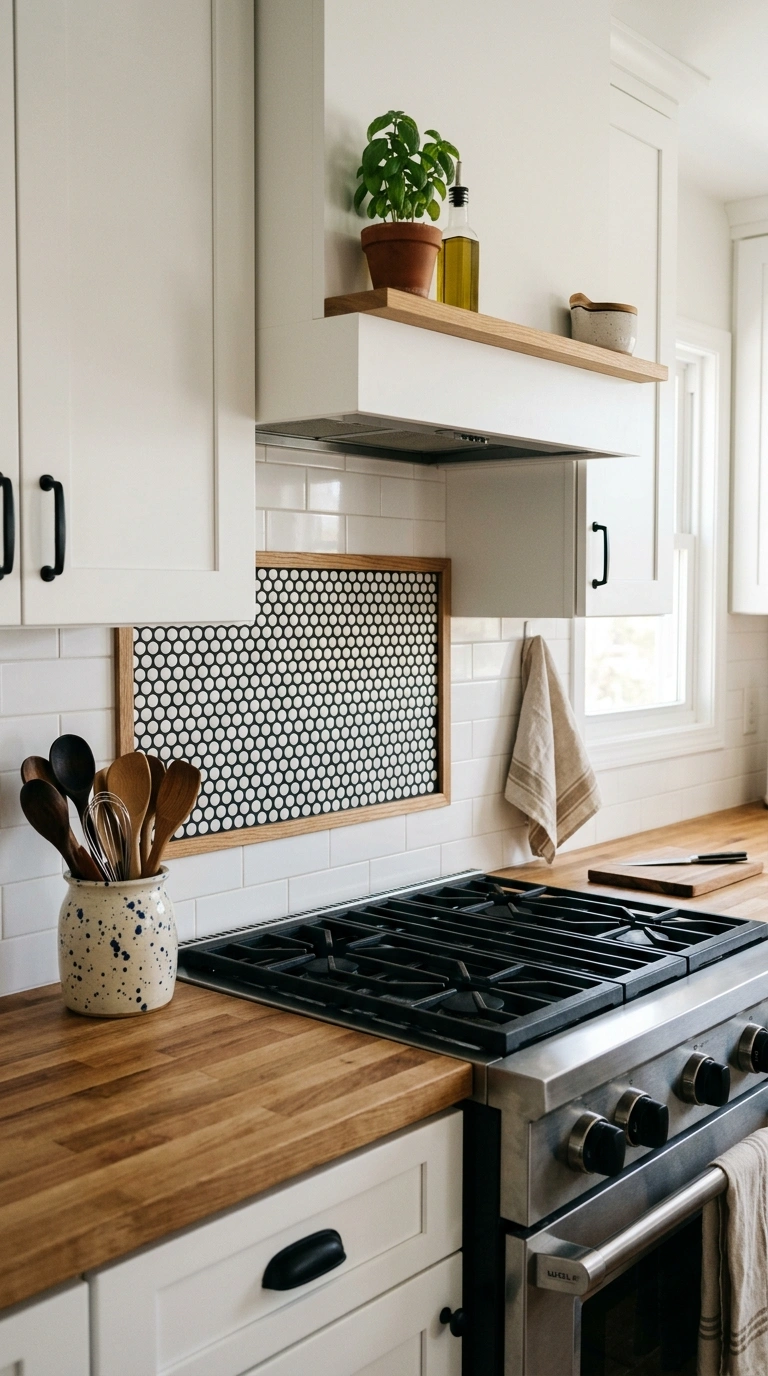
Penny tile brings in texture and a bit of vintage charm without covering an entire wall, which makes it one of the more budget friendly ways to add detail. Instead of tiling a full backsplash, many homeowners use penny tile just behind the stove or as a framed accent strip above the counter, which uses far less material while still making a strong visual statement. Black and white penny tile in a classic pattern feels timeless in almost any kitchen style.
Because the tiles are small, grouting takes patience, so working in small sections and wiping excess grout promptly keeps the lines crisp and even. Framing the penny tile section with a thin strip of wood or metal trim gives it a finished, intentional border rather than looking like a random patch. A single glass jar of wooden spoons or a small potted herb set nearby completes the styled, lived in look that photographs so well.
9. Mirrored Glass Panels
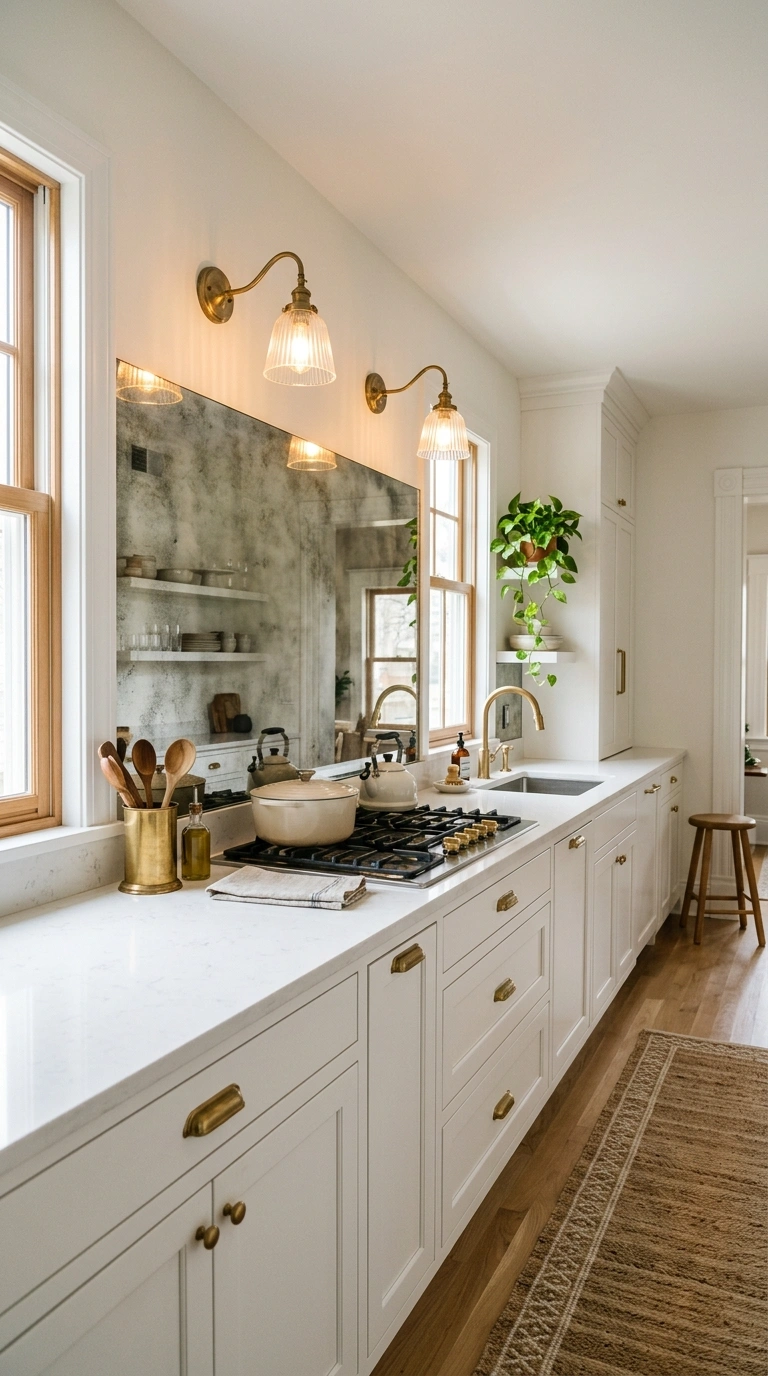
Mirrored glass panels bounce light around a kitchen and make even a small galley style space feel larger and brighter, all while giving off a glamorous, high end vibe. Smoked or antique mirror finishes tend to look more sophisticated than clear mirror, since they hide smudges better and add a soft, aged quality that pairs nicely with brass or gold hardware. This idea works especially well in kitchens that get plenty of natural light to reflect.
Mirror panels can be cut to size at most glass or hardware stores and mounted with mirror clips or a strong adhesive made specifically for glass. Because water spots show easily, a squeegee kept nearby for quick wipe downs helps maintain the polished look. Adding warm toned lighting above the mirrored section, like a row of small brass sconces, creates a soft glow that reflects beautifully and gives the whole kitchen a boutique hotel feeling.
10. Ledger Stone Look
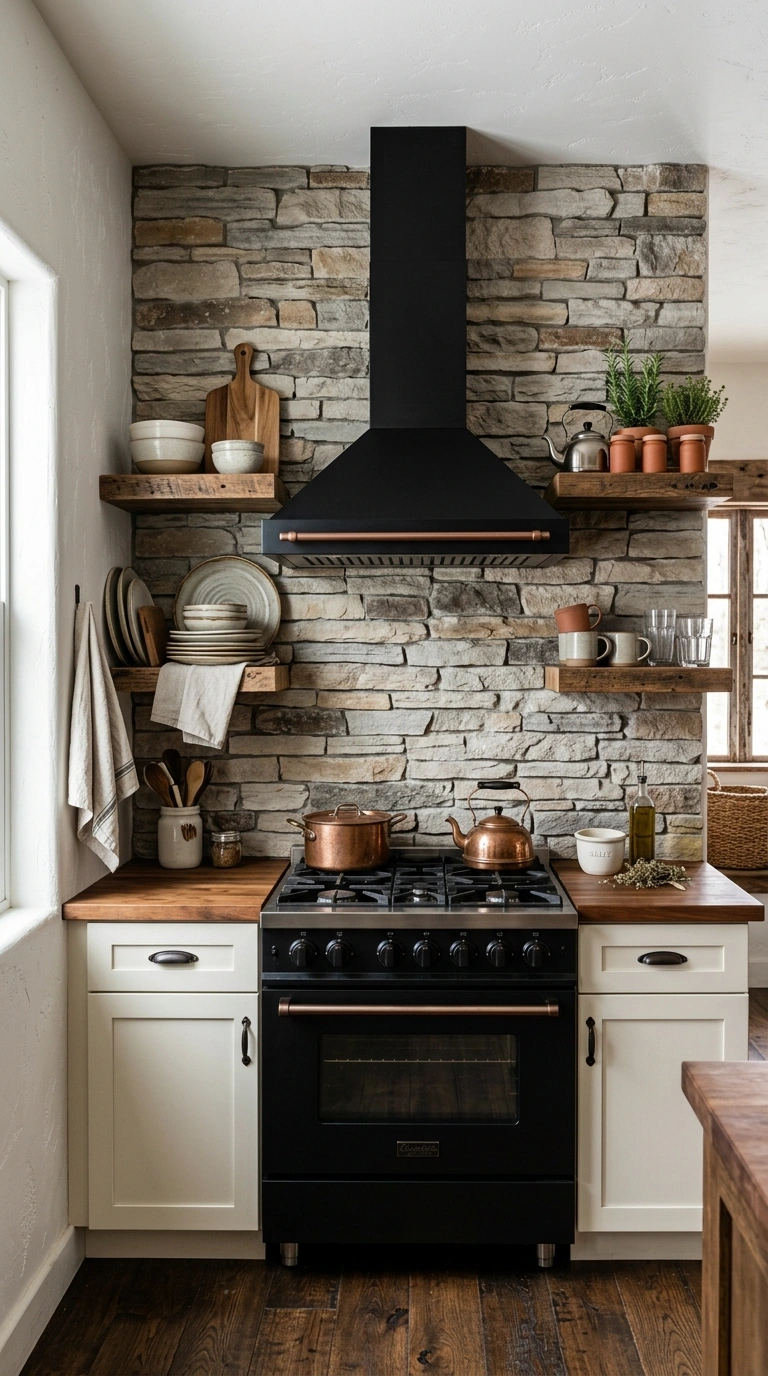
Ledger stone panels, sometimes called stacked stone, give a rugged and natural texture that usually signals a much higher renovation budget than it actually requires. Faux versions made from lightweight resin or PVC mimic the layered, rustic look of real stone at a fraction of the weight and cost, and they install with basic construction adhesive rather than mortar. This look fits especially well in farmhouse kitchens or as an accent behind a stove hood.
Because the panels have natural variation built in, matching seams is fairly forgiving compared to tile work, which makes this a good weekend project for a first time do it yourselfer. Sealing the surface with a stone sealer keeps grease from staining the texture over time. Pairing this backsplash with warm wood open shelving and a black or bronze range hood pulls the rustic, expensive looking style together completely.
11. Chalkboard Paint Strip
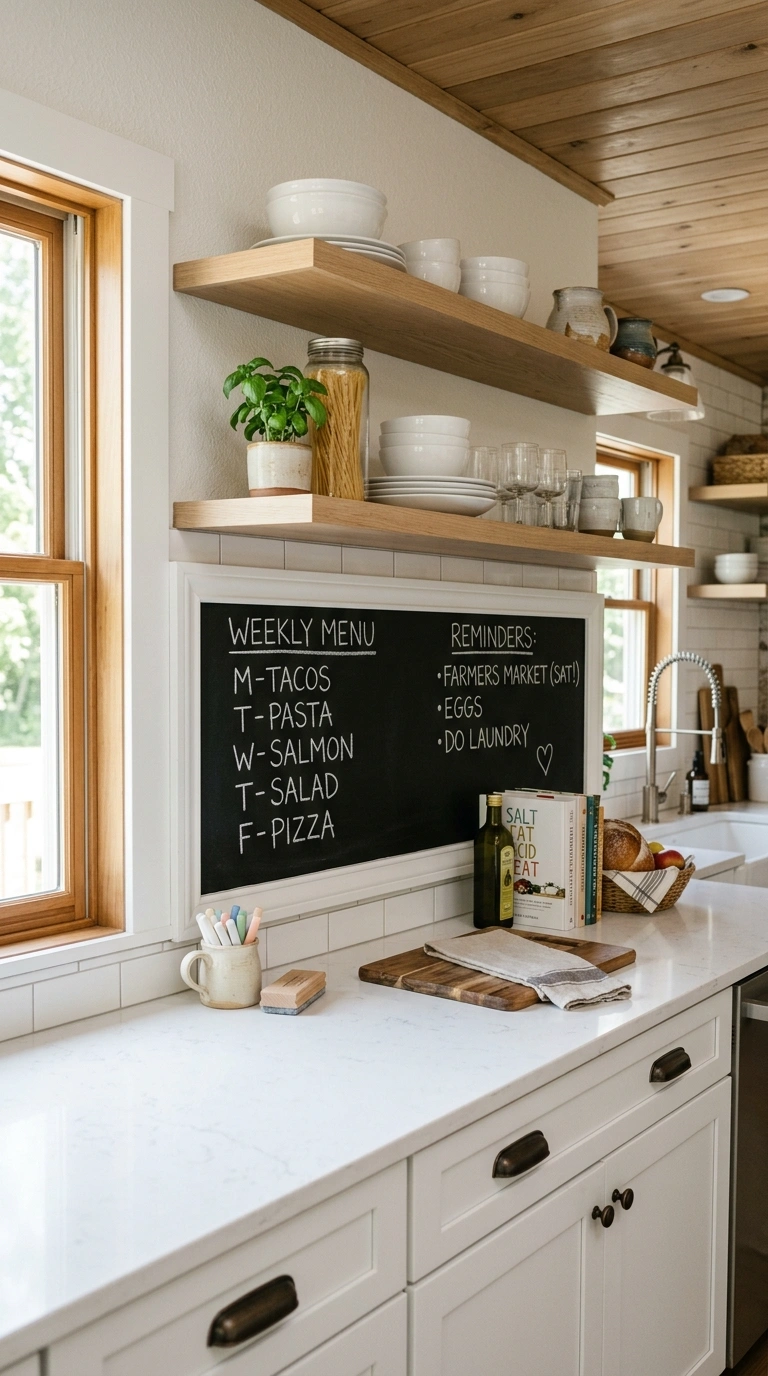
A chalkboard paint strip is one of the most overlooked ways to add personality to a kitchen wall without spending more than the cost of a small paint can. Painted in a horizontal band above the counter, it creates a functional space for grocery lists or little doodles while also acting as a striking design feature that draws the eye. This works particularly well in modern farmhouse or eclectic kitchens with open shelving nearby.
Applying chalkboard paint is as simple as taping off a clean, straight edge and rolling on two coats, letting each dry fully before use. Framing the painted section with thin wood trim gives it a finished, gallery like border instead of a raw paint edge. Styled with a small ceramic mug of chalk and a few written words in soft white lettering, this backsplash idea feels warm, personal, and surprisingly photogenic for how little it costs.
12. Vinyl Tile Sheets
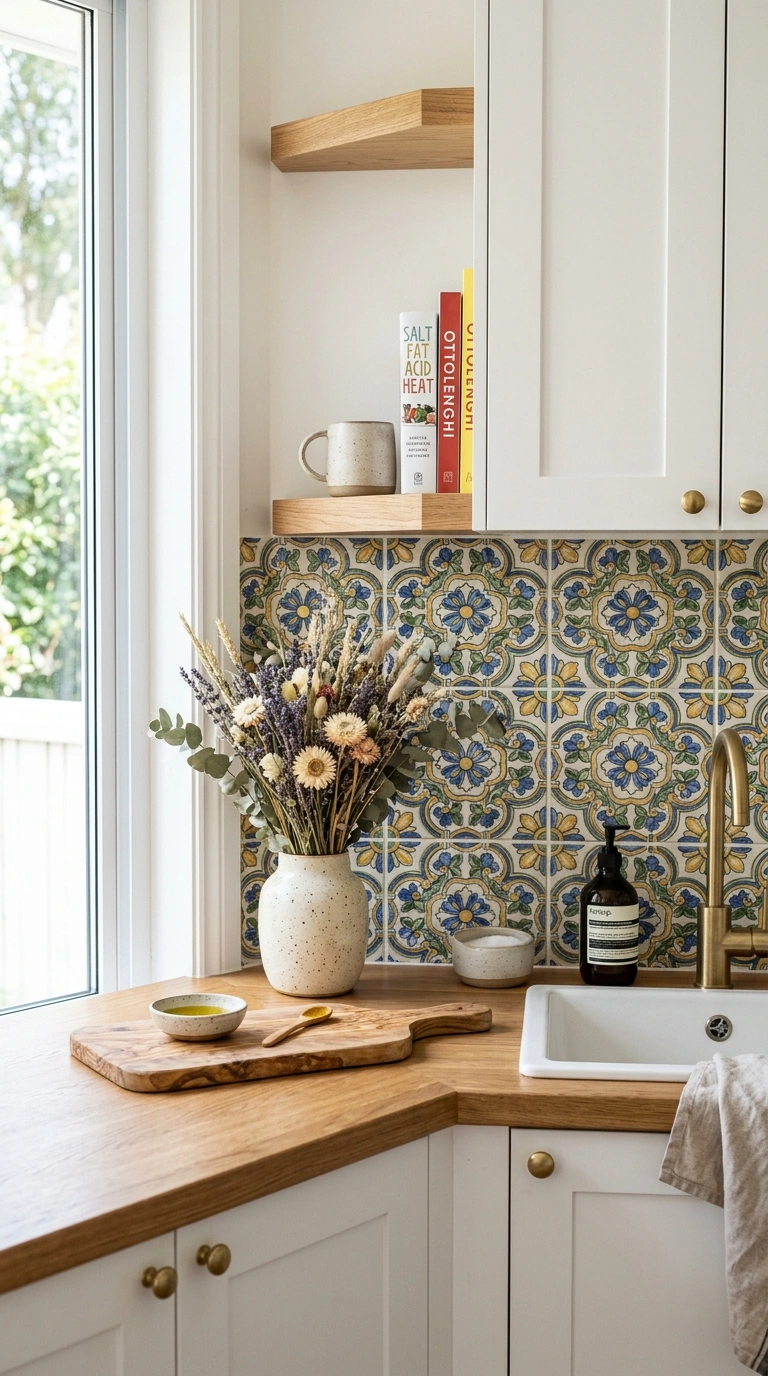
Vinyl tile sheets designed specifically for backsplash use have improved dramatically in recent years, now offering realistic textures that mimic hand painted ceramic, cement tile, or even natural stone. These sheets are lightweight, water resistant, and simple enough to install with basic adhesive, making them one of the fastest backsplash projects on this entire list. They are especially popular in rental kitchens where permanent tile installation is not an option.
Because the sheets often come in large single pieces rather than individual tiles, achieving a seamless look mostly comes down to careful measuring and a confident first placement, since repositioning after the adhesive sets is difficult. Trimming around outlets with a sharp blade and a straight edge keeps the cuts looking clean and professional. A wood cutting board or a small vase of dried flowers placed on the counter in front finishes the styled, cohesive photograph.
13. Picture Frame Molding
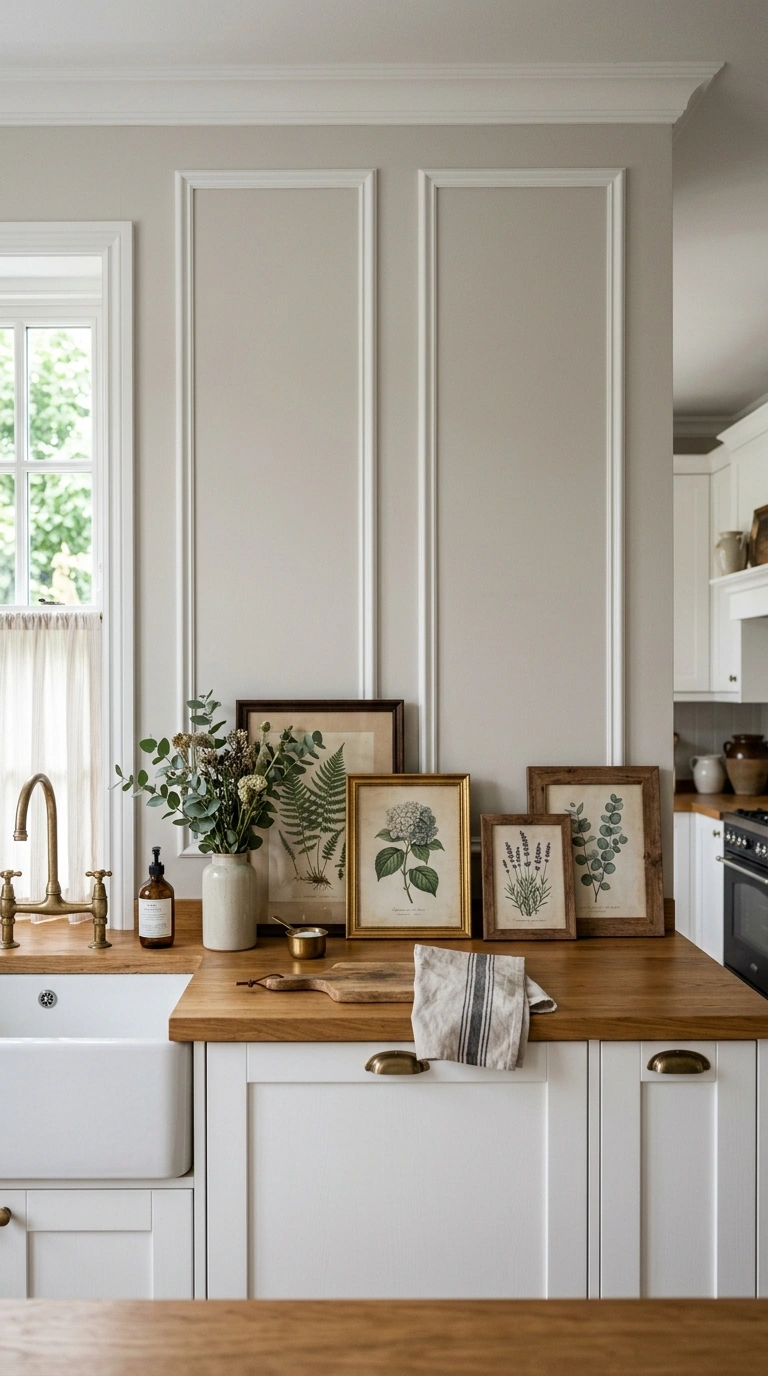
Picture frame molding applied directly onto a plain painted backsplash wall creates dimension and architectural interest that would normally require expensive millwork. Thin strips of wood molding, cut into simple rectangles or squares and attached with adhesive and small nails, add shadow lines that catch light beautifully throughout the day. This idea works wonderfully in traditional or transitional kitchens looking for a custom, built in feeling.
After the molding is attached, caulking the seams and painting everything the same color as the wall, usually a soft white or warm cream, makes it look like part of the original architecture rather than an added feature. This technique is especially budget friendly since it only requires molding strips, caulk, and paint, all of which cost very little at a hardware store. Styled with a few framed botanical prints leaned along the counter nearby, this backsplash idea photographs like a much larger renovation.
14. Whitewashed Brick
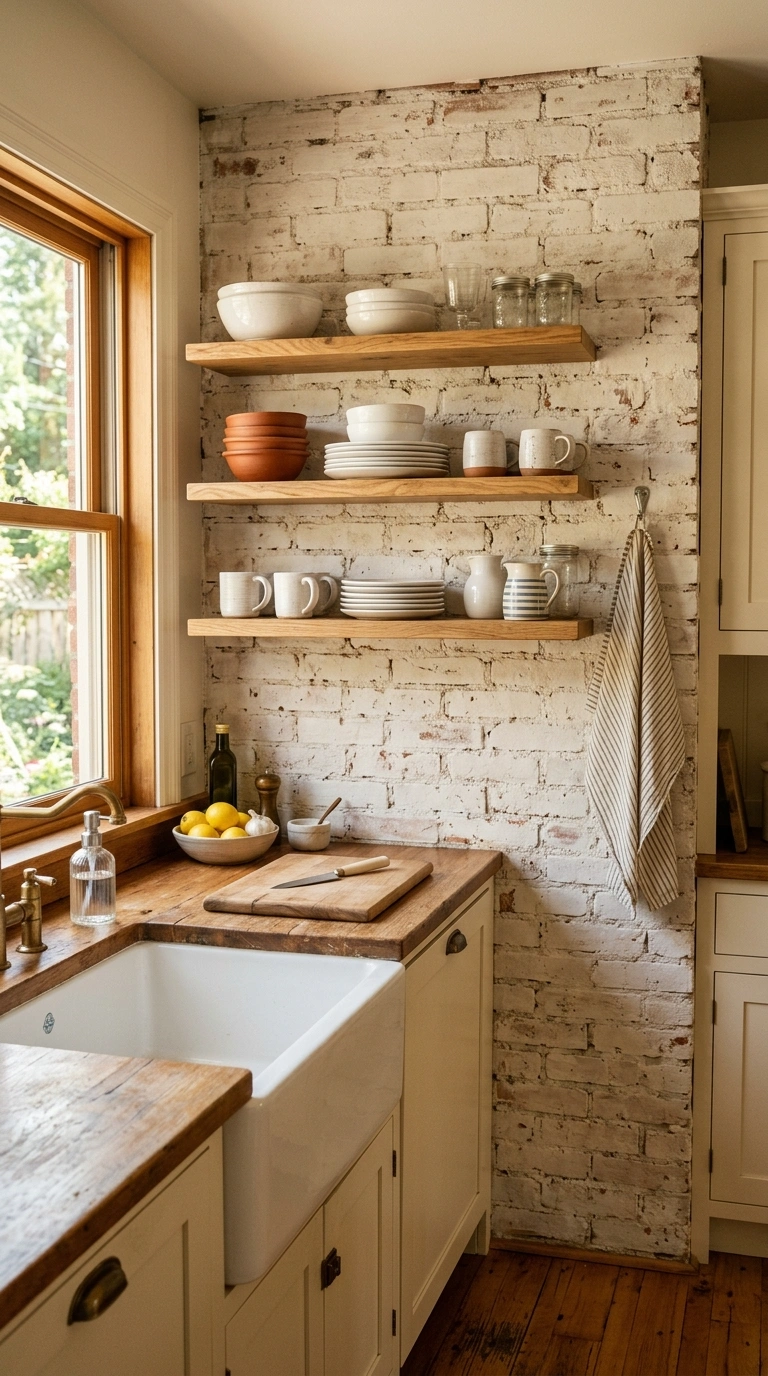
Whitewashed brick brings warmth and texture into a kitchen while still keeping the overall color palette light and bright, which photographs beautifully in natural daylight. This look can be achieved with real exposed brick if a kitchen happens to have it hidden under drywall, or faked convincingly with thin brick veneer panels applied over any flat wall. Either way, the whitewash technique involves diluting white paint with water and brushing it on so some of the brick color and texture still peek through.
For homeowners without existing brick, thin veneer panels sold at most home improvement stores can be cut and glued directly onto the wall before whitewashing begins. Working in small sections and wiping away excess paint with a rag creates that soft, weathered look rather than a flat, solid white coat. Open wood shelving mounted directly onto the whitewashed brick, holding simple white dishware, completes a warm and collected look that feels both rustic and refined.
15. Butcher Block Ledge
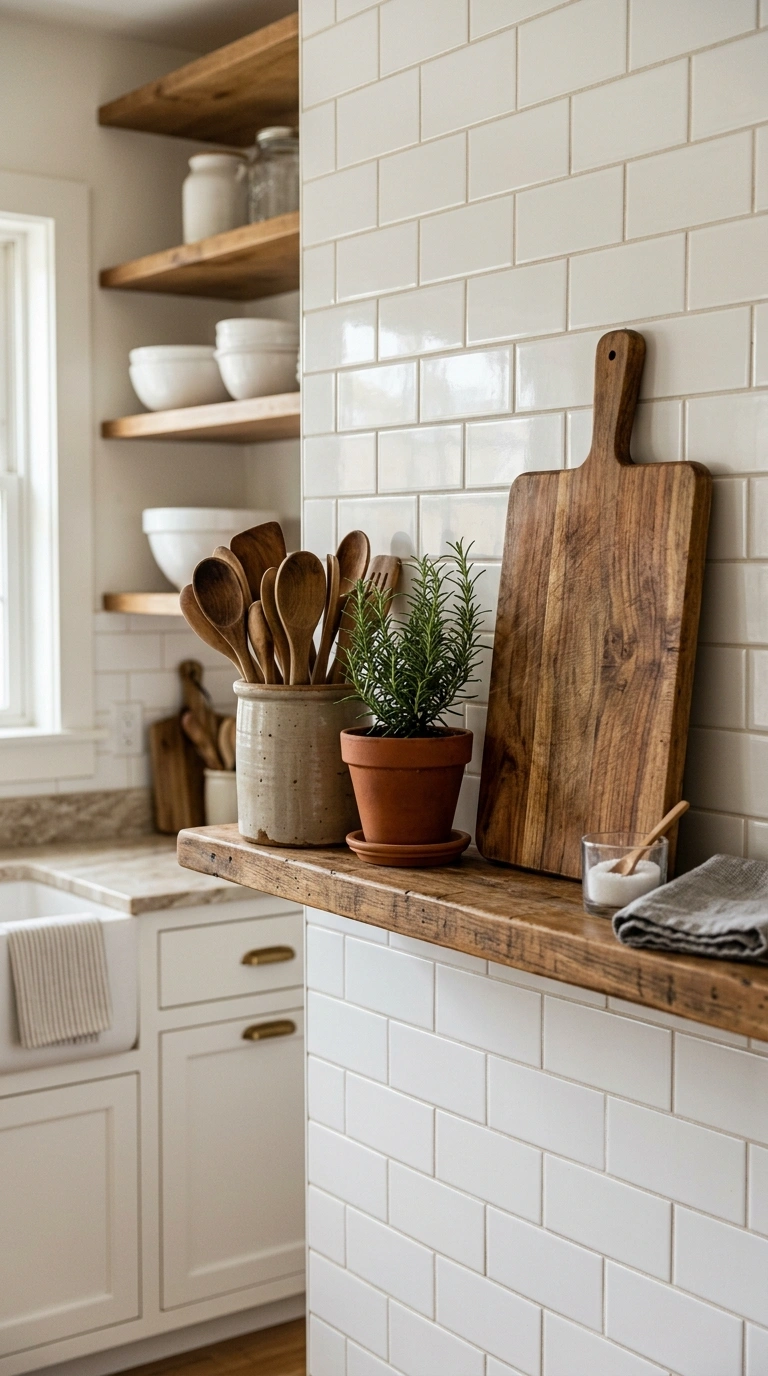
A narrow butcher block ledge mounted along the backsplash wall, just above the counter, adds warmth and a furniture like quality to an otherwise plain kitchen wall. This is not a full material replacement but rather a styling addition that gives the eye a place to rest and creates a natural spot to display cutting boards, small plants, or a row of cookbooks. It works beautifully paired with white subway tile or a simple painted wall above it.
Installing the ledge only requires a length of butcher block or a simple wood shelf board, cut to size and mounted with sturdy L brackets or a French cleat for a floating appearance. Sanding and oiling the wood beforehand keeps it protected from moisture near the sink or stove. Styled with a stack of wooden spoons in a crock, a small potted herb, and a leaning cutting board, this ledge instantly makes a budget kitchen feel curated and intentional.
Also read: White Oak Kitchen Ideas Full of Warmth and Character
16. Scalloped Tile Trim
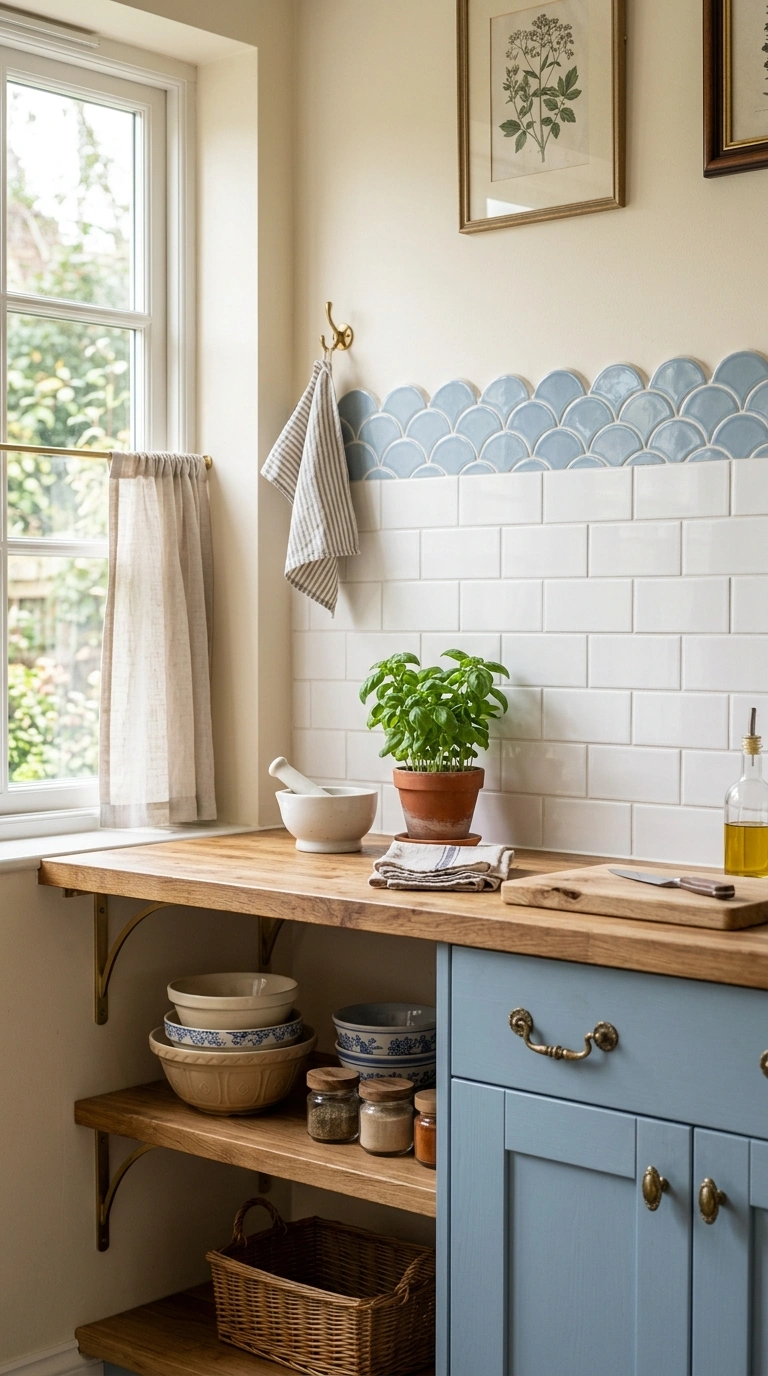
Scalloped or fish scale tile trim adds a soft, curved detail along the top edge of a backsplash, which gives an otherwise straightforward tile job a custom, high end finish. Rather than tiling an entire wall in this pattern, most homeowners use it as a decorative border along the top of a simpler subway or large format tile section, which keeps material costs low while still adding visual interest. This detail works especially well in kitchens with a slightly romantic or vintage feel.
Because scalloped tiles are small and curved, they require a bit more patience during installation, particularly when cutting pieces to fit corners or edges. Choosing a soft glossy finish in white or pale blue lets the shape itself do the visual work without overwhelming the room with color. Finished with simple brass cabinet pulls and open shelving below, this small decorative touch makes the whole backsplash look like a much larger design investment than it really was.
Conclusion
None of these ideas require a full renovation budget or weeks of dust and mess. A little planning, some patience with cutting and lining up seams, and the right material choice can make a kitchen wall look like it belongs in a much pricier home. Pick the one that fits your kitchen’s style and your weekend schedule, and give it a try.
Also read: 18 Moody Blue Kitchen Ideas for a Bold, Dramatic Refresh
FAQs
Do budget backsplash materials hold up over time?
Most of the options on this list, especially peel and stick, vinyl, and sealed painted finishes, hold up well for several years with normal kitchen use and occasional wiping down.
Can renters use any of these ideas?
Yes, peel and stick marble, removable wallpaper, and vinyl tile sheets are all renter friendly since they can be removed without damaging the wall underneath.
What is the cheapest option on this list?
Chalkboard paint and picture frame molding tend to be the least expensive since they mostly require paint, molding strips, and basic tools already found around the house.
Do I need to remove old tile before installing these?
In most cases no, as long as the existing surface is flat, clean, and free of major damage, many of these materials can be applied directly over it.
How long does a budget backsplash project usually take?
Most of these ideas can be completed in a single weekend, and several, like removable wallpaper or a butcher block ledge, can be finished in just a few hours.