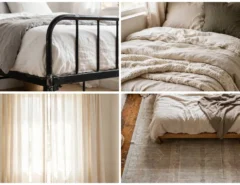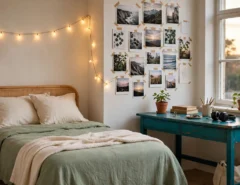
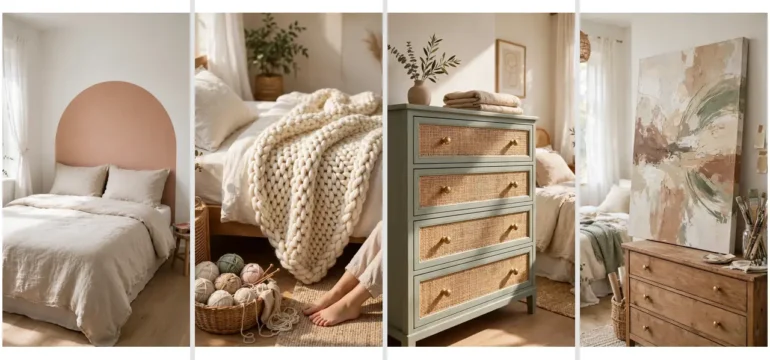
You want a bedroom that looks like you made it, because you did. Not a catalog room with the same lamp everyone owns, but a space with pieces that have a story behind them. That is the whole point of making things by hand.
The trouble is time. Big projects eat months, and most guides assume you have a garage full of tools. So the pretty room stays on a saved board and the bare wall stays bare.
These DIY bedroom decor ideas are built for one weekend. Each one comes with simple steps, materials you can find at a craft store or thrift shop, and a clear spot in the room where it belongs. You will find wall pieces, pillows, storage, lights, upcycled furniture, and a few desk projects.
Pick one for Saturday. Pick a second for Sunday if the first goes well. Your bedroom will start to feel handmade in the best way.
1. Paint an Arch Behind the Bed
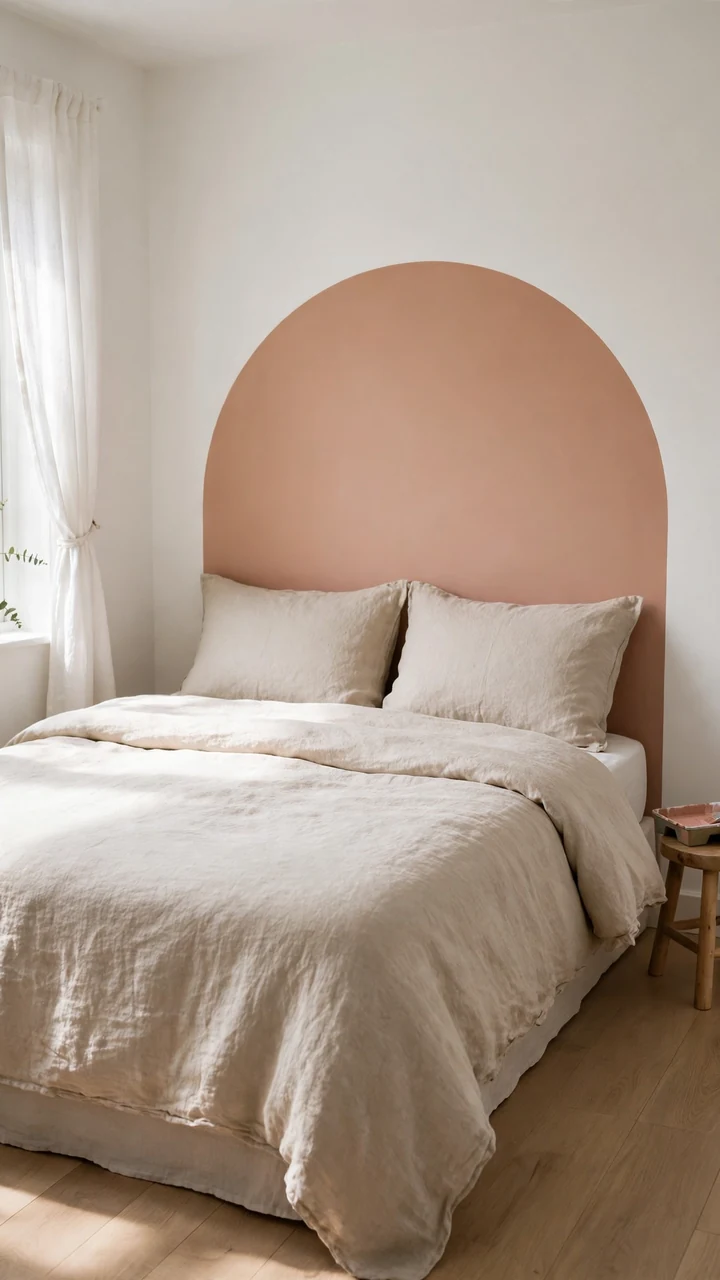
A plain wall behind the bed is the biggest blank spot in most bedrooms.
An arch fixes that with one can of paint and a roll of painter’s tape.
- Mark the center of the bed on the wall with a pencil.
- Tie a string to a pencil, pin the string at that center point, and swing a half circle for the top.
- Draw two straight lines down from the ends of the half circle to the headboard.
- Tape the outside edge, press it flat, and paint two thin coats.
Pull the tape while the paint is still a little damp for a clean edge. Soft clay, sage, or warm greige all show up well against white walls.
A flat wall above the headboard with nothing to anchor the bed. The eye slides right past it.
A painted arch frames the bed like a headboard and makes the wall look planned. Total work: one afternoon.
2. Weave a Yarn Wall Hanging

Yarn wall hangings look hard to make. They are mostly just over and under.
You need a wooden dowel about 18 inches long, chunky cotton yarn in two or three colors, scissors, and your fingers. Pick colors that already live in your room, like oat, rust, and cream.
Hang it on a small nail above the dresser or beside the window, where the fringe can move a little.
Cut 20 strands of yarn, each about 36 inches long. Fold each one in half and loop it over the dowel.
Take a long strand in a second color and weave it over and under the hanging strands in one straight row.
Push each row up snug against the last. Repeat with new colors until you have five or six rows.
Trim the bottom in a straight line or a V shape. Tie a loop of yarn to both ends of the dowel for hanging.
3. Frame Fabric Scraps as Wall Art
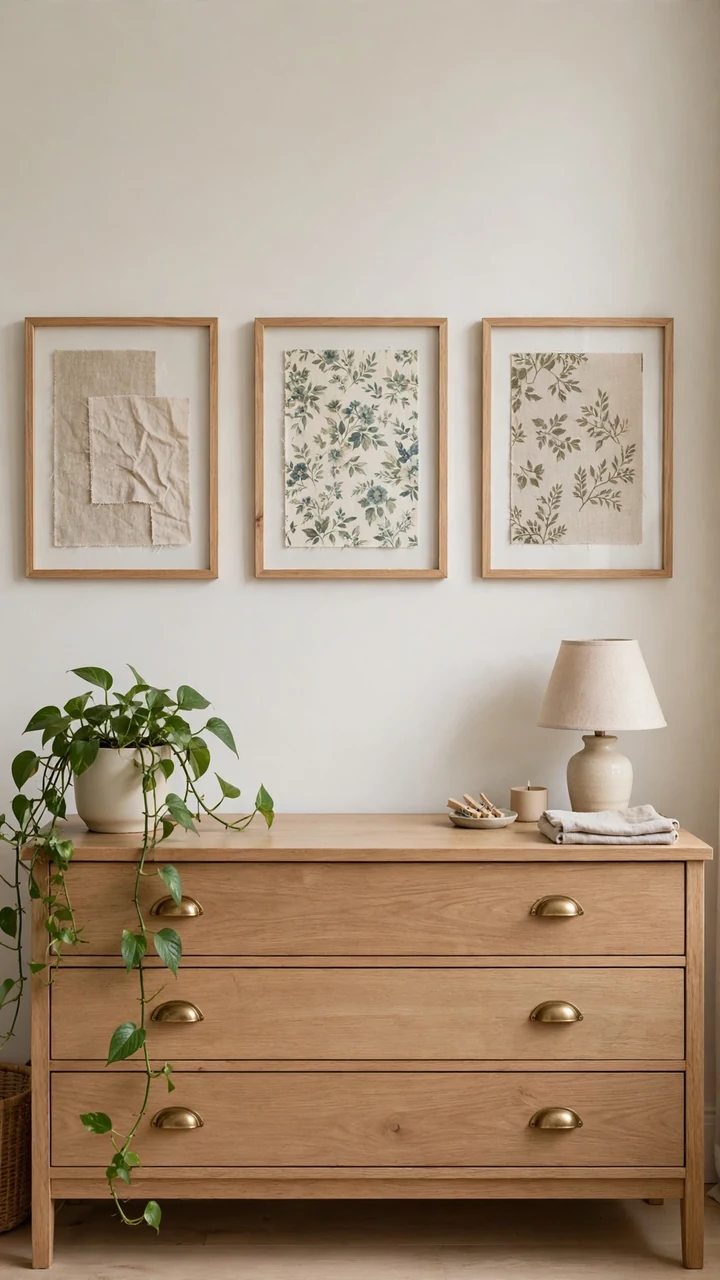
Leftover fabric is already full of color and pattern. A frame makes it look intentional.
Cut cardboard or foam board to fit the frame, wrap the fabric around it, and tape it tight on the back. Take the glass out of a thrifted frame and set the wrapped board inside.
Good fabric to use:
- A linen remnant
- An old scarf
- A pillowcase with a pretty print
- A cloth napkin
Hang three of the same size in a row above the dresser for a bigger effect.
4. Make a Gallery Wall with Thrifted Frames
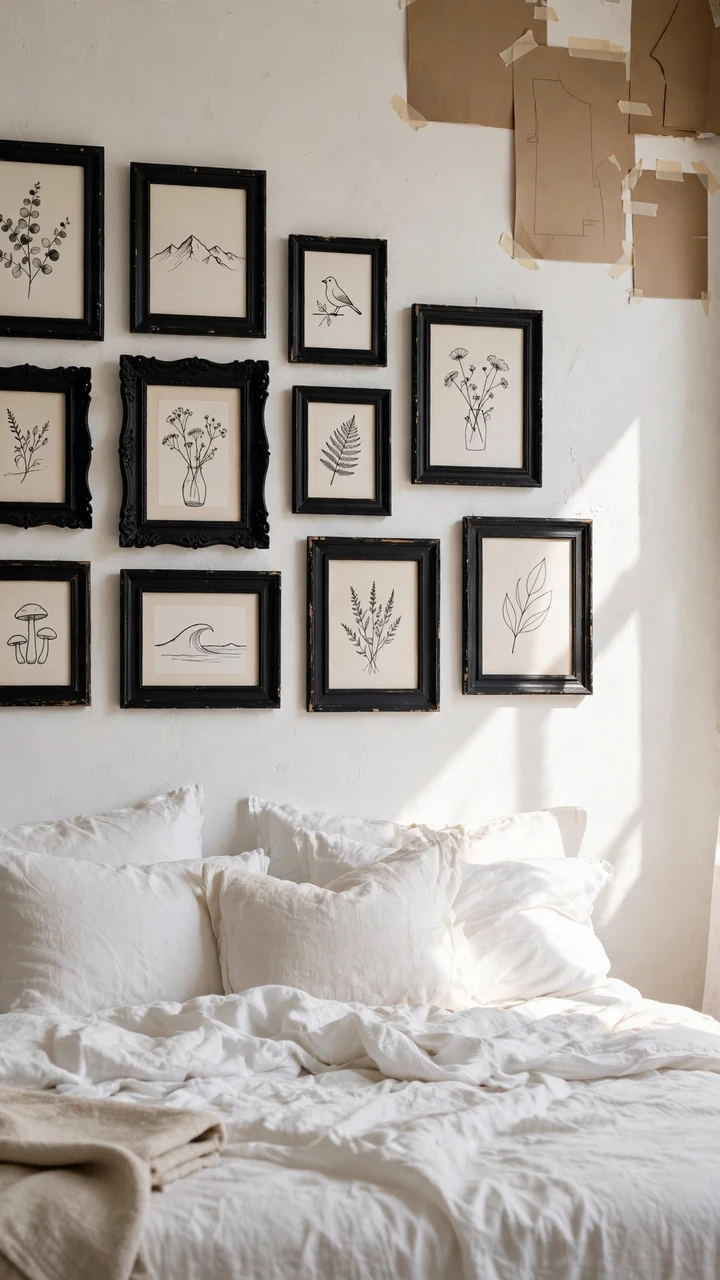
Mismatched frames only look messy when the colors fight.
Spray every frame the same color, like matte black, warm white, or soft brass, and the mix of shapes starts to look collected on purpose. Work outside on a cardboard sheet, apply two light coats, and let them dry before anything goes inside.
Lay the frames on the floor first and shuffle them until the gaps are about two fingers wide.
What to grab first
5. Knot a Macrame Plant Hanger
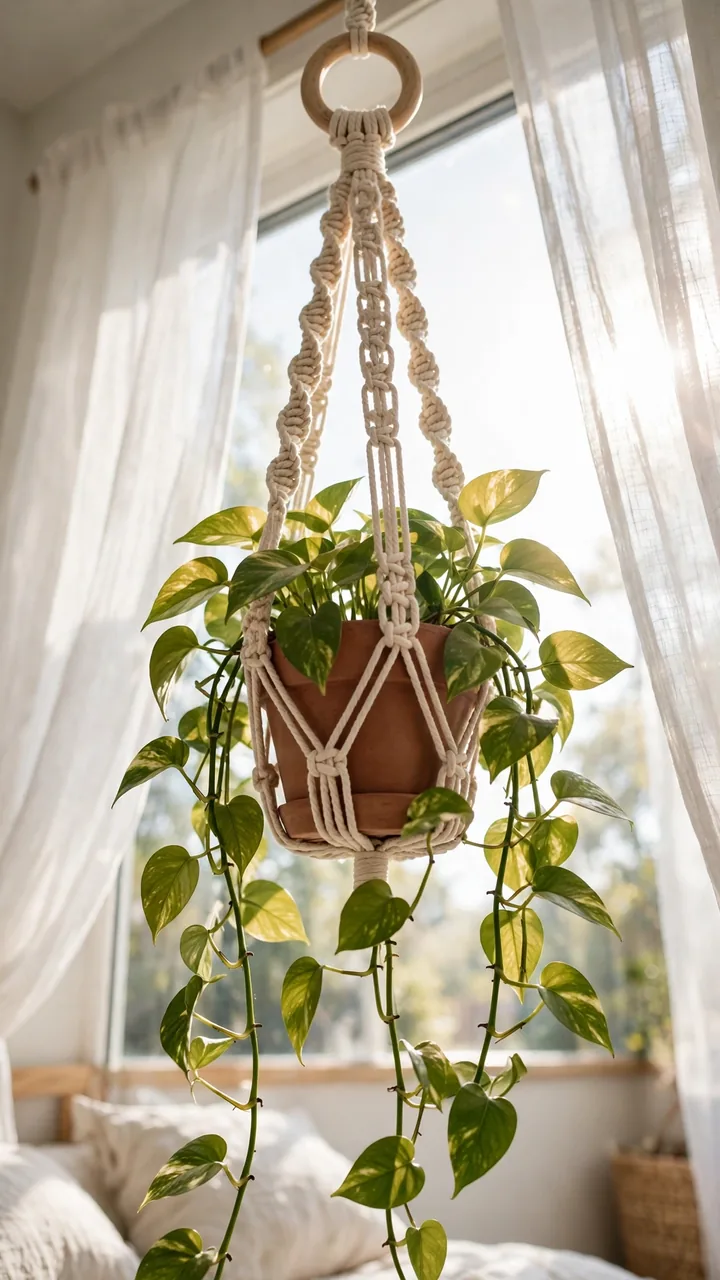
The corner by the window always looks empty, and a floor plant eats room you may not have.
A hanger uses the air instead. Cut eight cords, fold them in half over a wooden ring, and wrap a tight knot just under the ring. Split the cords into four groups, tie a knot in each group, then regroup and tie again lower down. Gather everything below into a basket shape for the pot.
Use a hardy plant like pothos in a lightweight pot, and screw the hook into a ceiling joist or use a ceiling anchor made for hanging weight.
6. Paint a Faux Headboard on the Wall
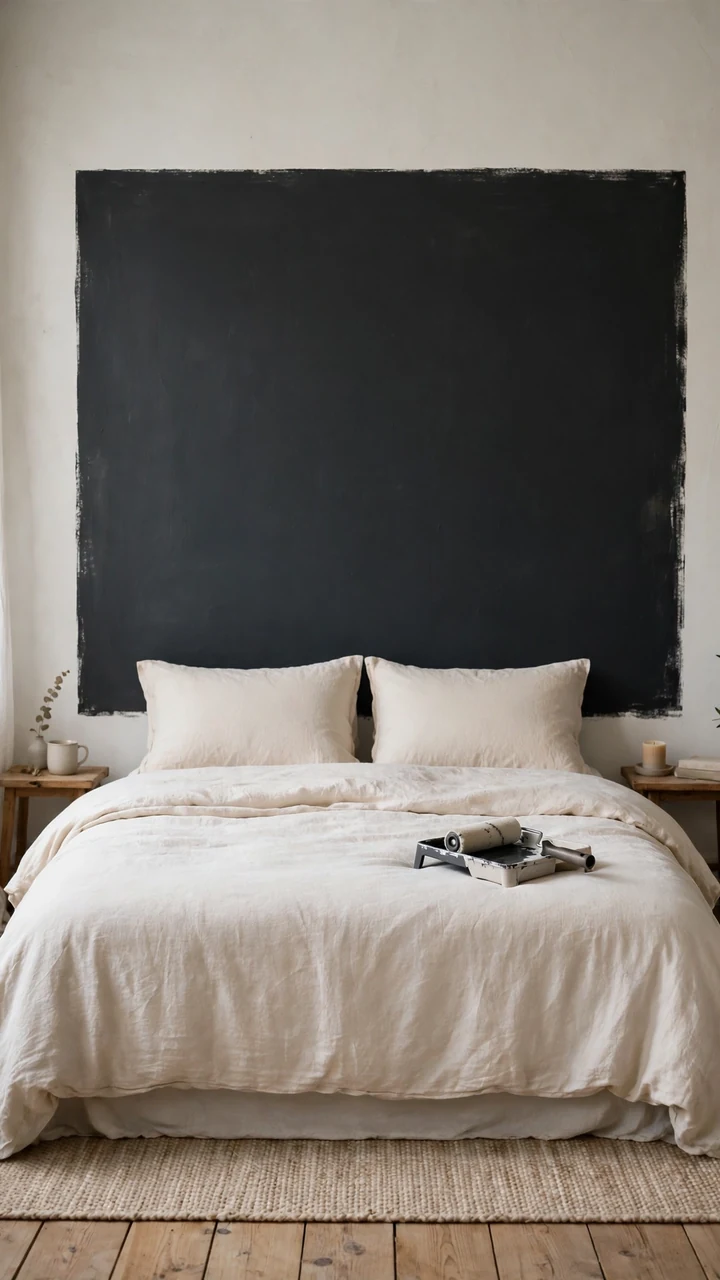
Make it wider than the bed. A painted shape that stops at the mattress edge looks like a mistake.
Mark a rectangle that reaches about six inches past each side of the bed and rises roughly two feet above the pillows. Tape the outline and fill it in with a color deeper than your wall. Soft charcoal on a white wall feels moody, and warm taupe on cream feels quiet.
Slide the bed against the wall before you start so you can see where the shape lands.
💡 Quick Tip
Use a small foam roller instead of a brush. It leaves fewer streaks on a big block of color, and two thin coats beat one thick one.
7. Sew an Easy Envelope Pillow Cover
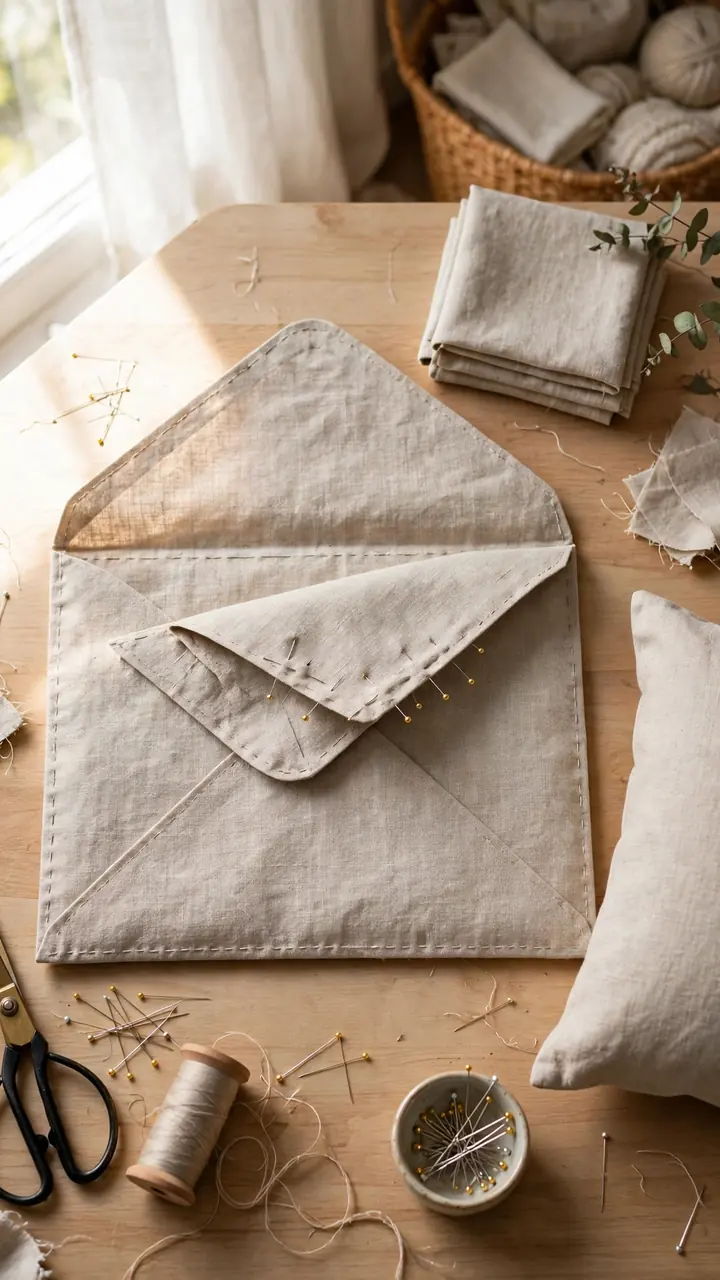
Cut the fabric as wide as your pillow plus one inch, and about two and a half times as long.
That one rectangle is the whole pattern. Then:
- Hem both short ends with a narrow fold and a straight stitch.
- Fold the ends toward the middle, right sides facing, so they overlap by about four inches.
- Sew down both sides, flip it right side out, and press.
There is no zipper and no button, so the back opening hides itself under the overlap. Linen, canvas, and cotton twill are the easiest fabrics to sew straight.
A cover with no zipper slips off for washing and swaps out fast when you want a new color.
8. Tea-Dye Your Pillowcases
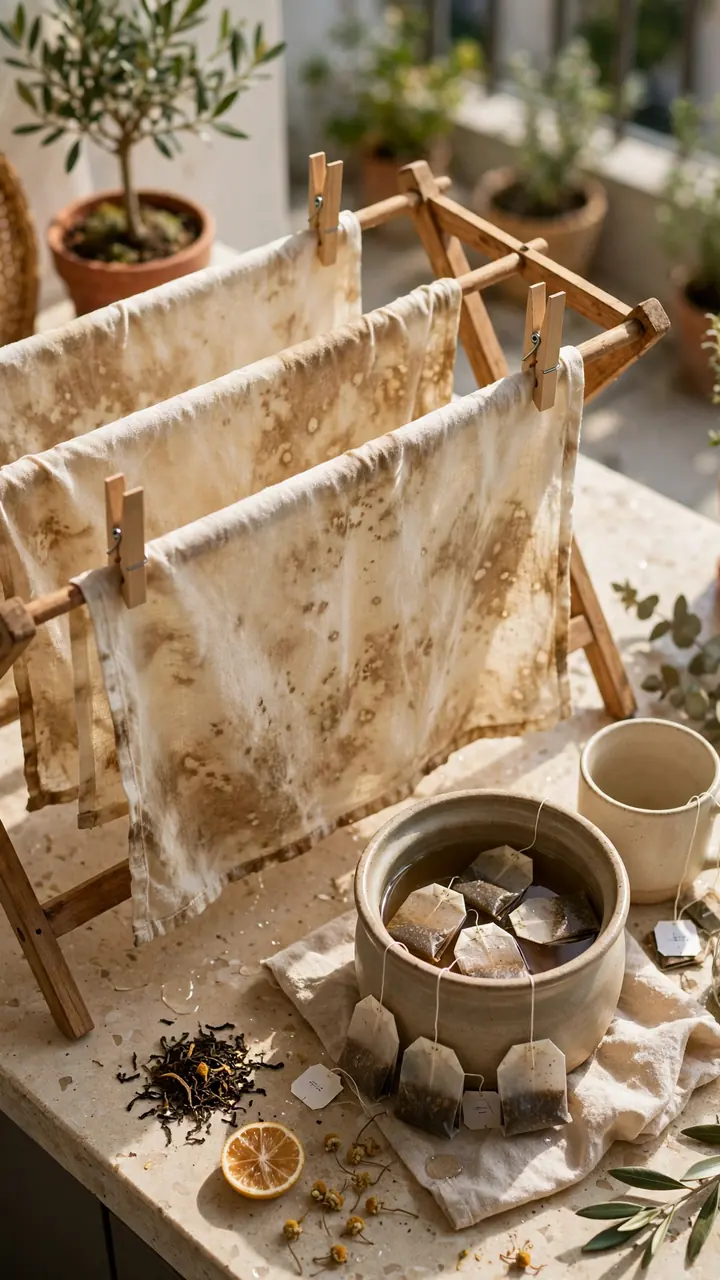
You do not need a dye kit to warm up a plain white pillowcase. A pot of strong tea does the job.
Steep a few black tea bags in hot water, drop in the pillowcase, and let it soak. Pull it out a shade darker than you want, because it dries lighter. Rinse in cool water and wash it alone the first time.
Cotton and linen take the color best. Polyester barely changes, so check the label first.
| Black tea | Coffee |
|---|---|
| Soft sand to light tan | Deeper, richer brown |
| Looks aged and light | Looks cozy and darker |
| Easy to build up in layers | Test a scrap first |
9. Arm Knit a Chunky Throw
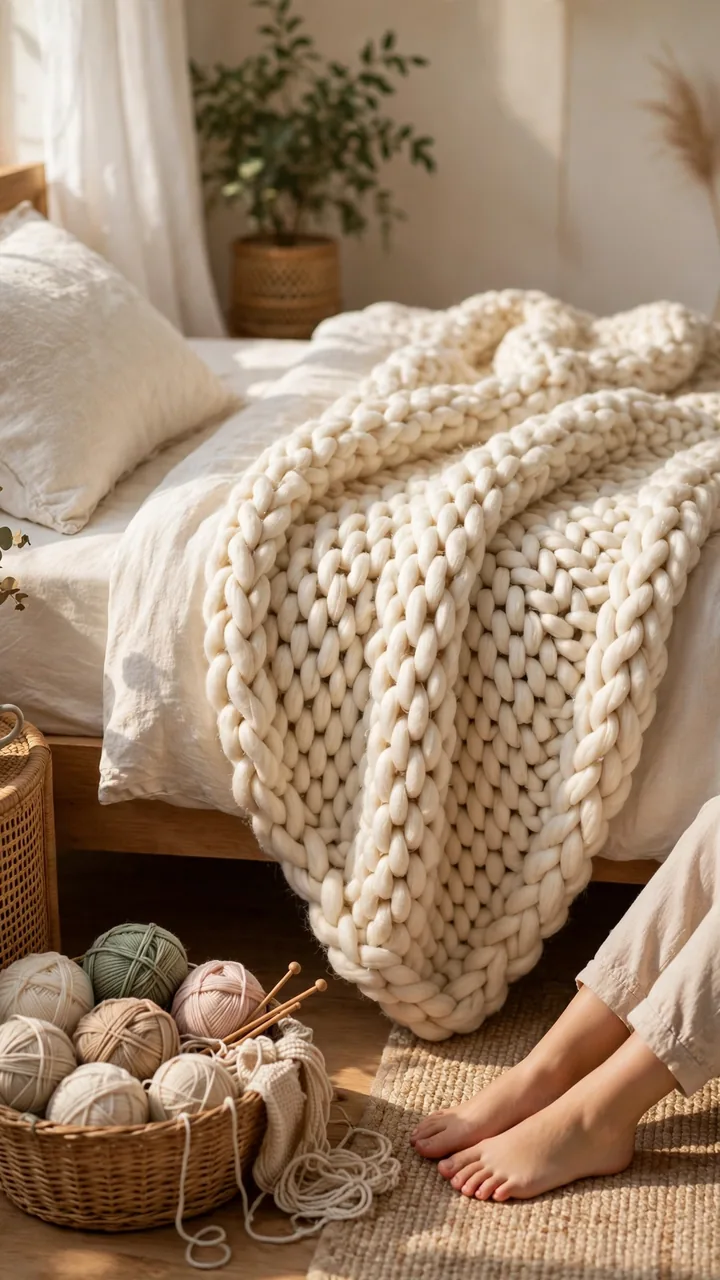
Needles are optional here. Your arms are the tools.
Grab jumbo chunky yarn and check the label for how much a throw needs. Make a slip knot, leaving a long tail, and cast on loops along one arm. Then pull each new loop through the last one, row after row, until the blanket is as long as you want.
The first rows feel clumsy. By the third, your hands know what to do, and the whole throw fits into one evening.
Cast on loops loose enough to slide off your hand.
Buy all your yarn at once so the color matches.
Pulling each loop tight. The edge puckers.
Thin yarn. It makes a flimsy, holey blanket.
10. Turn Old Shirts into a Bed Runner
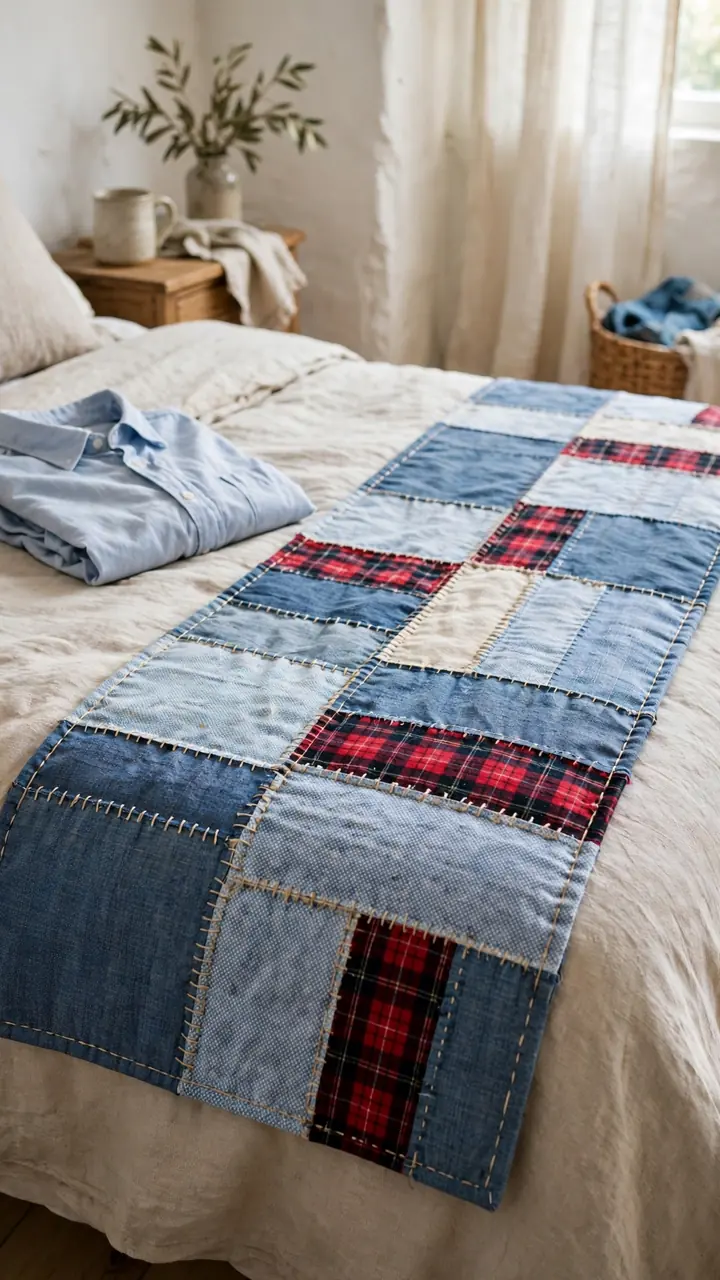
A faded chambray, a striped oxford, and a plaid flannel look good together because they have already been worn soft.
Cut each shirt into strips about eight inches wide. Sew the strips side by side into one long panel, then stitch that to a flat sheet or a plain piece of cotton as the backing. Fold the edges in and topstitch all the way around.
Lay it across the foot of the bed, a little off center, so it looks relaxed.
⚠️ Watch Out
Wash and dry every shirt before you cut. Mixed fabrics shrink at different rates, and an unwashed runner will pucker the first time it hits the machine.
11. Mount a Crate as a Nightstand
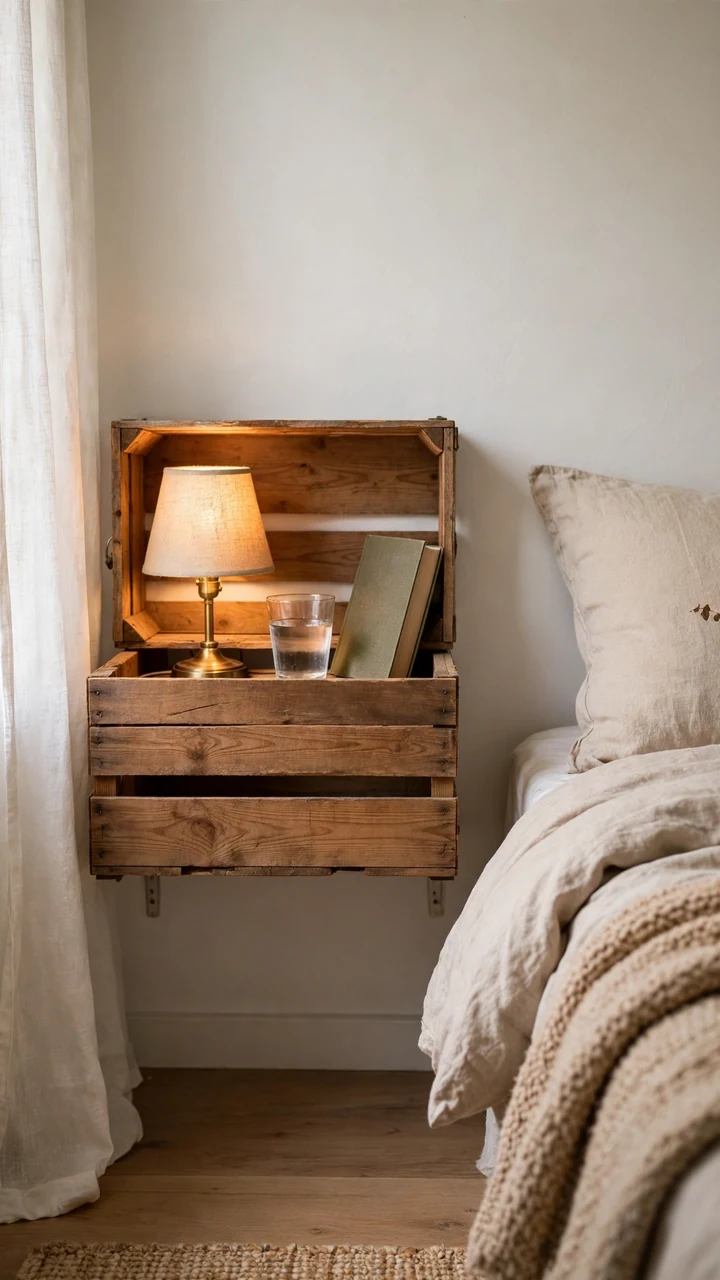
Some bedrooms have no room for a bedside table. A crate on the wall has no legs, so it takes up no floor.
Sand a wooden crate until it feels smooth, then wipe on a stain or paint it. Turn it on its side so the open face points out. Screw it to the wall through the back panel, going into a stud, with two screws near the top and two near the bottom.
It holds a lamp, a glass of water, and a book. Keep it light and skip anything heavy.
12. Build a Wood Slat Headboard
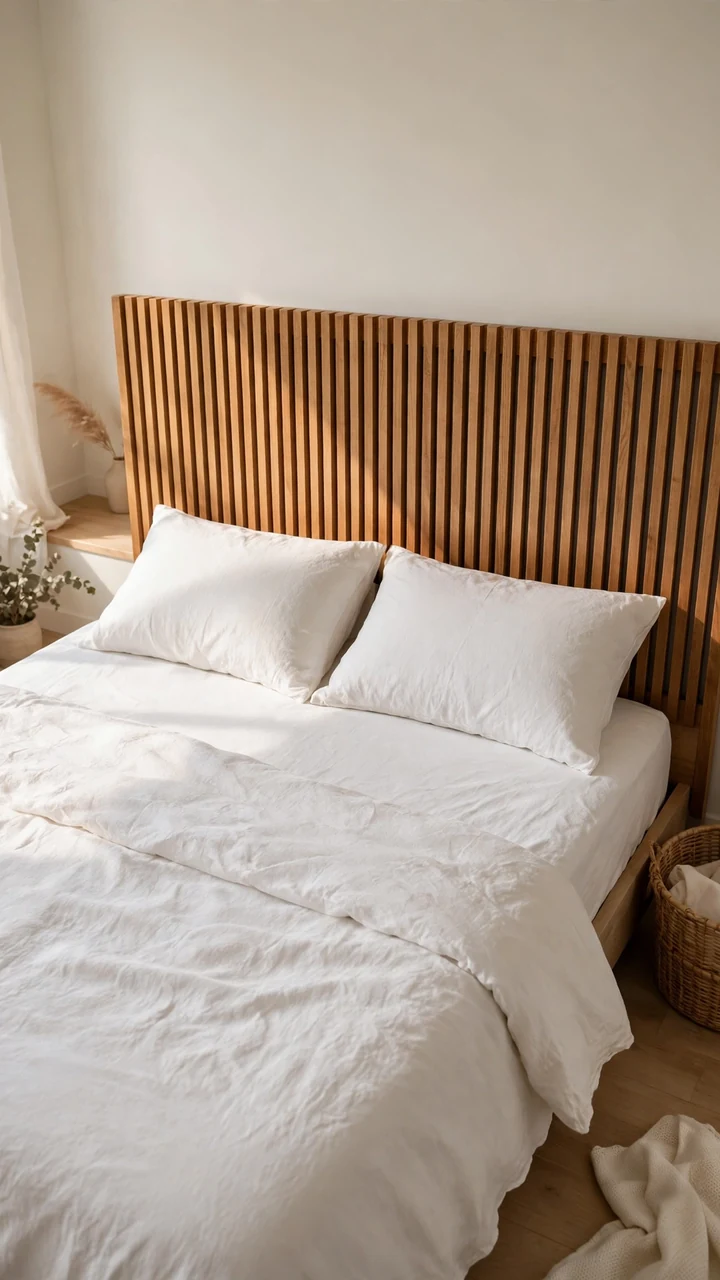
Most people cut their boards one at a time and end up with slats that do not match.
Cut them all in one go. Buy fence boards at the hardware store, ask them to trim each to the same length, and sand every edge. Stain them, then glue and screw the slats onto two horizontal backer boards, leaving a gap about the width of your thumb between each one.
Hang the finished panel on the wall with screws into studs, so it stays steady when you lean back on it.
- ▸Fence boards, cut to one length at the store
- ▸Two backer boards a little shorter than the bed is wide
- ▸Wood glue and short wood screws
- ▸Sandpaper and a wipe-on stain in one shade
- ▸Long screws for the studs behind the wall
13. Roll Clay Beads into a Garland
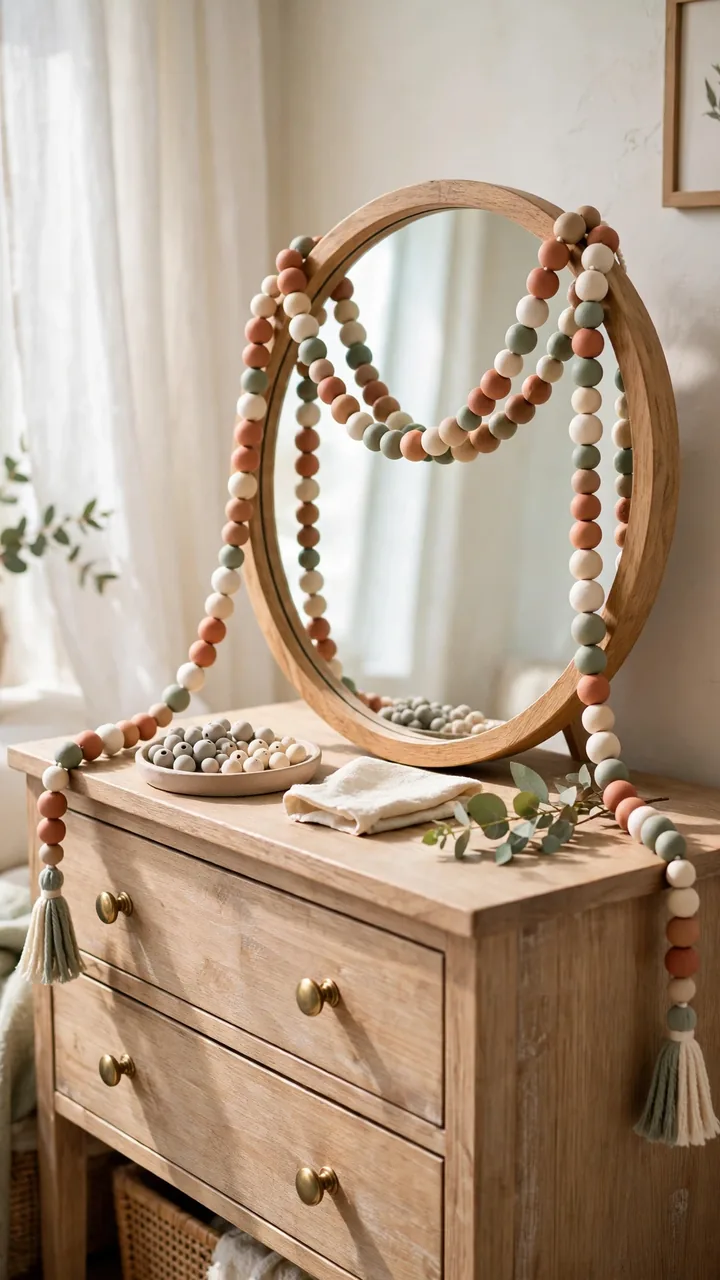
Air-dry clay costs very little, and you can shape a whole garland while watching a show.
Pinch off pieces and roll them between your palms into balls of different sizes. Poke a hole through each with a toothpick, then leave them to dry for about a day. Paint them in two or three soft colors, or leave them natural.
Thread the beads onto cotton cord with a knot between each one. Start the clay on Saturday and string it on Sunday.
A bare mirror frame on the dresser with nothing around it.
A beaded garland draped over the top, with a little tassel hanging off each end.
14. Wrap a Lampshade in Fabric
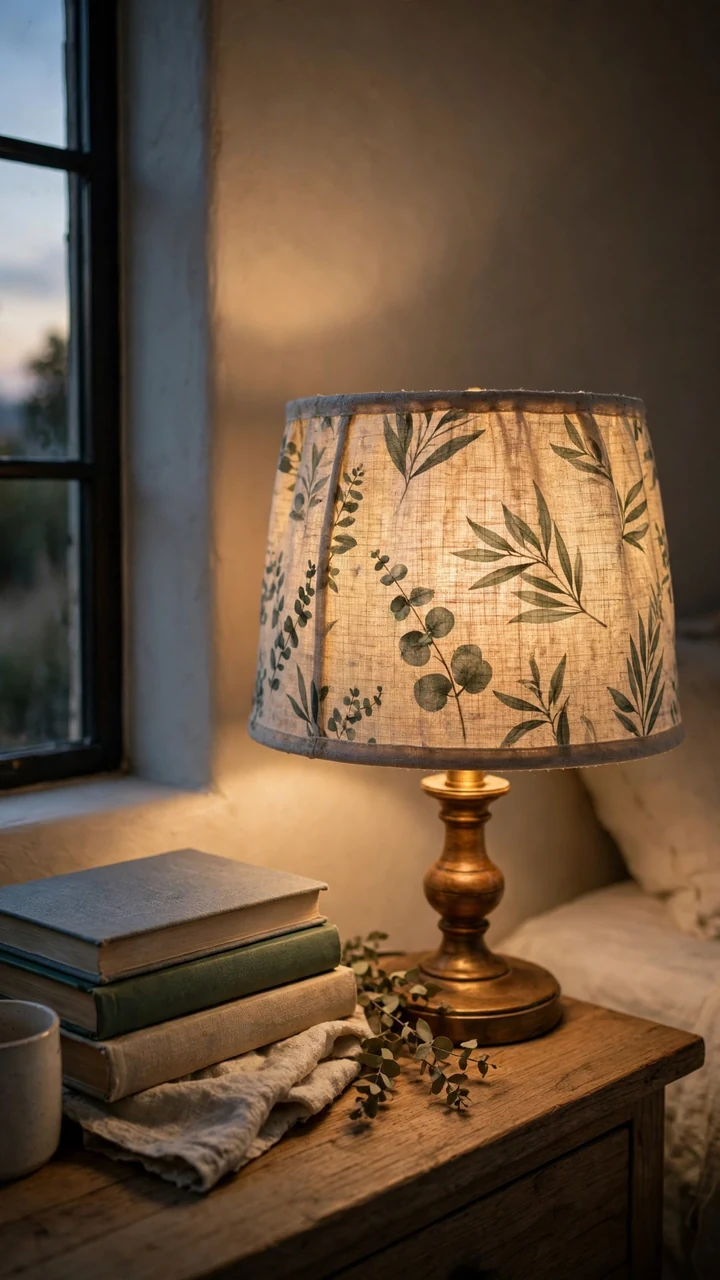
A tired shade can take on a new look with one piece of fabric.
Trace the shade onto paper by rolling it along one edge, then cut the paper pattern.
Pin the pattern to your fabric and cut it out, leaving half an inch extra on every side.
Brush a thin layer of fabric glue on the shade and press the fabric on, smoothing as you go.
Fold the extra fabric over the top and bottom rims, glue it down, and let it dry for an hour.
Pick a thin, light fabric so the lamp still glows through it. Use an LED bulb, since it stays cool, and keep the fabric from touching the bulb.
15. Make a Paper Cord Pendant Light
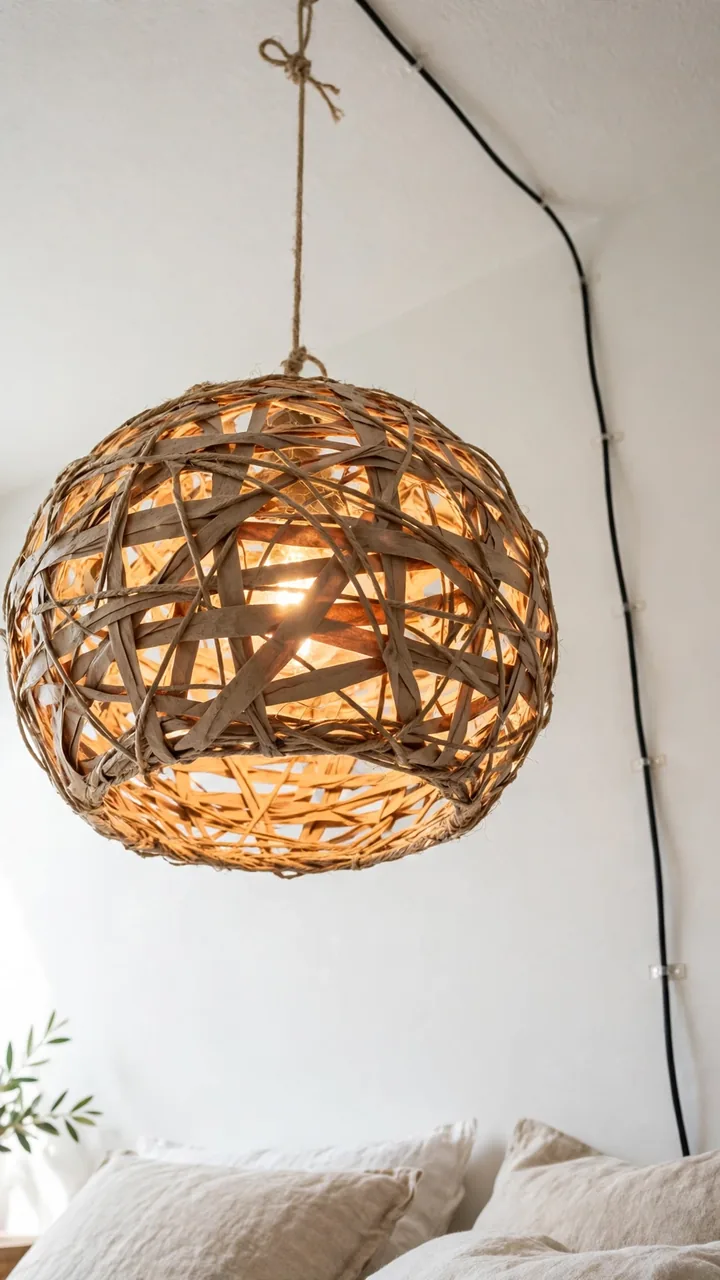
The ceiling light in a rental room is usually a flat white dome, and it throws a harsh glare.
You can hide it behind a handmade shade. Blow up a balloon, then wrap it with paper twine soaked in thinned craft glue. Leave gaps so light shines through. When the twine is fully dry, pop the balloon and lift it out.
Hang the shade over a plug-in pendant cord kit with an LED bulb, and keep the twine well away from the bulb.
16. Hang Fairy Lights on a Branch
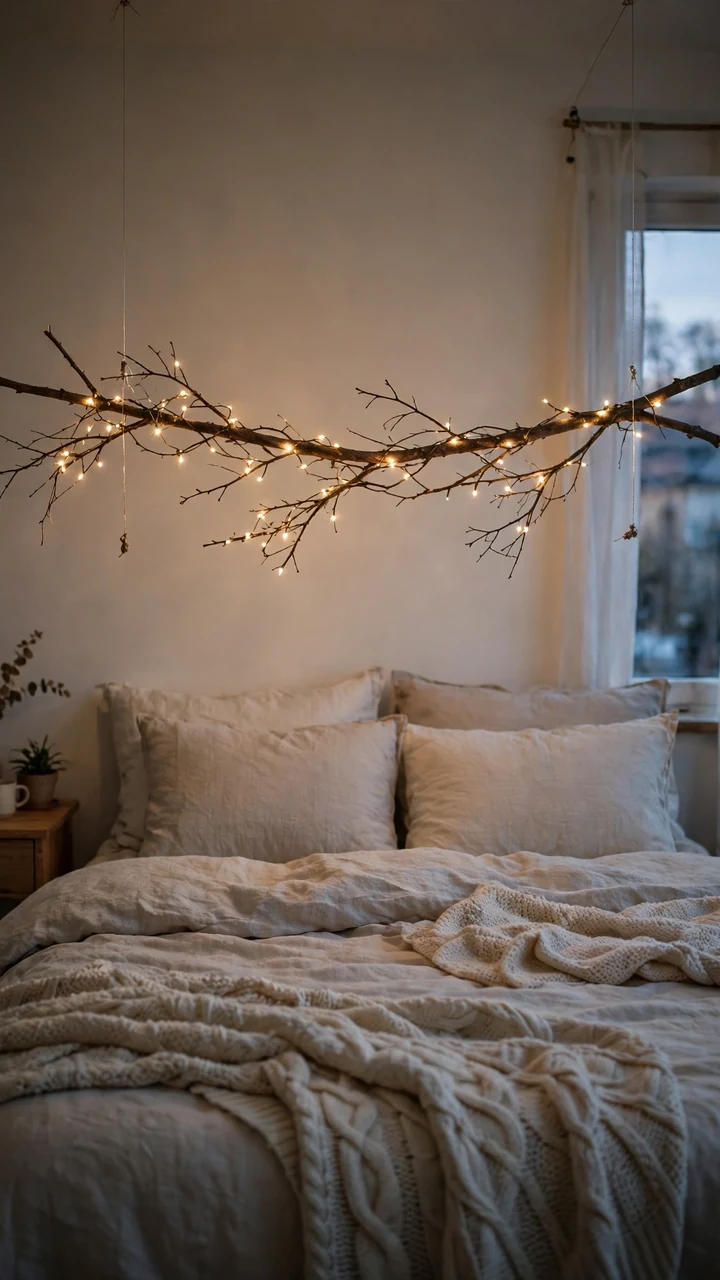
A fallen branch from the yard can hold a whole headboard’s worth of light.
Pick one that is dry and about as wide as your bed, and knock off any loose bark. Wind a string of warm white lights around it, tucking the wire behind the twigs so only the bulbs show. Hang it from two ceiling hooks with fishing line, or fix it to the wall with two sturdy screw hooks.
Choose lights that run on batteries or a plug with a switch you can reach from bed.
Gather before you start
17. Add Cane Webbing to a Dresser
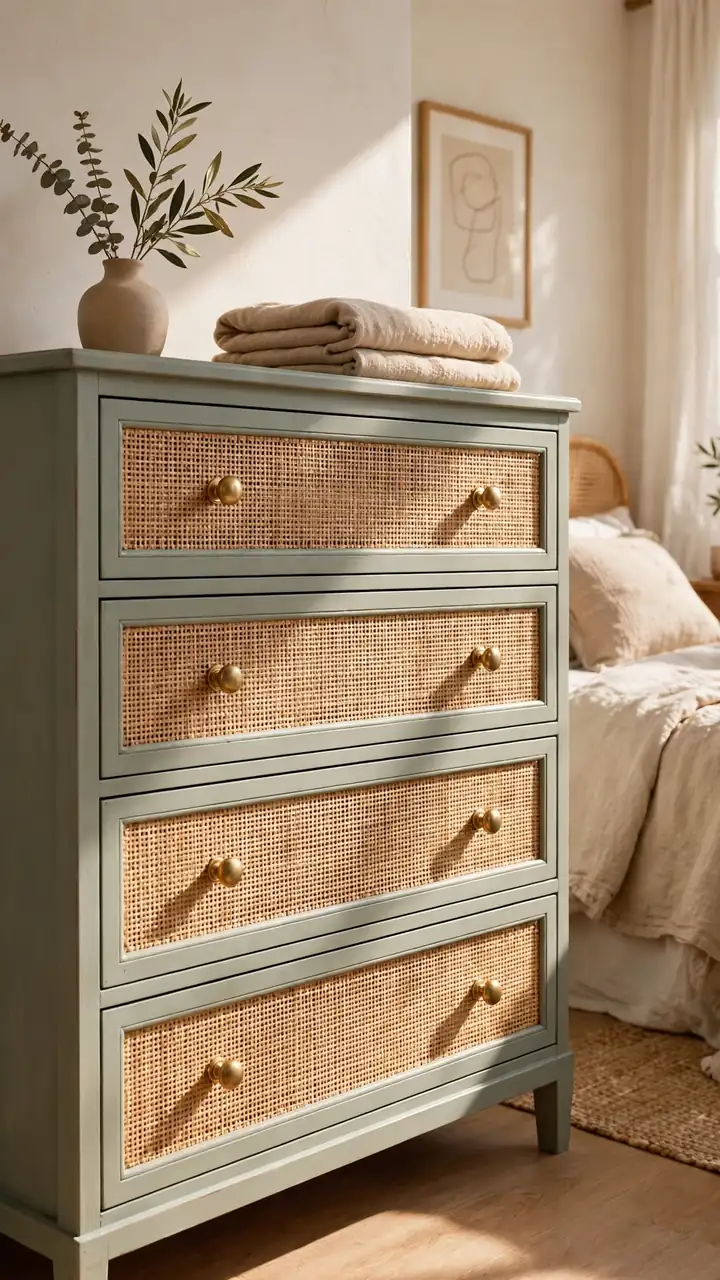
A flat dresser front can look like a store bought piece with one new panel.
Measure the inside of a drawer front or cabinet door and buy cane webbing a few inches bigger. Soak it in warm water for about ten minutes so it bends without cracking. Cut out the center of the wood panel with a jigsaw, or work on a frame that already has an open middle.
Press the damp webbing into the opening and glue it down. Add a thin wood strip on top to hold it in place, then let it dry flat.
Soak the cane first. Dry webbing snaps. Damp webbing bends, then tightens as it dries.
18. Repaint a Thrifted Dresser
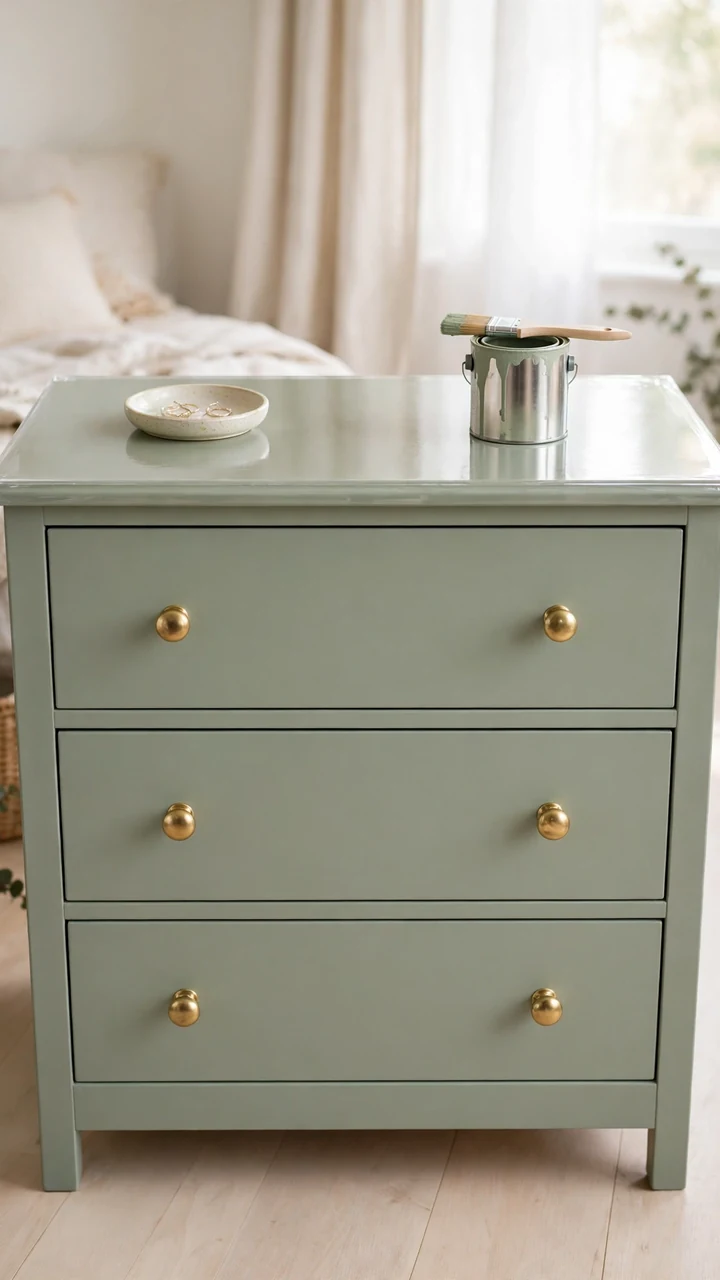
Dressers at thrift shops are cheap for a reason. The finish is scuffed, and the knobs are tired.
Sand the whole surface lightly so the paint can grip, then wipe off the dust. Apply a coat of primer, then two thin coats of paint with a small roller. Let each coat dry fully before the next.
Finish with a clear sealer on the top, where mugs and jewelry dishes will sit. New knobs in brass, black, or glass take twenty minutes to swap and change the whole look.
💡 Quick Tip
Take a photo of how the drawers sit before you remove them. Number the backs with a pencil, so each one slides back into its own opening.
19. Use an Old Ladder as a Blanket Rack
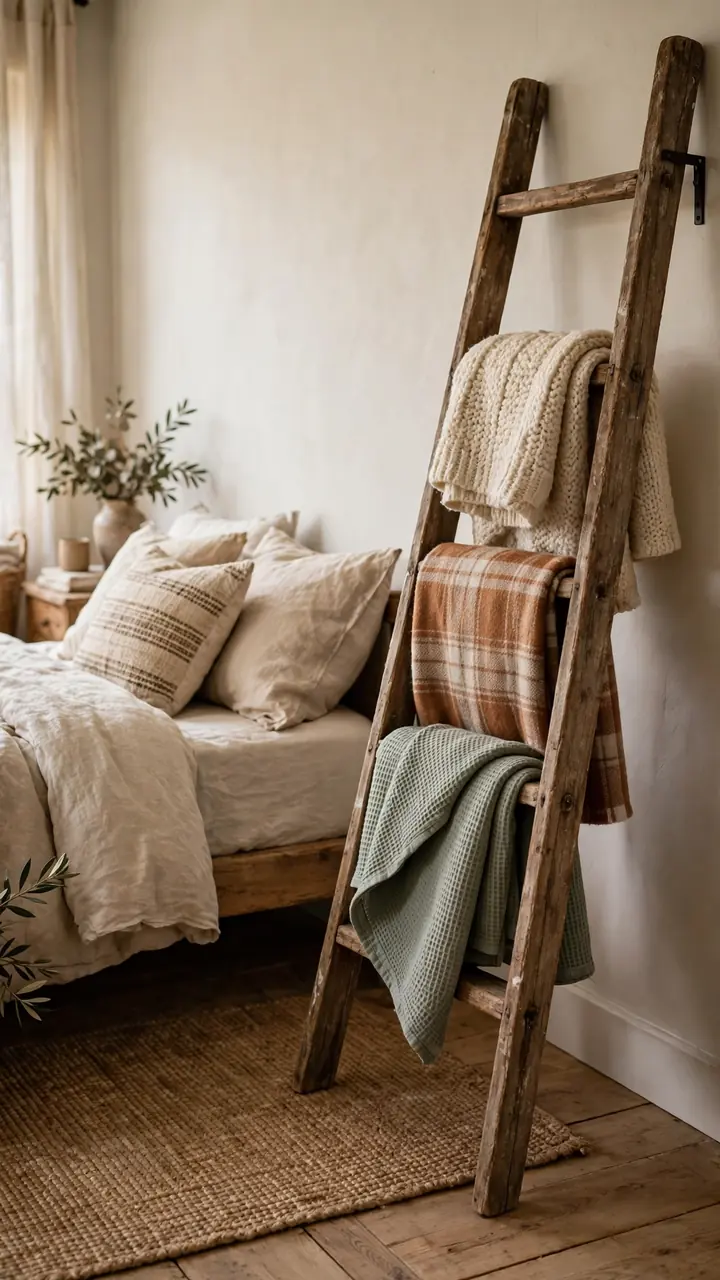
Blankets pile up on a chair until the chair disappears.
A wooden ladder gives them a home. Lean it against a clear wall near the bed, with the legs on a rug so they do not slide. Sand any rough spots, and rub on a little wax or oil if the wood looks dry.
Drape a throw over each rung, folded once, with the softest on top. Anchor the top of the ladder to the wall with a small bracket, which keeps it from tipping if someone bumps it.
20. Cover a Bench for the Foot of the Bed
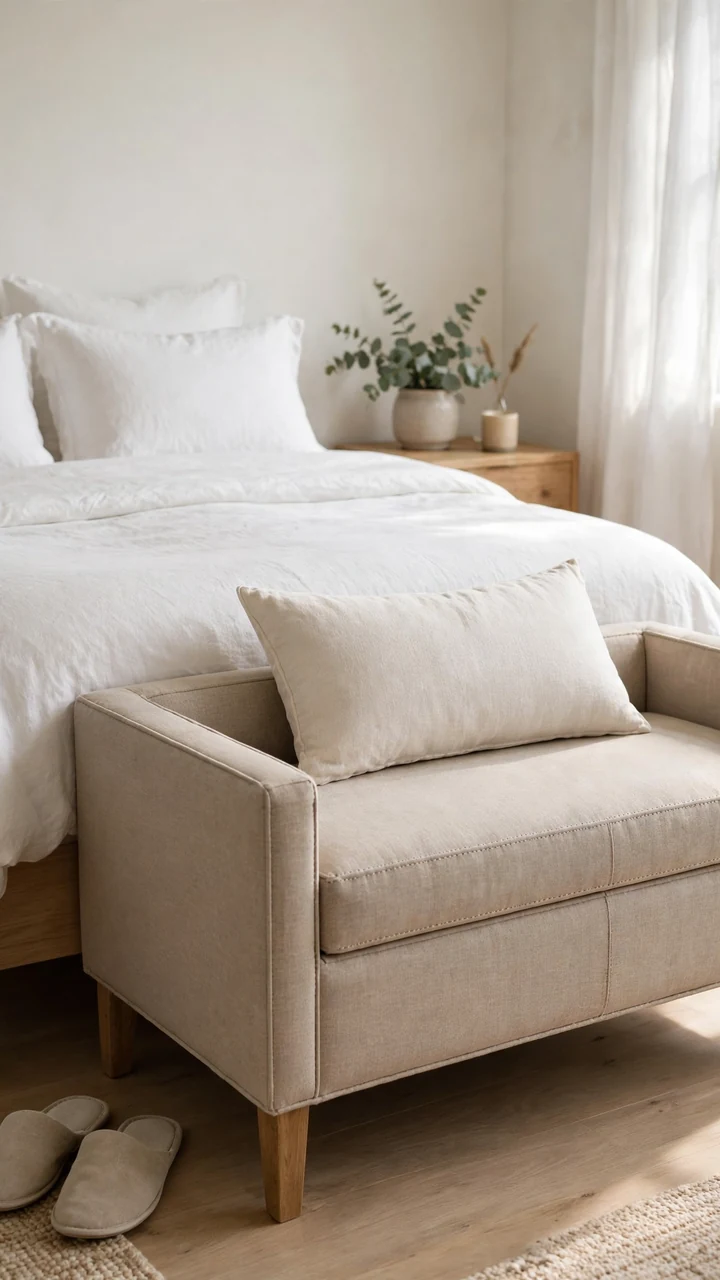
A bench at the end of the bed gives you a place to sit and pull on socks. A thrifted stool or an old bench is the cheapest start.
Take off the old seat and lay it on a piece of foam. Trace and cut the foam to match. Wrap a layer of batting over the foam, then pull your fabric over both and staple it tight underneath, working from the middle of each side out to the corners.
Fold each corner like a gift, and staple. Screw the seat back onto the base.
| Canvas or linen | Velvet |
|---|---|
| Sturdy and easy to staple | Soft, but shows marks and dust |
| Holds up to daily sitting | Better for a bench you rarely use |
| Wipes clean with a damp cloth | Needs a gentle brush |
21. Sew Canvas Bins for Under the Bed
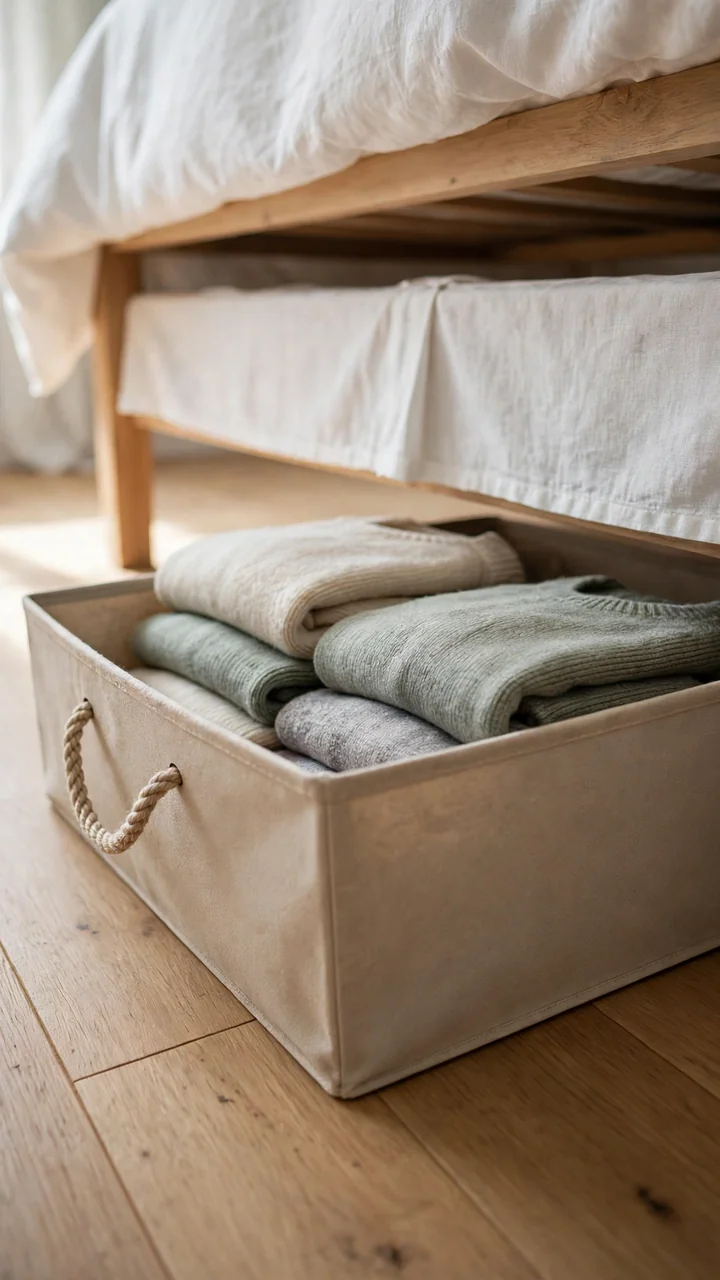
The space under the bed is the biggest storage spot in the room, and most of it goes to dust.
Measure the gap between the floor and the bed frame first, then subtract an inch. That is your bin height. Cut a canvas rectangle for the base and four for the sides, sew them into a box, and stitch a flat strip of stiff interfacing inside each wall so the sides stand up.
Add a rope handle on one end so the bin slides out with one finger.
Measure the clearance before you cut any fabric.
Use heavy canvas or denim so the walls hold their shape.
Soft cotton with no lining. The bin slumps.
Making the bin as wide as the whole bed. It gets too heavy to pull.
22. Cover Shoeboxes with Fabric
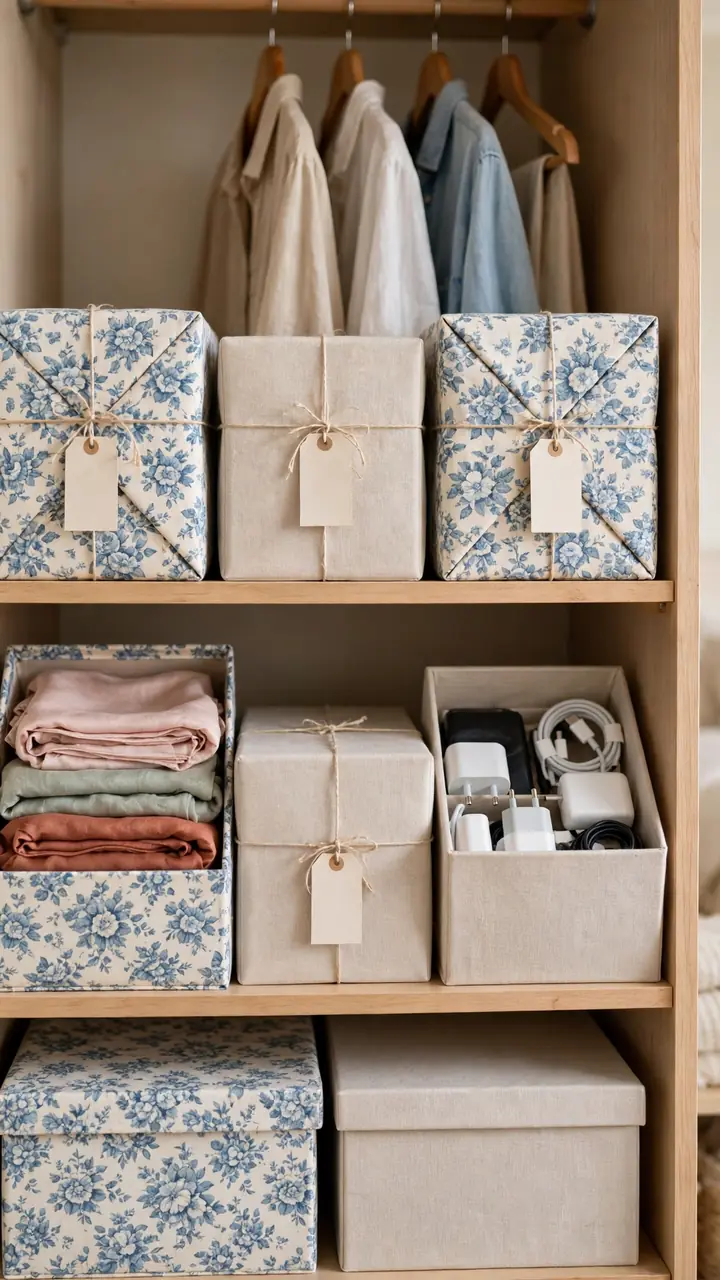
Closet shelves turn messy fast, because small things have nowhere to sit.
Shoeboxes fix that, and a fabric cover makes them look like a matched set instead of leftover packaging. Brush glue on the outside of the box and lid, press the fabric on, and fold the edges inside. Label the front with a strip of paper so you know where the scarves and chargers live.
Use one fabric for the whole shelf, or two that share a color.
What you need
23. Hang a Pegboard for Jewelry
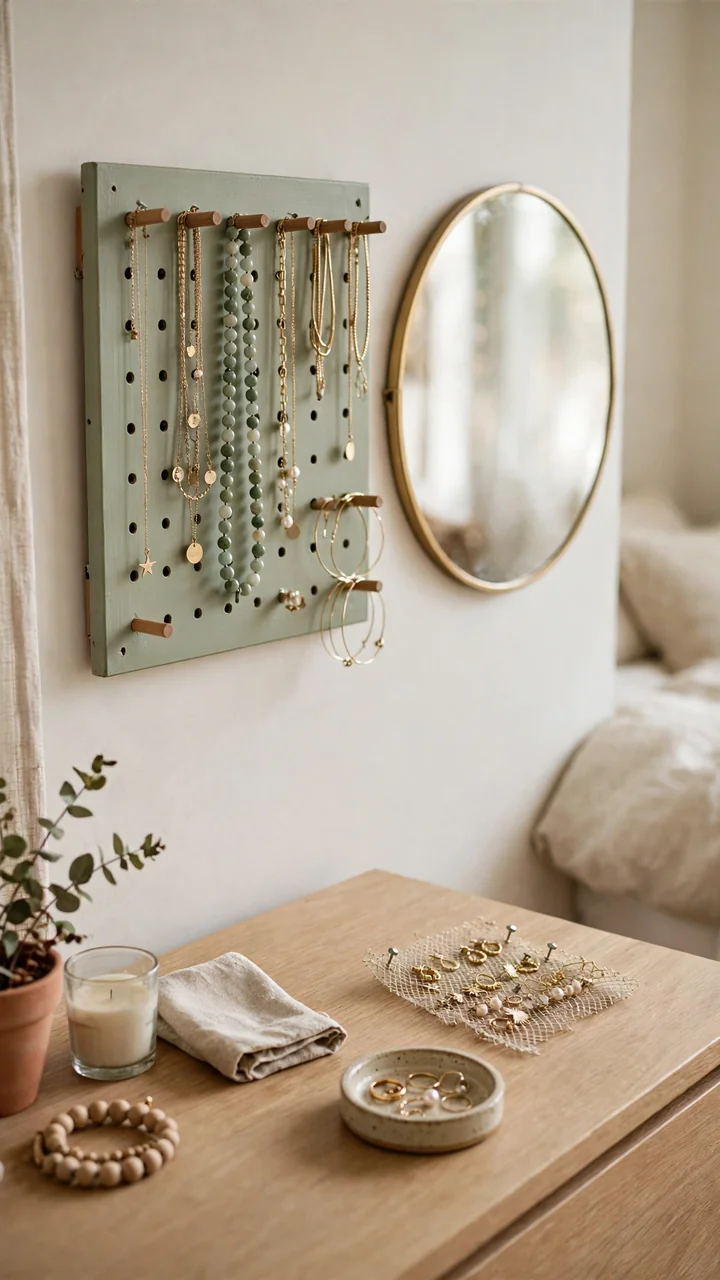
Necklaces tangle in a drawer. On a wall, they stay in order.
Buy a small pegboard, paint it any color you like, and mount it by the mirror with spacers behind it so the pegs have room. Then add hooks. Short hooks hold earrings and rings on a dish. Longer ones hold necklaces and bracelets.
Group like with like: chains on the left, studs in the middle, and the daily pieces closest to the mirror.
24. Build a Simple Desk Nook
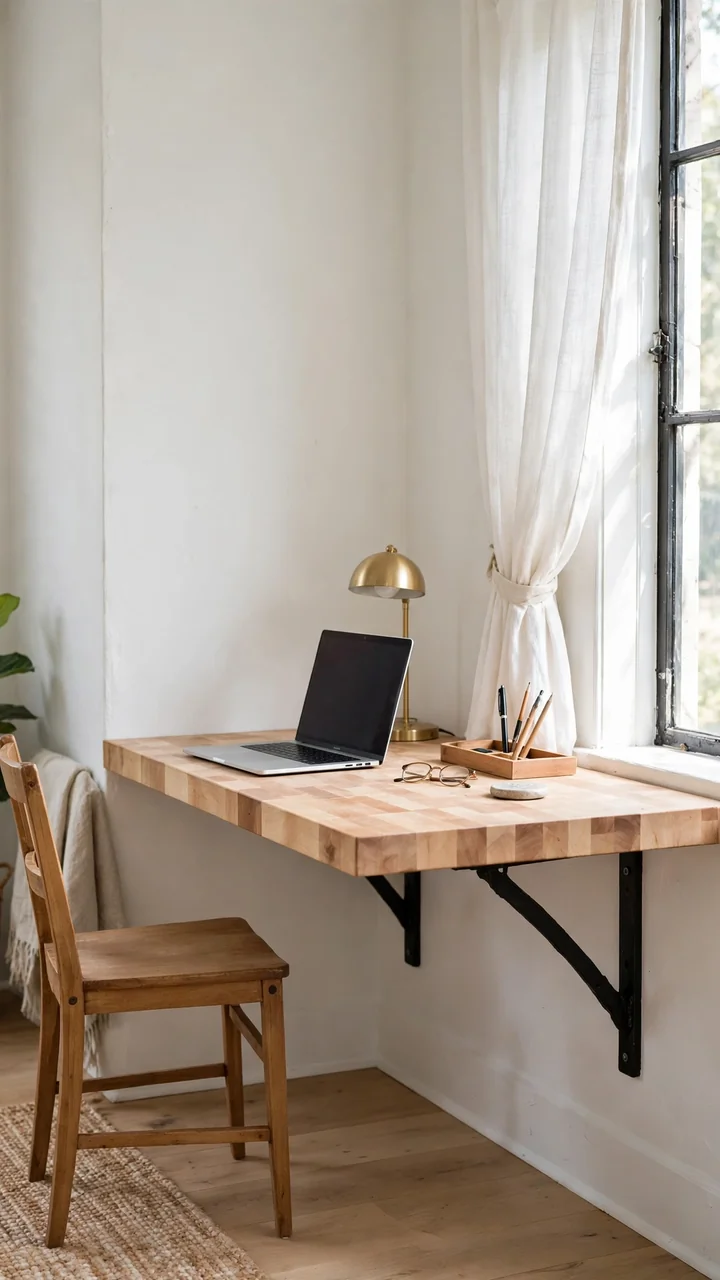
A desk does not need its own room. A slab of wood and two brackets can live along one bedroom wall.
Buy a butcher block or a thick shelf board, and cut it to fit the space between two walls if you can. Sand, oil, and let it dry. Find the studs, mark a level line about 29 inches from the floor, and screw two heavy duty brackets in place.
Set the board on top, and screw it down from below. Add a lamp and a small tray for pens.
⚠️ Watch Out
Anchor the brackets into wall studs, not just drywall. A desk holds a laptop, a lamp, and your arms, and drywall anchors alone will pull loose over time.
25. Pin Up a Cork Memo Board
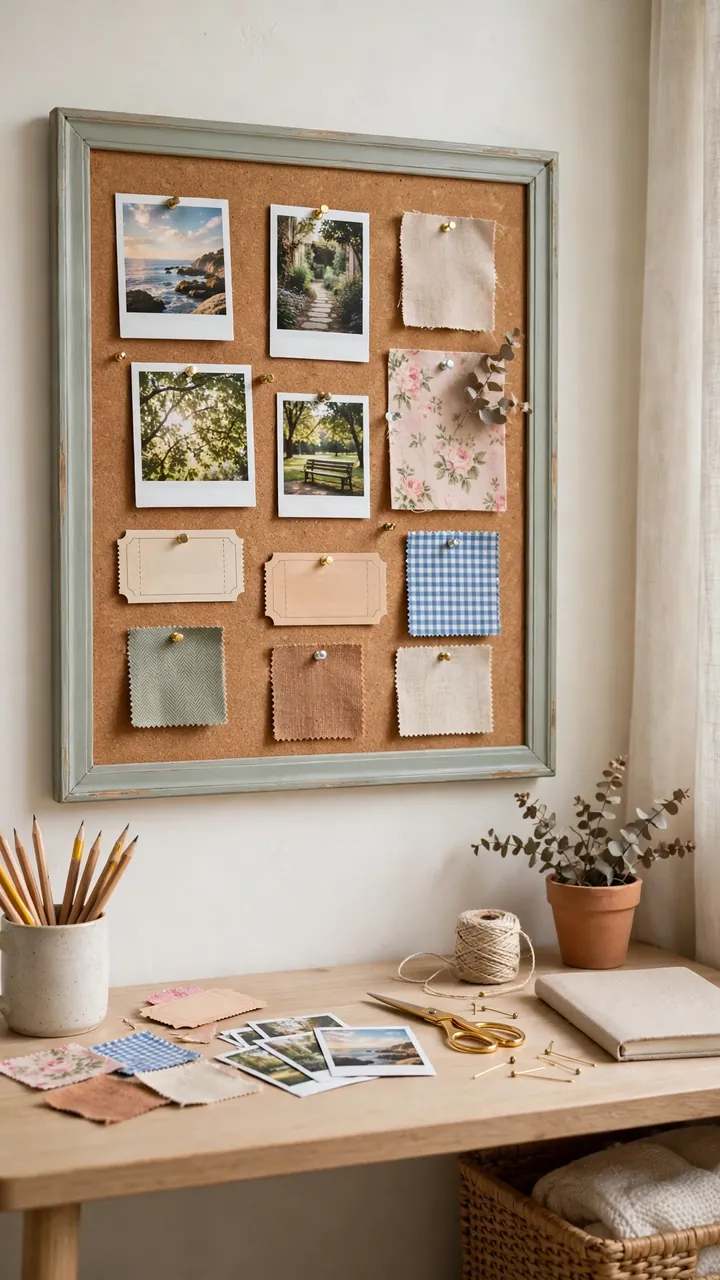
A bare cork board looks like an office. A framed one looks like part of the room.
Buy a cork roll or a few cork tiles, and cut them to fit inside a wide, flat frame, like one from a thrift shop. Remove the glass, and glue the cork to the backing board. Paint the frame to match the desk or the wall.
Keep the pins small, and clip on photos, tickets, and fabric swatches in a loose grid.
Sticky notes on the wall above the desk, curling at the corners.
A framed cork board with photos and swatches, tidy enough to count as wall art.
26. Press Flowers in a Glass Frame
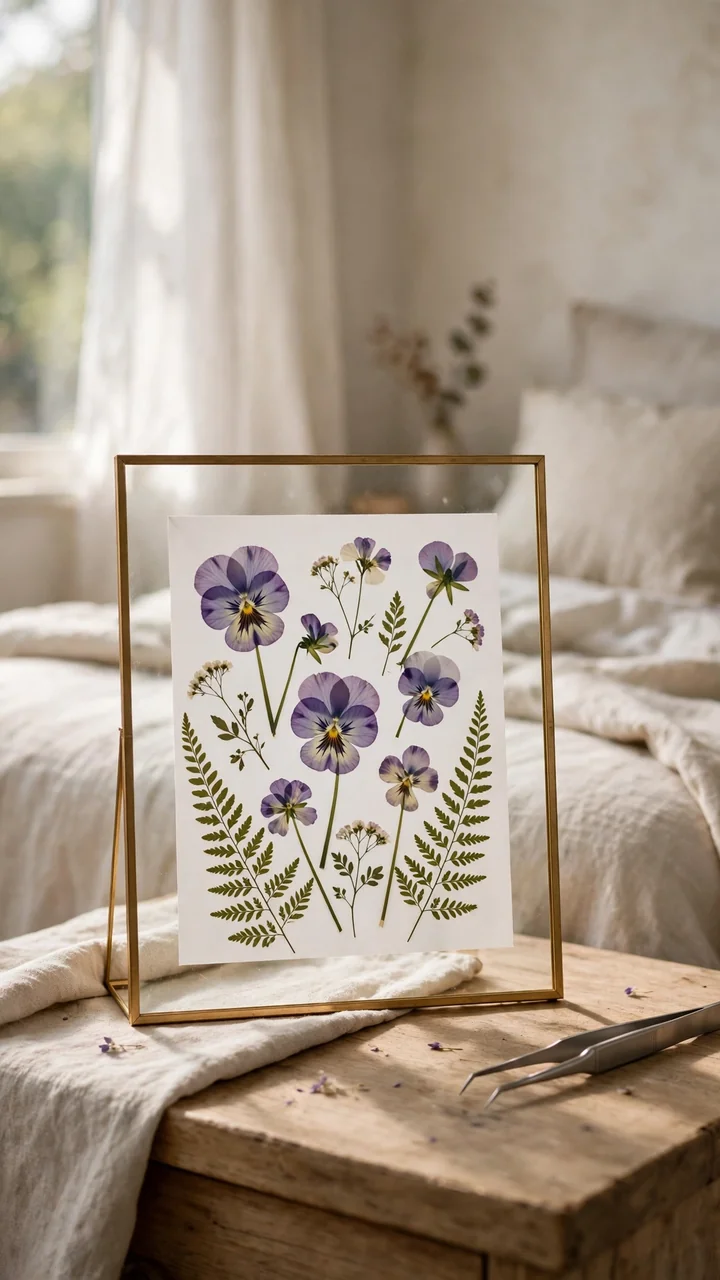
Pressed flowers look delicate, but the frame does the hard part. Two panes of glass hold everything flat.
A few small blooms work best, like pansies, ferns, or tiny daisies. Fresh flowers take a week or two in a heavy book. For a weekend project, use a microwave flower press, or start with ready-made dried pressed flowers from a craft store.
Lay the flowers on white paper, leave room around each one, and sandwich it all between the glass panels. A plain thin frame in white or black lets the color stand out.
- ▸Pick flat blooms. Thick centers will not press well.
- ▸Use tweezers to move petals without tearing them.
- ▸Choose a frame with two glass panels, not one.
- ▸Hang it where it can catch daylight without baking in direct sun.
27. Paint a Neutral Abstract Canvas
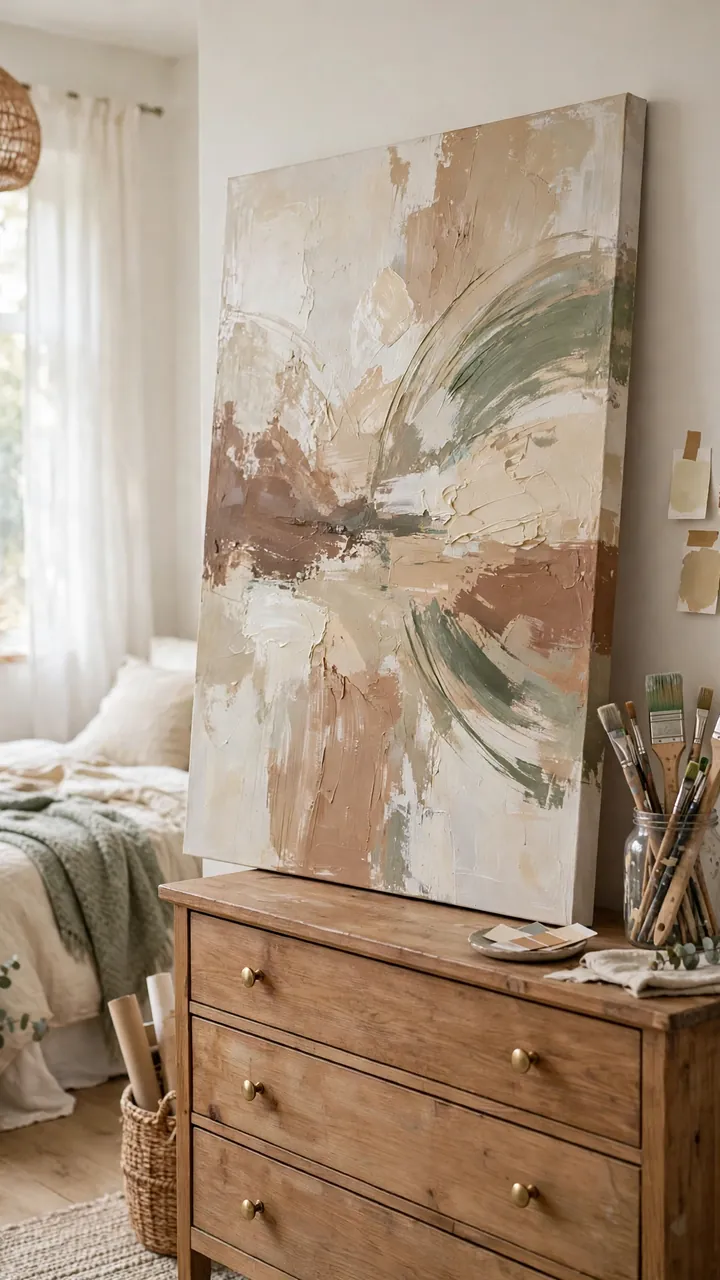
You do not have to paint a face or a landscape. A few soft shapes can fill a blank wall.
Buy a large canvas and three to four acrylic paints in colors that already live in your room, like cream, clay, sand, and a muted green. Mix each one with a little white so none looks harsh. Sketch a rough arch, circle, or wavy line in pencil, then fill each shape with a flat coat.
Brush in one direction, let it dry, and add a second coat. Hang it low, close to the dresser, so it feels part of the setup.
Pull every color from your room and the art will match without any extra planning.
28. Pour Candles into Thrifted Teacups
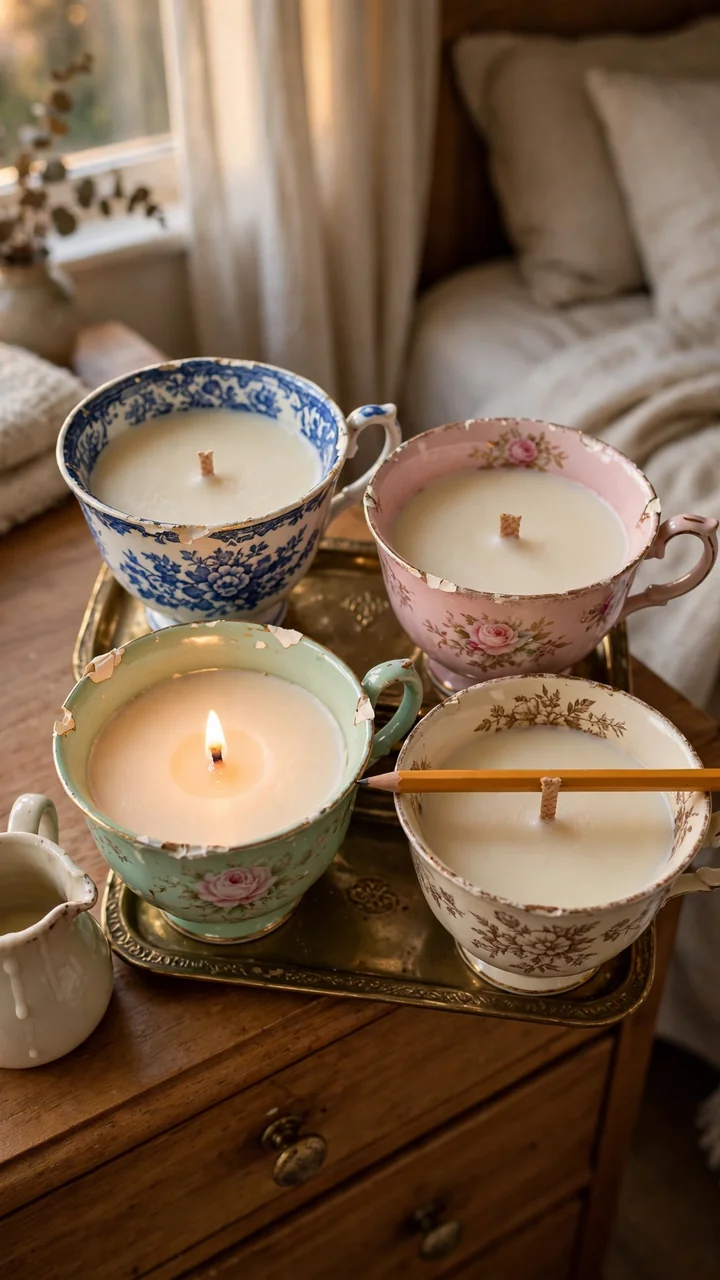
Chipped teacups cost almost nothing at a thrift store, and they make small, sturdy candle holders.
Supplies for four candles
Melt the wax in the pitcher set inside the pot of simmering water, and never leave it unattended. Stick the wick to the bottom of each cup, pour slowly, and lay a pencil across the top to hold the wick upright. Let the candles set overnight.
Trim the wick to about a quarter inch before you light it, and never leave a burning candle alone.
29. Make Rope Curtain Tiebacks
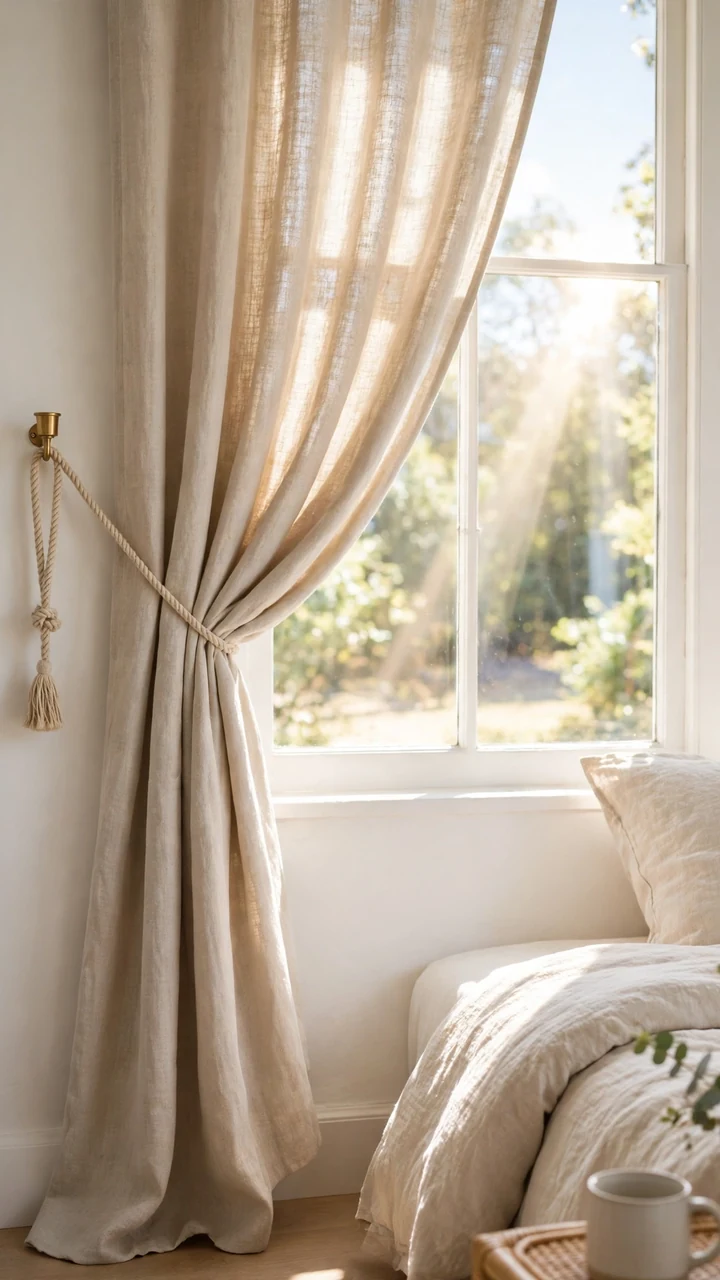
Curtains that sag in the middle can make the whole window look unfinished.
A rope tieback pulls them to the side in a clean curve. Cut a piece of thick cotton rope about 24 inches long, and wrap tape around each end so it does not fray. Tie a simple knot at each end, or sew on a loop. Add a tassel if you like the extra detail.
Screw a small cup hook into the wall at the window’s side. Hang the loop on it, and tuck the curtain behind the rope.
30. Arrange Dried Stems in a Vase
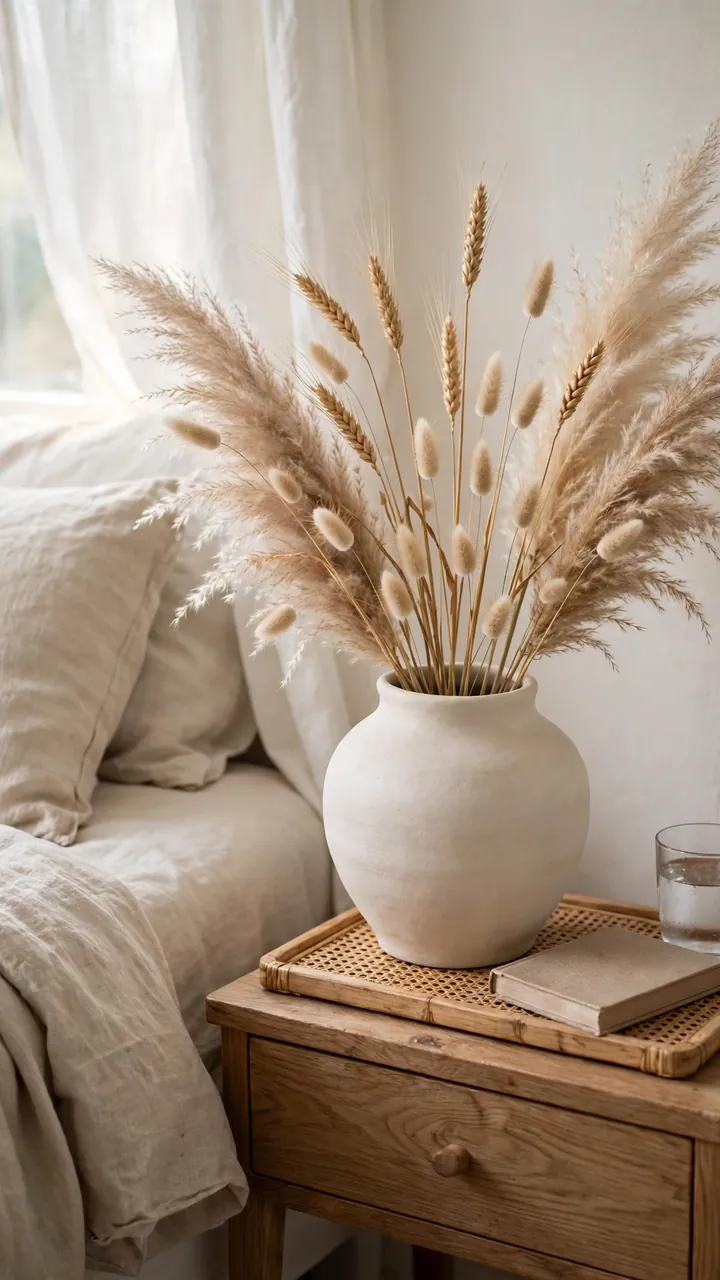
This one takes five minutes, and it is the last touch for the nightstand.
Pick a wide-mouth vase, so the stems have room to spread. Mix two or three shapes, such as pampas, wheat, and lagurus, and cut them to different heights. Odd numbers look more natural than even ones, so go with five or seven stems.
Set the vase on a tray, which gives it a clear spot and catches any dust or fallen bits.
💡 Quick Tip
Keep dried stems away from candle flames and heaters. A little hairspray, sprayed from arm’s length, helps hold the fluffy ones in place.
Conclusion
A bedroom feels different when you made some of it yourself. You notice the pillow cover you sewed on a slow Saturday, or the arch you painted behind the bed, every time you walk in.
You do not need to finish all 30. Choose the one that fits your wall, your budget, and your free hours, and start there. Small projects add up faster than you expect, and each of these DIY bedroom decor ideas teaches a skill the next one uses.
Take your time, and let the room fill up with things you made.
Save this list to your Bedroom Makeover Ideas board, so it is ready the next time you have a free weekend and a craft box to dig through.